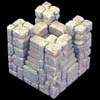
Dungeon Arena Building
|
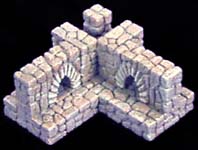
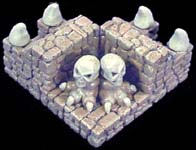
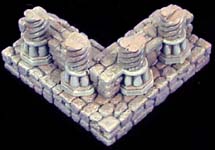
This page contains instructions for building a dungeon arena that can be used for MageKnight(TM), and many other miniature games. Please note that MageKnight(TM) is a trademark of Wizkids Games LLC. This website, its products and instructions are in no way affiliated with or endorsed by Wizkids LLC. The type of dungeon layout shown here is best used for a battle arena. This format allows you to make large interconnected rooms easily. The original idea of movable walls was borrowed from Shane Morrison. I expanded on his original idea to create what you see here. |
|
Casting Instructions
| 1. |
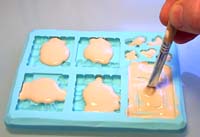
If you don't use the "wet water" method, then you will have to use a brush on mold #266. Start by pouring a small amount of plaster into each pocket of the mold. Next use a stiff bristled brush to paint around inside the mold. Tap or jar the mold occasionally to bring air bubbles to the surface. Wash the brush out immediately and fill the pockets the rest of the way with plaster. Acid brushes work well and are very cheap. You can find them at most hardware stores where solder is found. These brushes are used to apply flux to solder joints and are less than $1 each. |
|---|
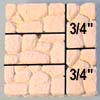
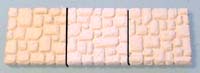
 The two molds used to make the floors for this dungeon are mold
 Making a Basic Set
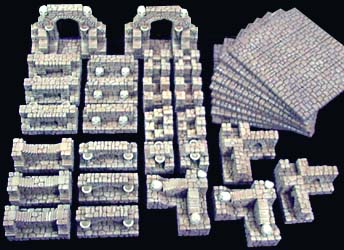
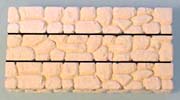
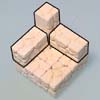
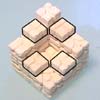
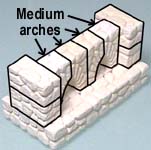
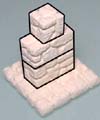
| 1. | To build the basic set shown here, you will need to cast the #265 Large Flagstone mold 24 times and the #70 Fieldstone Mold 24 times. I know that sounds like a lot of casting, but you are going to cover a very large area of floor with these tiles. You'll paint these pieces using the Earth Tone Painting Instructions. Further below are instructions on how to build a more decorative version of these wall pieces using mold #80, the Dragon's Teeth mold. |
 |
|---|
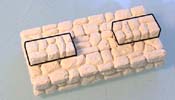
| 2. | If you only used mold #70, you could make just the wall sections. Then you could use maps that are currently available from MageKnight Dungeons(TM) and place the walls directly on the map pieces they provide as shown on the photo. The paper prints are well done, colorful, and much easier than creating and painting the floor tiles yourself. Once again, you can only get them from MageKnight(TM). |
 |
|---|
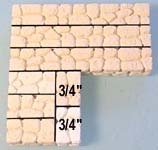
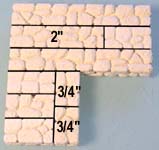
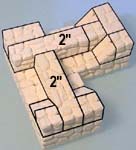
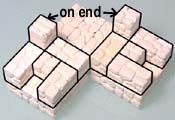
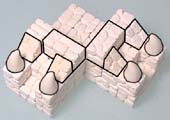
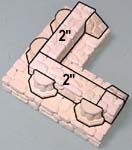
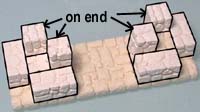
| 3. | I'm going to make my base sections 4 squares by 4 squares. Feel free to make yours any size you want. I feel that smaller sections slide around too much. Larger sections don't give you enough freedom when arranging the water tiles in different combinations. Be sure to choose a good base material to glue your tiles to. I would suggest foam core board (shown in the photo) because it's more resistant to warping, but still very light. It's a piece of foam sandwiched between two pieces of paper. You can find it at most art supply stores. Other materials include double thick cardboard, thin wood pieces and even acrylic sheets (Plexiglas). For plexiglass, check by your local hardware store. They usually have a scrap bin where you can find odd-sized pieces fairly cheap. |
 |
|---|
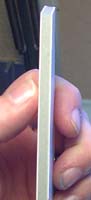
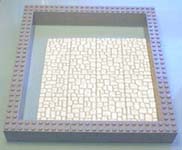
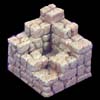
| 4. | Cut a 6" square of your base material and glue your floor tiles down to it. I'm using a frame made of Legos to keep the corners square. I slide the frame against each side of the tile to make sure that all of the sides line up and the corners are square. I made the mistake of using matte board to glue the tile down to. After the section was painted, the matte board warped slightly (as you can see in the second photo). |
 |
 |
|---|
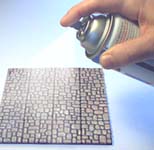
| 5. | Make 9 of these floor sections. You'll paint these pieces using the Earth Tone Painting Instructions. Also, be sure to protect the surface with a spray sealer. Flat lacquer or varnish works the best. Don't use a glossy sealant because it will look strange to have a glossy floor. |
 |
|---|
| 6. |
|
You'll paint these pieces using the Earth Tone Painting Instructions. |
|---|


| 7. |
|
|
|---|
| 8. |
|
|
|---|
| 9. |
|
|
|---|


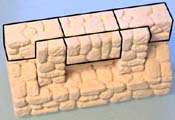
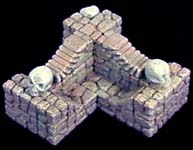
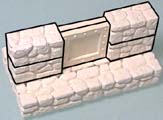
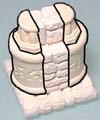
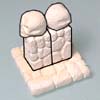
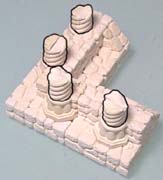
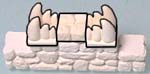
| 10. | 1. Glue the 5 blocks together that form the base. 2. Place a regular block on end in the center. Place 4 square blocks on each corner. 3. Place a medium arch on opposite sides of the center block. On the remaining sides glue a torch sconce. Make 2 of these pieces. |
 |
 |
|---|---|---|---|
 |
 |
| 11. | 1. Glue the 5 blocks together that form the base. 2. Place 3 regular blocks on top. One will be on end and the other two will lay flat. 3. Glue four square flat tiles on the places shown. Make 2 of these pieces. |
|
 |
|---|---|---|---|
 |
 |
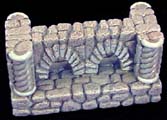
| 12. | 1. Glue the 5 blocks together that form the base. 2. Glue down 4 angle blocks, one on each side of the base. 3. Glue four regular blocks (on end) on each corner. Make 2 of these pieces. |
|
 |
|---|---|---|---|
 |
 |
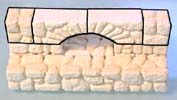
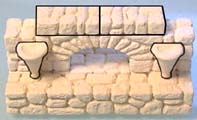
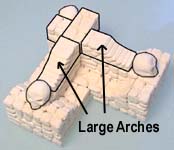
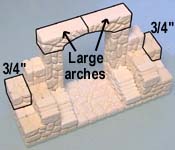
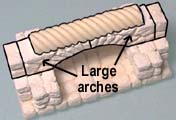
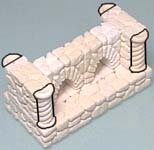
| 13. | 1. Stand a regular block on end and place 4 large arches around it. 2. Place 4 regular blocks on end on each corner and top them off with four square blocks. Make 2 of these pieces. |
 |
 |
 |
|---|
| 14. |
|
|
|---|
| 15. |
|
|
|---|
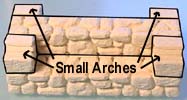
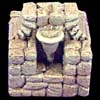
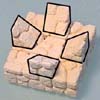
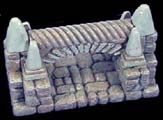
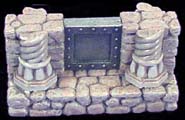
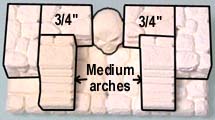
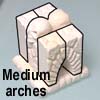
| 16. | The entrance doorways are the most involved pieces to build. Glue together 3 of the floor tiles from mold #265. If you only have mold #70, then skip the tiles and build the doorway without them. For the next layer, you'll need 6 regular blocks, 2 medium arches, and 2 of the 2" long pieces placed on end. |
 |
|---|---|---|
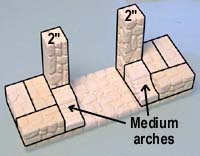 |
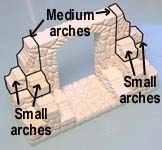
| 17. | Add 2 regular blocks (on end), 2 square blocks and 2 small arches. Next add two 3/4" blocks on each end and top off the doorway with 2 large arches. |
 |
 |
|---|
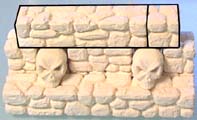
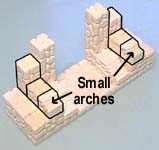
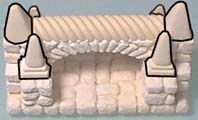
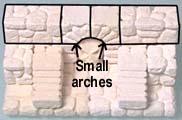
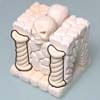
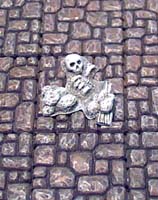
| 18. | Add 4 small arches and 2 medium arches on each side. Place the small arches with the smooth scraped side down. Finish the piece off with a 2" block across the top, 2 skulls and 2 torch sconces. |
 |
 |
|---|
| 19. |
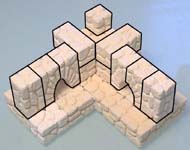
You'll paint these pieces using the Earth Tone Painting Instructions. The large photo shows what the whole set will look like when assembled. Feel free to make as many additional pieces and sets you want to expand your dungeon arena. The next article will show how to make a more decorative set. |
 |
|---|
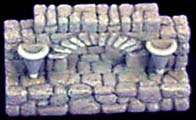
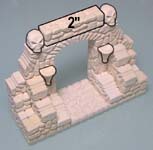
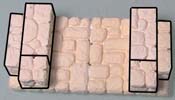
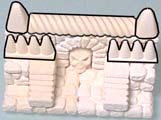
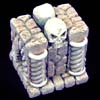
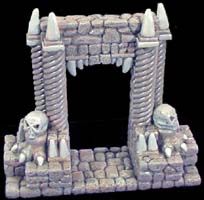
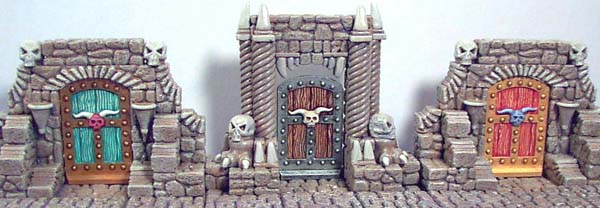
 Here's the finished entrance doorway. Make 2 of these pieces.
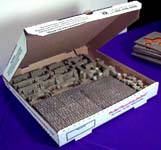
| 20. | Here's a great way to store and transport your dungeon. Pizza Boxes! A complete dungeon set will fit into two medium sized Pizza Hut boxes nicely. The thickness of the box is a little over 1 1/2" high which is perfect to store these in. Most restaurants will give you a box if you ask, or charge a few cents for them (I wouldn't suggest trying a used one). |
 |
|---|
Making a Decorative Set
To make the decorative wall set you will need to cast the #80 Dragon's Teeth mold 12 times and you will need to cast the #70 Fieldstone mold 20 times. You'll paint these pieces using the Earth Tone Painting Instructions.
| 1. |
|
|
|---|
| 2. |
|
Make 3 of these pieces. |
|---|
| 3. |
|
|
|---|
| 4. |
|
|
|---|
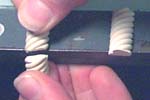
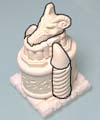
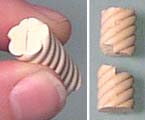
| 5. | 1. Start with one large flat tile from mold #265. Add 2 regular blocks and 1 square block. 2. Place a large column half on each side of the blocks. Then add a small column base on top of that. 3. Add a 1" spiral piece to each side, cap them with 2 curved teeth and glue a dragon's skull on top. Make 2 of these pieces. |
 |
 |
|---|---|---|---|
 |
 |
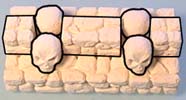
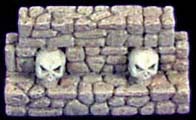
| 6. | 1. Glue 2 regular blocks back-to-back on top of a large floor tile. Add the 2 skulls on top. 2. Glue 4 medium arches on each side of the piece as shown. 3. Cover the flat side of the arches with 4 of the small torch stand pieces. Make 2 of these pieces. |
 |
 |
|---|---|---|---|
 |
 |
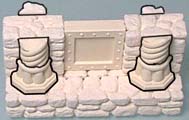
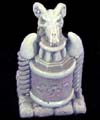
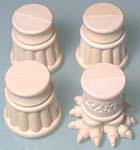
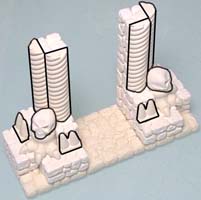
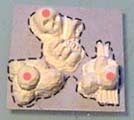
| 7. | The small pillar sections are easy to make. For the foot pillar, glue 4 of the dragon's feet together and top it with a large column section. Since you don't have that many feet (from only casting the mold 12 times) you can only make one of these. Make 1 foot pillar and 3 regular pillars. |
 |
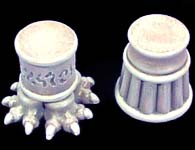 |
|---|
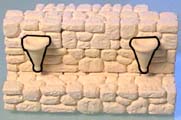
| 8. |
|
Make 2 of these pieces. |
|---|
| 9. |
|
|
|---|
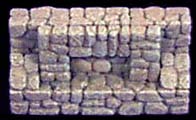
| 10. | The entrance doorways are the most involved pieces to build. Glue together 3 of the floor tiles from mold #265. If you don't have mold #265, then skip the tiles and build the doorway without them. For the first layer, you'll need 8 regular blocks (4 of which will stand on end) and 2 square blocks. |
|
|---|---|---|
 |
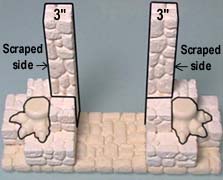
| 11. | Glue two 3" blocks on end. Be sure the scraped side of the block is facing outward. Also add the dragon's feet. For the arch above, glue a 2" piece and a square block smooth side facing up. Onto that glue a regular flat tile and a square flat tile. On top of that glue 4 sets of teeth and a square flat tile. |
 |
|
|---|
| 12. | Glue 4 halves of the long twisty columns onto each side of the doorway. Add the 2 skulls (on top of the dragon feet) and add 4 sets of short teeth also. Place the arch (from the step above) across the top of the doorway and add 4 pieces of teeth to decorate the top. |
 |
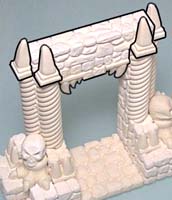 |
|---|
| 13. |
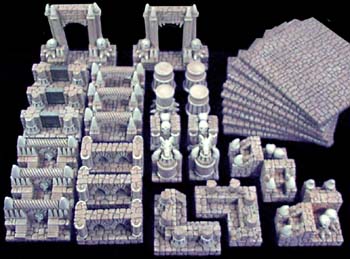
You'll paint these pieces using the Earth Tone Painting Instructions. The large photo shows what the whole set will look like when finished. Feel free to make as many additional pieces and sets as you want to expand your dungeon arena. |
 |
|---|
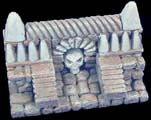
 Here's the finished entrance doorway. Make 2 of these pieces.
Water, Lava and Extras
For this section, you will need mold #266, the Large Flagstone Accessory mold. This section will show you how to paint the water and lava tiles, as well as how to paint the door and rubble pieces.
| 1. |
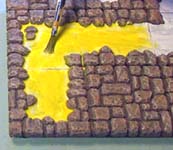
Mix the paint color for the water. Start with the darkest stone color (the one you paint on first that gets into all the cracks) and add a turquoise (blue green) color to it. Paint in the water areas and let it dry completely. To give the water a glossy shine you have several options. I'm going to use fingernail polish. Be sure you get the clear glossy kind. It already has a brush, which makes it really handy to use. You can also use gloss varnish, lacquer or acrylic gloss medium, to give the water a glossy coat. |
|---|
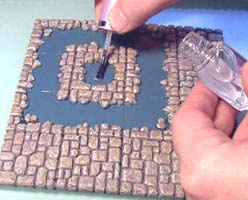 Assemble and glue the water tiles (just like you made the plain floor tiles at the beginning of this article). Paint the stone color over everything first. Don't worry if it overlaps into the water area. You'll paint these pieces using the
 | 2. |
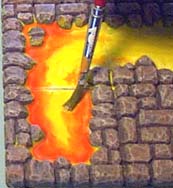
Paint the lava area solid white to begin with. Most yellows and reds are transparent colors and won't show up unless you put a white undercoat first. |
 |
|---|
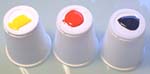 For the lava tiles I'm going to use 3 colors; yellow, red and black. Be sure to thin the colors slightly because we want them to be very wet so they will blend.
| 3. | Paint no more than 3 tiles at a time! If you try to paint more than this, the paint will dry and not blend correctly. Be sure to have a cup of water on hand so you can clean out your brush quickly. Paint the thin yellow into the first three squares and use a lot of paint! We don't want it to dry before we can mix it. Dip your brush into the red and paint it around the edge. The paint should start blending as you put it down. When your brush starts filling up with orange paint (from it mixing), clean it out quickly and continue painting the red. If you want your colors to blend more, simply dab the brush around closer to the center yellow. Since the red will have a tendency to take over (being the dominant color), clean your brush and add more yellow paint to the middle of the lava. |
 |
|---|---|---|
 |
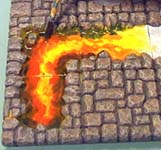
| 4. | Before the red paint has time to dry, quickly clean your brush and dip it into the black. Paint black around the edge, but not as far in toward the center as you did with the red. The paint should start blending once again. When your brush starts filling up with dark brown (from it mixing), clean it and continue painting the black. Since the black will have a tendency to take over, clean your brush and add more red paint near the inside edge of the lava. |
 |
|---|
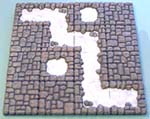
| 5. | Here are the water and lava tiles I've made for my own set. Feel free to make them in any pattern you want. Of course, feel free to leave out tiles completely or break off pieces of tiles to make open pits. |
 |
 |
|---|
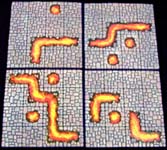
| 6. |
Be sure that the high spots (shown as red dots) are spaced evenly along the outside of the square. This will give your figure a stable place to stand while on the square. When painting the rubble, use the exact same colors as the stone floor, only dry-brush it with white as a last step. Wherever you place the rubble tile, the white will stand out from the rest of the floor and the rubble will be easier to see. |
 |
|---|
 For rubble tiles, cut a piece of cereal box about the size of a large tile. Glue 3 pieces of rubble to it. When dry, cut it out along the dotted line.
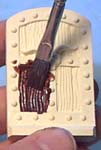
| 7. | There are several ways to paint the door. The most common way is to mix up some thin brown paint (artist acrylic works best), paint it on a panel, and immediately wipe it off with a Q-tip. Be sure to test your paint color on a spare or miscast door first! Once the panels are done, paint the outside frame solid black. |
 |
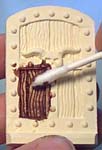 |
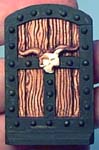 |
|---|
| 8. | Next dry-brush silver paint over top of the black. Be careful not to get it on the wood panels. Finish the door by painting the skull white. An ink wash will help the details of the skull stand out. Feel free to experiment with different colors for your door. Colored doors might only open with colored keys, they might be more resistant to bashing, or have magical properties that only allow certain creatures to use it. |
|---|---|
 |
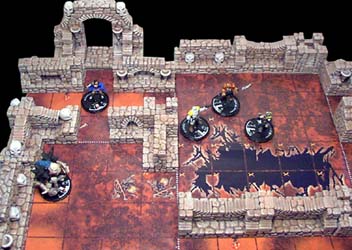
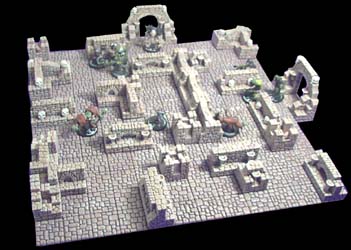
Here is a sample dungeon layout using Terminators and Genestealers from Space Hulk(TM). I still enjoy playing Space Hulk and I can make a scenario where the marines have to go into the depths of the earth to exterminate the Genestealer hive. Using these large tiles you could even make a good sized chessboard and use your figures as the pieces. We had even thought about using the board for Robo-Rally(TM) or Wiz-Wars(TM). In fact, I bet you can come up with a lot of other games that could use these pieces as a playing board. |
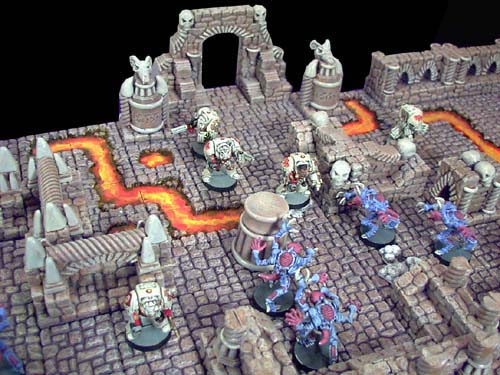 |
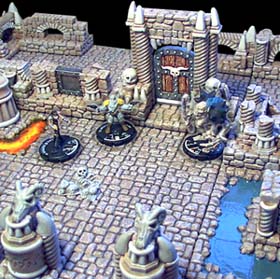
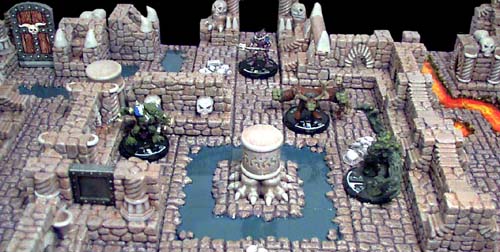
Here is a sample dungeon layout using the MageKnight(TM) figures. The great thing about the MageKnight figures is that you can make up any kind of story you want. Instead of using the official rules, sometimes my gaming group will use the figures as random monsters in a role-playing game, which works really well because the figures already have the hit points and other stats right on the base. |
 |