Detailed Dungeon Pieces Page 4
 |
 Steel Trap Hall |
 Window Tee Section |
 Altar Room |
 Room Supports |
 The Entrance |
 |
Steel Trap Hall
| 1. | You will need these decorative pieces. From mold #80 4 steel plates. From mold #71 2 long angle pieces, 4 pillar caps, 2 pillar bases, 2 smooth pillars and 6 recessed arch pieces. From mold #70 3 skulls. |
 |
|---|
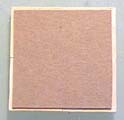
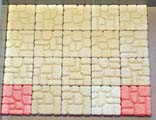
| 2. | Glue the tiles shown down to a piece of cereal box. Do not glue the tiles shown in red! When dry, remove these tiles to leave a hole. Lay out the 4 steel plates on a piece of cereal box and draw around them. |
 |
 |
|---|
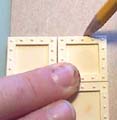
| 3. | Cut out the square of cereal box about 1/8" smaller than the outline. Lay the steel plates face down and glue it to the back. There should be a gap around all sides as shown. When completely dry, sand the edges down so the steel plates will easily fit into the square hole in the floor. |
 |
 |
|---|
| 4. | Glue the remaining pieces shown. Glue the pillar caps back-to-back, then glue them on top of the pillars overlapping the back wall. | |
|---|---|---|
 |
 | |
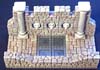
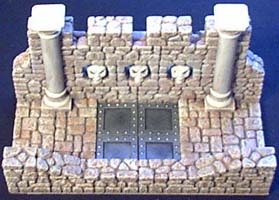
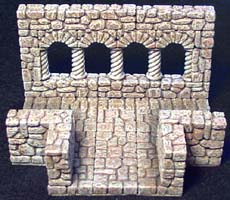
| 5. | Here's the finished piece. Remove the steel plates for a pit trap, or include them and keep the characters guessing as to what will happen when they cross the hall. The steel plates are painted black first then dry-brushed with silver paint. |
 |
|---|
Window Tee Section
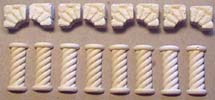
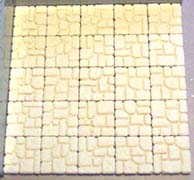
| 1. | You will need the following decorative pieces. From mold #70, 8 small arches. From mold #80, 8 twist stands. Glue a 4 x 5 grid of floor tiles to a piece of cereal box. Do not glue the tiles in red! |
 |
 |
|---|
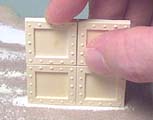
| 2. | Remove the 2 red tiles and glue the pieces shown onto the floor. These photos show the first and second rows. |
 |
 |
|---|
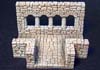
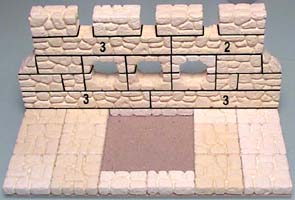
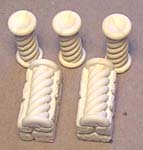
| 3. | Next we will make the back wall. Glue 3 of the twist stands together and glue the remaining 2 to the flat side of a regular block. When dry, assemble the wall section as shown. |
 |
 |
|---|
| 4. | Next we will make the back wall. Glue 3 of the twist stands together and glue the remaining 2 to the flat side of a regular block. When dry, assemble the wall section as shown. |
 |
|---|
Altar Room
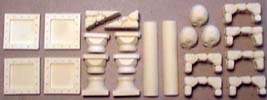
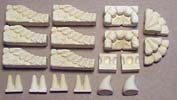
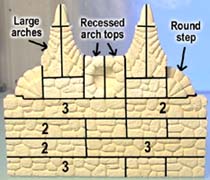
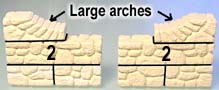
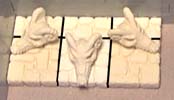
| 1. | For the room you will need these pieces. From mold #70, 6 large arches. From mold #71, 2 recessed arch tops, 2 short rail pieces and 2 round step sections. From mold #80, 4 small spike sets and 2 large teeth. |
 |
|---|
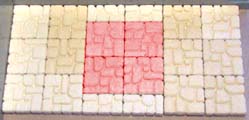
| 2. | Glue down a 5 x 5 grid of tiles to a piece of cereal box. For the back wall, glue the pieces as shown. |
 |
 |
|---|
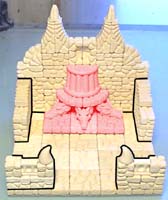
| 3. | Assemble and glue two side wall pieces. Assemble and glue two front pieces. Now glue all of the pieces onto the room. The altar (shown in red) will be assembled next. It can be removed so you can place other items in the room. |
|
 |
|---|
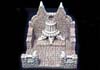
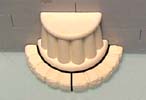
| 4. | The top half of the altar is made from a large column base glued to two circular step pieces. The base of the altar is made by gluing the tiles shown down to a cereal box and gluing the dragon skulls on. Let each half dry before you combine them. Here is the completed altar room. The altar can be removed so you can use it for other things. |
|
 |
|---|
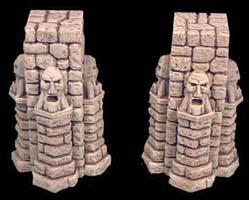
Room Supports
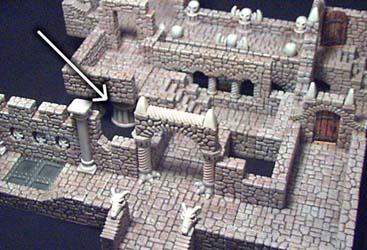
| 1. | These little supports can be used to place hallways and rooms up to the next level. These were made from mold #80 using the large column base pieces and column spacers.
|
 |
|---|
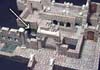
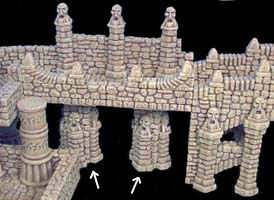
 Supports can be made using any pieces that stack up to 3 blocks high. The arrow points to supports holding up a hallway and room.
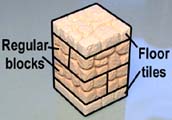
| 2. | These supports are made using the Bridge Mold (#74). Start by stacking 4 regular blocks between 2 floor tiles. Finish the outsides with pillar bases, hex pillar halves and faces as shown. |
 |
 |
|---|
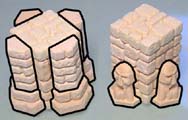
| 3. | These can be used separately or stacked on top of each other for sections that are twice as tall. |
 |
 |
|---|
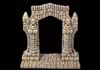
The Entrance
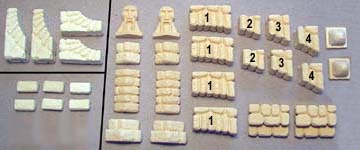
| 1. | For the entrance you will need these pieces. From mold #70, 2 large arches and 2 regular arches. From mold #260, 6 of the smallest tiles. From mold #74, the column and arch pieces shown, 2 step pieces and 2 small spike decorations. For specific information on the arch pieces, refer to the Fieldstone Bridge Building Instructions. |
 |
|---|
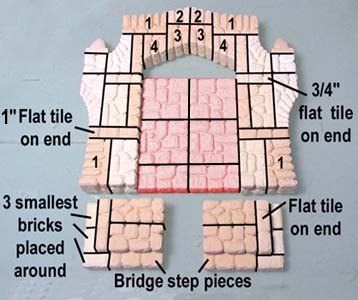
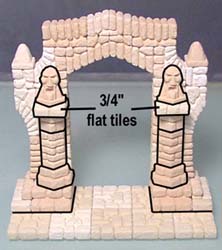
| 2. |
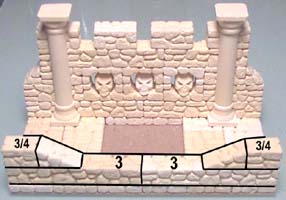
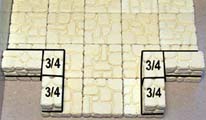
The larger photo shows the main arch. Do not glue the pieces shown in red. These are used to help keep the entrance straight. There are several places where flat tiles are turned on their edge. Two of these tiles are 3/4" long (from the floor tile mold #260). The bottom pieces use step blocks from the bridge mold. They also use 3 of the smallest blocks on each side (from the floor tile mold #260). |
 |
|---|
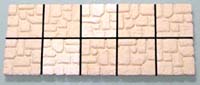 Glue together these floor tiles to form the base of the entrance.
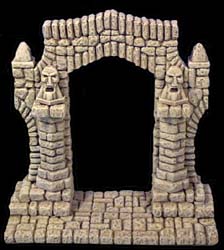
| 3. | Glue the main arch onto the floor tiles. Complete the entrance by adding the column bases, columns and faces onto the front. There are 3/4" flat tiles under the faces. Here's a photo of the finished entrance. |
 |
 |
|---|