Advanced Gothic Dungeon Pieces Page 4
These dungeon pieces use a variety of molds. Click on the photo to see building instructions for each piece.
 |
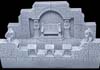 A Quiet Rest |
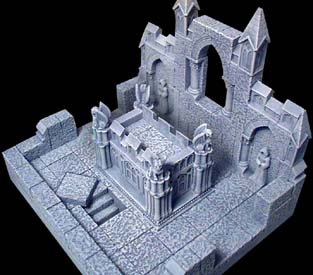
 The Sepulcher |
 The Meeting Room |
 The Bishops' Gate |
 Small Cell |
 |
A Quiet Rest
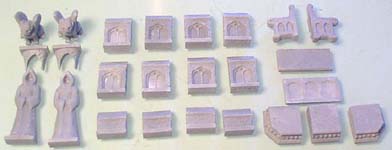
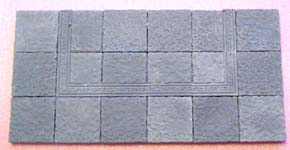
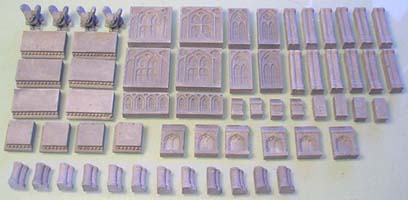
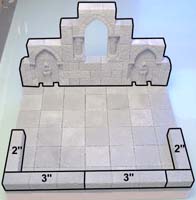
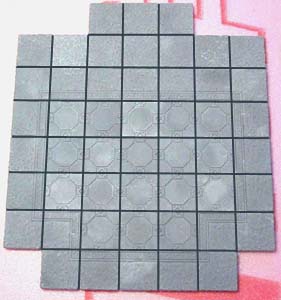
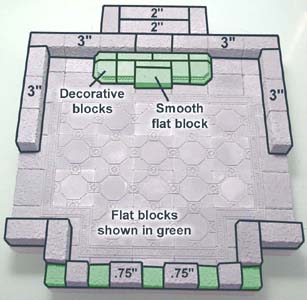
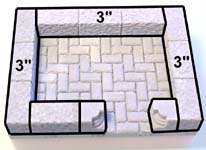
| 1. | You will need these pieces from mold #43 for this room. Glue the 6 x 3 grid of floor tiles down onto the foam base. I've used decorative tiles from mold #205 for the floor. If you don't have this mold, just use regular floor tiles instead. | |
|---|---|---|
 |
 | |
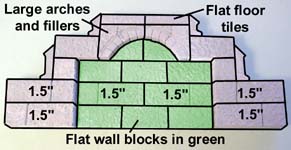
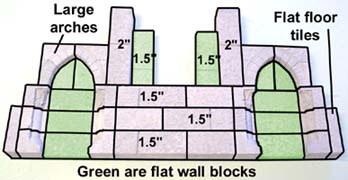
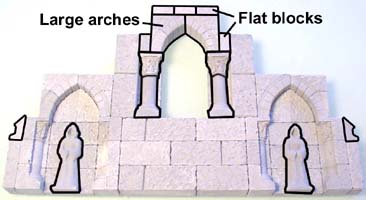
| 2. | Glue these blocks together to make the back wall. The blocks in green are flat wall blocks. Large arches are used on the top, placed to make a round top arch. The top is capped off with flat floor tiles. |
 |
|---|
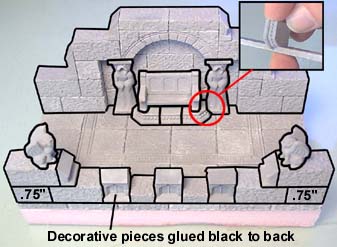
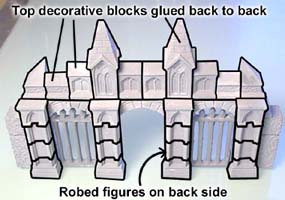
| 3. | You will need to file down the edges of the decorative pieces, so they will fit next to the robed statues. The decorative pieces along the front are glued back to back. | |
|---|---|---|
 |
 | |
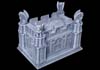
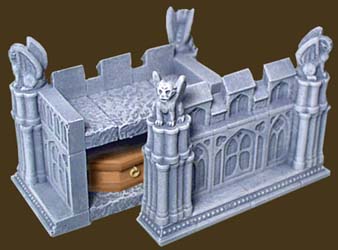
The Sepulcher
| 1. | You will need these pieces from mold #43 for this model. We'll start with the base pieces. Glue together the decorative flat pieces with 2 regular 1" square floor tiles in the center. |
 |
 |
|---|
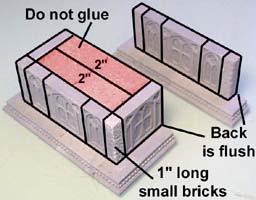
| 2. | Place four 2" blocks in the center and do not glue them. They are used to keep the other blocks in the right place. Glue the decorative blocks around the outside, but not to the 2" blocks. The side of the sepulcher is separate so it can come open later on. Flip it around and make sure it fits onto the back side. |
 |
 |
|---|
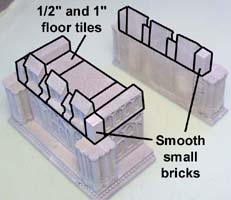
| 3. | Glue together a 1/2", 1", and 1/2" floor tile on top of the 2" blocks. Do not glue them to the 2" blocks! Add the decorative pieces around the outside of the floor tiles. Finish the tops by adding the decorative flutes around the smooth bricks, and top them off with gargoyles. |
 |
 |
|---|
| 4. | Once dry, remove the 2" blocks from inside. Once painted, the inside is large enough to fit a coffin or figures lying down. |
 |
 |
|---|
The Meeting Room
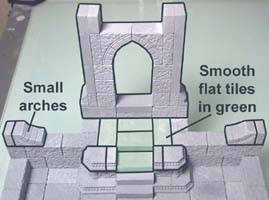
| 1. |
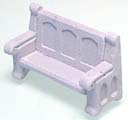
Assemble and glue the four benches using the pieces shown on the left of the second photo. Use very little glue for the best result. |
 |
|---|
 Gather these pieces from mold
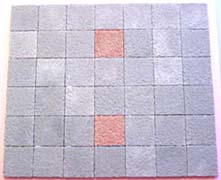
 | 2. | Glue the floor tiles shown. Do not glue the tiles shown in red if you want to add secret stairs. Assemble the back wall. The blocks shown in green are flat wall blocks. |
 |
 |
|---|
| 3. | Glue the additional pieces onto the back wall. Glue the back wall to the floor tiles and add the wall blocks in the front. |
 |
 |
|---|
| 4. |
Also glue the additional blocks along the top of the side walls. You can add the large half of the sepulcher in front of the door to act as a balcony or podium. |
 |
|---|
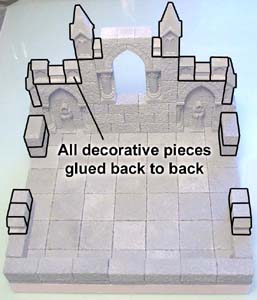 Glue the decorative pieces back to back along the top of the back wall.
| 5. | Do not glue the benches down and you can use the room for other things as well. The sepulcher can also be moved to the center of the room, where you can reveal any hidden stairs or other surprises in the room. | |
|---|---|---|
 |
 | |
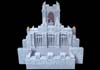
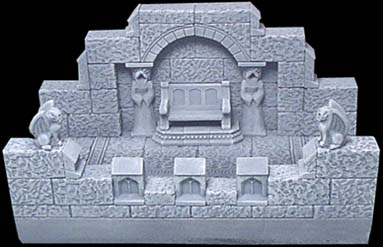
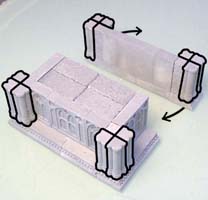
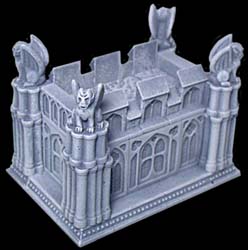
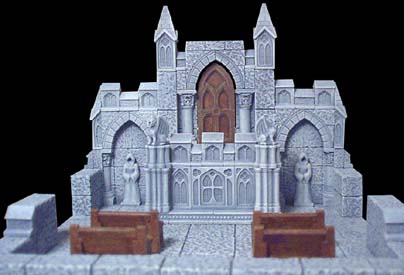
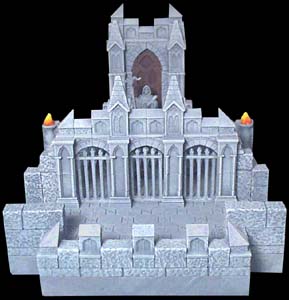
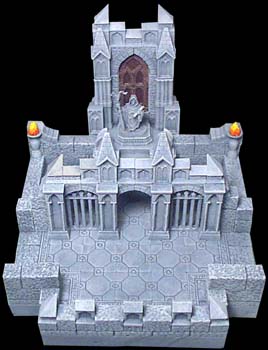
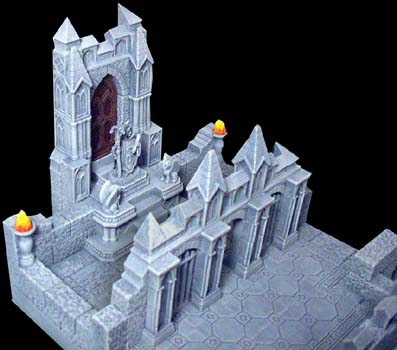
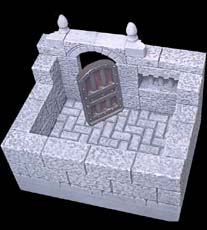
The Bishops' Gate
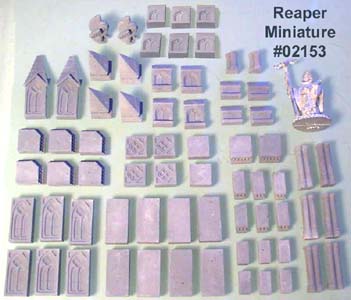
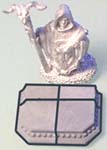
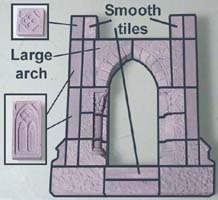
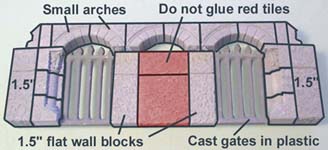
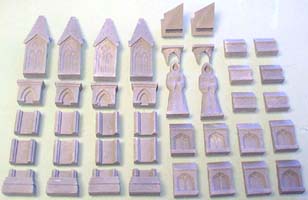
| 1. | Gather these pieces from mold #43. The miniature is from Reaper Miniatures. Their web site is at www.reapermini.com. Assemble and glue the floor tiles down. I'm using decorative floor tiles from mold #205, but you can just use regular floor tiles instead. | |
|---|---|---|
 |
 | |
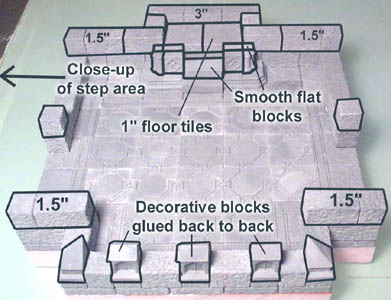
| 2. |
You can go ahead and glue the statue to the base if you like. I like to pin the model in place using a piece of wire. The statue and base will not be glued into the room. Place the first row of blocks onto the floor tiles. The blocks shown in green are flat tiles and set lower than the rest. The long skinny bricks at the top of the photo are found on the floor tile mold #201. |
 |
|---|
 Glue the decorative blocks together to form the base for the bishop statue to sit upon.
| 3. |
I have a close-up of the step section in the photo. The decorative blocks at the bottom are glued back to back. That finishes the front wall. |
 |
|---|
 The next layer is a little more difficult.
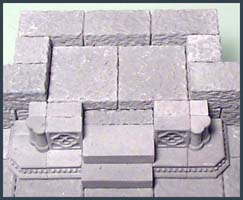
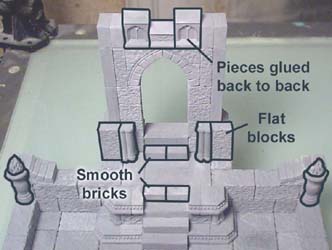
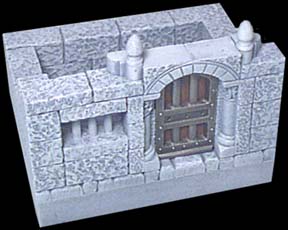
| 4. | Glue the doorway together. The blocks on the outsides of the doorway are the decorative blocks. Once dry, glue the doorway onto the back wall of the room. The smooth tiles are shown in green. |
 |
 |
|---|
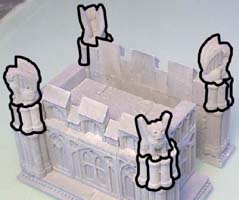
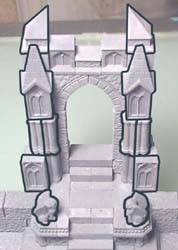
| 5. | The decorative blocks on top of the doorway are glued back to back. The smooth bricks finish the steps to the doorway. The arch is finally finished with the decorative blocks on the front of the doorway and top. Two gargoyles are placed on each side of the doorway. |
 |
 |
|---|
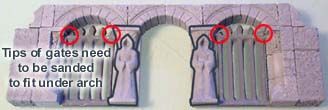
| 6. |
You don't have to add it if you want to leave the room open. Be sure to cast the gates in plastic. Otherwise they probably will get broken after much handling. |
 |
|---|---|---|
 |
 This gate section is optional.
| 7. |
Also, the decorative pieces along the top are glued back to back. This gate section does not have to be added if you want to leave the large room open. The center gate can be glued to a piece of clear plastic so it can stand up on its own and be added or removed when needed. |
 |
|---|
 Flip the section around and add these new decorative pieces to the back side.
| 8. | The bishop statue can be removed to allow passage through the door. The alcove at the front of the room can be used to place a couple of benches in. | |
|---|---|---|
 |
 | |
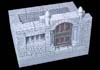
The Small Cell
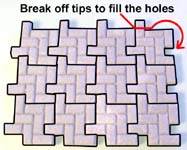
| 1. |
Once you glue the floor tiles together, snap off the tips and glue them into the empty holes along the outside edge. When finished, then glue the whole thing down to a piece of 1/2" foam. |
 |
|---|
 This room uses a few special blocks from mold
 | 2. | To make the window bars, cut 3 pieces of kabob skewer(or 1/8" dowel rod) 3/4" long. Glue them between two of the hole blocks. The complete height should be 1" tall. |
 |
 |
 |
|---|
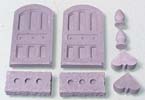
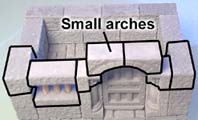
| 3. | Glue the window in and top off the doorway with the small arches. The final layer uses 3/4" floor tiles plus the decorative pieces on top of the doorway. Glue two halves of the door together so it will stand on its own. | ||
|---|---|---|---|
|
 |
 | |