Hex Hill Building Instructions
This page will show how to use molds #180, #181 or #182 to build rock hills for a hex based gaming table.

|
About the Hex Rock Molds
At the writing of this article I have three different sizes of the hex rock molds. These sizes are listed below. Click on a photo to get a larger view of the castings from the mold.
|
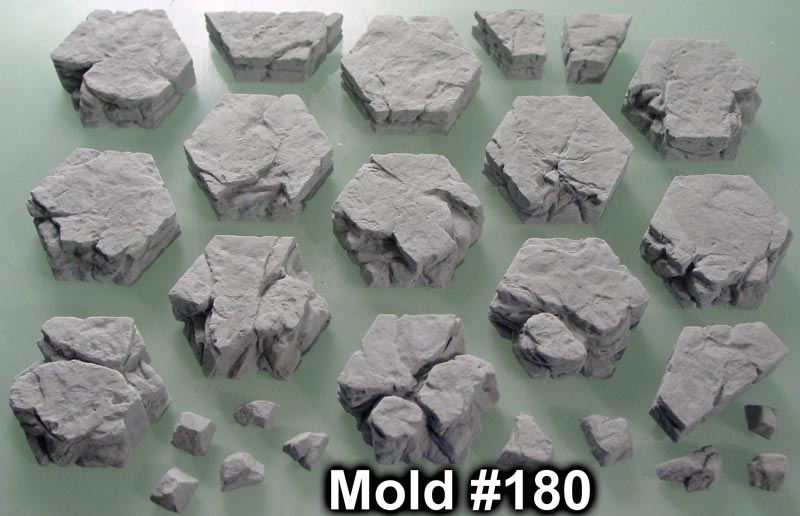
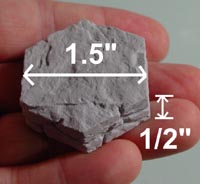
Mold #180 has hexes that measure 1.5" from flat to flat and are 1/2" thick. This mold will give you 12 hexes broken on various sides along with one half hex split vertically, one half hex split horizontally, one quarter hex and several small rocks. |
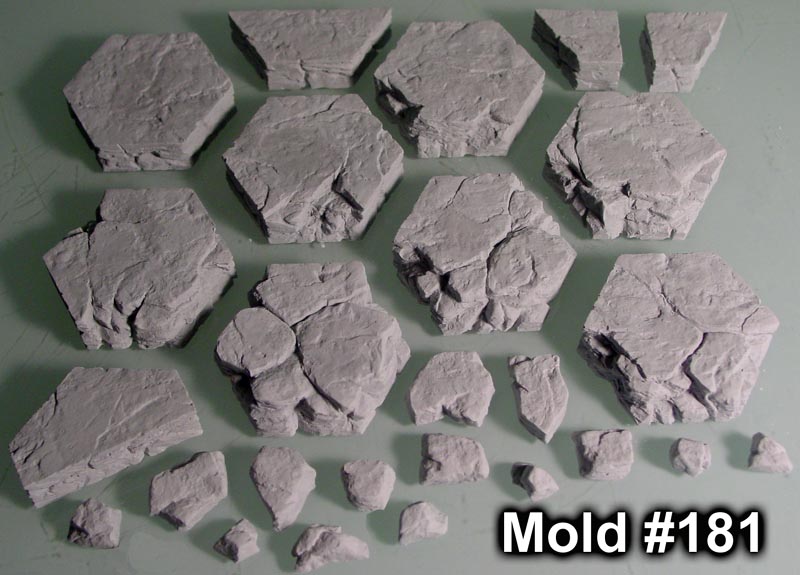
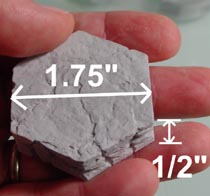
Mold #181 has hexes that measure 1.75" from flat to flat and are 1/2" thick. This mold will give you 8 hexes broken on various sides along with one half hex split vertically, one half hex split horizontally, one quarter hex and several small rocks. |
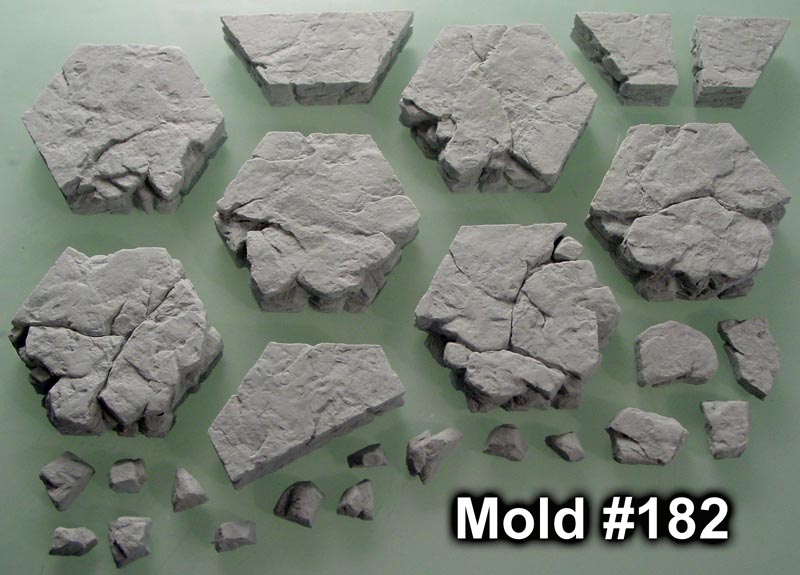
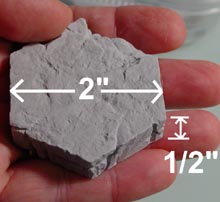
Mold #182 has hexes that measure 2" from flat to flat and are 1/2" thick. This mold will give you 6 hexes broken on various sides along with one half hex split vertically, one half hex split horizontally, one quarter hex and several small rocks. |
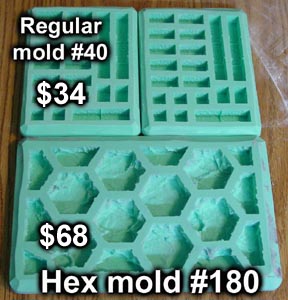 |
These molds are twice as large as our regular molds as you can see in the photo. I have two mold #40's above and one of the hex rock molds below. The reason I had to make these molds larger is that I could not get enough of a variety of hexes by using our standard mold size. Because these molds are twice as large, they are also twice as expensive as our regular molds. Since they take up twice the amount of room in a box when shipping them, they will count as two molds for shipping purposes. They will also count as two molds when figuring your discount. |
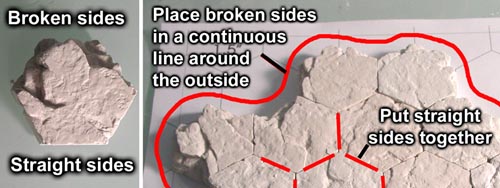 |
Some edges of the rock hexes are broken and some are straight. When building hills with these hexes, they will look better if you put the straight sides against each other and then try and get the broken edges to form a continuous line around the outside edge. |
Corrections on the Tutorial Videos
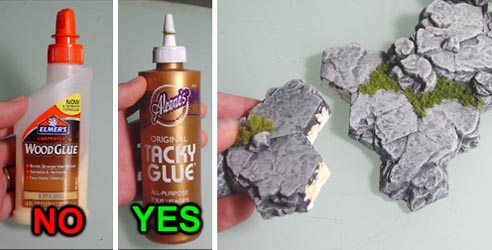 |
For this project I do not recommend Elmer's wood glue. It may be waterproof when it dries but it is also very brittle. Several of my pieces had come apart from regular handling because a slight jarring of the piece would break the glue. Aleene's tacky glue on the other hand is very tough and flexible after it dries. It may not be waterproof but the pieces will hold together much better. You just have to be careful when putting on your base coat of paint because the glue may soften slightly. |
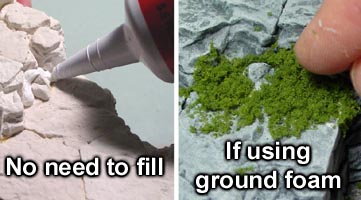 |
I also suggested in the video that you can fill the gaps around the rocks using caulking and plaster. I found out that If you are using Woodland Scenics ground foam for grass and bushes then you do not need to fill any of the gaps. The ground foam fills in the gaps just fine without having to fill anything with caulking. However, if you do not intend to glue ground foam onto your hills then you might want to fill in the deep cracks with caulking. |
Tutorial Videos
Here are the three videos I have made for using the rock hex molds. Keep in mind that these are beginner videos designed for Battletech players and others who may not have done any casting before. For complete instructions on casting, be sure to look on our Casting Instructions page.
 This video covers casting the hexes using regular plaster of Paris and a different way to make and use a pounding board for removing bubbles. |
 This video covers assembling the hexes on a printed plan sheet and how to connect hexes in a way that looks good. |
 This video covers painting the hex hills, filling the gaps and adding Woodland Scenics ground foam cover for grass and bushes. |
Hex Hill Assembly Instructions
You will need 24 castings of mold #180 to build the hill set shown here.
| 1. | You will need to 24 castings of mold #180 to make the whole set of hills shown here. I placed these hills on a printed hex map I had made. To print out your own copy, visit our Tips & Tricks 30 page which has copies of this map and instructions on how to print out this map and other maps as well. These instructions are only for using the 1.5" hexes from mold #180. If you want to use a larger size hex, then you will need to make your own adjustments to these plans. Click on the photo to see a larger view of the complete rock hill set. |
|---|---|
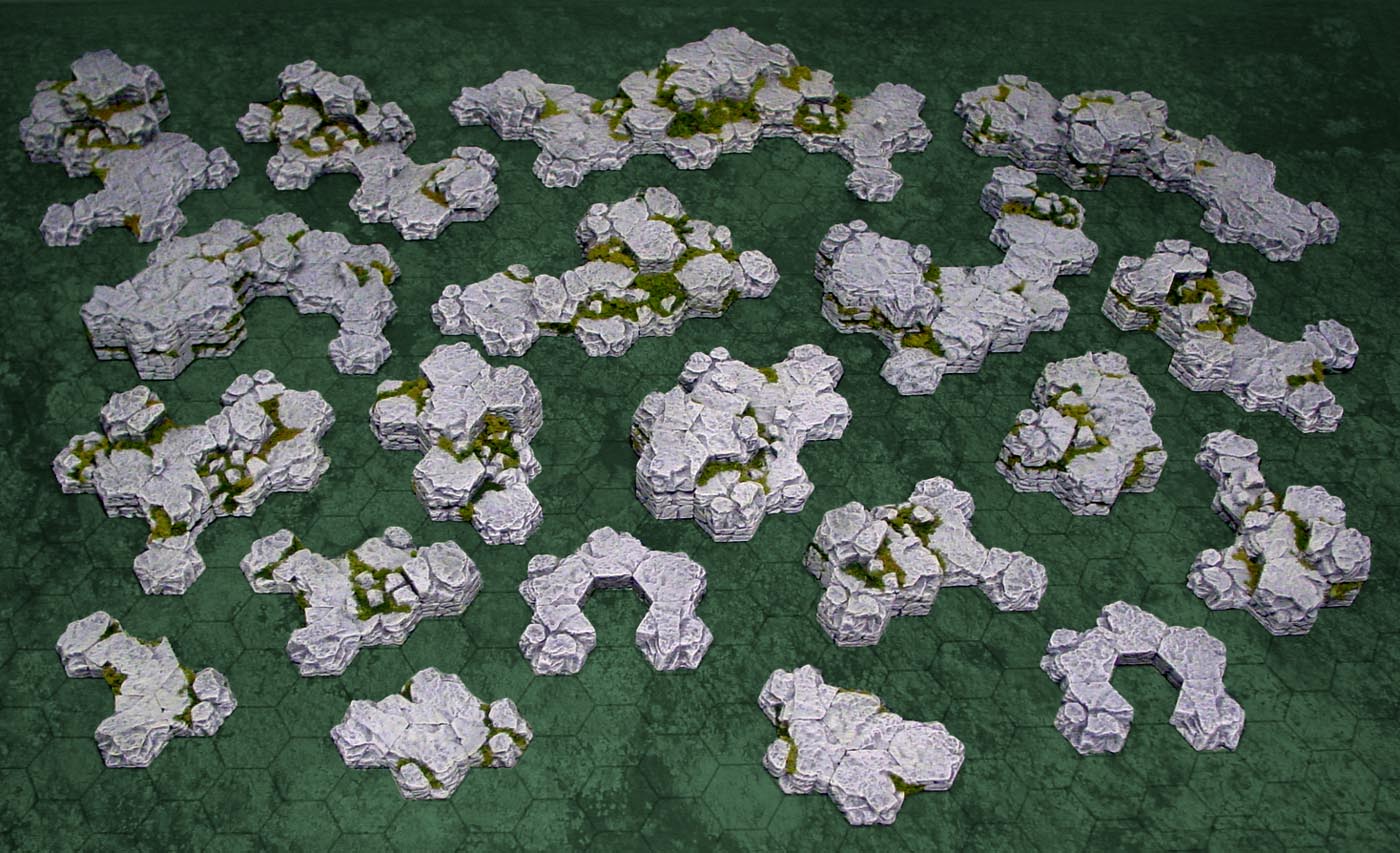 |
| 2. | Separate hills can be set next to each other to make a larger hill. Once they are set together, it is very difficult to see where each separate hill section begins and ends. Click on the photo for a larger view. |
|---|---|
 |
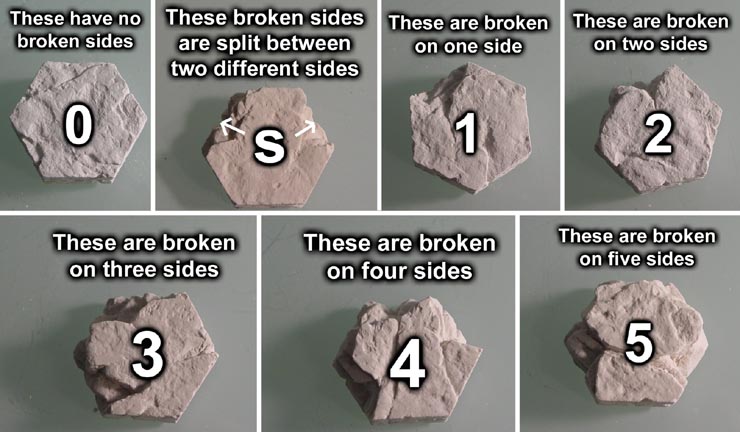
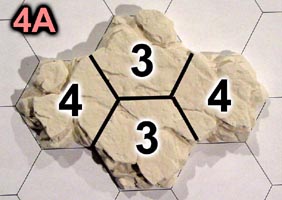
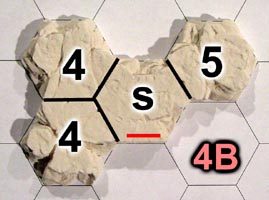
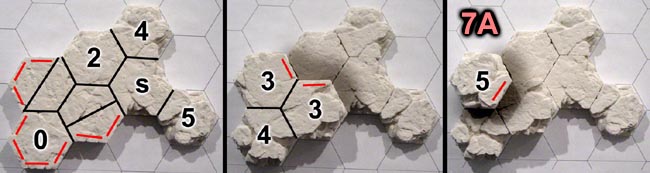
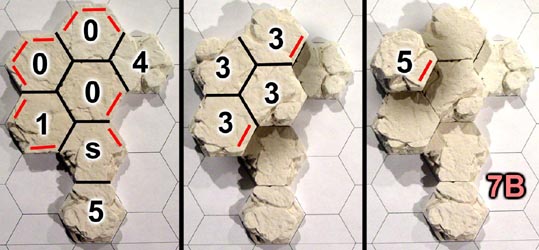
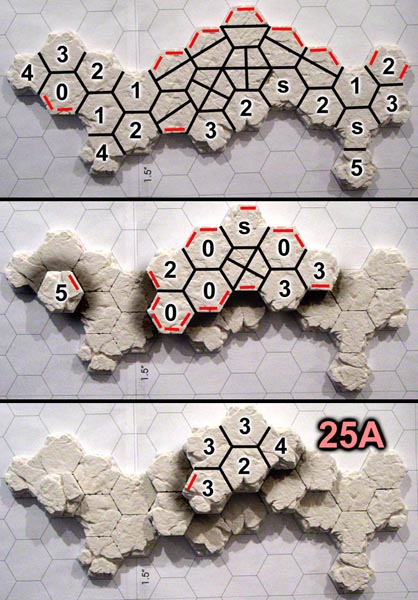
| 3. | You will need to sort the blocks according to how many broken sides are on each block. These numbers (and letter) are used on the assembly plans below. The lower case "s" stands for "split" which means that the two broken sides are not connected. Also note that there are actually three different hex tiles that are broken on 3 sides and each have a different texture. |
|---|---|
 |
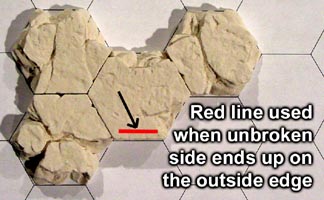
| 4. | Anytime you see a red line on the plans below, it means that you will have a straight side that ended up around the outside edge of a hill. Usually you try to avoid putting straight edges around the outside of the hill because of the unnatural look. In most cases, I have put them on the outside when I know that the next layer is going over top of them. |
 |
|---|
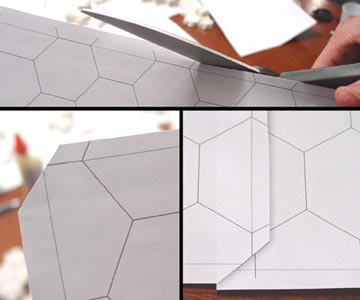
| 5. | To help keep your rock hills lining up exactly on a hex grid, you can print out sheets of 1.5" hex grids. You can find the other sizes of hex grids on our Printed Plans page. Just scroll down until you find the size of hex grid you are using. You can tape several sheets together to make a larger hex grid. Just trim off the edge and snip off the corners as shown here. Be sure to leave the border line around the outside when cutting. This will allow you to line up two or more sheets exactly so you can tape them together. |
 |
|---|
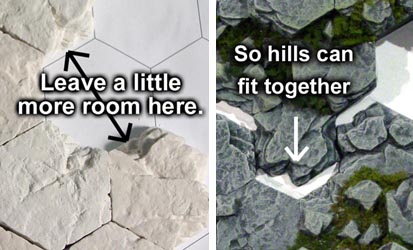
| 6. | Whenever you create a "U" shape with the hexes, be sure to leave a little more room between both sides of the "U". Later on when you put these hex hills on a map, you may want to link together several of the hills to make one larger hill. If you don't leave enough room between the two sides of the "U" shape, then you won't be able to fit a single hex between them later on. |
 |
|---|
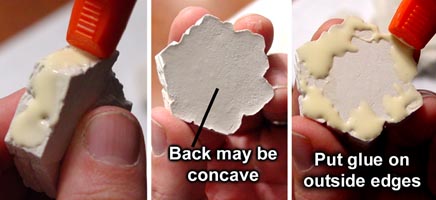
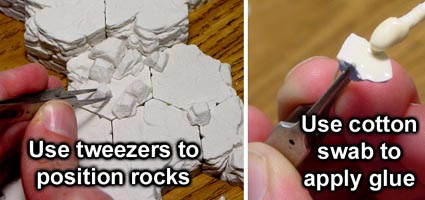
| 7. | I recommend Aleene's Tacky glue for this project. When gluing the sides, use plenty of glue so it can get down into the cracks. If your pieces stick to the printed hex sheets (and they will), just print out more hex sheets as needed. When gluing hexes on top of other hexes, the back of the block may be concave depending on how you scraped the mold. If this is the case, place the glue around the edges of the underside of the block. |
 |
|---|
| 8. | Now for the hill assembly instructions. These are the smallest hills. They have no upper layers or other hexes stacked on top of them. You will make one each of every hill except for the "U" shaped hill below. |
 |
 |
|---|
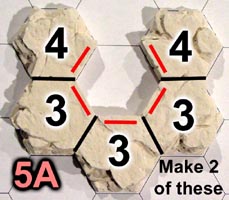
| 9. | For the "U" shape (shape 5A), make 2 copies of this. These can be used for strategic bases to capture or start from. Just make one each of all the other shapes. |
 |
 |
|---|
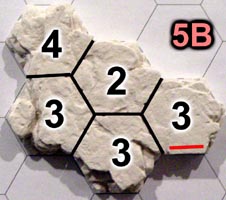
| 10. | This group of hexes only has one block on the second layer. I turned the flat side of the hex towards the center. |
 |
|---|
| 11. | The bottom layer on this piece uses four half-hexes. |
 |
|---|
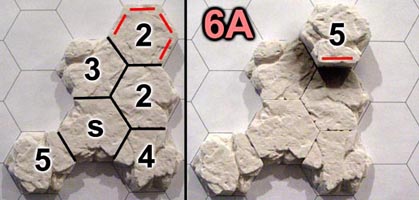
| 12. | The #5 hex on the bottom layer is connected by an "s" piece which has two non-connected broken sides. The two islands above on steps 3 and 4 also do this. |
 |
|---|
| 13. | 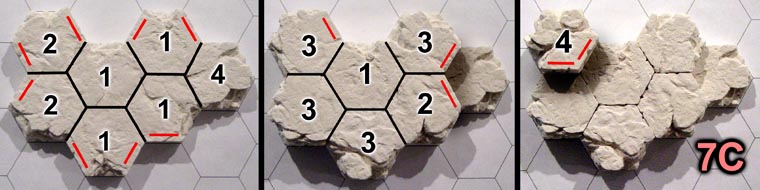 |
|---|
| 14. | 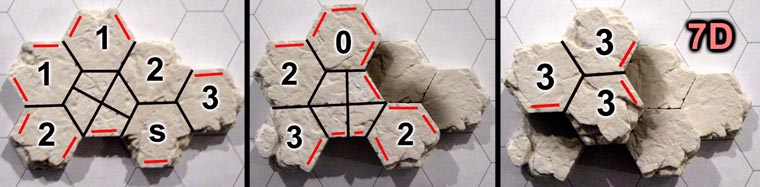 |
|---|
| 15. | 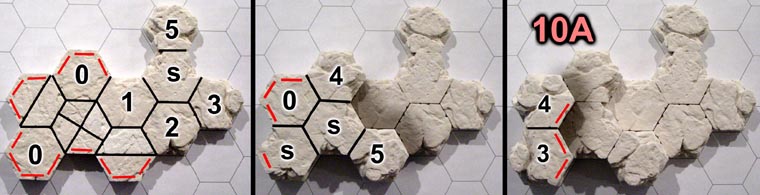 |
|---|
| 16. | 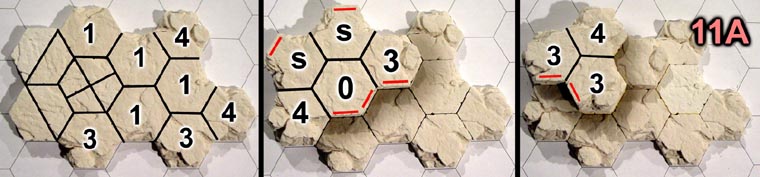 |
|---|
| 17. | 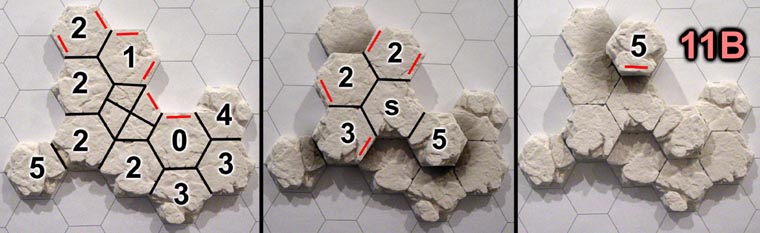 |
|---|
| 18. | 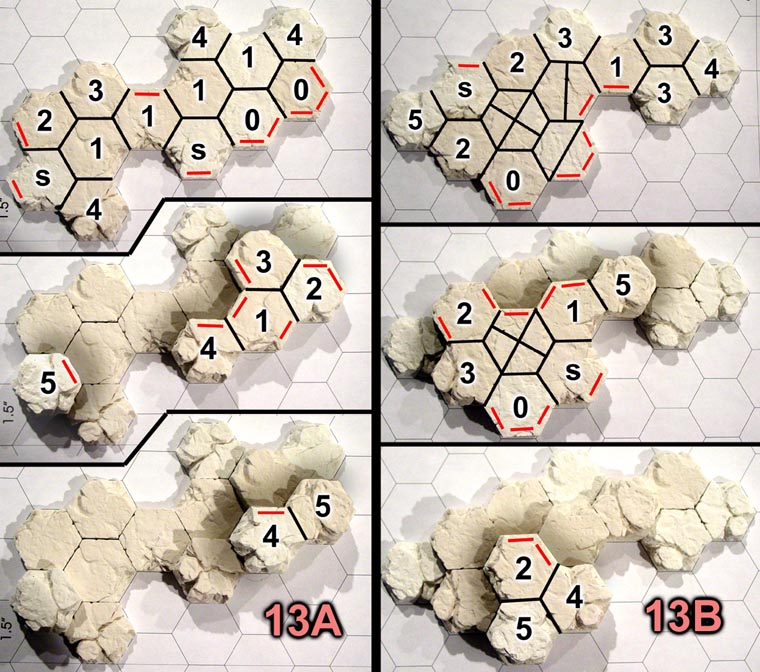 |
|---|
| 19. | 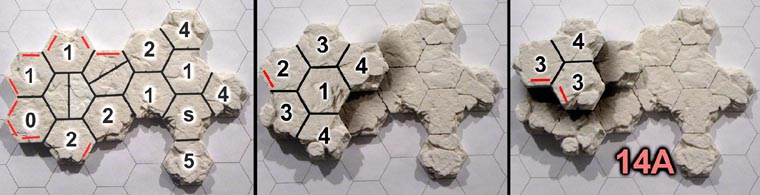 |
|---|
| 20. | 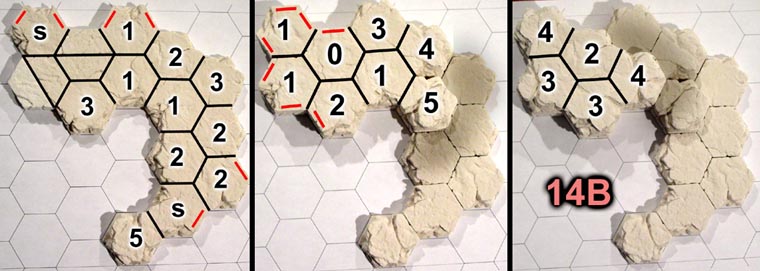 |
|---|
| 21. | 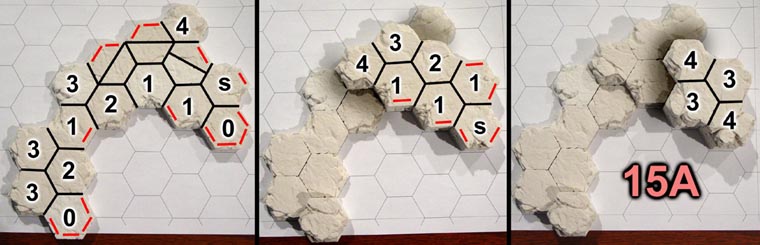 |
|---|
| 22. | 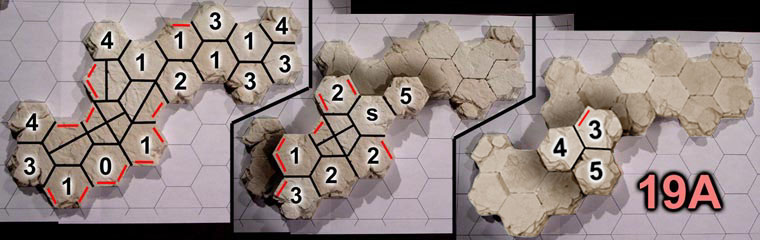 |
|---|
| 23. | I have assigned a number to each hill. After you make and paint each hill, put a sticker on the bottom with this number on it. 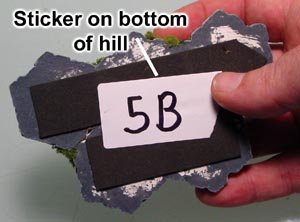 When you create a map using these hills, you can write down each of these numbers on your guide map for future reference. 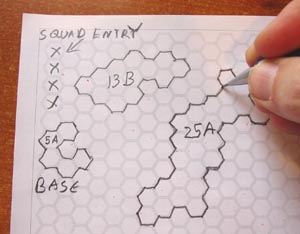 |
 |
|---|
| 24. | After gluing the hills together, you may want to add on the small rocks that came on the mold. Placing these rocks on a lower lever next to a ledge will help break up the 1/2" sudden drop. All of these rocks are exactly 1/4" tall so you will be able to make a flat surface to stand a miniature on top of them. |
 |
|---|
Painting and Mounting the Hills
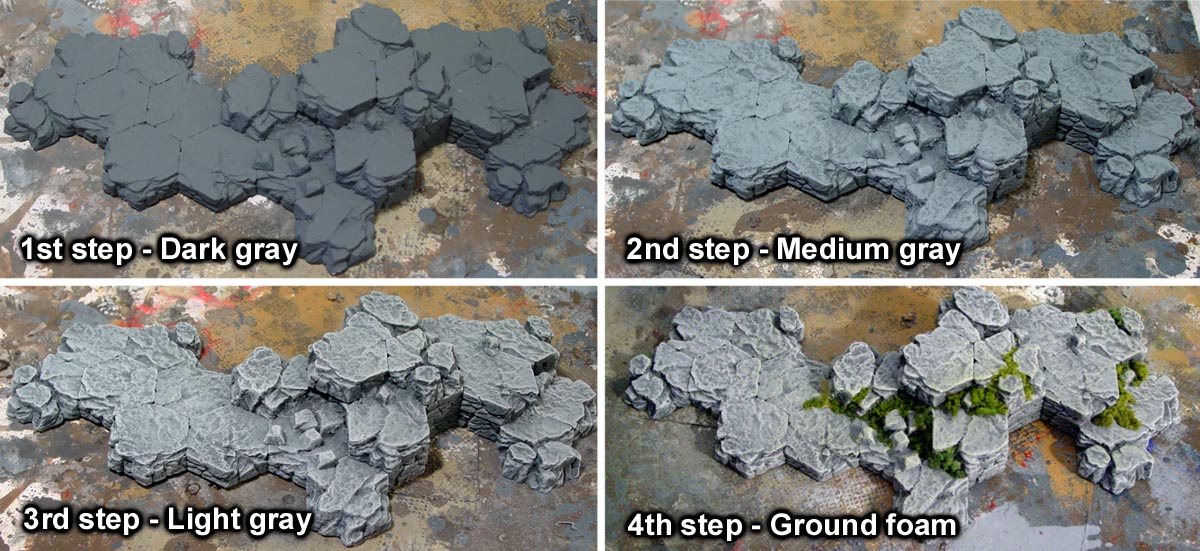
| 1. | To paint the rock hills, I will follow the instructions and colors from the Painting Instructions page. I am using the Castle Gray colors, but you may choose different colors depending on the color and environment of your gaming table. Click on the photo for a larger view. |
 |
|---|
| 2. | Once again, here is the video for painting the hex hills. I still prefer to use house paint instead of craft paint but house paint is much more expensive. Also, if you intend to add ground foam to your hills for grass and bushes then you do not need to fill any of the deep cracks with caulking. |
|
|---|
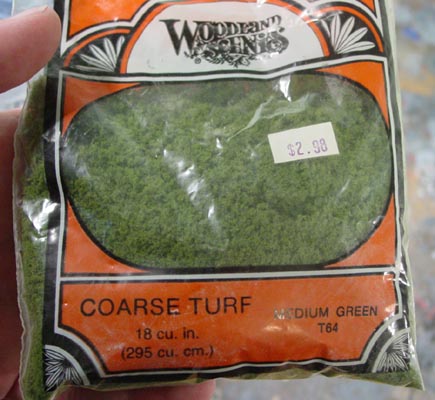
| 3. | To add grass and bushes to the hills, I am using Woodland Scenics ground foam. You can find it on the Woodland Scenics web site. I use several different colors and textures of foam to give a more natural look to the hills. Click on the photo for a larger view of the ground foam. |
 |
|---|
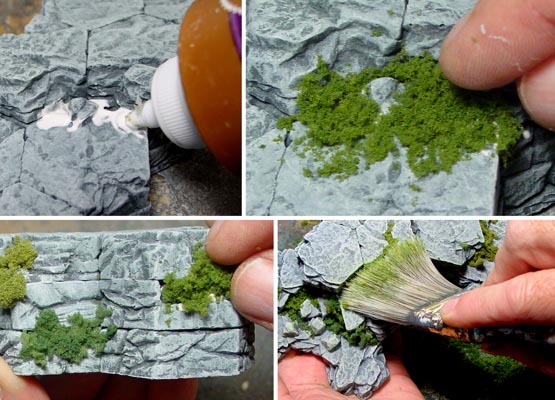
| 4. | I'm using Aleene's Tacky glue straight out of the bottle to glue down the ground foam. Just squeeze out a good amount around small rocks and down into cracks. Then sprinkle on the ground foam. Try to alternate between several different colors and textures for a more natural look. After the glue dries (give it a couple of hours), take a stiff brush and brush away the excess foam. It's a good idea to do this over a trash can because it's a bit messy. |
 |
|---|
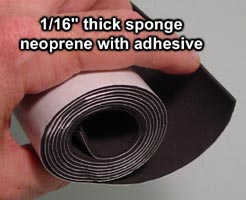
| 5. | After the hills were all finished, I chose to mount all of my hills of self-adhesive black foam. The foam I used was 1/16" thick and had a white backing that you peel off. To find this foam, you will need to do a search for "sponge neoprene with adhesive" and you should be able to find it on Amazon, Ebay or Google. The foam on the back keeps them from sliding around on the table. The foam also protects the map from getting scratched up when you set the hills on it. |
 |
|---|
| 6. | Cut the foam into 3/4" wide strips and apply them across the hex tiles from flat to flat. Afterwards, put a sticker on the bottom of each labeling them with their specific number. This number is helpful for recording the position of your hills for various games. |
 |
|---|
Finished Photos
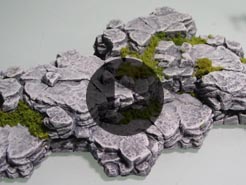
Click on the photos to see a larger version. You can find full color copies of the hex maps on our Tips & Tricks 30 page. The mechs you see displayed here are CAV mechs from Reaper Miniatures. The mechs were painted by Matt Leahy and he really did a wonderful job on them. These rock hills can be used for games such as Battletech, Mech Warrior and any others that use hex grid for movement. | 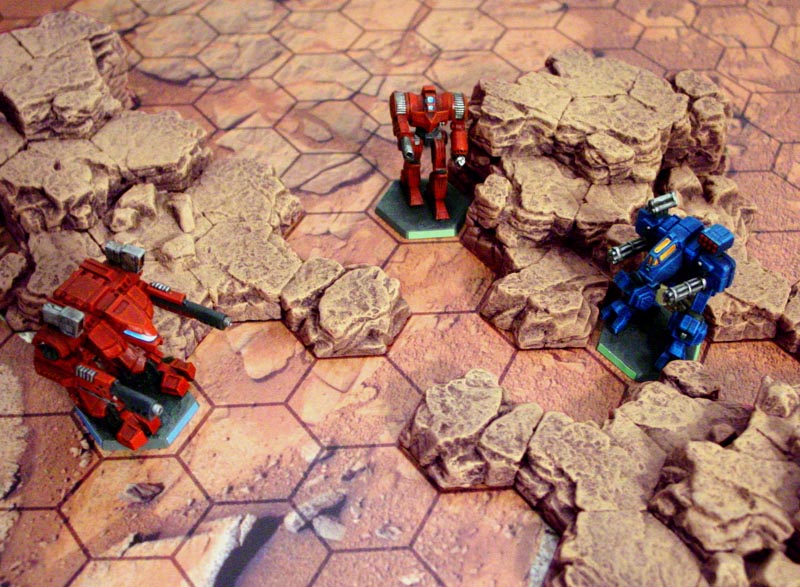 |
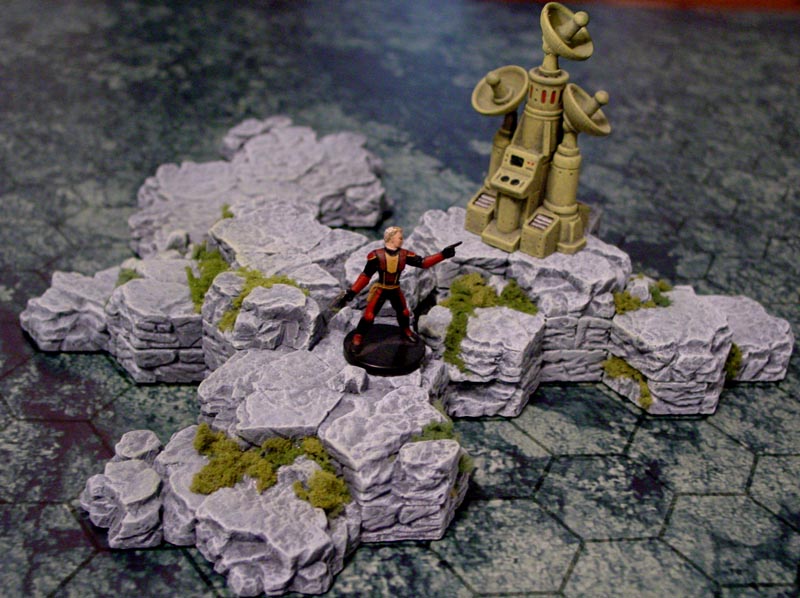
Even if you have no need for hex movement, you can still create rocky hills for your tabletop games for other scales. The first photo below shows a 25mm figure and a communications tower built from mold #326. | |
 |
 |