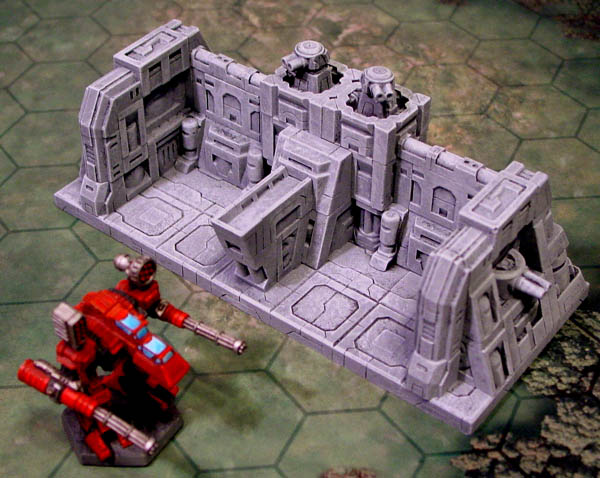
Star Fortress Building Instructions Page 2
 |
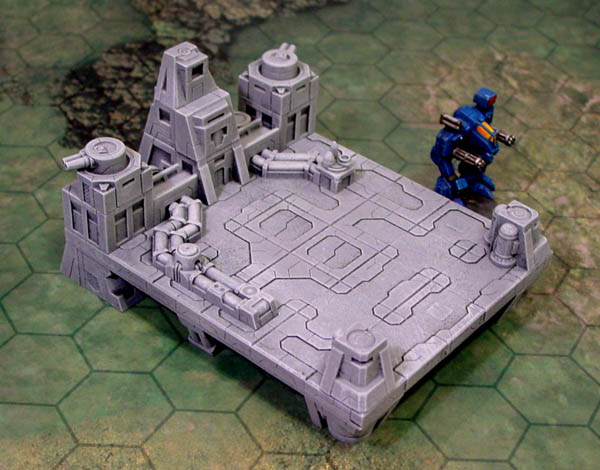
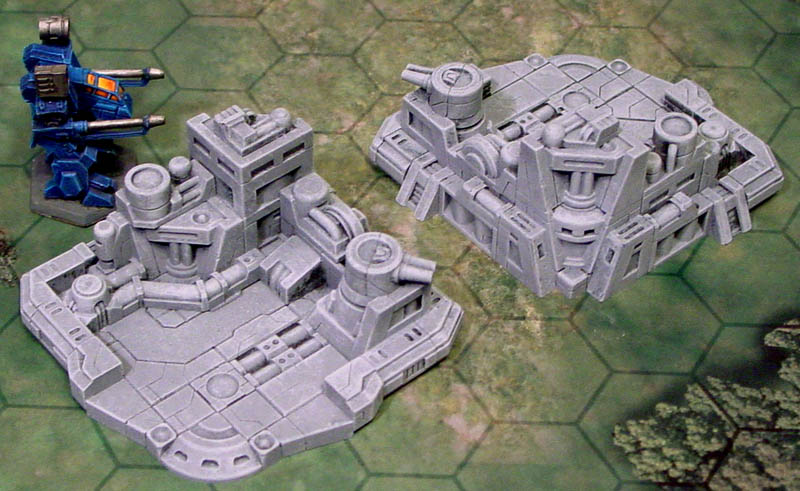
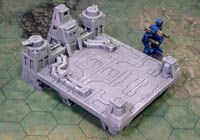 Landing Pad |
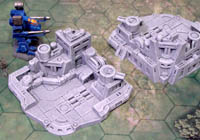
 Mech Hangar |
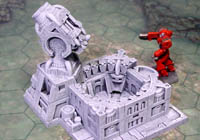 Signal Jammer |
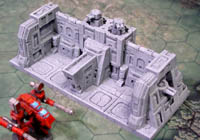
 Main Bases |
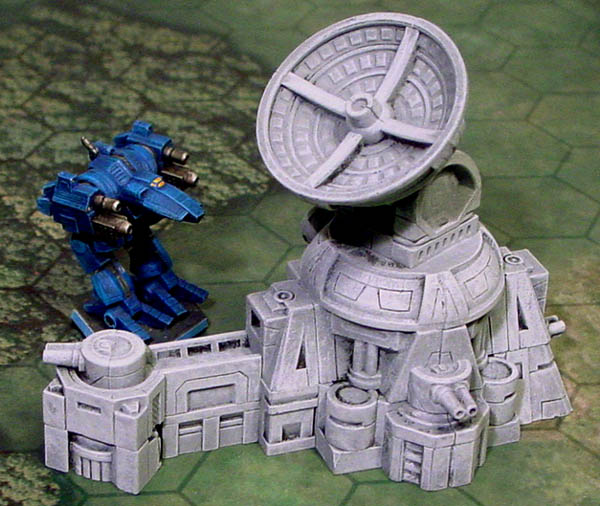
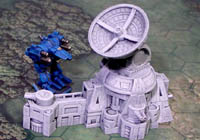 Comm Array |
 |
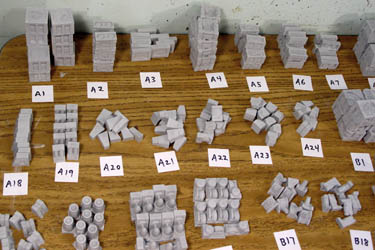
To build all of the items shown here, you will need 12 castings of each of the following molds:
#312 Star Fortress Mold A, #313 Star Fortress Mold B, #314 Star Fortress Mold C and #275 Techno Floor Mold.
 You will need this parts list to build these items!
Click on the icon on the right to bring up a PDF file of the parts list. These are all of the parts from molds #312 (mold A), 313 (mold B) and 314 (mold C).
The reference numbers of these parts are referred to in the instructions and also the videos.
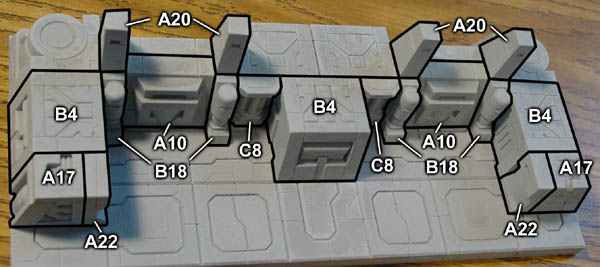
After you print out the parts list above, you will notice that there are 82 different blocks when you combine these three molds. If you want to follow the building instructions I have for these models, the best way to find the blocks that you need is to sort the blocks into small piles and arrange them by number. Here, I've written the number of each part on a scrap of paper to help me find the blocks I need quickly. This is time consuming at first but you will save more time in the long run if you do it this way. |
 |
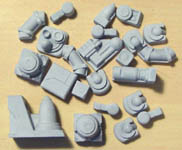
I recommend that you make these items in the order that you see them listed here. The items near the end of the list use floor tiles that are completely covered up and it will not matter if you use the same floor tile patterns that I show being used. It's more important to match the floor tile patterns on the first items shown such as the landing pad and mech hangar. The few blocks you see in the photo are the only pieces left over after building everything shown here, so almost every block of the 12 castings has been used. |
 |
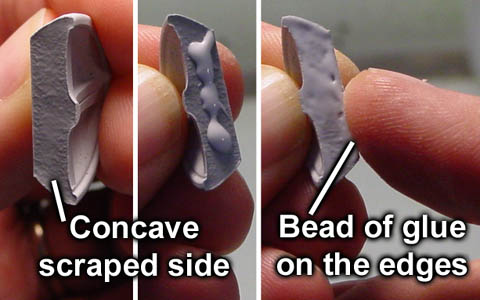
Gluing the Blocks When gluing the blocks, you will notice that some have a concave side where the mold was scraped. When you have items that will be glued concave side to concave side like the small radar dish here, it's important to get the glue out to the edge of the piece. Place a bead of glue on the block and spread it to the edges of the block using your finger. |
 |
Landing Pad
| 1. | Parts List Part# - Quantity
|
 |
|---|
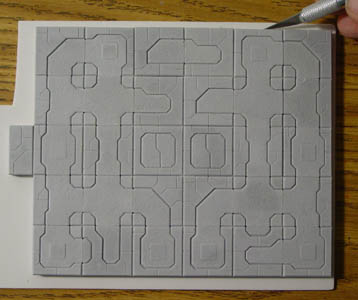
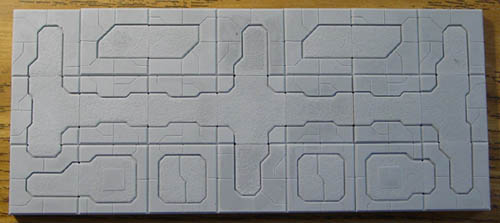
| 2. | Glue the following floor tiles down onto a piece of thick card stock or matt board. This is optional but I though the center could use a little extra support. After the glue dries, cut around the outside using a hobby knife. 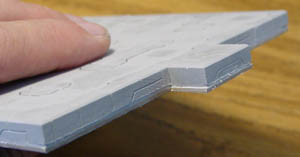 |
 |
|---|
| 3. | Assemble the pieces shown using a straight edge across the front and use any 1/2" wide blocks as spacers. |
 |
|---|
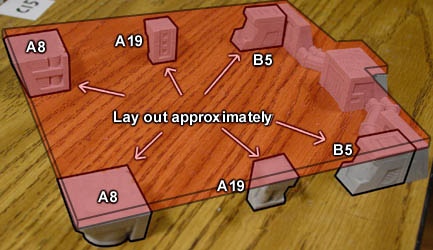
| 4. | Glue the B5 pieces onto the above assembly and lay out the following pieces approximately next to it. The large flat panel of floor tiles you glued from step 2 (above) will be glued down on top of these blocks. After gluing them down, you can slide the blocks around so the A8 blocks are directly under the corners and the A19 blocks are somewhere near the center. |
 |
|---|
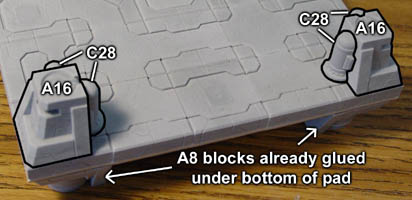
| 5. | Above the end supported by the A8 blocks, glue two A16 blocks on top of each corner. Then add four of the C28 decorations, one on each side of the A16 blocks. |
 |
|---|
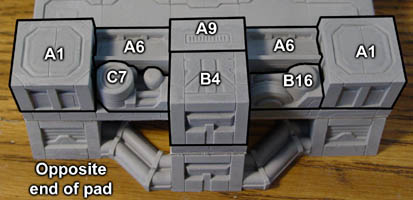
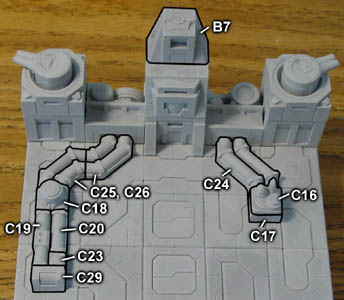
| 6. | On the opposite end of the pad, Glue on the blocks shown. You will notice that the angle on the A9 block in the center faces away from you. |
 |
|---|
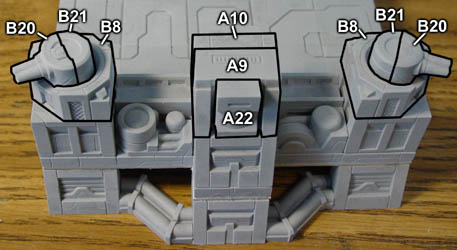
| 7. | This tall side is finished by adding the round guns and final top blocks. The A10 block is facing away from you and will make a smooth transition into the angle block it's setting on top of. The A9 block you see also makes a smooth transition into the angle block it's setting on top of. The A22 block fits into the recess of the A9 block. |
 |
|---|
| 8. | We will finish the landing pad by adding the final top block and all of the decorative blocks on the floor. The ends of the hoses start under the center of each bridge pieces. The top block is set back so the back of the block is flush with the block underneath. |
 |
|---|
Mech Hangar
| 9. | Parts List Part# - Quantity
|
 |
|---|
| 10. | Glue the following floor tiles down onto a piece of thick card stock or mat board. This is optional. After the glue dries, cut around the outside using a hobby knife. |
 |
|---|
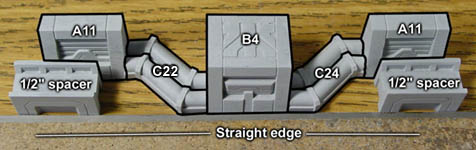
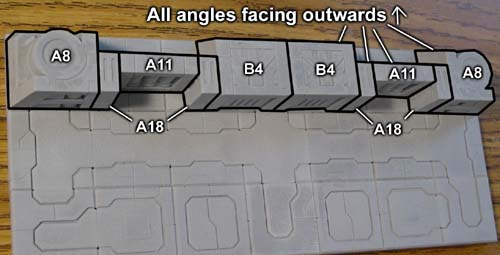
| 11. | Glue the block onto one edge so that the angled side of all the blocks are facing away from you. Pay careful attention as to how the edges of the blocks line up. The back edges of the A18 and A11 pieces are aligned and the front edges of the A8 and A18 pieces are aligned. |
 |
|---|
| 12. | Glue all of these blocks on paying careful attention to their facing. The A20 blocks set directly on top of the A18 blocks from the layer below. |
 |
|---|
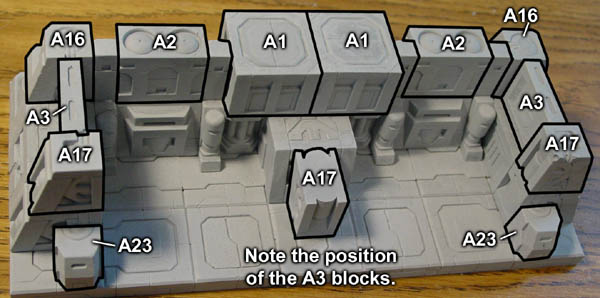
| 13. | The A17 block in the center is placed upside down. The A3 blocks are placed centered between the A16 and A17 blocks. The A23 blocks should be aligned with the blocks behind them on the inside edges. |
 |
|---|
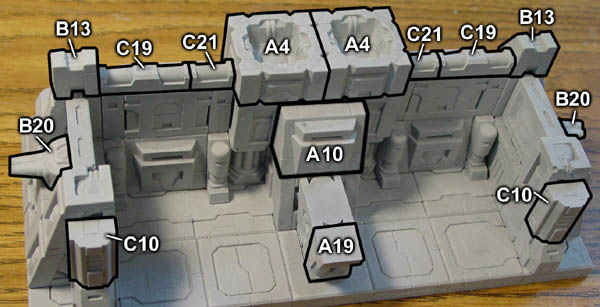
| 14. | The A19 block in the center is also placed upside down. The B13 blocks are placed with the angle facing away from you. The C19 and C21 sides are aligned with the inside of the wall. |
 |
|---|
| 15. | Place the C14 guns any direction you like. I prefer them slightly rotated to give the feeling they can swivel right and left. |
 |
|---|
Signal Jammer
| 16. | Parts List Part# - Quantity
|
 |
|---|
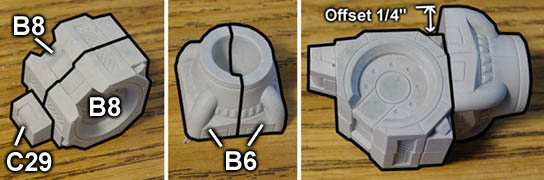
| 17. | Glue the B8 blocks bottom to bottom and set them so the angle is facing upper left, then add the C29 block. When adding the B6 blocks, be sure they are offset by 1/4". |
 |
|---|
| 18. | 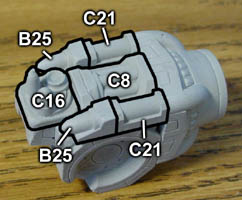 Add these decorative blocks onto the top of the gun. Make this floor section out of the floor tiles. The C5 tiles will take the place of the floor tiles in the center. |
 |
|---|
| 19. | 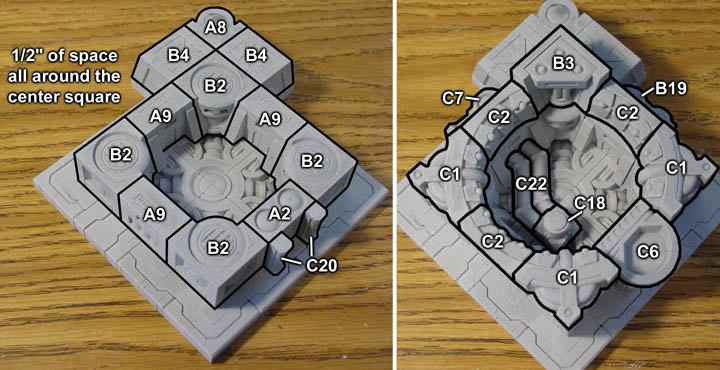 |
|---|
| 20. | 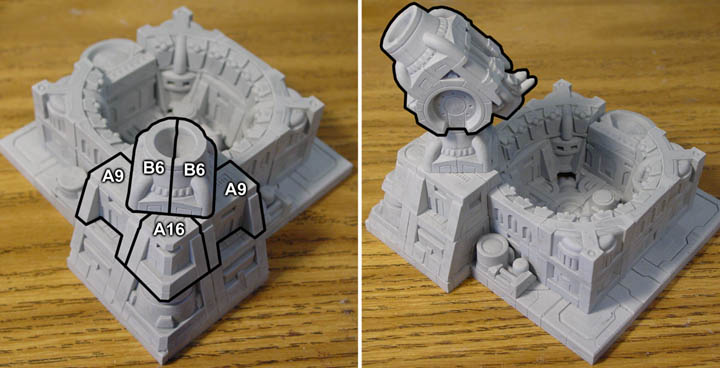 |
|---|
Main Bases
| 21. | Parts List Part# - Quantity
|
 |
|---|
| 22. | 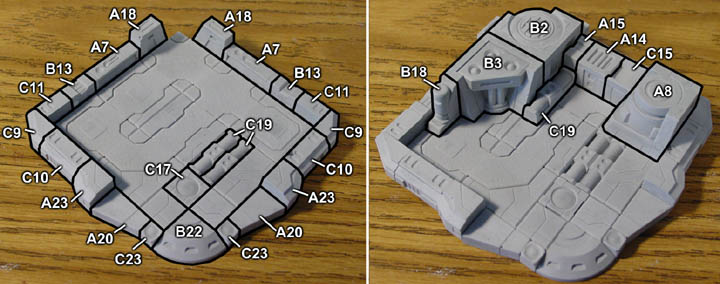 |
|---|
| 23. | 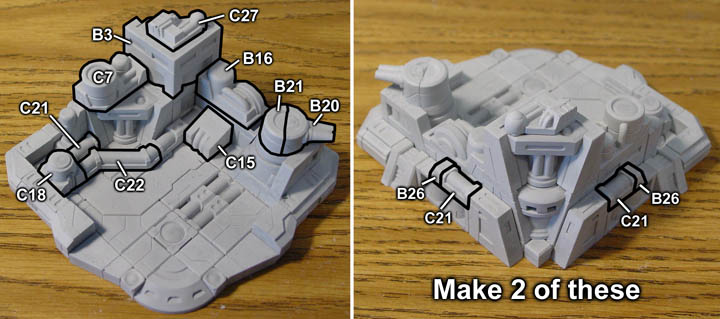 |
|---|
Communications Array
| 24. | Parts List Part# - Quantity
|
 |
|---|
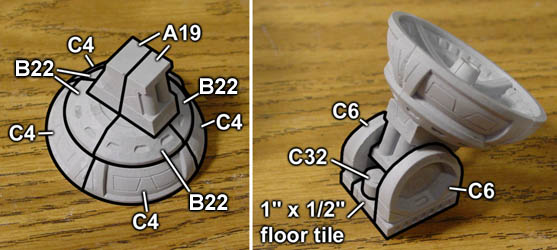
| 25. | Glue a ring of C4 blocks together and top them with a ring of the B22 blocks. Then glue on a pair of A19 blocks back to back. Once dry, glue the base block to hold the dish at the angle you want. |
 |
|---|
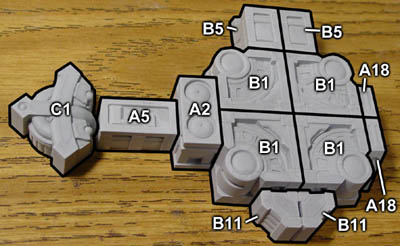
| 26. | Glue all of the blocks together as shown. The C1 block will not really be able to be glued in place until you put the next layer of blocks on top. The A5 block is centered onto the face of the A2 block. The B5 blocks have their angled side facing away from you. Glue the A18 blocks back to back so the angles face away from each other. |
 |
|---|
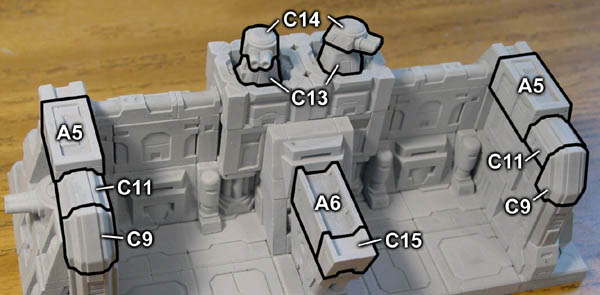
| 27. | At the far right, the C13 block cannot be seen but it's squeezed between the two A21 blocks and forms the base of the gun stand. Once glued into place, cap it off with the C14 gun top. Near the top of the photo, the two A24 blocks are glued side by side. Later they will have another small block set on top of them to help support the smaller radar dish. The B23 blocks will have the front half gun B20 placed on top in the next step. |
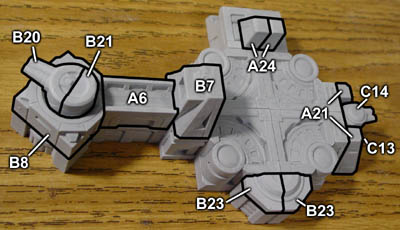 |
|---|
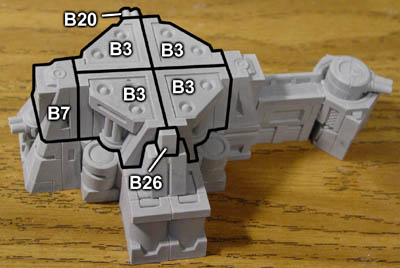
| 28. | Here the whole thing is turned around so you can see the other side. The B20 gun at the top is set on top of the B23 pieces below it. Only the front half of the gun is used. Near the bottom, the B26 piece is added to help support the small radar dish that will go there. |
 |
|---|
| 29. | Finish the top by adding the four C4 pieces. These are placed upside down to form the turning base of the large dish. Add the C3 small radar dish onto the B26 block and position it as best you can. The large radar assembly from step 25 is placed on top any facing you like. I would suggest gluing it on top because it may be a bit unbalanced depending on how far down you angled the main dish. |
 |
|---|