Tips & Tricks 12
How To Use Mold #164
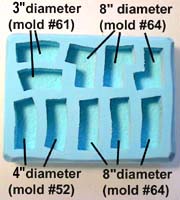
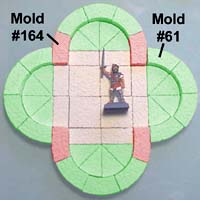
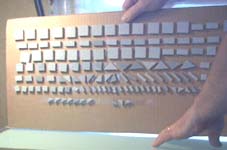
| 1. | The round connector block mold #164 looks like this. The pieces it makes fit the circular tower molds #52, 61 and 64. These three molds will make circular towers of 4", 3" and 8" outside diameters.
Just imagine that you took a square block and welded it to a curved block. |
 |
|---|
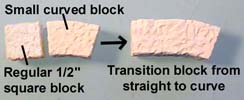 The odd shaped blocks that you see are meant to turn a straight wall into a curved wall with no obvious seams.
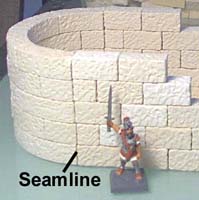
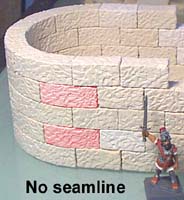
| 2. | Without the connector blocks, you can't turn a straight wall into a curved wall without an obvious seam. Using the connector blocks (shown in red), you can now turn a straight wall into a curved wall with no seam showing. |
 |
 |
|---|
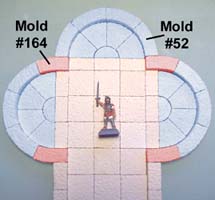
| 3. | Now I'm going to show a few floorplan layouts using these connector blocks.
The roman soldier is a 25mm figure and will be used in the remaining photos to give you some idea of scale. |
 |
|---|
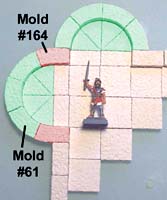
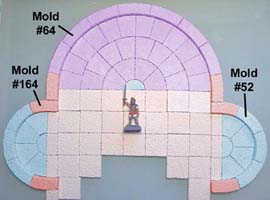
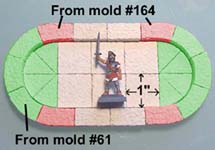 The two layouts shown here use basic blocks and floor tiles along with pieces from mold
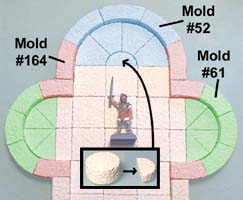
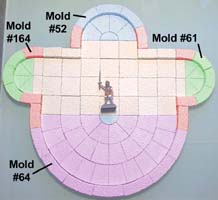
 | 4. | The first photo could be a different way to make corner towers or balconies. The second photo uses molds #52, 61 and 164. Please note that you have to make the flat half-circle tile by sanding down the round block on mold #52. I know this isn't fun to do, but since you rarely need a block like this, I thought it would be a waste of good mold space to add it to a mold. |
 |
 |
|---|
| 5. | The first photo uses molds #164 and #52. The second photo uses the large round mold #64 along with #164 and #52. |
 |
 |
|---|
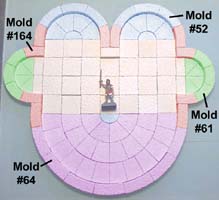
| 6. | These last two photos probably wouldn't make a good looking building, but I put them here to show that you can make almost any arrangement of straight and curved walls using the connector blocks. I hope this section has given you a better understanding of what the connector blocks look like and how you can use them in your models. |
 |
 |
|---|
Painting Small Parts
For this section I wanted to show how to pre-paint small pieces and then assemble them into different floor patterns. Pre-painting and dry brushing small pieces can be difficult without getting paint all over your fingers and losing small pieces.
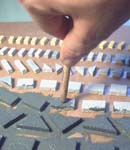
| 1. | For my first attempt, I put several strips of double sided tape down onto a sheet of cardboard. I made sure it was the permanent stick kind with the strongest adhesive. I stuck down the blocks I wanted to paint with about 1/4" in between blocks. I even turned the cardboard on end to make sure the blocks stuck well. Several blocks fell off and had to be repositioned a few times. |
 |
|---|
| 2. | The biggest problem with this idea was that the blocks would not stick down, either because it had a concave bottom or a bit of loose plaster on them. Then when you go to paint the sides of the pieces, the pressure of the brush was enough to knock them off also. While painting the pieces I had to constantly keep pushing them back down with the handle of the paintbrush. Overall I decided that this was not the way to do it. |
 |
|---|
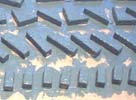
| 3. | I found that the best way to hold the pieces down was to use a toothpick or kabob skewer. I would hold down the piece with my left hand and paint it with my right hand. The point of the toothpick is so small and sharp that you won't leave a bare spot on the block where it touches. |
 |
|---|
| 4. | At this point I made an interesting discovery. The dried excess paint from my first coat glued the blocks down well enough for me to do the rest of the painting without a problem. |
 |
|---|
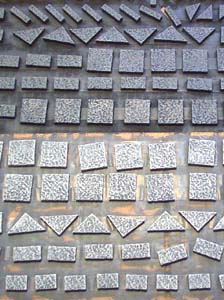
| 5. | In summary, don't tape the blocks down. Instead, simply hold them down while you paint the first coat and let them dry. Be sure you leave them at least 1/4" apart so you can do the remainder of the painting easily. After they dry, the dried paint will have secured them to the cardboard well enough so they won't come off for the dry-brush coats of paint. For the following examples, I painted the floor tiles in two different colors. The upper blocks used an undercoat of black and were dry brushed with dark gray. The bottom blocks were undercoated with medium gray and dry-brushed with white. Make the two shades very different. I had to repaint the dark tiles even darker because the difference between the colors wasn't big enough to see the floor patterns well (shown below). |
 |
|---|
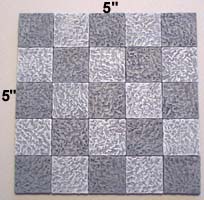
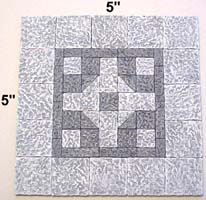
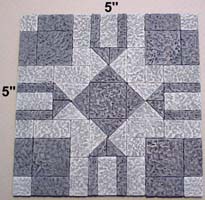
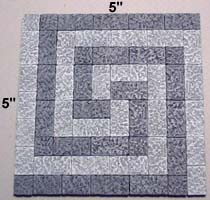
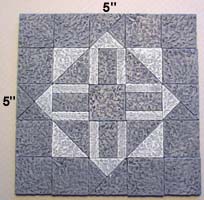
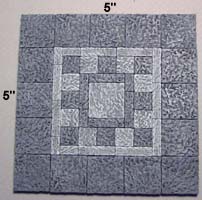
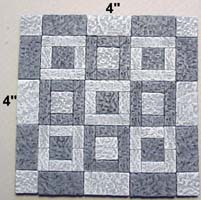
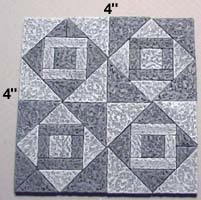
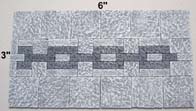
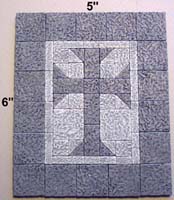
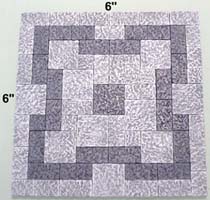
Floor Tile Patterns
All of the floor tile patterns shown here are made using mold #201. The outside dimensions for each pattern will be shown. Hopefully these will give you some ideas for making your own patterns to dress up your dungeons or castles.
 |
 |
 |
 |
 |
 |
 |
 |
 |
|
 |
 |