Tips & Tricks 14
How to Add Water to the Gothic Fountain
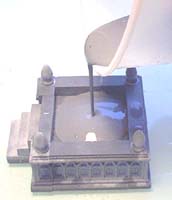
| 1. | To build this fountain, visit the Gothic Dungeon Arena page. Spray the surface completely with water. Really soak it. Next, mix up some plaster and pour it into the fountain. Tap the fountain to get the plaster up into the corners. You will probably have to spray some more water on it to get the plaster to flow well. |
 |
 |
|---|
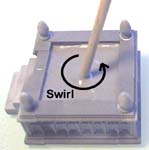
| 2. | Using the handle of a paint brush, swirl the plaster slowly as it dries. It will take about 10 minutes for the plaster to set up (and you can stop swirling). If you want calm water, just let the plaster dry on its own. Once the plaster dries completely, paint and dry brush the fountain as you normally would. |
 |
 |
|---|
| 3. |
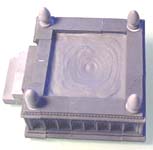
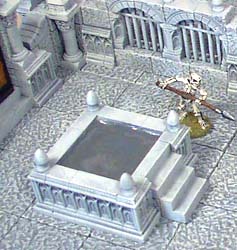
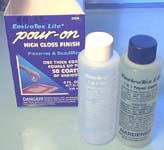
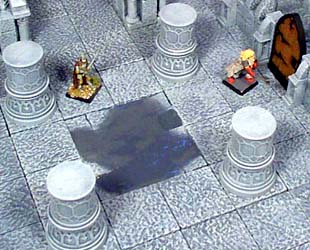
To add gloss to water, I'm using a product called "Envirotex Lite, Pour-on High Gloss Finish". This little 8 ounce kit costs about $10, but it's really good stuff. You mix equal parts of A and B, mix it up and pour or brush it onto the surface. It's meant to act as a very thick varnish. Use a cheap brush, because you'll have to throw it away afterwards. Once it dries (about 24 hours later), your fountain will be complete. |
 |
|---|
 Paint the water color using dark gray plus a little green.
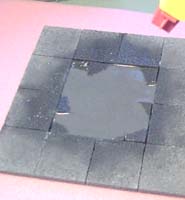
Making a Hole in the Gothic Floor
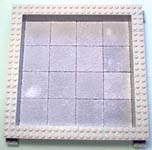
| 1. | I'm making a hole in the floor of the Gothic Dungeon Arena. I'm using Legos to help get the sides to line up square. To start this, lay out the floor tiles for your floor section on 1/2" thick polystyrene foam insulating board. This is the stuff they use for sheeting on houses before they put siding on. |
 |
 |
|---|
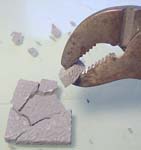
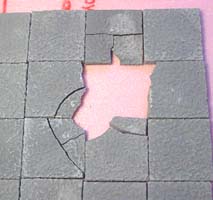
| 2. | Use a pair of pliers to break up the floor tiles around the hole. Be sure you keep track of the pieces and set them back together. Next, sand a few of the pieces on the bottom so that they will look like they're sinking down into the floor. |
 |
 |
|---|
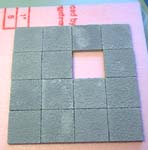
| 3. | Place the pieces back around the hole until you are happy with how it looks. Then glue the pieces into place on the foam. Once it dries completely, cut a hole in the foam using a hobby knife. Try to shape the hole to match the edges of the cracked tiles. |
 |
 |
|---|
| 4. |
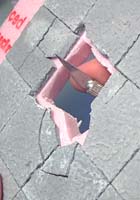
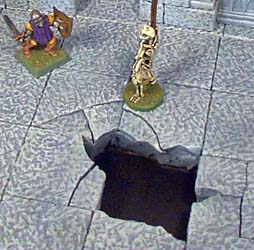
Trim the foam away from the outside of the floor section. Paint and dry brush the floor section as shown in the painting instructions. Finally, paint the bottom of the hole black. The 1/2" foam will be thick enough to give the illusion of depth to the hole. |
 |
|---|
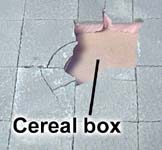 To cover the bottom of the hole (you don't want your table to show through), glue a piece of cereal box under it.
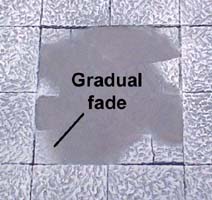
Making a Puddle of Water on the Floor
| 1. |
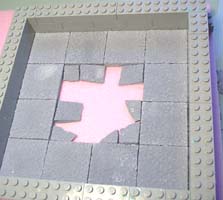
Break and sand the bottom of several floor tiles. This will make them look like they're sinking into the floor. Arrange them onto your foam and then glue them down when you're happy with how it looks. |
 |
|---|
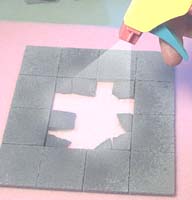
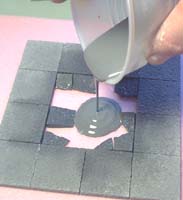
| 2. | Spray the surface completely with water. Really soak it well. Next, mix up some plaster and pour it into the hole. Tap the piece to get the plaster up into the corners. You will probably have to spray some more water and do a lot of tapping to get the plaster to flow well. |
 |
 |
|---|
| 3. | Let the plaster dry completely, then paint and dry brush the tile. To paint the water, mix up a dark gray with green added. Whenever you have tiles sinking into the water at an angle, you'll need to gradually blend the dark gray into the rest of the tile. This will make it look like the tile is sinking down into the water. |
 |
 |
|---|
| 4. |
You mix equal parts of A and B, mix it up and pour or brush it onto the surface. It's meant to act as a very thick varnish. Use a cheap brush, because you'll have to throw it away afterwards. Once it dries (about 24 hours later), your puddle will be complete. |
 |
|---|
Making an Open Grave
| 1. | I'm making an open grave in the floor of the Gothic Dungeon Arena. I'm using Legos to help get the sides to line up square. Arrange them onto your foam and then glue them down when you're happy with how it looks. Leave out two of the tiles where the grave will go. Use a hobby knife to cut a hole in the foam where the grave will go. |
 |
 |
|---|
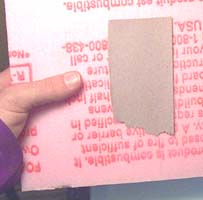
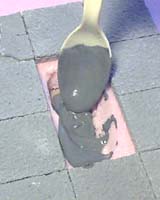
| 2. | Glue a piece of cereal box over the bottom of the hole. Let this dry completely before you continue. Mix up some plaster a little thicker than normal and spoon it into the cavity. Spread it around with the spoon and try to hump it up on the edges. |
 |
 |
|---|
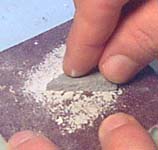
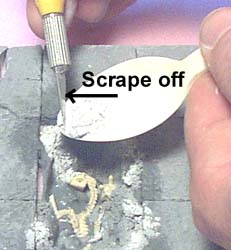
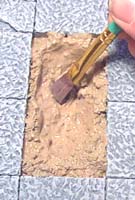
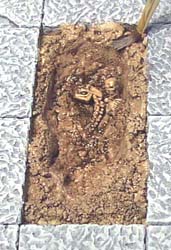
| 3. | While the plaster is still wet, embed some plastic bits into the plaster. I'm using some skeleton bits from Games Workshop here. To give the plaster a rough texture (to resemble dirt), wet the area and then spoon some dry plaster around the edges of the hole. I've found that the easiest and most exact way to get the dry plaster where you want it, is to put a little in a spoon and gently scrape off small amounts with a hobby knife. |
 |
 |
|---|
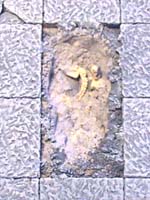
| 4. | Gently mist the dry plaster with water so it will set up. Let it dry completely before painting it. Paint and dry brush the floor tiles gray. Then paint the dirt an earth color. For specifics on making an earth color of paint, see the Earth Tone Painting Instructions page. Let the paint dry completely before you move onto the ink wash. |
 |
 |
|---|
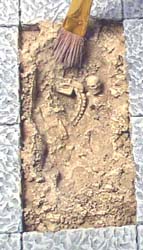
| 5. | I'm using a brown and black ink wash mixture next. Thin the ink 1 part ink to 1 part water. These ink washes are from Games Workshop, but I'm sure other types of inks would work just as well. Slop the ink into all of the cracks and then soak it back up with the brush if it puddles in areas. After the ink has dried, dry brush a light cream color onto the dirt area. Be careful not to get it on the stone slabs. You can also dry brush white onto the bones. |
 |
 |
|---|
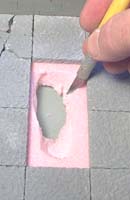
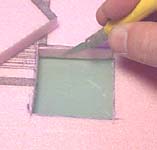
Making a Secret Entrance
| 1. | I'm making a secret entrance for the Gothic Dungeon Arena. This will be where monsters can sneak out and ambush intruders. Place a 1.5" floor tile down and surround it with flat tiles. Using an ink pen, draw a line around this collection of tiles. Cut a hole in the foam where your line was. |
 |
 |
|---|
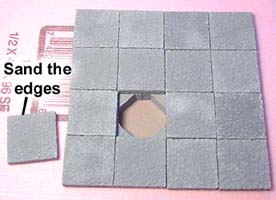
| 2. |
Assemble and glue the remaining floor tiles on the section. Since you want the one floor tile that covers the hole to be removable, sand the edges of it so it will be a little smaller. |
 |
|---|
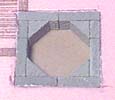 Glue a piece of cereal box over the bottom of the hole and then glue the tiles in the hole as shown. I've used some angle blocks in the corners, but you don't have to put them in.
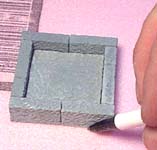
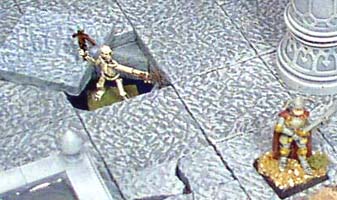
| 3. | The removable floor tile should fit loosely. If the floor tile hangs up a little in the hole, it won't fit once you paint the piece. After you dry brush the gray on the stone, paint the bottom of the hole black. Now you have a place for enemies to sneak up on anyone who wanders in the dungeon. |
 |
|---|