Tips & Tricks 2
Using the Cobblestone Mold #210
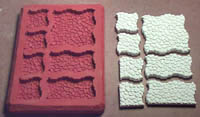
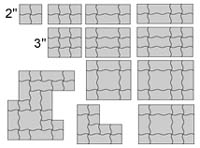
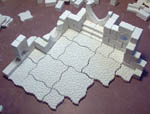
The cobblestone mold is used to create a seamless random stone texture for cobblestone streets and floors. To do this seamlessly, I had to create interlocking pieces. You'll notice that a few of the pieces have straight sides. These are placed against walls, or wherever you need a straight edge. The pieces are designed so that almost any layout can be made. These diagrams show how to make various sizes of floor sections using the basic shapes. |
|
The cobblestone mold was used for the floor of this dungeon diorama. You probably can't tell from the photo, but after I finished the diorama, it was obvious where the seams in the cobblestone were. I was so unhappy with it that I scrapped the whole thing and completely remade it! |
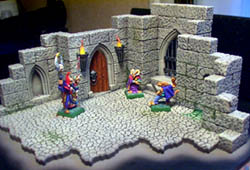 |
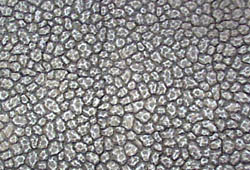
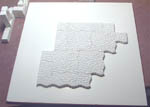
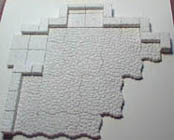
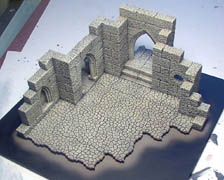
The new mold blends the stones together much more seamlessly, and I'm much happier with the result. Can you tell where the seams are? |
 |
Making a Dungeon Diorama
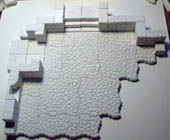
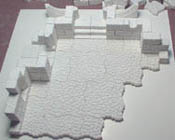
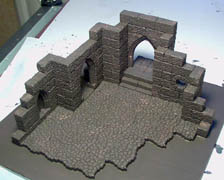
| 1. | The first step in laying out the diorama was to stack up blocks until I liked the layout. You will notice that the arched doorways are placed upside-down. This helps me leave the right amount of space for them (since they won't stand up on their own yet.) |
 |
|---|
| 2. | I cut a piece of foam core board to glue the whole thing down to. Any stiff material that will support the weight of the model will do. The floor tile sections were then laid out and glued into place. |
 |
|---|
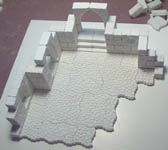
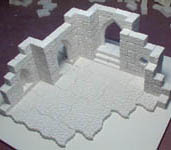
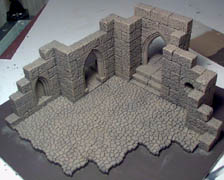
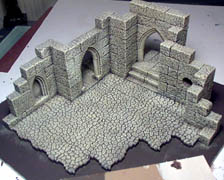
| 3. | The next few photos show the step-by-step construction of the walls. | ||
|---|---|---|---|
 |
 |
 | |
 |
 |
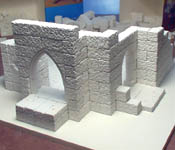 | |
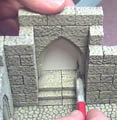
| 4. | I used the same paint colors that I had for the bell tower and gothic church. The first coat is dark and the paint is thinned so it will run into all the cracks. The second coat is lighter and dry-brushed with a medium pressure. The final coat is the lightest and dry-brushed with a very light pressure. To help the model stand out from the background, I airbrushed the medium color around the edge of the base, and airbrushed the rest of the base black. | |
|---|---|---|
 |
 | |
 |
 | |
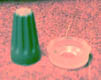
| 5. | Making TorchesThe torches were made from pieces from the hardware store. A wire nut is used for the base, and a decorative screw flange for the top. The two pieces were glued together and the back was sanded flat (so you can glue it to the wall). |
 |
 |
|---|
| 6. | The flames are made from a 2-part epoxy putty. Mix the 2 parts together well, and roll a small cone shape. Place it in the torch and twist the end to make the flame wave. |
 |
 |
|---|
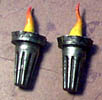
| 7. | The flames are painted yellow, then gently blend in red as it goes toward the tip. The bases are painted flat black with silver dry-brushed over top. The finished torches look like this. |
 |
|---|
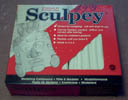
| 8. | Making a Textured DoorI make a lot of my pieces from polymer clay. The brand shown here (called "Sculpey") I can get at my local craft shop. Polymer clay doesn't harden until it's baked in the oven. After it's baked, you can also carve it. |
 |
|---|
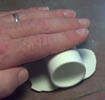
| 9. | Start by rolling out a small amount on a piece of glass. The glass forms a perfectly flat surface, and you can place it in the oven to bake the clay (the clay instructions tell you not to bake it on a metal pan). Use anything you want as a rolling pin. I found a scrap piece of plastic pipe. A dowel rod also works well. |
 |
|---|
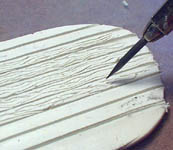
| 10. | Lay a ruler across the clay. Use a sharp pencil (dull the point slightly) to drag across the clay, making planks. These can be from 1/8" to 1/4" apart. Sharpen the pencil and use it to make the wood grain on the planks. |
 |
 |
|---|
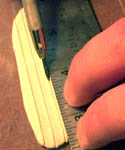
| 11. | Make two of these wood surfaces. Once will be for the front of the door and one for the back. Bake the two pieces at 275 degrees for 15 minutes. Allow the pieces to cool before you trim them. |
|---|
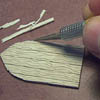
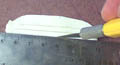
| 12. | Trim the bottom of the door square. Place it behind your doorway and draw around the edge. |
 |
 |
|---|---|---|---|
Using the pencil line as a guide, trim down the top of the door. Place the door in the doorway to see how it fits and trim as needed. When finished, glue this half of the door onto the back of the other half and trim as needed. That finishes the wooden part of the door. |
 | ||
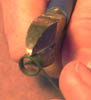
| 13. | Now for the pull ring. Take a piece of wire and wrap it around a paintbrush handle. Use wire cutters to cut as shown. You can make several loops of wire this way. |
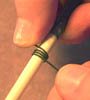 |
 |
|---|
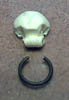
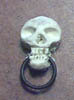
| 14. | This shows the various steps to make the pull ring. Use a pencil or toothpick to form the clay. Dental tools work even better. |
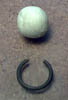 |
 |
 |
 |
|---|
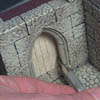
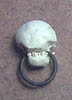
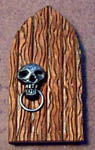
| 15. | Here's the finished door. Paint the wood part brown and then wipe the paint off like a stain. The grooves will stay darker. The pull ring was painted flat black and dry-brushed with silver. After both parts are painted, glue them together and glue the door onto a thin clear piece of stiff plastic so it will stand up on its own. |
 |
|---|
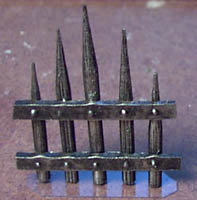
| 16. | Making a PortcullisStart by placing a piece of card stock behind your doorway and tracing the shape of the door. Lay kabob skewers on the card and mark the bottom where the skewers should be cut. Cut them to the length needed. |
 |
 |
|---|
| 17. | Roll out a piece of polymer clay. Cut two thin strips and lay them over the doorway outline. Carefully lay the kabob skewers (now trimmed) onto the clay strips, making sure the bottom of the skewers are aligned, and gently press them into the clay. Bake the whole thing at 275 degrees to harden the clay. |
 |
|---|---|---|
 |
| 18. | After it's baked, trim the excess off the sides. To add rivets, place dots of superglue gel on the strips and let dry (or use a catalyst like zip kicker). Paint the whole thing black and dry-brush with silver. Glue the gate to a strip of clear stiff plastic and place it on your model. This allows you to place the gate wherever you want, in an open or closed position and also keeps it standing up. |
 |
|---|
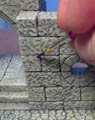
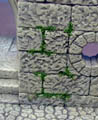
| 19. | Adding MossTo add moss between the stones, dilute some white glue with water and paint it in the cracks. Sprinkle on some ground foam (railroad scenic materials) or green powdered tempera paint. |
 |
 |
|---|
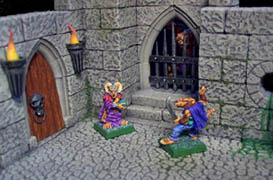
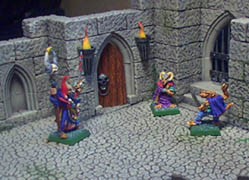
There's a couple of pics showing the finished diorama.
 |
 |