Tips & Tricks 23
|
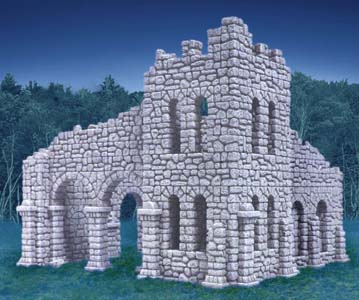
To build the ruined fieldstone tower shown here, please visit the Ruined Fieldstone Building Instructions page. |
|
The Easiest Way to Use the Ruined Fieldstone Mold
| 1. | The easiest way to use the ruined fieldstone mold is to:
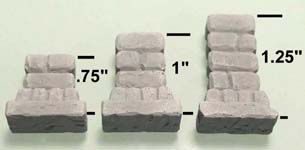
Regular fieldstone pieces cannot be broken with pliers to make them look ruined (as you can do with regular blocks). The ruined pieces give a much more natural look to your model. |
 |
|---|
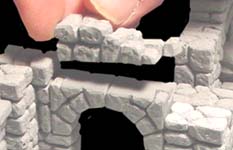
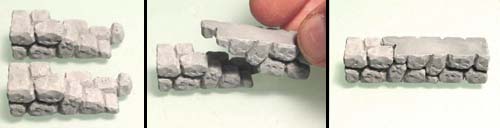
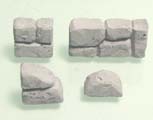
| 2. | These photos show how the ruined pieces can be added on top of plain walls to make them look ruined. However, there is much more that this mold can do besides ruining the tops of walls. The instructions below show you in detail how each piece on this mold can be used. |
 |
 |
|---|
What is on Mold #75
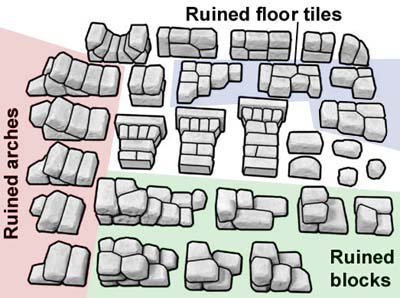
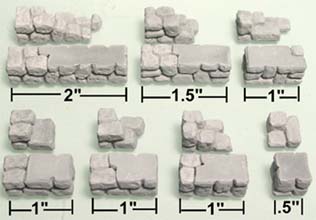
| 1. | Here is a diagram of the blocks that come on mold #75. After sorting the cast blocks, these instructions should help you identify what each of the blocks is and how they can be used. The ruined arches are in the red section. The ruined floor tiles are in the blue section. The ruined blocks are in the green section. Other pieces on this mold include thin wall blocks, pillar pieces, rounded blocks to fill in behind recessed arches and random stones. |
 |
|---|
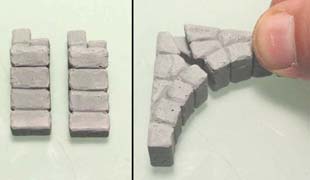
| 2. | Take two duplicate ruined blocks, flip one upside down and place it on top of the other. |
 |
|---|
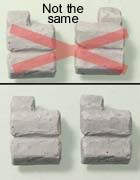
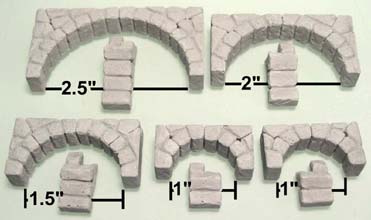
| 3. | The ruined arches work much the same way. Get two identical arch pieces. Their irregular stones fit together to make a full arch piece. Be careful on the smallest ruined arch pieces shown in the last photo. There are two different ones. Only two identical pieces will fit together. |
 |
 |
|---|
| 4. | Here are examples of full blocks and arches that each of these ruined pieces can make. | |
|---|---|---|
 |
 | |
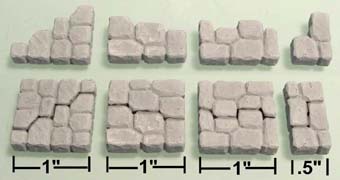
| 5. | The ruined floor tiles work much the same way. Simply glue two duplicate pieces together to make a complete floor tile. The sizes of the tiles are shown here. |
 |
|---|
| 6. | This mold also includes thin wall blocks. These blocks are used to make recessed wall sections when using the two smallest arch sizes. |
 |
 |
|---|
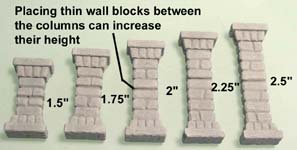
| 7. | The pillars can be assembled to a variety of heights. |
 |
 |
|---|
Making Removable Sections
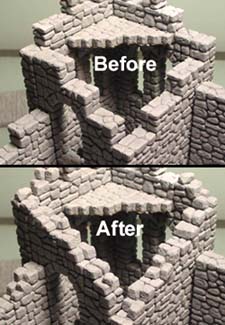
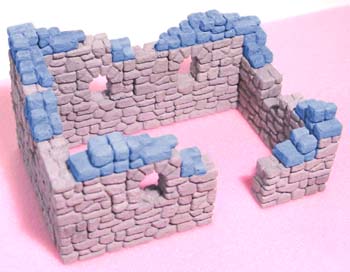
| 1. | I'm going to make a removable section for a small house. When the top section is removed, the house should look like a ruin. When the top section of the house is replaced, it should look like an undamaged house. This way you can destroy a house in a game simply by removing the top. Start by laying out the basic walls of the house including the window and door arches, but don't build it too tall. For this example I'm not going to show where every block is put. Feel free to make the house any size and shape you want. |
 |
|---|
| 2. | Add and remove blocks so the house is a little taller on one corner and shorter on another. Next, add the ruined blocks on the tops of the existing blocks. Be very careful here! Do not put any ruined blocks where an arch will have to go later. A good way to do this is to put down a ruined block, then make it a full block by putting its other half on. If the full block does not get in the way of an arch or a necessary piece, then you can glue the bottom of the ruined block there (be sure to remove its top half again). Glue the ruined blocks onto the top edge of the building. |
 |
|---|
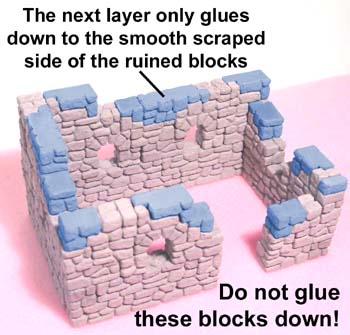
| 3. | Next, place the matching halves of the ruined blocks on top of the ruined blocks you already have down. Do not glue these blocks down! You want these blocks to lift off with the top of the house. These will make the top edges nice and flat so the remaining rows can be glued down. Be sure to glue the next rows onto the smooth scraped side of the ruined blocks only! If you glue the next rows to anything else then the top will not come off. |
 |
|---|
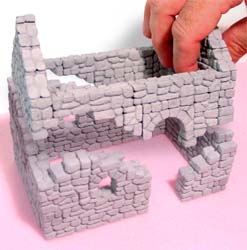
| 4. | Finish the house by gluing the remaining rows on top of the house. Once dry, you can remove the top of the house leaving a ruin. This would also work nicely for a bridge. You could make the center part of the bridge removable. Once the bridge is destroyed you simply remove the center section and figures cannot cross it anymore. |
 |
 |
|---|
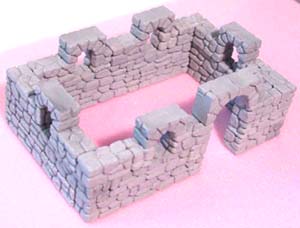
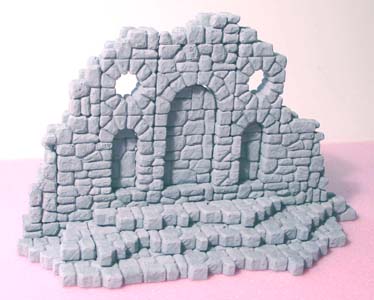
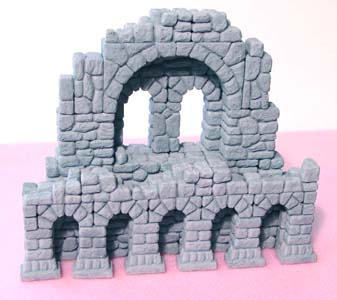
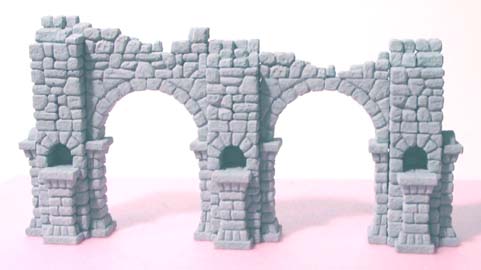
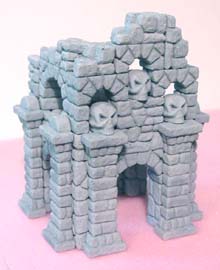
Combining Molds #70 and #75
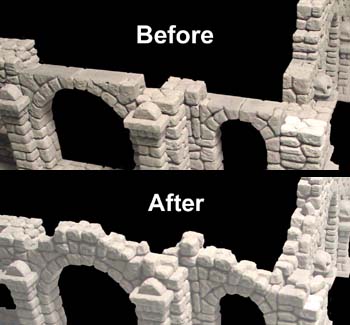
Here I have included a few examples of what can be made when you combine mold #70 fieldstone wall and mold #75 ruined fieldstone mold. It's helpful to have a #70 because it gives you lots of basic blocks to build with. You can make some basic blocks from mold #75 but it would take a lot of casts to be able to build anything. The round arches on mold #75 give things a bit more of a Roman look which makes this mold especially good for aqueducts and walls with a lot of arches. |
 |
 |
 |
 |
 |