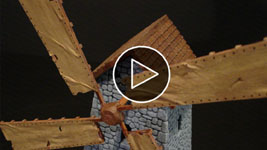
Windmill Building Instructions
|
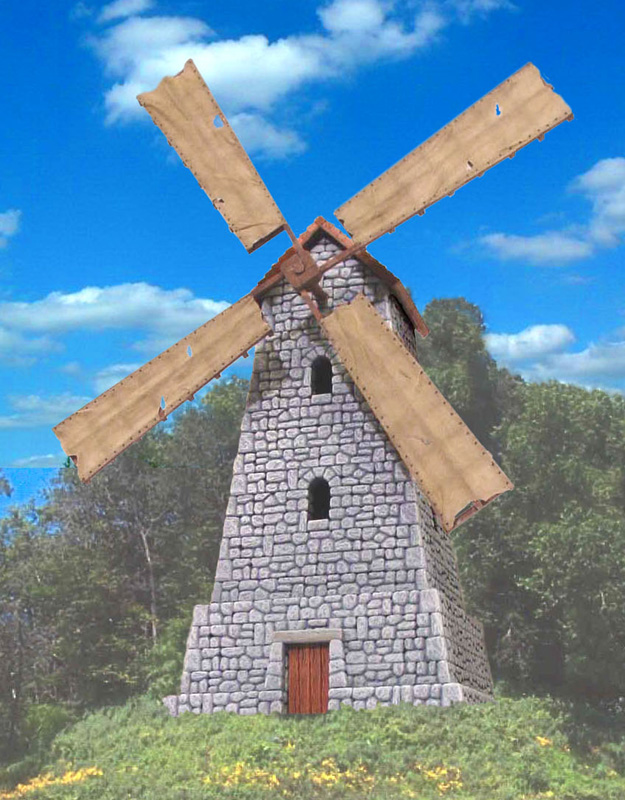
This model is built using mold #76. This mold must be cast 20 times in order to have enough blocks to build the windmill. The windmill is a medium difficulty project. If this is your very first model and you have not built any gaming terrain before then you might want to pick a more simple project. This model is more difficult than a beginner model because of the sloped blocks. You have to be sure that the blocks are facing the correct direction when gluing them together. Getting walls square can be difficult because they slope inward. |
| |
 |
||
How to Use Mold #76
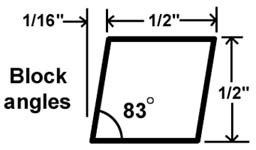
| 1. | The blocks on the windmill mold are sloped. For every height of 1/2", the blocks lean in 1/16". So instead of your usual 90 degree angle, you're left with an 82.37 degree angle. This can cause some problems when you're building. Especially when you want to get the corners to fit. |
 |
|---|
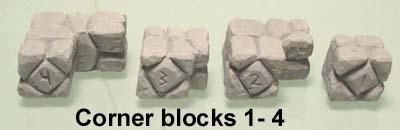
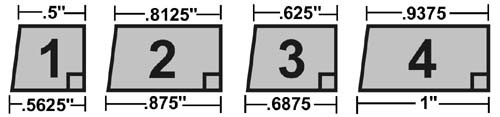
| 2. | To fix this, I've created some special corner pieces. These corner pieces are labeled 1-4 on one side to make identification easy. These corners are best used in groups of 4. |
 |
|---|
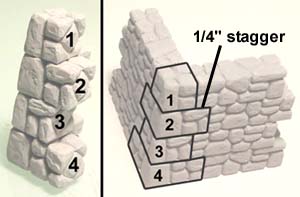
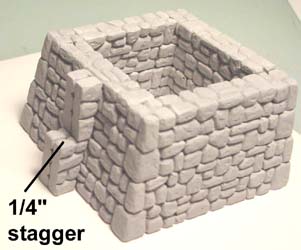
| 3. | Stack these corner blocks up in order starting with number 1 at the top and working down to number 4. When you do this, you'll notice that each row will stagger 1/4" back and forth to help hide the seams in the fieldstone blocks. This group of corner blocks can also be turned upside down if you wanted to make an inside corner instead of an outside corner. |
 |
|---|
| 4. | For those of you who want to put these blocks into a program such as "sketchup", I've included a side view of the corner blocks here with measurements. |
 |
|---|
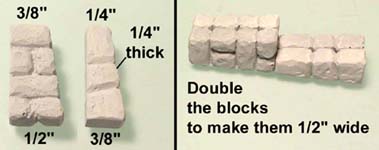
| 5. | I've also included some connector blocks on the mold. These blocks will allow you to join a sloped wall into a straight wall. The reason they are only 1/4" thick, is that I ran out of room on the mold. You have to double them up (set two blocks side-by-side) to make a block that is 1/2" thick. |
 |
|---|
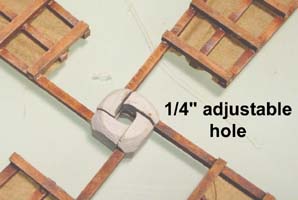
| 6. | Here is a photo of the connector blocks used to join a sloped tower into a straight wall. I've doubled them up to make a regular wall thickness. I've placed the thick block on the bottom in order for the edge of the straight wall to be staggered. This will help hide the seams when joining this into a regular straight wall. If you want these to be in a more even shape you can switch the blocks places. |
 |
|---|
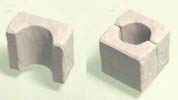
| 7. |
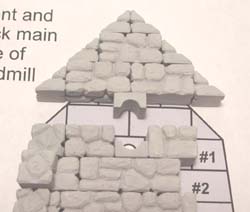
When you put 4 of these together in a circle, they will form a 1/4" adjustable hole in the center. This is for the main axle of a windmill that the sails will spin around. Instructions for building the sails are on the Tips & Tricks 27 page. |
 |
|---|
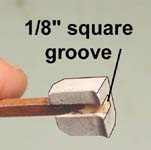 This piece is the sail hub. It has an 1/8" groove in it, so you can slide a 1/8" square wooden stick into the groove. It's also just the right size for a kabob skewer.
| 8. | This small piece will make a block with a hole that is slightly larger than 1/4" diameter. This is used to slide the axle through the side of the windmill wall. |
 |
|---|
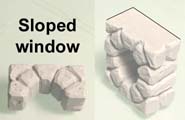
| 9. | This piece is a sloped window. With it you can make round topped windows fit into the sloped wall. You can also make round holes in the sloped wall. |
 |
|---|
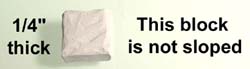
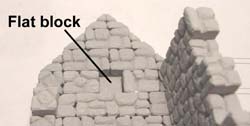
| 10. | This small flat tile is not sloped at all. We will use it for the bottom sill of the round windows. |
 |
|---|
Building The Windmill
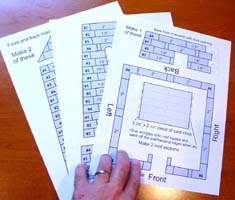
| 1. | You will need to cast mold #76 twenty times in order to have enough blocks to build the windmill. To start with, you will need to print out the building plans. These are found on the Printed Plans page. Just look for the plans labeled "windmill plans". We will be laying the blocks directly onto these plans when we glue the blocks together. |
 |
|---|
| 2. | In order to get the highest variety of textures, you can flip blocks upside down. Be sure that the slope is going the correct direction. This will give you new textures and will help stop repeated patterns. |
 |
|---|
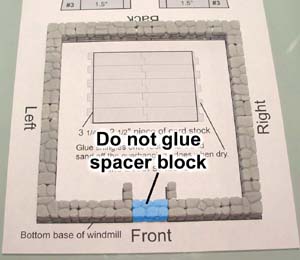
| 3. | We'll start by creating the base of the windmill. Be sure your floorplan prints actual size. Set all of the blocks you need directly down onto the plan. Do not glue them down to the plan! Instead just glue them end to end. If you don't trust yourself and think you'll get sloppy with the glue, tape a piece of wax paper over the plan to keep it from sticking. You will notice that I've placed a 1" block (shown in blue) in the doorway as a spacer. Do not glue this block. This just holds the correct space for the door later on. Allow this to dry completely before removing it from the plan. |
 |
|---|
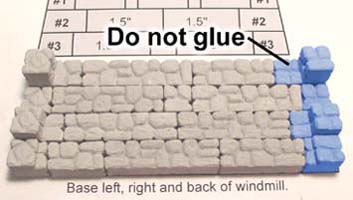
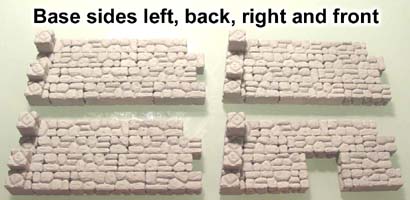
| 4. | Next we'll glue the base. What you see here forms the left, back and right of the base. Do not glue the blocks shown in blue. The plans will tell you to make 3 of these base sides and 1 base side with a door opening. |
 |
 |
|---|
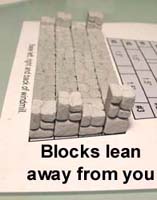
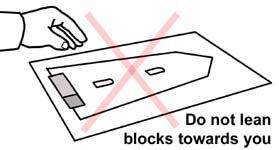
| 5. | When laying blocks on the plan, be sure the blocks lean away from you. The side of the blocks facing you is the inside of the windmill. The outside of the windmill is against the paper. |
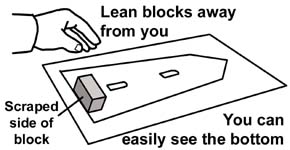 |
 |
|---|
| 6. | When each base side is dry, remove the corner blocks on the right side. These are the corner blocks shown in blue that we said "not to glue". You will make 3 solid base sides and 1 base side with a door opening. When they're totally dry, we'll glue them together to form the base of the windmill. |
 |
|---|
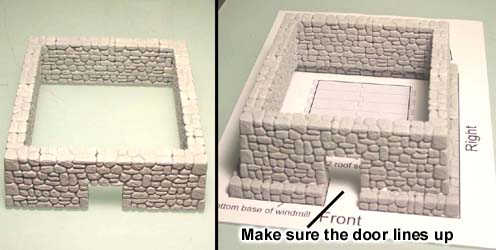
| 7. | Assemble and glue the base walls as shown. My bottom base ring is still setting on the plan paper so I'll be sure it is square. Put a bead of glue around the inside edge of the base. The outside top corner of this base ring will show so don't get glue all over it. Now set the base on top of the base ring and be sure that the door opening lines up. |
 |
|---|
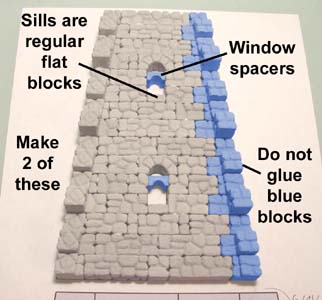
| 8. | Next we'll glue and assemble the left and right side of the tower. You will need to make two of these sides. Do not glue the blocks shown in blue. The blue blocks shown in the windows are half blocks with the hole in them but you can use any 1/2" wide block you want. These simply help keep the windows from accidentally closing in. Also, the bottom window sills are the 1/4" thick flat blocks that have no lean to them. Be sure that you push them down so they set flat against the row below them. If you don't, when you turn the wall over and look at the back side, these blocks will have a large gap between them and the row underneath. |
 |
|---|
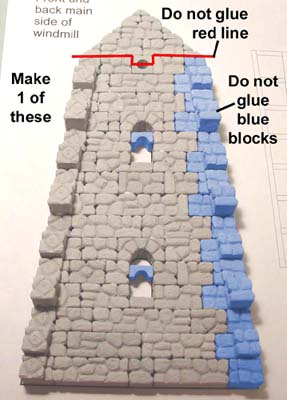
| 9. | Next we'll glue and assemble the front of the tower. Do not glue the blocks shown in blue. The blue blocks shown in the windows are half blocks with the hole in them but you can use any 1/2" wide block you want. These simply help keep the windows from accidentally closing in.
We will do this because it will make it easier to insert the sail axle later on. Just make one of these sides with the hole in it. |
 |
|---|
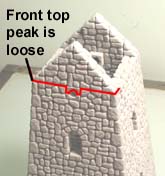
 You do not want to glue on the red line. When this wall section is finished, you should be able to remove the pointed top of the tower and the top half of the hole should lift off with it.
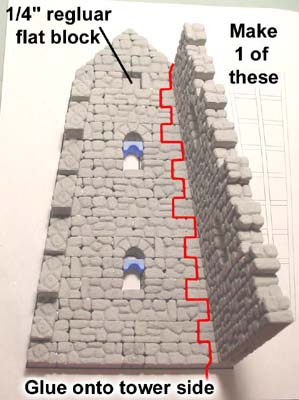
| 10. | Next we'll glue and assemble the back of the tower. This is the very last wall of the windmill. Do not glue the blocks shown in blue. At this point you may realize that you no longer have any extra corner blocks to fill in on the right side of the tower. What we'll do instead is to glue this wall directly to one of the side walls as shown in the photo.
I'm doing this because I don't want the axle of the sail to go all the way through the tower. On the next step we will add the block with the hole in it for the axle. |
 |
|---|
 Near the top, where the block with the hole should be, we will instead glue a flat block in its place.
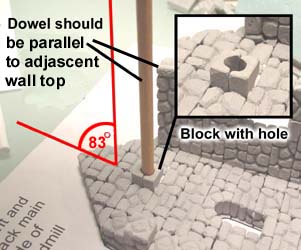
| 11. | Next we will glue two halves of the hole block on top of it. This block will end up sticking out of the back by 1/4". Please note that the two halves of the hole block will be offset slightly. The top one will stick out slightly further than the bottom one because the side walls are at a slope. To make sure that the hole block angles in the right direction, stick a 1/4" diameter dowel rod into it and make sure the dowel rod leans away towards the peak of the roof a little. The dowel rod should be parallel with the top of the adjacent wall. Do not glue the dowel rod into the hole. |
 |
|---|
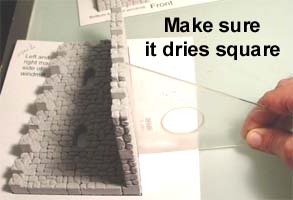
| 12. | Be sure that the two tower side dries squarely in place. You can do this by occasionally checking it with a triangle, or setting a book next to the side that is drying. While you're at it, you can also glue the other two sides of the tower together, making sure they are square as well. However, be sure you glue the walls in the correct order! It would be a bad mistake for the front and back of the tower to end up next to each other by accident! |
 |
|---|
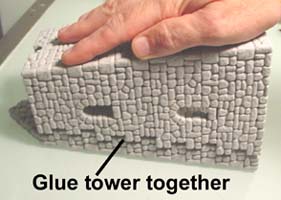
| 13. | Now it's time to glue the 4 walls of the tower together. This may be a tight fit. One of the reasons I like to use Tacky glue is that it's still flexible after it dries. Pushing the sides together is not as difficult if the glue is flexible. If you used wood glue, then you may have to file or sand a few edges to get the tower to fit together. |
 |
|---|
| 14. | Once glued, the tower should look like this photo. Peaked walls should be opposite of each other. Remember that the front peak section comes off - as indicated by the red line in the photo. At this point you should be able to stick a 1/4" dowel rod through the hole, have it stick into the back side of the tower and the dowel should be parallel to the table top. |
 |
|---|
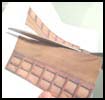
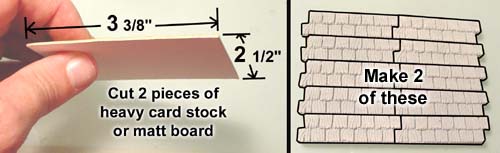
| 15. | Now it's time for the roof. You will need 2 pieces of very thick card stock or matt board. Glue the roof tiles down onto the matt board. They should just fit with the jagged edges hanging over both sides. |
 |
|---|
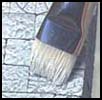
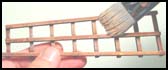
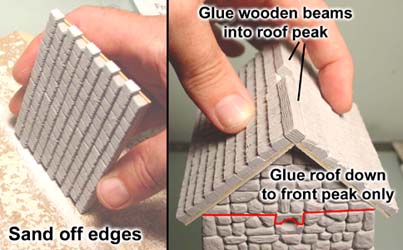
| 16. | Sand the jagged edges off of both sides of each roof section. Place glue on the front peak only. Do not put glue on the back peak. Position a roof section on each side of the roof and hold it there. Next glue wood beams on each side. You will notice that two wooden beams are not long enough to fill the entire distance. Place the wooden beams so they are flush on each end of the roof and leave a gap in the middle. |
 |
|---|
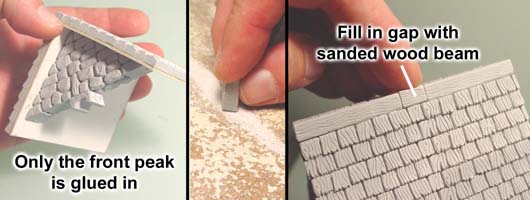
| 17. | Once dry, the front peak should lift off of the tower. We did not glue the back peak so it would come off. Fill the gap in the roof peak by breaking a small piece off a wooden beam and sanding it down. |
 |
|---|
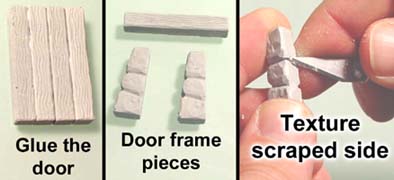
| 18. | Glue 4 planks together to make the door. Gather the 3 pieces shown to make the door frame. Use a hobby knife to texture the scraped side of the stone pieces. It won't make that much difference if you do not texture them, but it will make the inside of the door frame look better. |
 |
|---|
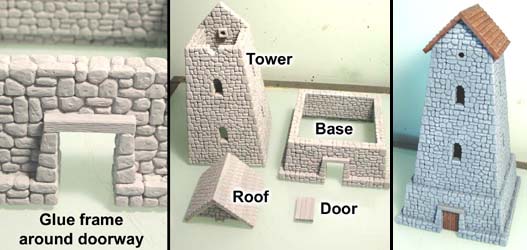
| 19. | Glue the frame pieces around the doorway opening. I'm going to paint the body of the windmill using the Castle gray colors shown on our painting instructions page. For the door and the roof, I will paint them brown and dry brush them with light brown paint. |
 |
|---|
Painting Instructions
Making the Sails
|
|