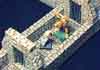
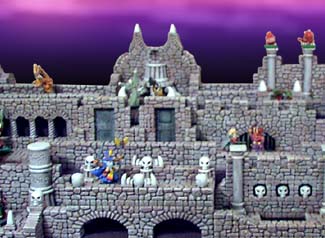
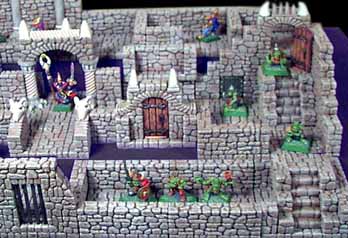
Detailed Dungeon Pieces
The molds used for all the dungeon pieces shown here are molds #70, 71, 72, 73, 74, 80 and 260. The number of castings needed are different for each room and I do not know exactly how many castings you would need to build all the pieces shown here.
My suggestion would be to start with 30 castings of mold #260, 24 castings of mold #70 and 12 castings from all the rest. That will give you a good starting point but additional castings will still be needed.
 |
 Casting Instructions |
 Construction Guidelines |
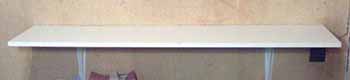
 Making a Shelf Display |
 Modular Doorways |
 Modular Gates |
 |
Casting Instructions for Accessory Molds
Instructions for #71 Fieldstone Accessory Mold
| 1. |
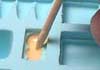
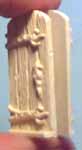
This mold contains a wooden door. You need to use a stiff brush to get the air bubbles out. Pour a little plaster into the mold, wet the brush, then work the brush around to remove air bubbles. Rinse your brush out immediately and fill the rest of the mold. The door has a small foot on the bottom so when you glue them back-to-back it will stand up on its own. I wrestled with the door hinge thing for a while. As most of you realize, when you glue the door back-to-back the hinges will be on the wrong side on the back of the door. At first it bothered me, but then I realized that people wanted to make quick and easy doors that looked good. Making separate hinges and gluing them on was a hassle. Besides, most people can't see both sides of the door at the same time anyway. |
|---|
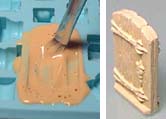 I strongly suggest dental plaster for these molds. Pieces like the door and recessed arch are very thin and will break if a strong material is not used.
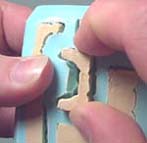
| 2. | One of the most difficult pieces to remove is the recessed arch. Be sure that the plaster is completely set up before you try and remove it. You might even leave it in the mold a little longer than the rest. Gently pull the mold apart, trying to pull the flat side of the piece away from the rubber first. Then push your finger up under the mold to lift the piece slightly. Lastly, grip the top back corners and pull the piece out of the mold. If you do break one, let the pieces dry and glue them together later. |
 |
|---|
Instructions for #80 Dragon's Teeth Accessory Mold
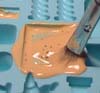
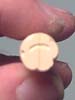
| 1. | This mold has a steel plate with rivets. To get the rivets to come out you need a stiff brush. Pour a little plaster into the mold, wet the brush then work the brush around to remove air bubbles. Rinse your brush out immediately and fill the rest of the mold. |
 |
 |
|---|
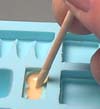
| 2. | This decorative tooth piece is probably the hardest to cast without air bubbles on the tips. My best suggestion is to stretch out the mold in that area while dripping plaster into it. You can also use a toothpick to work the plaster into the tips. |
 |
 |
|---|
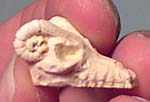
| 3. | The next difficult piece is the dragon's skull. You can see small air bubbles in the horns. Once again either stretch out the mold before you drip the plaster in or use a toothpick. |
 |
 |
|---|
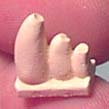
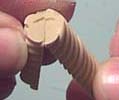
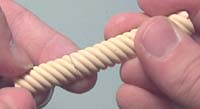
| 4. | Lastly I want to mention the spiral columns. I've placed marks on the tops that you need to line up to make the spiral line up. Also, if you line the marks up, then spread out the bottom until the 2 marks are face to face, you can make a continuous half-round spiral to go against a wall. It will even work if you put a 1" and 2" section together. |
 |
 |
|---|---|---|---|
 | |||
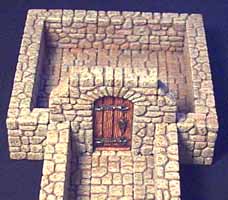
Construction Guidelines
There are many of you who will want to make your own custom pieces. If you follow these basic guidelines, all of your dungeon pieces will line up exactly with the ones I show in this site.
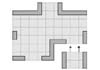
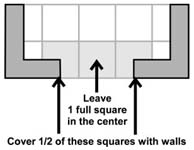
Rule #1 When you plan a new piece, lay out full square tiles to make the floor. When you place your walls on top of the floor tiles, you lose a 1/2" on each side. Three squares wide will make your average hallway. |
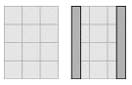 |
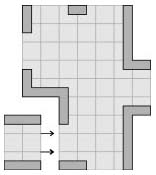
If you made a hallway only 2 squares wide, it wouldn't give you enough room to move your figures around and the floor tiles won't match up. Making your base grid over 3 wide is just fine. Here's an example of a grid that's 4 squares wide. |
 |
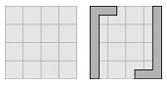 |
Rule #2 This will ensure that your hallway pieces will fit against your room openings correctly. This odd-looking room would still be functional because hallway pieces would fit into the openings. |
 |
 |
Rule #3
|
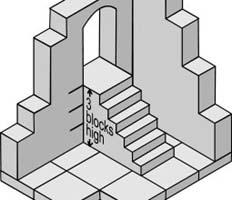 |
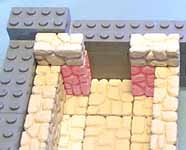
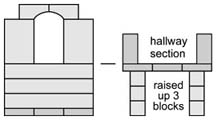 Occasionally you will want to add a higher level to your dungeon for bridges, pit traps and rivers that fall below the floor level. Landings and raised doorways will be 3 blocks above the floor tiles. Now you can use a hallway section as a bridge.
Making a Shelf Display
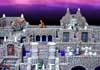
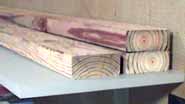
| 1. | One of the great things about dungeon pieces is that you can use them to display your miniatures on. If you have a shelf that you store your gaming supplies on, get 3 pieces of 2x4 lumber the length of the shelf. Most lumber yards will cut it for you. Set them on the shelf as shown. If you can't get lumber, even old paperback books stacked up will work instead. Cover the boards with a piece of black cloth. |
 | |
|---|---|---|---|
 |
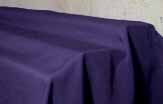 | ||
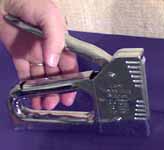
| 2. | You can staple the cloth down to hold it in place. Tape your favorite poster behind the shelf. I painted this one using an air brush. If you don't have a poster, just run the cloth up the wall behind. |
 |
 |
|---|
| 3. | Just set your dungeon pieces on the shelf at random. The steps on the shelf will raise the back pieces where you can see them all clearly. Place miniatures wherever you like. Now you have a place to store your dungeon pieces and they can be used to display your miniatures. | |
|---|---|---|
 |
 | |
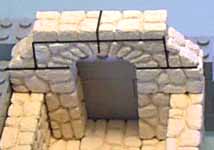
Modular Doorway
| 1. | Start with the end of a hallway section. Sand 2 blocks down a little and place them where they're shown in red (sanded side against the hallway). Be sure that you can fit a door loosely between the blocks! Do not glue this to the hallway! Just glue the blocks to each other. Also, make sure they fit loosely in the hallway (not shoved tightly against the wall). |
 |
 |
|---|
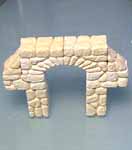
| 2. | Glue the remaining blocks on top to finish the arch. Be sure this piece fits loosely in the hallway! While you're at it, glue together 2 halves of the door (found on mold #71). |
 |
 |
 |
|---|
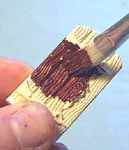
| 3. | To finish the door, I'm going to use brown paint. House paint doesn't work as well as artist's acrylic tube paint. Artist's paint has much more color in it and your door will look brighter. Thin the paint a little with water, paint it on and wipe it off immediately with a soft rag. The paint will act as a stain. |
 |
 |
|---|
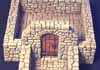
| 4. | Finally I painted the lock and hinges black. Then I dry-brushed silver paint on them. I just left the bottom support on the door brown. At first I thought it should be stone colored, but you don't really notice it that much. Here's the finished doorway. It's really handy to be able to move the doorway anywhere you want in the dungeon. |
 |
 |
|---|
Modular Gates
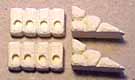
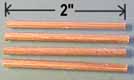
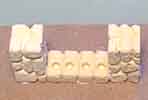
| 1. | For these gates you will need the sloped blocks and grate builder blocks from mold #71 (fieldstone accessory mold). Also get 4 kabob skewers, dowel rods or fireplace matches cut to 2" lengths. Be sure these will fit into the holes of the blocks. |
 |
 |
|---|
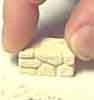
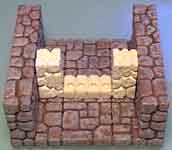
| 2. | Sand down 2 regular blocks. Just like the previous door, we want this to easily fit into a hallway section. Glue the blocks down to a piece of cereal box. The sanded side of the blocks should be facing outward to the left and right. |
 |
 |
|---|
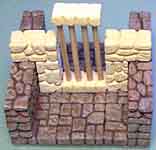
| 3. | When the glue dries, trim off the excess cereal box and set the piece in a hallway section. Make sure it fits loosely. Put a dot of glue on the ends of the sticks and place them in the holes. Cap off the sticks with another grate block. Also glue the blocks as shown. Don't glue them to the hallway! |
 |
 |
|---|
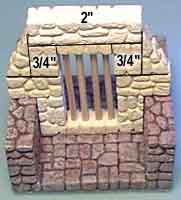
| 4. | Glue the blocks as shown. The 3/4" blocks are on end. When dry, paint the stone color first. Then paint the bars black and dry-brush them with silver. Now you have movable gates you can use to trap your characters into a hallway section or keep them out of secret rooms. |
 |
 |
|---|