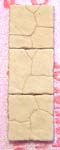
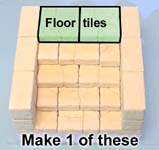
Basic Tomb Pieces
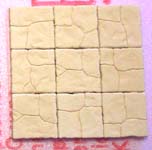
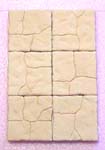
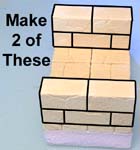
For this set, you will need to cast the #290 Egyptian floor tile mold 21 times, and the #95 Egyptian basic block mold 14 times. I cast these pieces out of tan dental plaster, but you can use white plaster instead if you like. The casting will take the average person about 1 full day, and the pieces can be glued together in about two hours! After you complete these, feel free to make your own custom pieces any size you want. The beauty of casting pieces is that you can always make more and build whatever you want. Once you get the hang of it, check out the Detailed Tomb Pieces for more ideas. |
 |
Building Tips
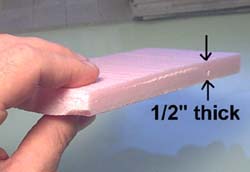
| 1. | To base these tomb sections, I'm going to mount the floor tiles on pieces of 1/2" thick polystyrene foam insulating board. This is the stuff they use for sheeting on houses before they put siding on. You can get it at any lumber yard and usually comes in pink or blue. The main advantage is that it's stiff and doesn't warp easily. It's also easy to cut (with a sharp knife), and you can make pits and holes in the floor that actually look deep. |
 |
|---|
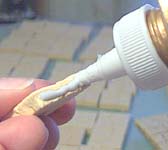
| 2. | You'll also need some glue. My favorite choice is "Aleene's Tacky Glue". It's a water based craft glue that's really thick. You can find it at most craft stores or at any Wal-Mart. When gluing the blocks down, be sure to spread glue on the bottom and sides of the floor tiles. |
 |
 |
|---|
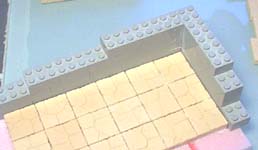
| 3. | I built a simple "L" shape using Legos. When you set your blocks against this guide, they will line up straight. You can also build forms by looking at the Tips & Tricks Page. Let the glue dry completely before trying to trim off the outside edges of the foam. |
 |
|---|
| 4. |
If it doesn't cut all the way through, break off the excess edge after you cut the foam and it will break fairly clean. |
 |
 |
|---|
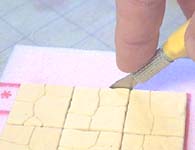
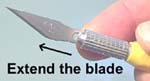 If you extend the blade of your hobby knife, you can cut completely through the foam. Be sure you use a sharp blade or the foam will tear.
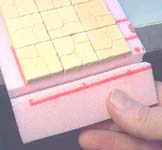
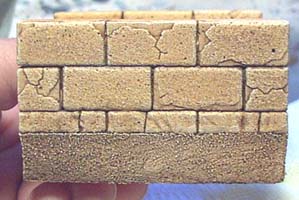
| 5. | Sand the edges using a very coarse sand paper. Be sure to vary the direction you sand it, so you do not get grooves running one direction. When painted, the sanded texture of the base will work well with the sand blasted texture of the stones. |
 |
 |
|---|
| 6. | 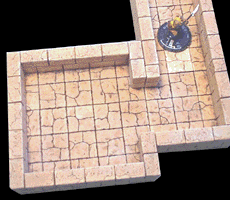 |
All of these pieces are made with the walls setting on top of the floor tiles. This way, you'll end up with one full square in the center of the hallway pieces. This will allow you to move figures with larger bases in even 1" squares and be able to see exactly which square they occupy. |
|---|
Basic Set Pieces
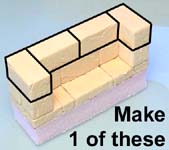
| 1. | The basic set will consist of the pieces shown here. To build these pieces, you will need to cast the #290 Egyptian Floor Tile Mold 21 times, and the #95 Egyptian Basic Block Mold 14 times. You don't have to use the exact block arrangement that I show to make the sections, but you may have to cast the mold a few more times if you don't. |
 |
|---|
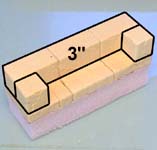
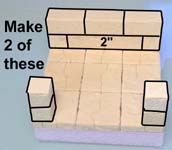
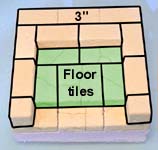
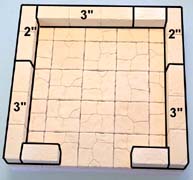
| 2. | The first piece to make is the 3" hallway section. Start by gluing down a grid of 3 x 3 floor tiles. Next glue the wall pieces directly onto the floor. Be sure to use a guide to get the walls nice and straight. Make 4 of these sections |
 |
 |
|---|
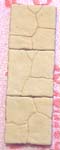
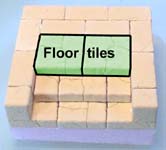
| 3. | The next photo is a 2" hallway. Following that is a 1" hallway. |
 |
 |
 |
 |
|---|
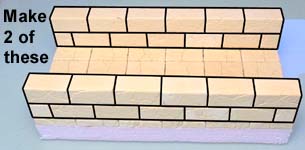
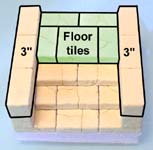
| 4. | For this 6" hallway section lay out a grid that's 3 x 6. Make 2 copies of this piece. |
 |
 |
|---|
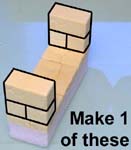
| 5. | Here's the dead end section. Make 1 copy of this piece. |
 |
 |
 |
|---|
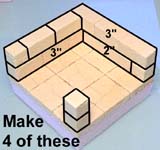
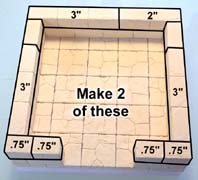
| 6. | These sections both use a 3 x 3 grid for the base. First is the corner section. Make 4 of the corner pieces. Next is the tee section. Make 2 of the tee pieces. |
|
 |
 |
|---|
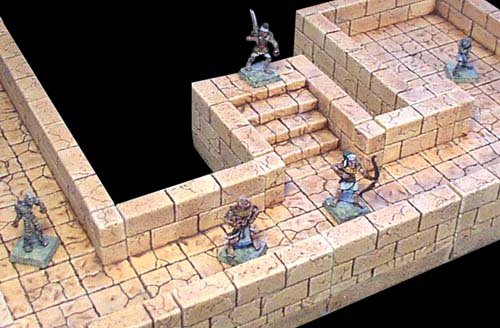
| 7. | This step section starts with a 3 x 3 floor grid. It's used for the entrance to the tombs. Make 1 of these. | |||
|---|---|---|---|---|
 |
 |
 |
 | |
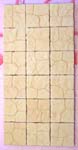
| 8. | The last piece starts with a 5 x 5 grid of floor tiles. Make 2 of these rooms. Feel free to make any additional pieces you want. You can also leave floor tiles out to make pits, or leave a tile loose (don't glue it down) to make a secret passage below the floor. That completes all of the pieces for the basic set. |
 |
 |
|---|
Painting Instructions
| 1. |
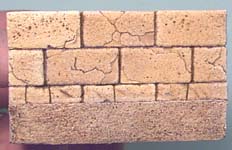
However, you will need to paint the foam base a color that matches the wall color. If you cast your blocks out of white plaster, you would paint the wall section along with the base instead of just painting the base. To get the color to match, mix up paint a shade lighter than the walls. When the paint dries, it will dry slightly darker and match the walls better. Don't worry if your color doesn't match the walls exactly. The base will represent a chunk of desert pulled out of the ground that the walls are resting on. |
|---|
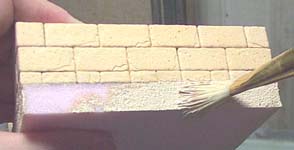 To paint these tomb sections, I used the
 | 2. | Next, I painted the whole wall section with clear flat varnish, and used gel stain (colonial oak) to wipe over it. To see how this works, look at the Antiquing Method found on our painting instructions page. You can see how the texture comes out on the foam base where I sanded it. |
 |
|---|
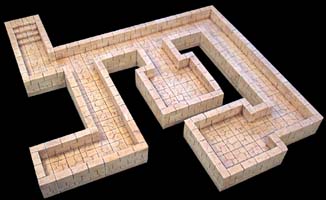
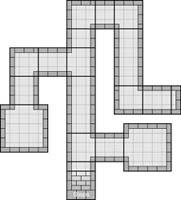
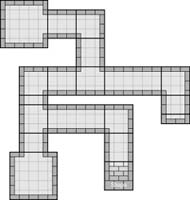
When you're finished, here's a few layouts you can make with this simple basic set. Remember, you can make as many additional pieces as you want so your dungeon can continue to grow. For more decorative pieces you can build, check out the Detailed Tomb Pieces.
 |
 |
 |
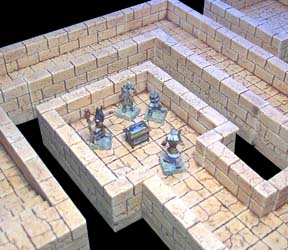
The Egyptian miniatures shown here are from www.crocodilegames.com. They have a wonderful selection of Egyptian miniature figures, creatures and accessories. These miniatures were painted by Robert Sparenberg (aka Imahilus). To paint the model look at the Antiquing Method found on our painting instructions page. For more decorative pieces you can build, check out the Detailed Tomb Pieces. |
 |