How To Use The Gothic Graveyard Mold #46
|
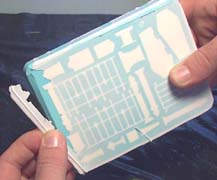
The pieces you see here are cast in plastic resin. You cannot use plaster to cast the fence and gate sections, because they would be too fragile and would break when you try to remove them from the mold. Caution! Resin casting material will deteriorate the mold if not used properly. Please refer to the Plastic Casting Instructions before using casting resin. |
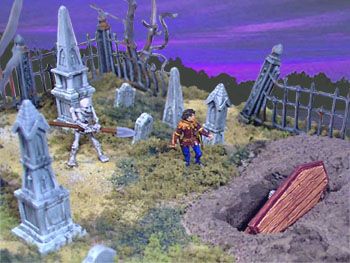
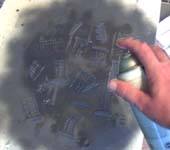
"Sir Robert's Last Discovery" |
Finished Model Video This shows what the finished graveyard will look like and shows this diorama with 28mm scale figures. |
 |
About Mold #46
| 1. | The pieces of this mold are cast in plastic resin. Caution! Resin casting material will deteriorate the mold if not used properly. Please refer to the Plastic Casting Instructions before using casting resin. It has detailed, step-by-step photos and videos on this casting method. The fence and gate sections must be cast in plastic, but the rest of the mold could be cast successfully in plaster. If you cast the tombstones in plaster, then you can break them easily for ruined headstones. |
 |
|---|
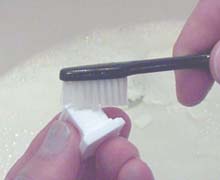
| 2. | After you cast the pieces, be sure to wash them off with soap and water! I put them in the bathroom sink and scrub them with an old toothbrush. If you don't wash them off, paint will not stick to them. The mold release used when casting the pieces forms an oily coating. If you don't wash the pieces, paint will not stick to them (even spray paint) and will flake off. Afterward, rinse off the pieces and set them on a paper towel to dry. |
 |
|---|
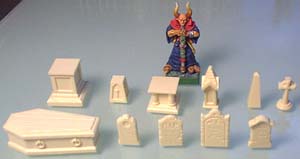
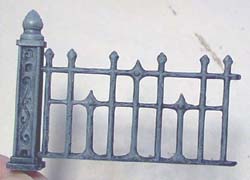
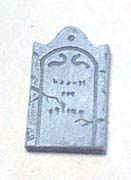
| 3. | The gravestone pieces are shown in the first photo. I've placed a 25mm Warhammer(TM) figure next to them so you can compare the size. The figure is about 1 1/2" tall. The large monument bases are in 2 halves that you can glue together for a full section. The fence and gate sections are also included in the mold. Each fence section has one post made onto the end of it, which makes the fence sections much more sturdy. The gate has hinges as well. |
 |
|---|---|---|
 |
| 4. |
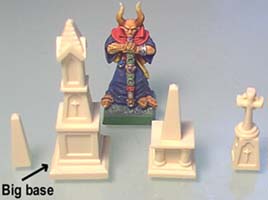
The only monument piece I had trouble with is the large base. When I created and tested the piece, it worked out fine. After I created the mold masters, the pieces didn't seem to line up as they should. This is fairly easy to fix though, just line the sides up when you glue the 2 halves together. Then sand the bottom flat. |
 |
|---|
 The smaller pieces can be arranged into a variety of large monuments.
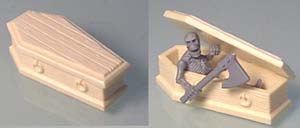
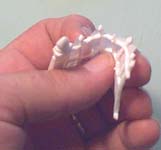
| 5. | The coffin turned out very nice. It comes in two pieces, which snap together so you have a coffin lid with a working hinge. I've placed a Games Workshop plastic skeleton inside the coffin so you can see how the size compares. |
 |
|---|
Assembling and Using Fence Sections
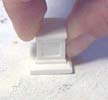
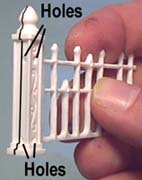
| 1. | To complete a fence section, you first have to glue the back of the post on. I use super glue (CA) for this. The black line shows where the two halves meet. You'll notice that the posts have holes in them. To join fence pieces, put a drop of glue into the holes and press the next fence section into it. |
 |
 |
|---|
| 2. | You can also join fence sections into the side of the post for corners and tees. |
 |
 |
 |
|---|
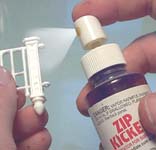
| 3. | For a hinged gate, glue the hinge loops onto the fencepost. "Zip Kicker" is an accelerator that will help the super glue (CA) set up quickly. Trim off the excess hinge pieces from the gate. |
 |
 |
 |
|---|
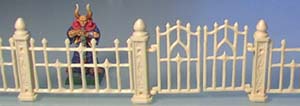
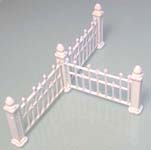
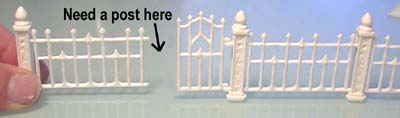
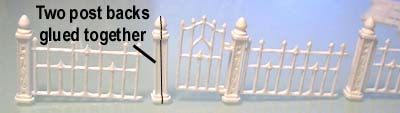
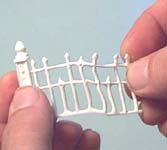
| 4. | The fence sections can join in a circle to make a complete fence. However, you will need an extra post for the entrance gate. To make the extra post, simply glue two post backs together to form a new post. Some of you may have noticed that this new post doesn't have any design on the front. In most cases no one will notice. However, if you absolutely must have designs on the front of this post, I've shown how to do this below. |
 |
|---|---|---|
 |
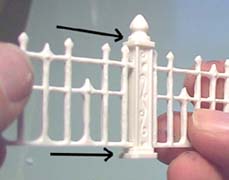
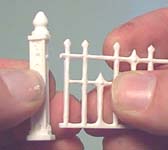
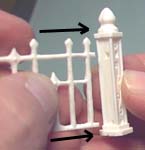
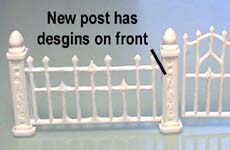
| 5. | Break the fence away from a post. Glue this post back-to-back with another post. This new post will have holes on the side, so your design can be on the front. |
 |
 |
 |
|---|
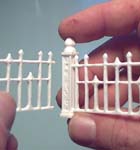
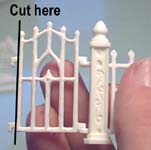
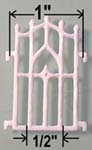
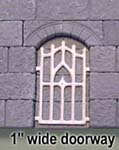
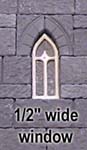
| 6. | If you trim down the gate and fence pieces with a pair of wire cutters or a hobby knife, you can make other uses for it. The second photo shows how the gate can be used as a permanent gate to close off areas. The third photo shows using the gate as a window tracery. |
 |
 |
 |
|---|
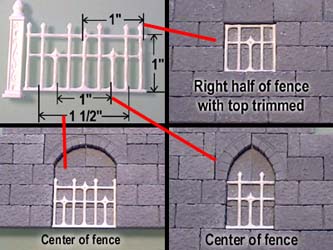
| 7. | Here I've shown 3 ways to use fence sections for adding bars into windows and gating off large doorways.
|
 |
|---|
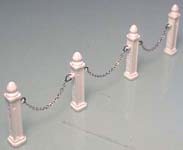 Fence posts can also be glued back-to-back by themselves. For this example, I've glued the gate hinges on both sides of the post, then linked pieces of chain between them.
Bending Fence Sections
| 1. | The first method is to remove the fence sections before they harden completely. For this example I'm using Smoothcast 300, which sets up in about 15 minutes. Instead, pull out the pieces after 10 minutes, and they will be very soft and bendable. The disadvantages of this method are that you have to time things fairly well, the flash is a little harder to trim off and some of the other pieces in the mold may be distorted accidentally. |
 |
 |
|---|
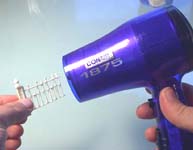
| 2. | The second method is to take a hair dryer to the fence section for about 30 seconds on high heat. The heat will soften the plastic enough for you to bend the piece. This is the method I prefer. The disadvantage is that some plastics may not soften with a hair dryer. You'll have to experiment with your type of plastic and see what works. |
 |
 |
|---|
Painting Resin Pieces
| 1. | Before you paint the pieces, it's extremely important that you wash them off with soap and water! I put them in the bathroom sink and scrub them with an old toothbrush. If you don't wash them off, paint will not stick to them. The mold release used when casting the pieces forms an oily coating. If you don't wash the pieces, paint will not stick to them (even spray paint) and will flake off. Afterward, rinse off the pieces and set them on a paper towel to dry. |
|
|---|
| 2. | I spray painted the fence sections (and posts) with a flat black spray paint. Be sure you work in a well ventilated area! I suggest doing this outside if possible. Put down some newspaper to protect the floor, and place it in a 3 foot radius around the spray area. You'll be surprised how far spray paint can float. When dry, flip over the pieces and spray the back side. Be sure to get the sides and edges of the pieces as well. |
 |
|---|
| 3. |
To finish the fence, I dry-brushed it lightly with a medium gray paint. You can also add spots of brown to look like rust. |
 |
|---|
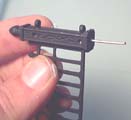 To add support to the fence sections, I've drilled a small hole and glued a piece of wire in the post. You don't have to do this, but it will make the fence stand up better and give you something to hang onto when painting.
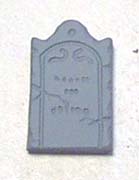
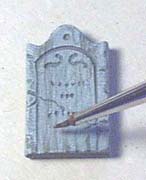
| 4. | To paint the tombstones, I sprayed them with gray primer. Then I dry-brushed them with light gray paint. To add weathered effects, I used a combination of black and brown ink wash (thinned with water) and streaked it down the front. |
 |
 |
 |
|---|
Photos of the Graveyard
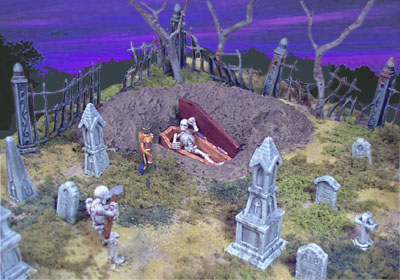
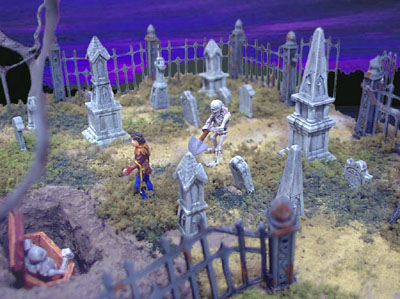
Sir Robert's Last Discovery Here are a few photos of the finished graveyard. For instructions on how to create this diorama, go to the Tips & Tricks 13 page. The Tips & Tricks page shows how to make the trees along the outside, how to make the dug up earth look realistic, how to apply the ground cover and how to keep the gate sections and tombstones standing up. The skeleton models are Warhammer(TM) miniatures from Games Workshop. I'm not sure who the prince model was made by. The ground cover is all Woodland Scenics products. |
 |
 |