Med Lab Interiors
For this set, you will need to cast the #301 Starship Wall mold 18 times, the #270 Starship Deck mold 25 times, the #303 Med Lab Accessory mold 20 times, and the #271 Laboratory Floor mold 20 times. I cast these pieces out of white dental plaster. The casting will take the average person about 2 full days, and the pieces can be glued together in a few hours. After you complete these, feel free to make your own custom pieces any size you want. The beauty of casting pieces is that you can always make more and build whatever you want. |
 |
Building Tips
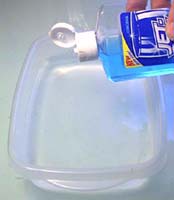
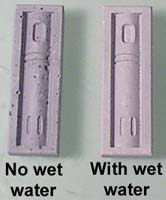
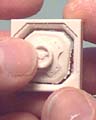
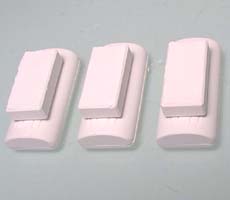
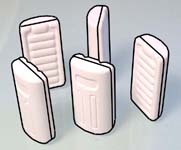
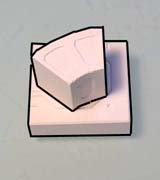
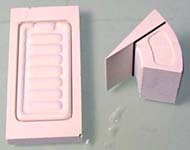
| 1. | When casting blocks, be sure to use the wet water method shown on the casting instructions page. These sci-fi blocks are very difficult to cast without air bubbles if you do not use it. The first block shown was cast without the "wet water" method and the second block is cast using "wet water". |
 |
 |
|---|
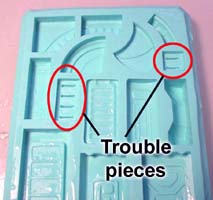
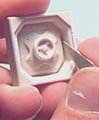
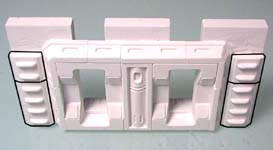
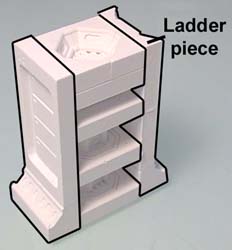
| 2. | On mold #303, the difficult pieces to cast are the ladder sections. I've circled these in red on the photo. The problem is getting the plaster to flow into the rungs. To begin with, use the wet water method shown above. Pour a little plaster into these sections and use a blunt pencil or thin paint brush handle and work it side-to-side in each rung. It's almost impossible to get air bubbles out unless you do this. |
 |
 |
|---|
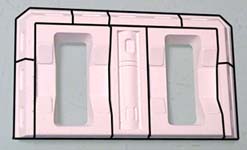
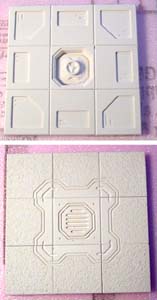
| 3. | You will also notice that mold #271 has a hatch door on it. You can remove the door by using a hobby knife to poke through at the thin parts around the outside. This is much easier to do if the piece is freshly cast and is just setting up. Afterward, smooth the edges down using the knife. |
 |
 |
 |
|---|
| 4. | I also found a quicker way to remove the hatch (by accident). This works if you do not want to save the outside frame. Simply drop the piece on the floor and the outside frame will break away leaving the center hatch intact. |
|---|
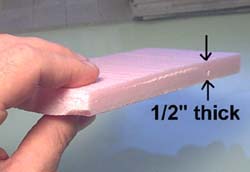
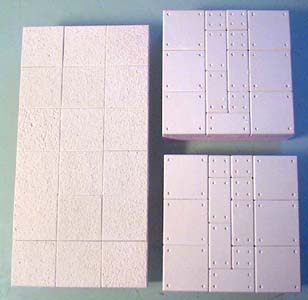
| 5. | To base these starship rooms, I'm going to mount the floor tiles on pieces of 1/2" thick polystyrene foam insulating board. This is the stuff they use for sheeting on houses before they put siding on. You can get it at most lumber yards and usually comes in pink or blue. It's easy to cut (with a sharp knife), and you can make pits and holes in the floor that actually look deep. For more instructions on using this for your floor, please look at the Starship Basic Interiors page. |
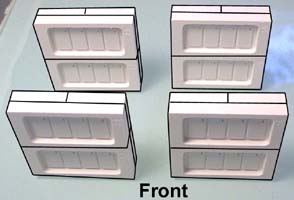
 |
|---|
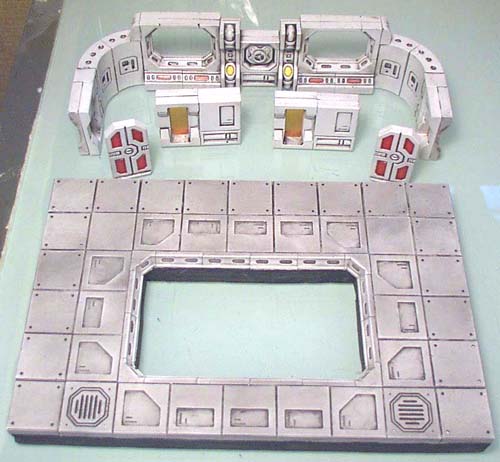
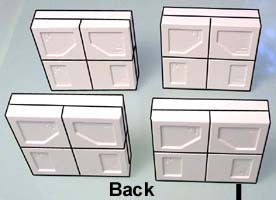
Med Lab Set Pieces
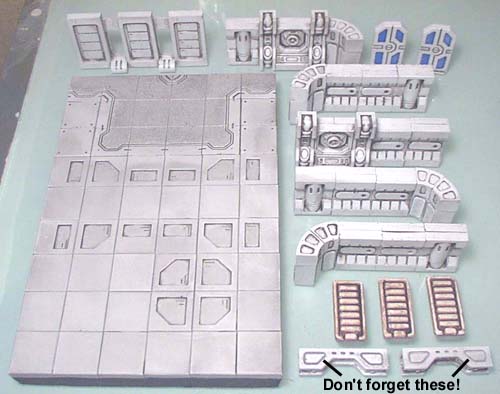
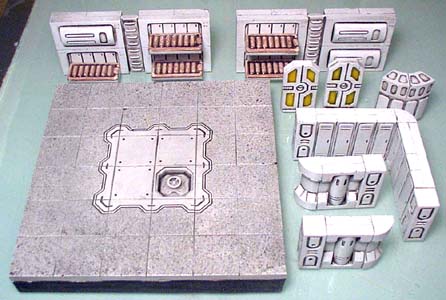
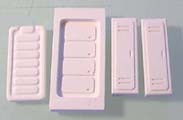
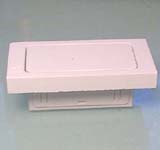
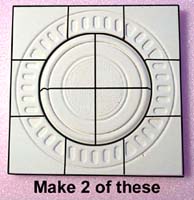
| 1. | The med lab set will consist of the pieces shown here. To build these pieces, you will need to cast the #301 Starship Wall mold 18 times, the #270 Starship Deck mold 25 times, the #303 Med Lab Accessory mold 20 times, and the #271 Laboratory Floor mold 20 times. The rooms shown on top of the floor sections are glued down to the floor. The other wall sections are separate so you can move them where you like. When making new pieces of your own design, notice that the floor sections are based on groups of 3 x 3 tiles. |
|---|---|
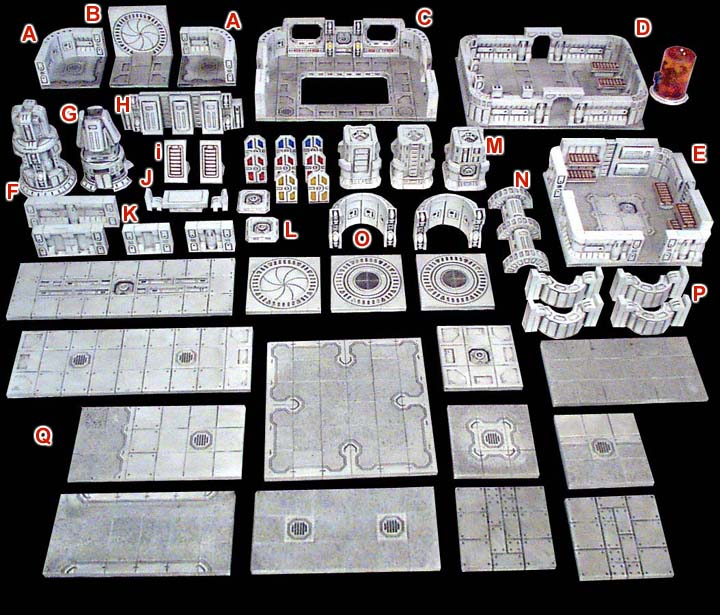 |
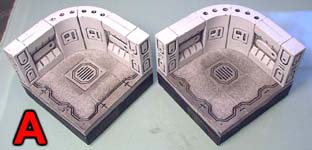
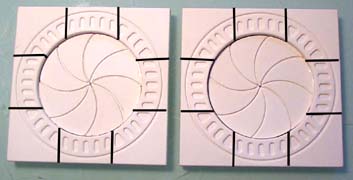
Corner Pieces "A"
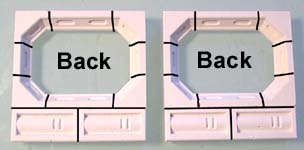
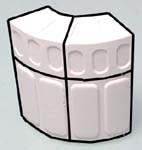
| 2. | We'll start in the upper left on the photo above. This is the piece labeled "A". Start by gluing these floor tiles down to a piece of 1/2" foam. Also glue the wall section together as shown. Make 2 of these. Paint the wall and floor sections before gluing them to the floor. |
 |
 |
|---|
| 3. | For painting instructions, please visit our Painting Instructions page. |
 |
 |
|---|
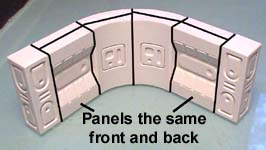
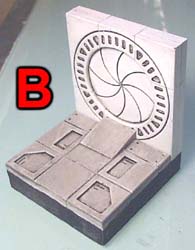
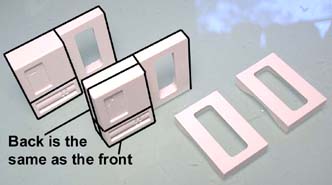
Iris Door "B"
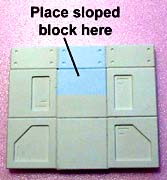
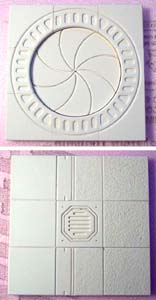
| 4. | For the next piece, glue these floor tiles down to a piece of 1/2" foam. Then glue a sloped block onto the blue area. Glue together two iris doors flat on the table. When dry, glue them back to back. |
 |
 |
|---|
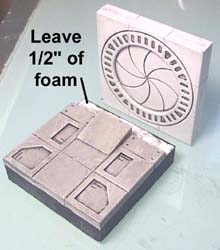
| 5. | Be sure to leave a 1/2" of foam on the top edge of the floor piece. This will give you an edge to set the wall section onto the floor. Paint the wall piece and floor separately before gluing them together. You will notice that the wall sections are much whiter than the floor. For painting instructions, please visit our Painting Instructions page. |
 |
 |
|---|
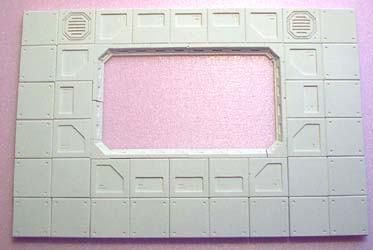
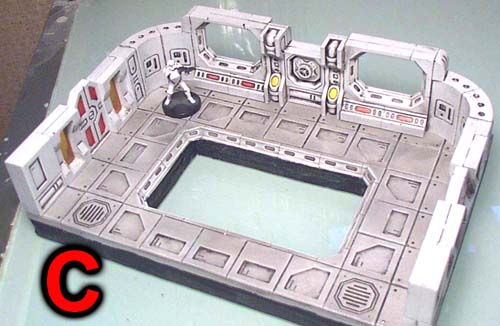
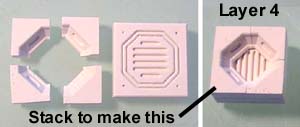
Docking Bay "C"
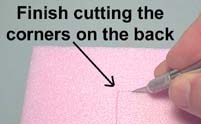
| 6. | Glue these tiles down onto 1/2" foam. Once dry, cut the hole in the center out with a hobby knife. Since the corners of the hole are hard to cut from the top side, turn the piece over and finish cutting the corners from the back. |
 |
 |
|---|---|---|---|
 |
| 7. | Glue 2 sets of windows. These will end up being glued front-to-back for 2 full windows. |
 |
 |
|---|
| 8. | Glue the hatch panel pieces front-to-back also. Glue all of these pieces for the wall section. |
 |
 |
|---|
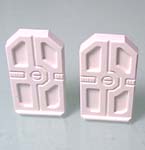
| 9. | Don't forget to make 2 doors as well. Just glue 4 halves together. Once the doors are painted you can add color to the panels by following the Tips & Tricks 19 page. |
 |
|---|
| 10. | 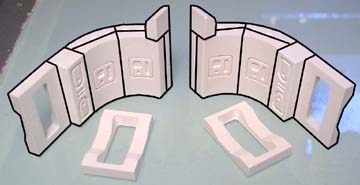 |
 |
|---|
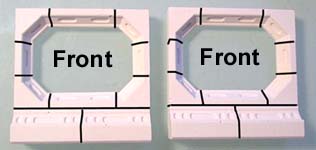
| 11. | Shown above are the remaining walls to the docking bay. These curved walls are glued against the sides of the windows to complete the wall section. The extra pieces laying down are the other half of the windows. You don't want to glue the windows together until after the pieces are painted because we want to put colored plastic in them. Once the pieces are painted you can add the colored inserts in the windows. Instructions for this are shown on the Tips & Tricks 18 page. |
 |
|---|
| 12. | Make sure the wall pieces are painted before you glue them down to the floor. For painting instructions, please visit our Painting Instructions page. You may also decide to put a piece of tinted plastic in the hole so your people can walk over it. Another idea is to glue a color print of a space ship or vehicle down in the bottom of the hole. |
 |
|---|
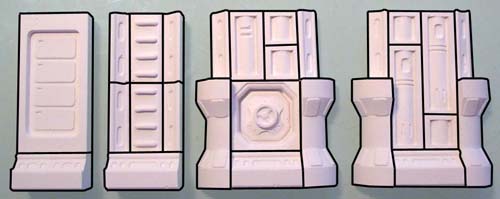
Med Lab "D"
| 13. | Glue these tiles down onto 1/2" foam. Glue the wall sections together as shown. The same panels are used for the front and the back of the walls. |
 |
 |
|---|
| 14. | Glue the two hatch sections together. Once dry, stand them up, turn them around and add the remaining panels around them to complete these wall sections. |
 |
 |
|---|
| 15. | To make the 3 beds, start with the pieces shown here. Glue the mattresses onto the rounded capsules (flat scraped side to flat scraped side). Finish the bed by gluing the small floor tiles centered onto the rounded capsules. |
 |
 |
|---|
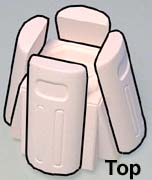
| 16. | Glue the wall panel shown and let it dry completely. Stand it up and add these pieces to the back side. Be sure the open windows fall between the panels. |
 |
 |
|---|
| 17. | Turn the wall around again and add the ladder pieces on each side. Also make two doors and one complete round section. |
 |
 |
 |
|---|
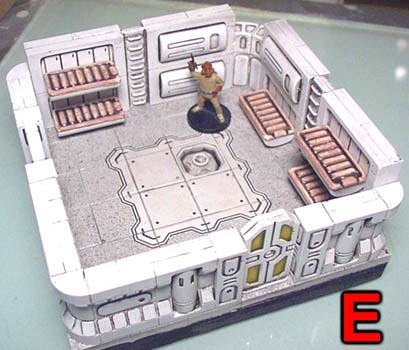
| 18. | Here are all of the pieces to the med lab. Be sure to paint them completely before gluing the room together. At the bottom right of the photo you will also notice two doorway tops not shown in the photos above. Be sure to paint these as well. They will go over top of the doorways. You will also notice that the doors have color panels on them. For instructions on how to make the color panels see our Tips & Tricks 19 page. |
 |
|---|
| 19. | The beds are more of a brown color. To see how I painted them, visit our Tips & Tricks 19 page. We also have a creature in a stasis tube on the right. This poor fellow is actually a Wookiee Star Wars miniature. The base of the tube is the round section shown above. To see how to make this tube, visit our Tips & Tricks 19 page. For painting instructions, please visit our Painting Instructions page. |
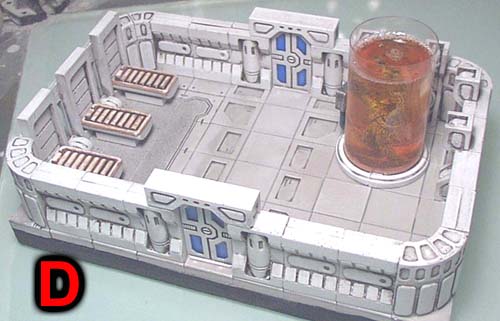 |
|---|
Barracks "E"
| 20. | Glue these tiles down onto 1/2" foam. The outside are all carpet tiles, and the inside has the tiles with rivets. Glue the wall sections together as shown. The front is slightly different from the back. |
 |
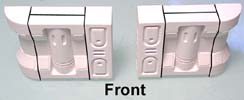 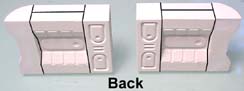
|
|---|
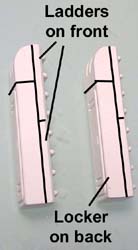
| 21. | Glue this wall section together. The inside is lined with the locker blocks. |
 |
 |
|---|
| 22. | Glue these four wall sections together. The back is made from floor tiles from mold #271. The beds will fold out from these walls. |
 |
 |
|---|
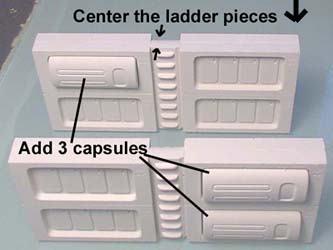
| 23. | Use the four sections above along with these ladder pieces to complete the two large wall sections. The ladder pieces (once glued to the locker blocks), should be centered front-to-back in the wall sections. Finally, glue the 3 capsule blocks onto the front of the walls as shown. |
 |
 |
|---|
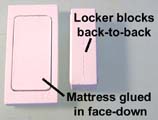
| 24. | The last pieces you need to assemble are the 5 beds made by gluing the capsules back-to-back with the mattress blocks, a corner piece and two doors. |
 |
 |
|
|---|
| 25. | Here are all of the pieces to the barracks. Be sure to paint them completely before gluing the room together. For painting instructions, please visit our Painting Instructions page. You will also notice that the doors have color panels on them. For instructions on how to make the color panels see our Tips & Tricks 19 page. |
 |
|---|
| 26. | The completed barracks room looks like this. Feel free to make rooms smaller or larger to provide sleeping quarters for the inhabitants of your ship. The beds are more of a brown color. To see how I painted them, visit our Tips & Tricks 19 page. The beds look like they can fold down and up. However, they are actually anchored in place and cannot move once glued there. I used bits of wire set into the pieces for added strength. To see how I anchored the beds in place, visit our Tips & Tricks 19 page. |
 |
|---|
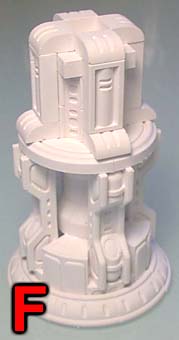
Power Station "F"
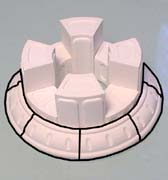
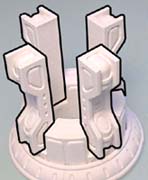
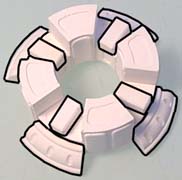
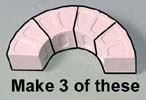
| 27. | Glue the curved blocks together in a circle. Then glue the curved edge blocks around the outside. Glue the buttress blocks on the inside of the recesses. You will need to put a bead of glue on the edges of these blocks where the edges touch the sides. |
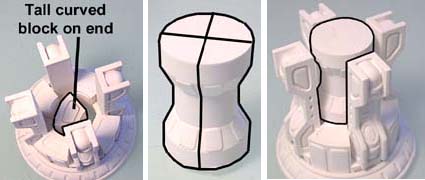
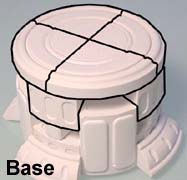
 |
 |
 |
|---|
| 28. | These pieces are used to make the top piece of the tower. For the bottom half, place a tall curved block in the center and glue the post (made from 4 pieces) on top of it. |
|
 |
|---|
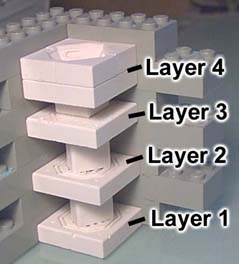
Communications Tower "G"
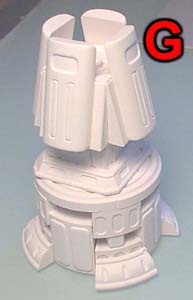
| 29. | Take a badly cast tile and glue a small curved block onto it. Glue a hatch tile on the top and glue sloped blocks around the outside. Finish by gluing capsule blocks around the outside. |
 |
 |
 |
|---|
| 30. | Glue the curved blocks together in a circle. Add the curved edge blocks on the outside along with the smallest blocks centered in the gaps. Glue small curved blocks on top of them and cap it off with a large round section. |
|
 |
 |
|---|
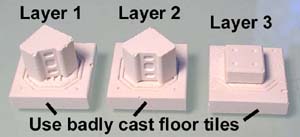
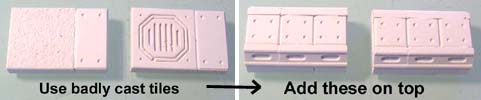
| 31. |
I use badly cast tiles for these pieces because they will be completely covered up by other blocks. Finish the center section by adding the beveled trim around the bottom along with the other small blocks around the outside. All three pieces are glued together to make the complete communications tower. Be sure this thing is completely dry before you handle it and paint it. It can be fragile in the center. |
 |
|---|
 The center section is made by using a badly cast floor tile and gluing two square blocks on top of it.
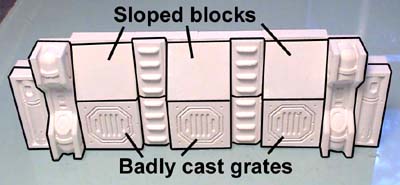
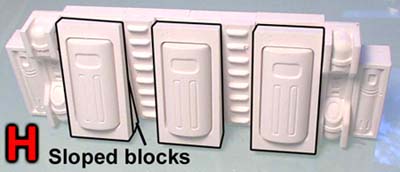
Cryo Wall "H"
| 32. | We'll start with the back side of the wall. Glue the pieces shown while they are laying flat on the table. Most of the blocks are floor tiles from mold #271. |
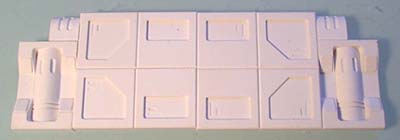 |
|---|
| 33. | Stand the pieces up (when they're dry) and add the blocks onto the back side of the wall. Since we will end up with several unused grate tiles, use the most badly cast tiles you can find. They will be covered up later. |
 |
|---|
| 34. | Glue sloped blocks above and in front of the grate tiles. This will form a nice slope for the capsules. Finally, add the slabs and capsules onto the front of the slopes. This will finish the wall piece. |
 |
|---|
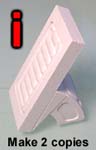
Angled Beds "i"
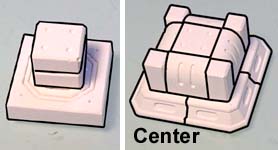
| 35. |
Also glue a mattress inside one of the large slab blocks. When dry, glue the slab onto the base. Make 2 copies of this. |
 |
|---|
 The angled beds are very easy to make. Glue a sloped block to a tall curved block.
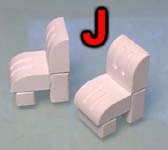
Table and Chairs "J"
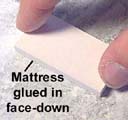
| 36. | For the table, glue a mattress block face-down into a slab. Also glue the locker blocks back-to-back. When dry, sand the top of the slab until it's smooth and flat. |
 |
 |
 |
|---|
| 37. | Glue the slab on top of the locker blocks to finish the table The chairs are made by using the small blocks shown here. Glue them together to make 2 chairs. |
 |
 |
 |
|---|
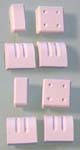
Wall Sections "K"
| 38. | Glue the wall sections shown here. These are used as temporary walls to divide off parts of the ship when needed. The top two sections have a window block on one side and a pipe block on the other. The remaining sections are exactly the same front and back. |
 |
|---|
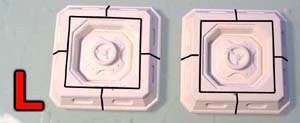
Floor Hatches "L"
| 39. | Glue the pieces shown to make 2 floor hatches. These can be used to add floor entrances so figures can enter the ship anywhere you want. |
 |
|---|
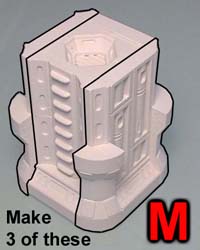
Main Pillars "M"
| 40. | We'll start with the center of the pillar. You can use badly cast tiles for these because they will be covered up later. I'm using a corner of Legos to help keep these layers straight when I glue them together. |
|
 |
|---|
| 41. | Glue these pieces to make the 4 sides of the pillar. |
 |
|---|
| 42. | Glue the large slab onto one side, and glue the ladder piece onto the other side. To finish the piece, glue the remaining sides onto the pillar. Make 3 copies of this pillar. |
 |
 |
|---|
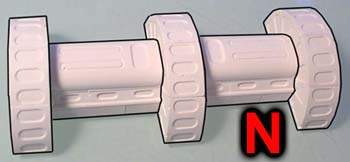
Conduit "N"
| 43. | Glue these blocks together. |
 |
 |
|---|
| 44. |  Glue the capsule blocks on these to cap the center pieces. Finish the piece by gluing the arches around these blocks. |
 |
|---|
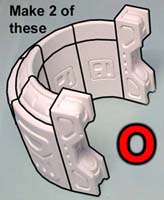
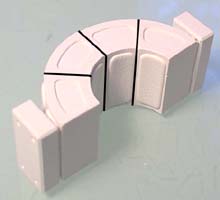
Lift Tube "O"
| 45. | The lift tubes can be placed on the edge of the board as a place where troops can enter the ship. The wall section uses the curved pieces on mold #303 glued back-to-back, then capped with the small curved pieces. I didn't glue the walls to the floor in case I wanted to use the floor somewhere else. |
 |
 |
|---|
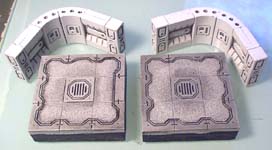
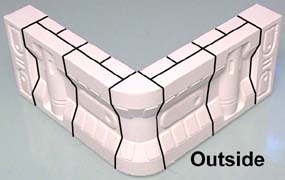
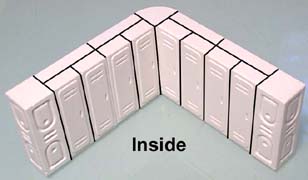
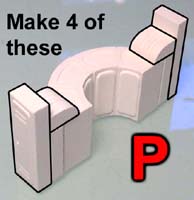
Rounded Walls "P"
| 46. | These wall sections are a little tricky to get straight. They'll need a good bit of glue on the sides. I suggest putting them against a flat surface to let the glue dry. Once the additional blocks are put on the sides, it will strengthen the wall. These wall sections will end up a slight bit long, but they will still work well for temporary wall sections. Make 4 of these. |
 |
 |
|---|
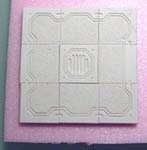
Floor Sections "Q"
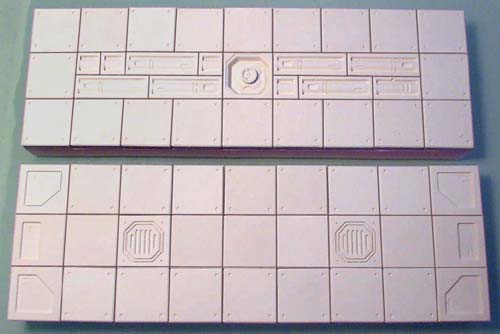
| 47. | This last part covers all of the extra floor pieces needed to complete the set. This first floor is made up of tiles with rivets all around the outside edge. The center has pipe tiles and a hatch. The second floor is made using tiles with rivets for the top and bottom row. The center row is made using plain smooth tiles from mold #271 (along with a couple of grates and decorative tiles). |
 |
|---|
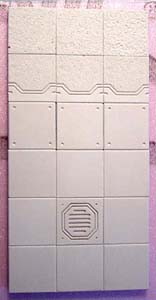
| 48. | Keep in mind that all of these floor sections are mounted on foam. For more information about mounting them, please look at the Starship Basic Interiors page. This first floor section is made using the carpet and trim floor tiles from mold #270. The second floor section uses carpet tiles on the top, rivet tiles in the center and smooth flat tiles from mold #271 on the bottom half. |
 |
 |
|---|
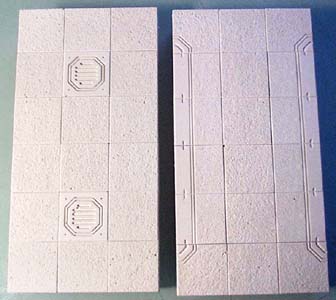
| 49. | The first floor section is made using carpet tiles and grates. The second floor is made using carpet and trim tiles. The third floor is made using decorative tiles and a hatch from mold #271. The last floor is made using carpet and trim tiles and a grate. |
 |
 |
|---|
| 50. | The first floor section is made using all plain carpet tiles. The second and third floors are made using all rivet tiles of various sizes. The fourth floor is made using the circular floor tiles from mold #303. The last floor is made using plain tiles from mold #271 on the left, and carpet, trim tiles and a grate on the right. |
 |
 |
|---|
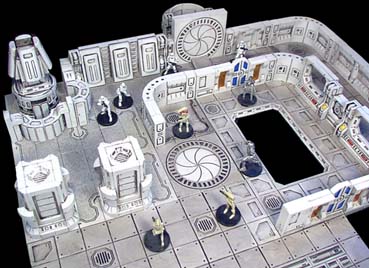
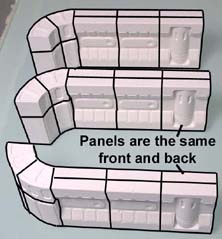
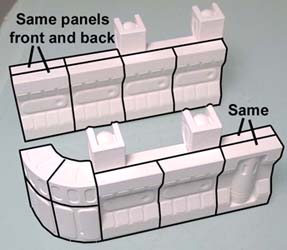
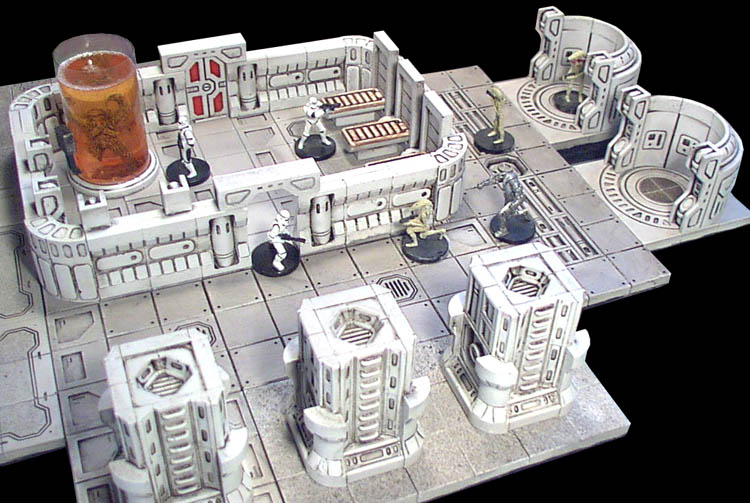
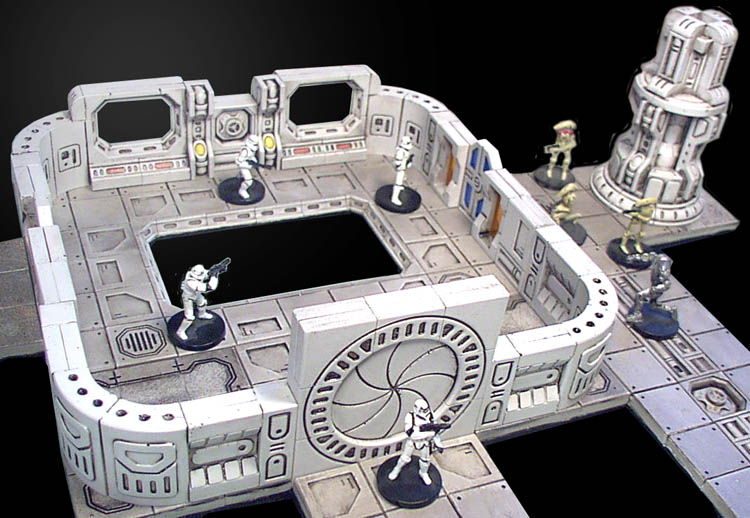
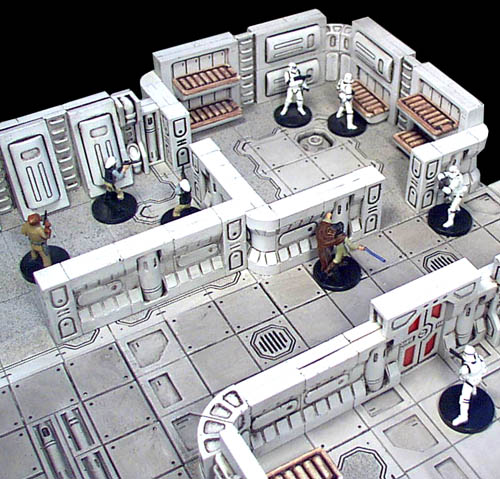
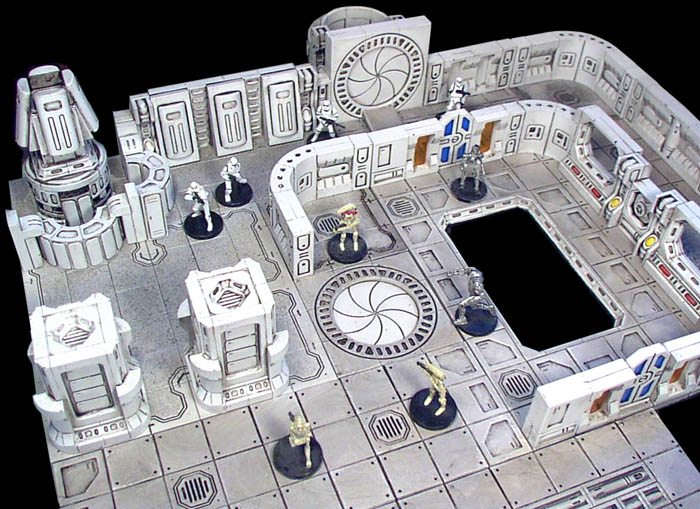
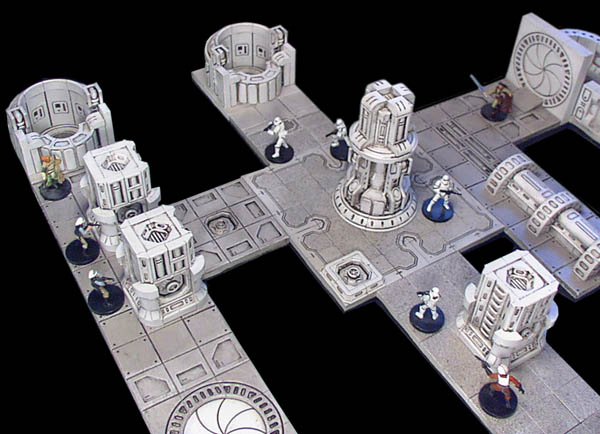
The floor sections and rooms can be easily rearranged into any kind of layout you want. As long as any additional floor pieces are based on a 3x3 size, then everything will fit together correctly. Here are a few photos of the finished pieces arranged in simple layouts. The Star Wars miniatures are from Wizards of the Coast. For instructions on how the pieces were painted, please visit our Painting Instructions page. For instructions on doing other details, see our Tips & Tricks 19 page. |
Click on the photos for a larger view. |
 |
 |
 |
 |