How to Build a Dungeon Twister Game Board
|
This page will show how to use Mold #88 to add walls to the game boards of Dungeon Twister. Here is the official web page for Dungeon Twister. It is originally a 2-player game, but I believe they have expansions that will allow up to 4 players. This is a great game created by Christophe Boelinger, illustrated by Wayne Reynolds and Thierry Masson. It's published by Asmodee Editions LLC. The artwork is wonderful and I would recommend it to anyone. Adding 3-D walls to the game board will enhance the game play tremendously and this article will show you how to do it. |
|
Casting the Walls Using Mold #88
| 1. | You will need to make 34 castings of mold #88 to make all the walls for the 8 board sections in the original game. That is a lot of casting. You might consider getting 2 copies of mold #88 to cut your casting time in half. There is no need to cast all of the pieces, so instead we'll just cast the ones we need. Below is a photo of mold #88. Fill the bottom area with plaster and ignore the thin pieces on the top and sides. This will save you plaster and time. If you're wondering what the thin pieces are used for, visit our Tips & Tricks 25 page. |
|---|
 |
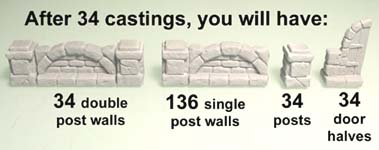
| 2. | After casting the mold 34 times you will end up with 34 double post walls, 136 single post walls, 34 posts and 34 door halves. We will need to glue some of these pieces together to make painting easier. |
 |
|---|
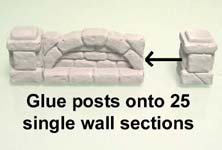
| 3. | Glue together 26 door halves to make 13 complete doors. Glue 25 extra posts onto single post walls. This will give you 25 additional double post walls. |
 |
 |
|---|
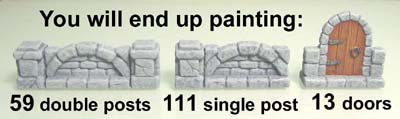
| 4. | After the glue dries, you will end up painting 59 double post walls, 111 single post walls and 13 complete doors. I painted the wall pieces using the castle gray colors shown on the painting instructions page. |
 |
|---|
I must warn you that these wall sections take a long time to paint. You'll spend more time painting these than you will doing anything else on this project.
One thing I did to speed up the process was to dip the pieces in the darkest color of paint. Put a rubber glove on one hand and dip each end of the wall section into the paint. Then with the other hand, use a brush to push off the excess paint and set each wall piece onto a piece of wax paper.
This first coat of paint (the darkest color) is the most time consuming to do. Once you get through it, the rest of the painting will go more quickly.
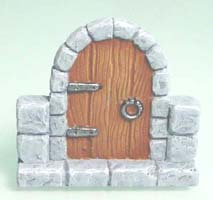
| 5. | The doors will take a little time to paint. Start by painting the outside stone the exact same way as you did the wall pieces. Don't worry if you get gray paint on the wood part of the door. Next, paint just the wood of the door dark brown. When dry, dry-brush light brown on top of it. To make this dry-brushing job a little easier, look at my door template from my Tips & Tricks 25 page. Finally, I painted the hinges and ring black, and then lightly painted silver on the very tops of them. |
 |
|---|
Enlarging the Board Sections
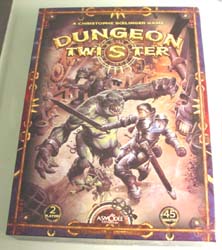
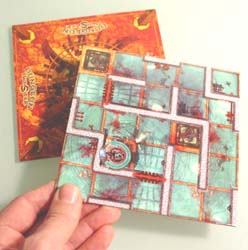
| 1. | First off, you'll have to buy a copy of Dungeon Twister. The game is made of eight 2-sided game boards. One side has the map and the other has the Dungeon Twister logo on it. I think the artwork is one of the nicest things about the game. However, we'll have to enlarge it if we want to fit the walls on the game board. |
 |
 |
|---|
| 2. | You will need to find a place that can do 11" x 17" full color copies. The boards will need to be enlarged 182%. When they enlarge them, be sure you have them move it over and down by 1/4" so that you end up with 1/2" of white paper all around the artwork. |
|---|
| 3. |
On the outside edge the walls are cut in half because they meet against other game boards. The first photo shows how the walls straddle the outside line. Since we cannot glue half of a wall piece onto the outside edge of our game boards, we need an extra 1/4" all the way around. The second photo shows the board with an extra 1/4" of space around it. This 1/4" of space is colored in with markers. Now the outside walls can fit on completely. |
|---|
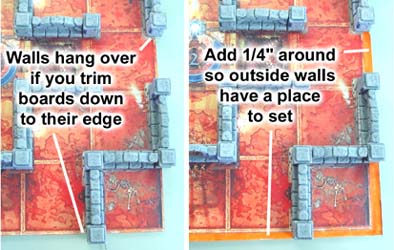 On the printed game board, walls fall on the dividing line between floor tiles. This works fine until you get to the outside edge of the game board.
| 4. |
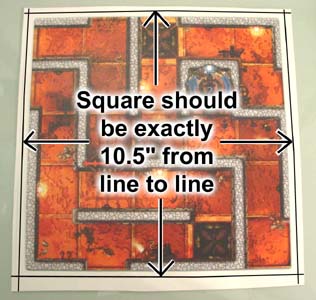
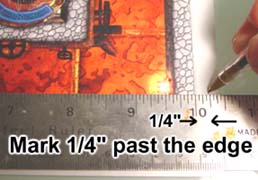
Using a ruler, place a mark 1/4" past the board edge on all sides. Put a couple of marks on each edge so you can connect the dots to make a straight line. Then draw a line around the outside edge. The finished square from line to line should measure 10.5" square. |
 |
|---|
 So after enlarging the game boards 182%, we need to add 1/4" around the outside.
| 5. |
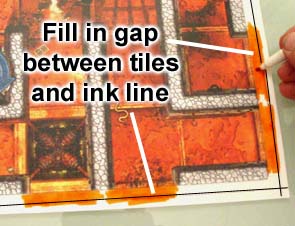
Test out the markers and try to find a color that matches the color of the board. Then use that marker to fill in the white gap between the color game board and the ink line you drew. There is no need to fill the gap between the walls and the ink line, since a wall piece will cover that part. |
 |
|---|
 You will need colored markers for this next step.
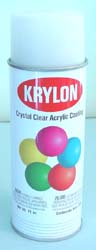
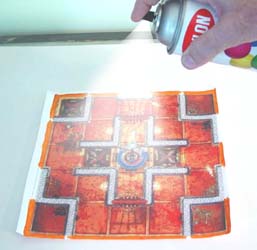
| 6. | To protect the surface of the print, I'm going to use flat Krylon crystal clear acrylic coating. Be sure to find a well ventilated area to spray this in. Give it a couple of light coats. I also laminated one to see how it would do. It protects the surface better but lamination was way too shiny and you couldn't see the board if you had any kind of light source overhead. I would imagine any kind of flat, clear protective coating will work for this. Be sure the spray coating dries completely before moving on. |
 |
 |
|---|
| 7. |
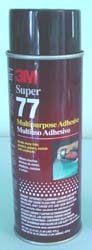
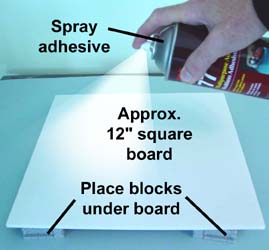
The glue I'm using is 3M Super 77 Multipurpose Adhesive. If you can't find a spray adhesive, you can use a glue stick instead. Do not use white glue because it will wrinkle the artwork. Spray a piece of foam core (around 12" square) with a good coat of adhesive. I've put mine on blocks so the next piece I spray won't stick to the table. |
 |
 |
|---|
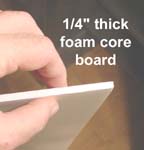 I'm going to mount the enlargements onto 1/4" thick foam core board.
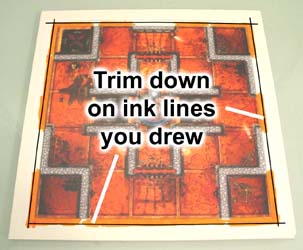
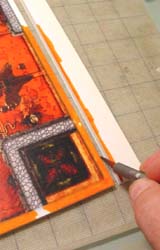
| 8. | Carefully spread the enlargement on the board trying to avoid any wrinkles. Once in place, cut on the ink lines you drew. This will give you the extra 1/4" that the outside walls need. Be sure you use a sharp knife to cut foam core board or it will tear. I'm using a cutting board to protect my table and extend the life of my cutting blade. |
 |
 |
|---|
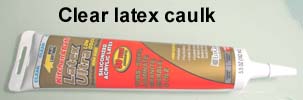
| 9. | I'm going to glue the wall sections down using clear latex caulk. Caulk will hold the pieces down to the board better than most glues (and I've tested several). |
 |
|---|
| 10. | Test fit the walls to make sure where each wall section goes. Do not glue the doors if you want to remove them to show them open and closed. Place a good solid bead of caulk across the bottom of the wall pieces. Then carefully set them on the board where they belong. Any clear caulk that squishes out will dry clear. Be sure the doors fit loosely between the posts so they can easily be removed later on. Take your time gluing the pieces. Once they are stuck you will never remove them without ripping the paper. I suggest to start gluing from the outside edges and working your way into the center. |
 |
|---|
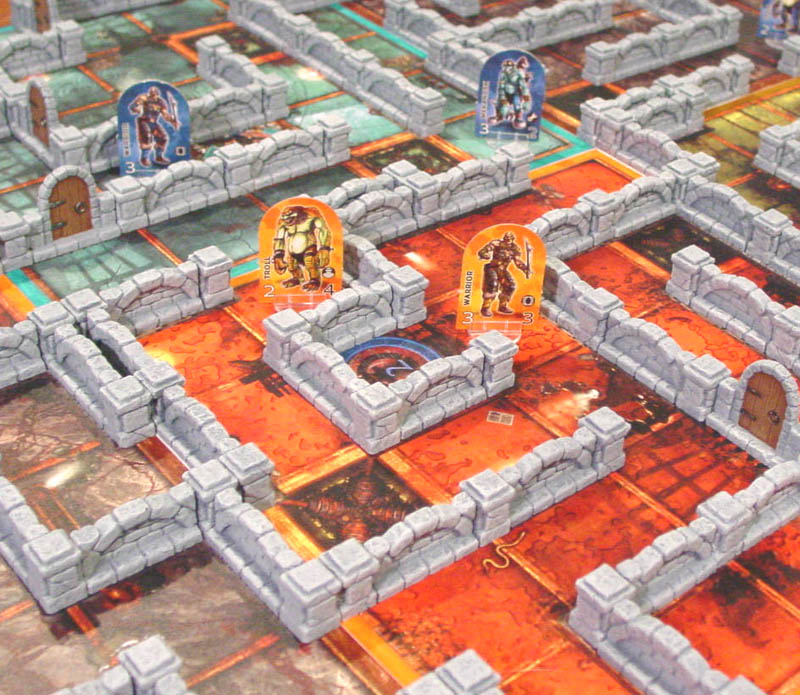
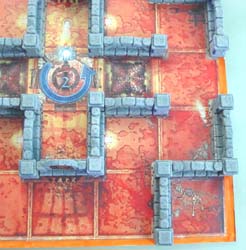
Once you finish gluing all the walls down, you should have something that looks like this. Click on the photo to view a larger version of it. The larger board and 3-D walls really add to the game play, and give you a much more spacious playing area. For more information on Dungeon Twister, visit their web site at www.dungeontwister.com. Hirst Arts is not affiliated with or endorsed by Asmodee Editions LLC. who publish the Dungeon Twister game. |
 |