Building Instructions
This page will give you basic instructions on stacking and gluing the blocks.
For ideas on what to build, visit the Projects page.
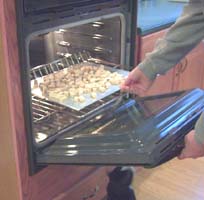
| 1. | Once your blocks are cast, they must be completely dry before you can build with them. If the blocks look darker or are cool to the touch, then they're still wet. How quickly the blocks dry will depend on the humidity in the air where you live. During the winter (when the furnace is running), the blocks will dry more quickly than in the summer. One way to dry the blocks quickly is to put them on a cookie sheet, and bake them in the oven at the lowest temperature available for a couple of hours. |
 |
|---|
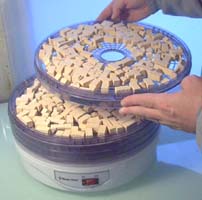
| 2. | My favorite method of drying blocks is to use a food dehydrator. The one you see here is a brand called "Magic Chef". It has five trays which are deep enough to hold lots of blocks easily. This one cost me around $20, and the best time to pick one up is right before Christmas. After that the cheap ones (like mine) are harder to find. Don't pay any more than $30 for one or you're paying too much. This dehydrator will dry a full load of blocks in about 2 hours. |
 |
|---|
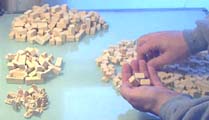
| 3. | Once the blocks are dry, you'll want to sort them into piles. Sorting your blocks will make it much easier to find the blocks you need while building. |
 |
|---|
| 4. |
Also, if you messed up and glued some blocks in the wrong place, you can spray water on them (really soak them) which will soften the glue so you can fix the problem. However, the glue will also soften up slightly when you paint the model, so it's best to paint the bottom half, let it dry, then paint the top half of the model. You can also use Elmer's wood glue which dries waterproof and will not soften up when you paint. Once the glue dries you won't be able to fix wrongly placed blocks as easily. Don't use Elmer's white glue. It's too thin and takes forever to dry. There are a lot of other glues you can use as well. Any glue that works on porous material will work on the blocks. |
|---|
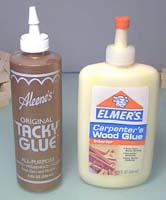 My favorite glue is Aleene's Tacky glue. The advantage of Aleene's is that it will set up in about 2 minutes, but you can still shove the blocks around up to 10 minutes later if you need to adjust things.
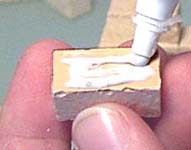
| 5. | Since Tacky glue is so thick, I use a piece of foam with a hole in it as a bottle holder. This keeps the bottle upside down so I always have glue at the tip where I need it. The next photo is how much glue I put on the blocks when building. Apply glue to any side that touches another block. |
 |
 |
|---|
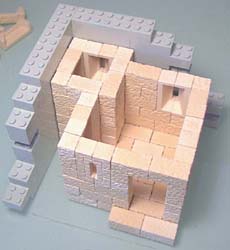
| 6. | Once a row of blocks is glued down, I use a form to help line the blocks up so they'll dry straight. This form is made out of Legos and works very well. If Legos are too expensive, there are also Megablocks and other Lego knock-offs that are cheaper. |
 |
 |
|---|
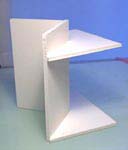
| 7. | You can also build a form out of other material. For instructions on building this form, visit the Tips & Tricks 6 page. Of course you don't have to line the walls up straight. Crooked walls can make your building look old and decayed. |
 |
 |
|---|
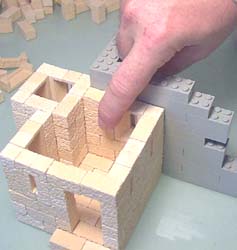
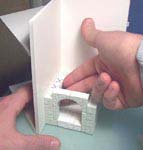
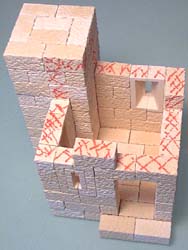
| 8. | To make sections that remove, mark the area where the building will come apart. I've used a red marker here. For the next row, glue the blocks to each other, but do not glue to the red marked area. On the second photo, I've put a black line where this model will separate. |
 |
 |
|---|
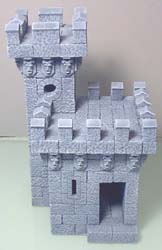
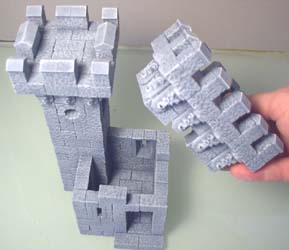
| 9. | When the model is finished and painted, you'll have a removable section. For information on painting your model, visit the Painting Instructions page. The removable section allows you to paint on the inside of the building and also set miniatures in it. |
 |
 |
|---|