Descent Game Board
|
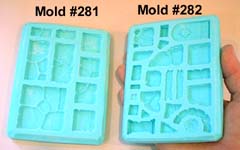
This page will show how to use Mold #281 and Mold #282 to build a game board for the Descent game produced by Fantasy Flight Games. Hirst Arts is not affiliated with or endorsed by Fantasy Flight Games in any way. To make this game board, you will need to cast mold #281 34 times and mold #282 24 times. This is a lot of casting but there are a lot of floor sections to this game board. Following these instructions, you will have board pieces identical to what comes in the Descent game and will be able to build any of the layouts used in their instructions. |
|
What You Will Need
| 1. | Rubber MoldsIf you are new to Hirst Arts and have never cast pieces using our molds, then be sure you look at our Quick Guide for the Beginner page. This will give you an overview of what casting is all about. You will need molds #281 and #282 from our molds available page. |
 |
|---|
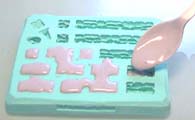
| 2. | Casting MaterialFor this project, I suggest using Dark gray Merlin's Magic dental plaster. You can find out more about this product and where to buy it on our Dental Plaster page. You can use regular plaster of Paris if you like but since it is a softer material, the pieces will be more prone to chipping and wear. |
 |
|---|
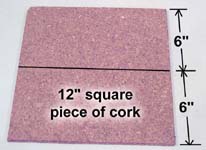
| 3. | Basing MaterialI am going to base the game board pieces onto cork. You can find cork tiles at most office supply stores for around $15.00 for a package of four 12" square pieces. To find cork tiles near you, search the internet for "Frameless cork panels" and you should find some. These are 1/8" thick. I liked using cork the best because it's easy to cut, it glues easily and it grips the table nicely so the pieces don't slide around. |
 |
|---|
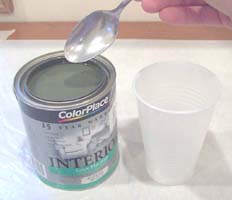
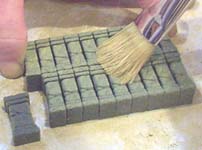
| 4. | House PaintYou will find detailed instructions on how to apply the paint on our Painting Instructions page. I also have the formula for the exact colors I used on the Painting Instructions page, along with detailed instructions on how to brush the paint on the pieces. You will need a quart of dark green, a quart of medium tan and a small bottle of white craft paint. |
 |
|---|
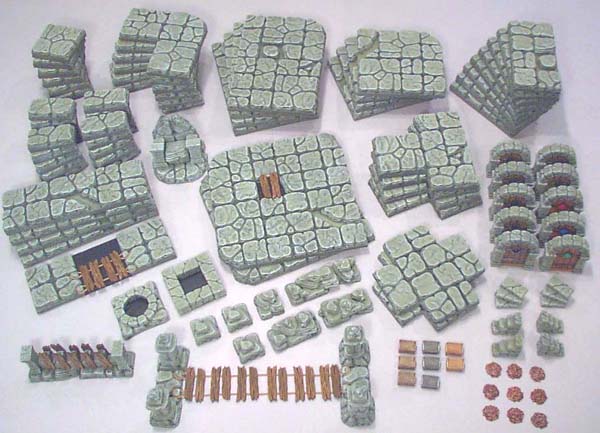
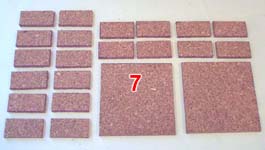
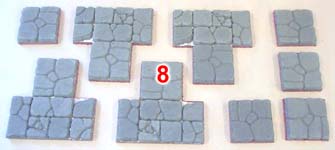
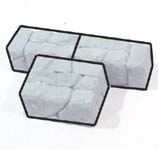
The Complete Set
This photo shows the complete set that I'm going to build. This set has the same number and type of board sections found in the original Descent game. Once you make this set, you will be able to play any game shown on the Descent missions. You will need to cast mold #281 34 times and mold #282 24 times to have enough tiles to build it. |
 |
Building The Board Sections
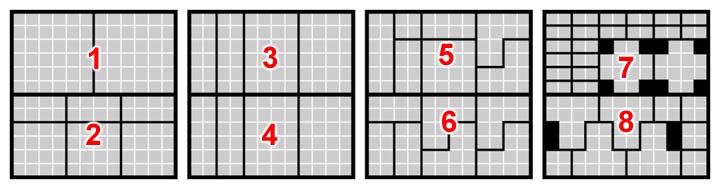
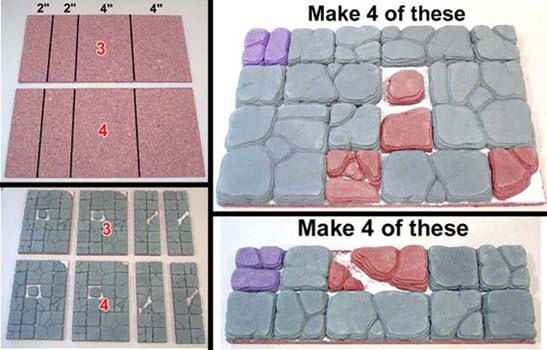
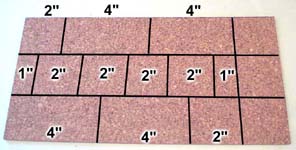
| 1. | The package of cork includes four 12" square pieces, which is just enough to get all of the board sections out of. What we will do is cut the cork pieces up first, then glue the tiles on them. Below is the plan for how the game board pieces will come out of the four square pieces of cork. Each square on the white grid is 1". |
|---|---|
 |
| 2. | I am going to base the game board pieces onto cork. You can find cork tiles at most office supply stores for around $15.00 for a package of four 12" square pieces. To find cork tiles near you, search the internet for "Frameless cork panels" and you should find some. These are 1/8" thick. I liked using cork the best because it's easy to cut, it glues easily and it grips the table nicely so the pieces don't slide around on the table. | ||
|---|---|---|---|
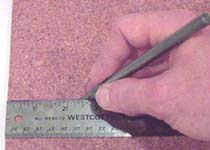
Take each square and cut it in half. The easiest way is to mark it with a ruler and use a hobby knife to cut them in half. When you have finished cutting the pieces in half you will have eight pieces that measure 12" x 6" each. |
 |
 | |
| 3. | 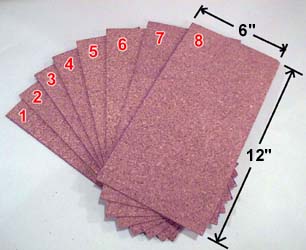 |
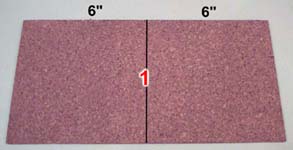
Notice that the pieces 1-8 match up to the diagram at the top of this article. Take the first piece and cut it in half to make two 6" square pieces. |
|---|---|---|
 |
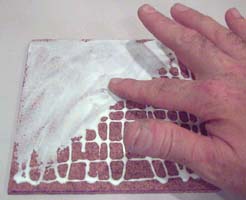
| 4. | Take white glue (I like Aleene's Tacky glue) and squeeze out a generous amount on the surface. Then take your finger and spread it out evenly. You'll need quite a bit of glue because the cork soaks it up. You will also notice when cutting the cork that the 12" pieces can be slightly short sometimes. When you run into a short piece, just try to get as close as you can to the right measurement. |
 |
|---|
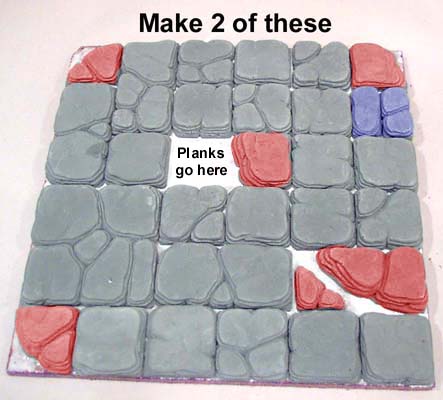
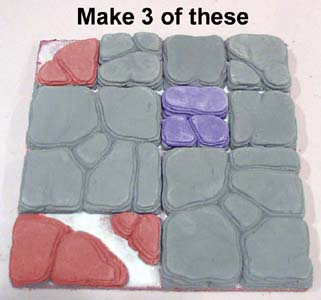
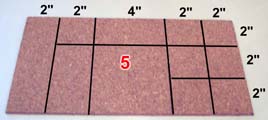
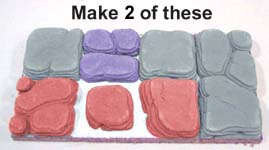
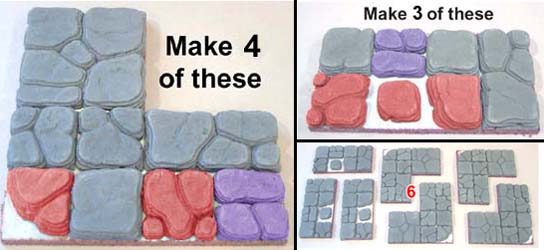
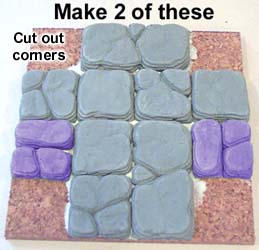
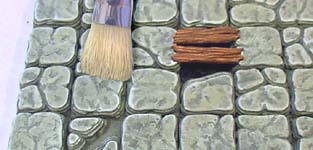
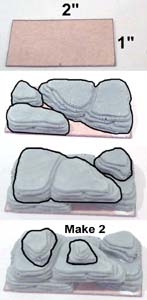
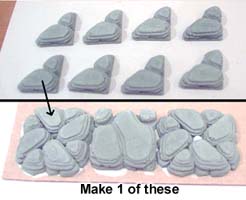
| 5. | Set the tiles shown on top of the glue. The tiles shown in red are odd shaped pieces from mold #282. The tiles shown in purple are the 2 small 1" x 1/2" tiles set together to fill a 1" square. I have these tiles counted exactly, so if you do not want to run out of certain floor tiles then put down the exact tiles that I show. Once the glue is dry, cut off the excess cork from the corners. Two wooden planks will go across the hole after the piece is painted. For complete painting instructions, look at our Painting Instructions page. Make 2 of these. |
 |
|---|
| 6. |
The tiles shown in red are odd shaped pieces from mold #282. The tiles shown in purple are the 2 small 1" x 1/2" tiles set together to fill a 1" square. |
 |
|---|
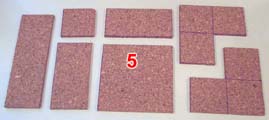
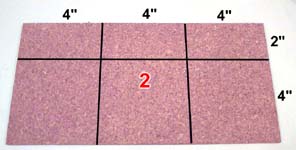 Cut the next piece of cork into the 6 pieces shown and spread glue on them.
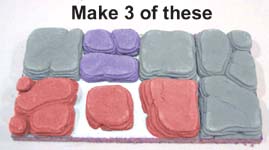
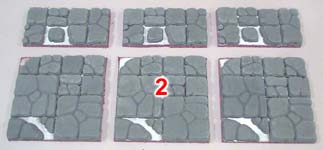
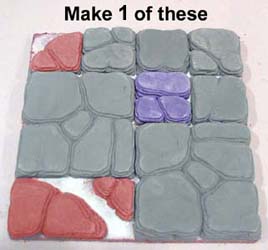
| 7. | Make 3 of each. |
 |
 |
|---|
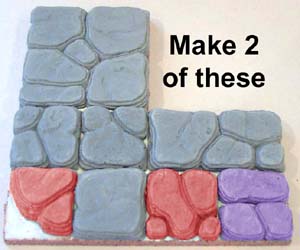
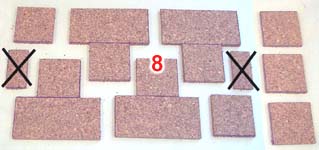
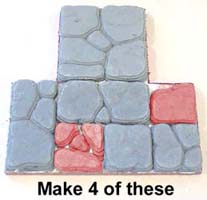
| 8. | Here is group 3 and 4. Cut the next 2 pieces of cork as shown and spread glue on them. The tiles shown in red are odd shaped pieces from mold #282. The tiles shown in purple are the 2 small 1" x 1/2" tiles set together to fill a 1" square. Make 4 of each. |
 |
|---|
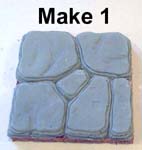
| 9. | Draw the lines on the cork tiles as shown, then cut them apart. To see how to make the bridge visit our Tips & Tricks 20 page. |
 |
 |
|---|
| 10. | 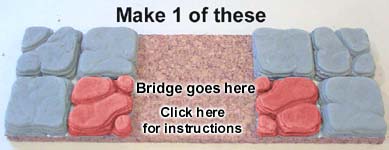 |
 |
|---|
| 11. | The tiles shown in red are odd shaped pieces from mold #282. The tiles shown in purple are the 2 small 1" x 1/2" tiles set together to fill a 1" square. |
 |
 |
|---|
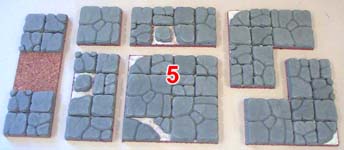
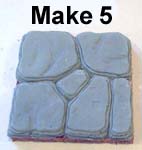
| 12. | This will complete all the pieces in group 5. |
 |
 |
|---|
| 13. |  |
 |
|---|
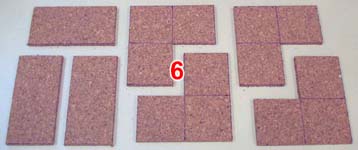
| 14. | The tiles shown in red are odd shaped pieces from mold #282. The tiles shown in purple are the 2 small 1" x 1/2" tiles set together to fill a 1" square. This will finish group 6. |
 |
|---|
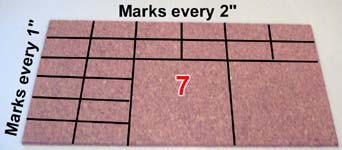
| 15. | Here is group 7. The small pieces measure 1" x 2". |
 |
 |
|---|
| 16. | For the 1" x 2" pieces we're using the 1 x 2 solid tiles (ten of each). Once the glue is dry, cut the corners out of the "cross" floor sections. 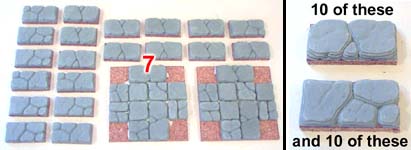 |
 |
|---|
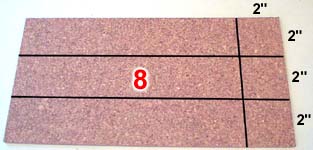
| 17. | Here is group 8. The measuring here is a little more difficult. |
 |
 |
|---|
| 18. | Be careful when cutting out the "T" sections. The small pieces with the "X" are not used. |
 |
 |
|---|
| 19. |
This concludes all of the board sections you will need for the game. The next section will show how to build doors and other accessories. |
 |
|---|
 The tiles shown in red are odd shaped pieces from mold
 | 20. | After all the pieces are glued down and dry, you'll want to paint them. For complete painting instructions, look at our Painting Instructions page. To see how to make the bridges and other special painting instructions, see our Tips & Tricks 20 page. |
 |
|---|
Building The Accessories
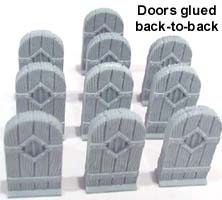
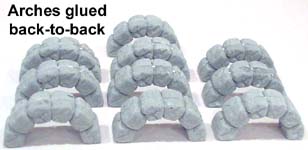
| 1. |
Start by gluing together 10 arches and 10 doors back to back. Sometimes the back or scraped side of the door will be a little concave. If you sand the back of the doors they will glue together a little better. |
 |
|---|
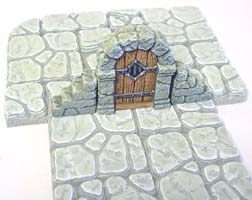
 We will need to make doorways for the game.
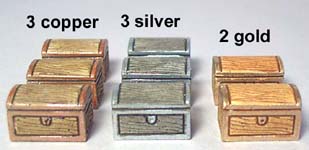
| 2. | You will also need 20 door posts. The pieces will need to be painted before gluing them around the door. For complete painting instructions, look at our Painting Instructions page. To see how to paint the wooden doors, see our Tips & Tricks 20 page. Once painted, one door post will go on each side of the door with the flat scraped side facing the door. The colored diamond on each of the three doors is used for colored rune doors in the Descent game. | |
|---|---|---|
 |
 | |
| 3. |
|
 |
 |
|---|
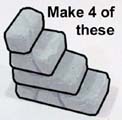
| 4. | We're going to make two stair pieces to show where figures can move from level to level. For my plans shown here I have only made two of them. If you have extra blocks or castings from mold #282, you can make more stair pieces if you like. |
 |
 |
|---|
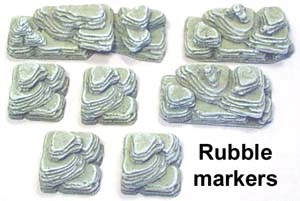
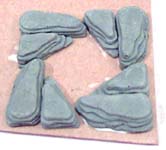
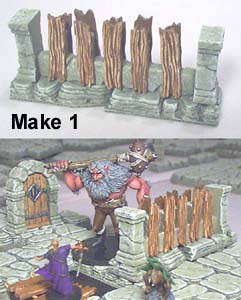
| 5. |
These are used to separate large floor sections that have a doorway between them. |
 |
 |
|---|
 Make 4 of these temporary wall sections.
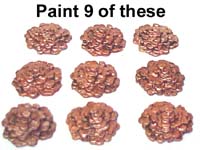
| 6. | Paint the chests and coin piles as shown. To see how to paint the chests and coin piles, see our Tips & Tricks 20 page. |
 |
 |
|---|
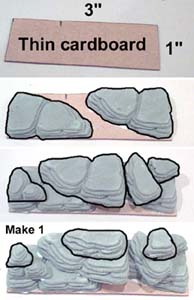
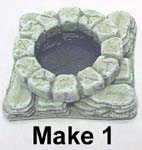
| 7. | The round well is made by placing the 8 irregular tiles from mold #282 in the pattern shown. I am gluing these to thin cardboard or cereal box. Then glue 2 doorway arches on top to form a ring. After painting the stone color on it, paint the hole black. |
 |
 |
|---|
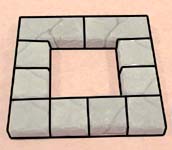
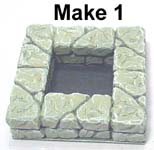
| 8. | The square pit is made by placing the rectangular and square tiles from mold #282 in the pattern shown. I am gluing these to thin cardboard or cereal box. Then glue the second layer on top using all rectangular blocks. After painting the stone color on it, paint the hole black. |
 |
 |
|---|
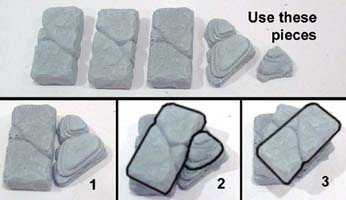
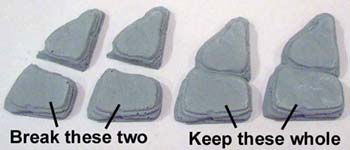
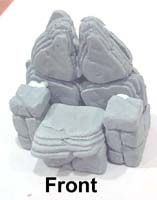
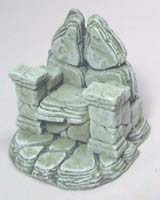
| 9. | Now for the giant's throne. |
 |
 |
 |
|---|
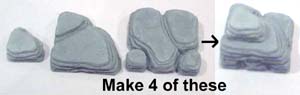
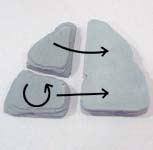
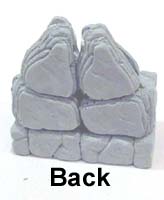
| 10. | Break 2 pieces. Glue the halves onto the back of another piece. Make 2 of these. |
 |
 |
 |
|---|
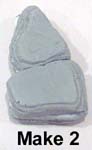
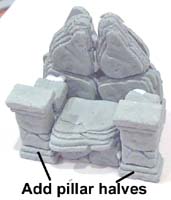
| 11. | Make 2 pieces from above. Glue these two pieces onto the back of the throne. Use lots of glue because these pieces do not have flat edges and will fit very loosely. Add pillar halves onto the front of the throne. |
 |
 |
 |
|---|
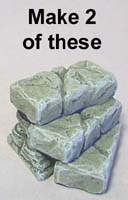
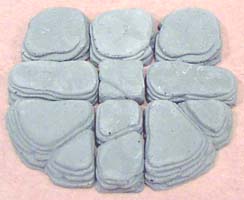
| 12. | Glue these irregular tiles (and one square tile) to a piece of thin cardboard or cereal box. Glue the throne on top of it. For painting instructions, see our Painting Instructions page. Make 1 of these. |
 |
 |
|---|
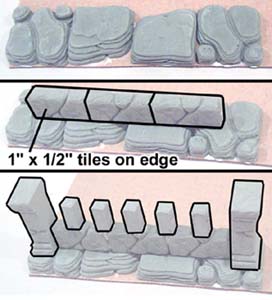
| 13. | To make the barricade, glue the four tiles shown down to a piece of thin cardboard or cereal box. Glue the three 1" long flat tiles down to the center and on edge. Add a pillar on each end and then evenly space out 5 small bricks on top. Add the wooden planks after the piece has been painted. |
 |
 |
|---|
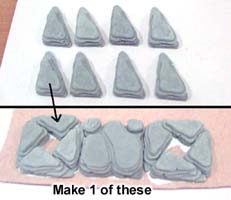
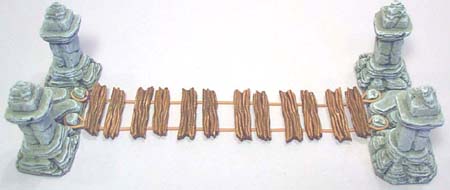
| 14. | The bridge has two ends that we are making here. Arrange the irregular shaped tiles in a circle on each side and glue them down to thin cardboard. Since there are not enough irregular pieces for both ends, we're using different tiles for each end. |
 |
 |
|---|
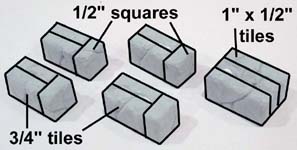
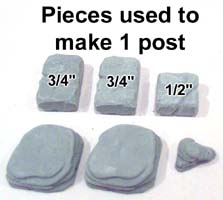
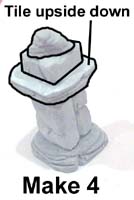
| 15. | We will need 4 posts. Start with the tile shown and glue two 3/4" long tiles back to back on it. Then glue a larger tile upside down on top of it. Cap it off with a square block and the smallest stone. |
 |
 |
 |
|---|
| 16. | Glue the posts on top of the bases. After they are dry, cut the excess cardboard off from around them. For painting instructions, see our Painting Instructions page. To see how to make the bridges and other special painting instructions, see our Tips & Tricks 20 page. This completes the accessories for the Descent game.
|
 |
|---|
The Descent Models
You can find examples of how the Descent models can be painted on our Tips & Tricks 20 page. There I have detailed photos of each model painted along with the name of each artist who painted them. |
 |
Finished Photos
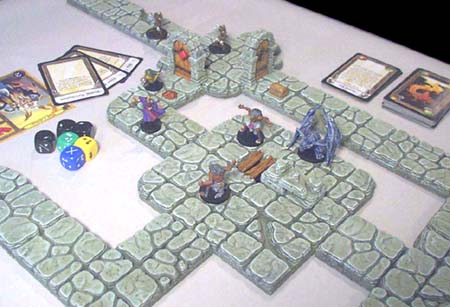
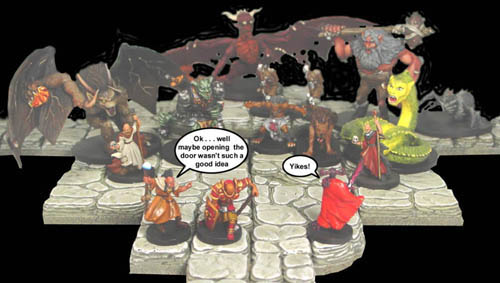
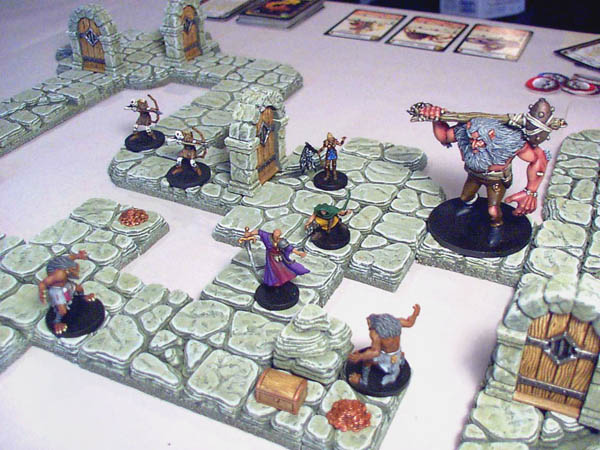
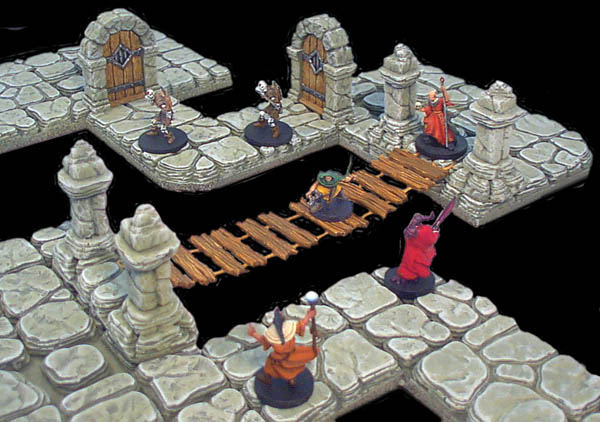
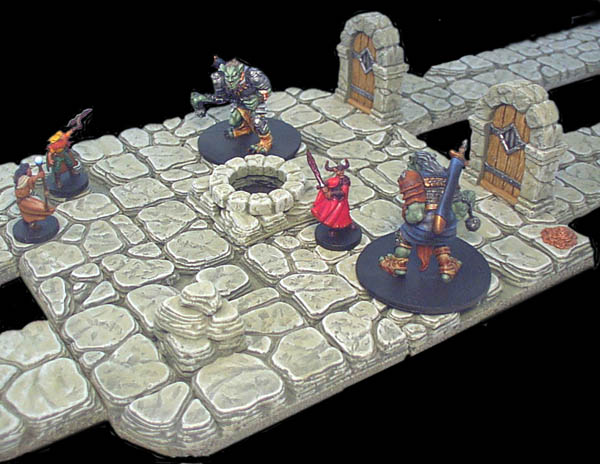
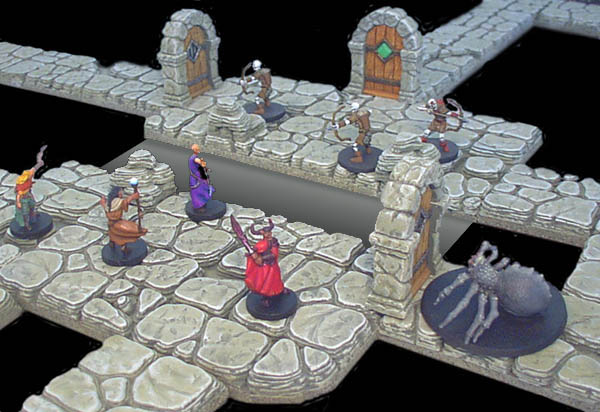
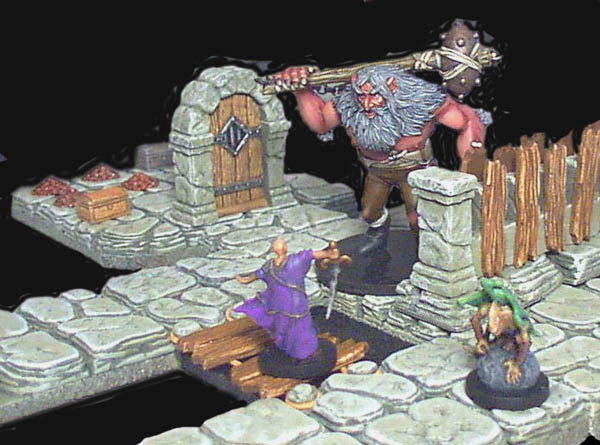
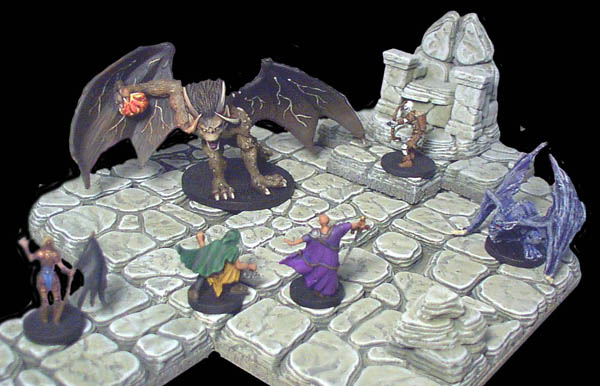
Here are some finished photos of the figures in action. Click on a photo to view a larger version of it.
 |
 |
 |
 |
 |
 |