Detailed Egyptian Tomb Pieces Page 4
These tomb pieces use a variety of molds. Click on the photo to see building instructions for each piece.
 |
 Statue Corner |
 Three Doorways |
 Statue Trap |
 Forbidden Pool Entrance |
 Panel End |
 |
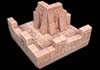
Statue Corner
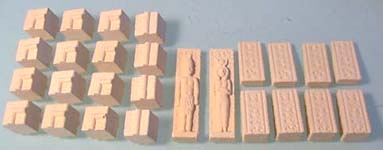
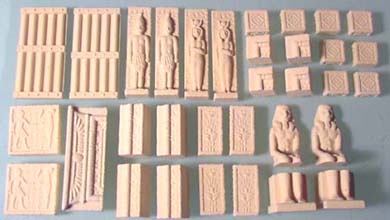
| 1. | Gather these step pieces from mold #97. You need twelve of the decorative corners, four of the decorative straights, two statues and four sloped buttresses. |
 |
|---|
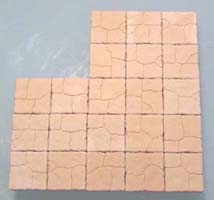
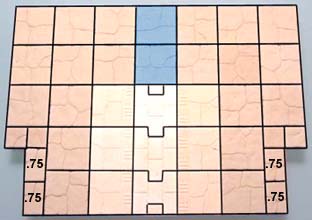
| 2. | Glue together the floor tiles on foam in the corner shape as shown. Add the wall blocks around both sides of the corners. For each decorative shape, you want to use 3 corners and 1 straight decorative piece. |
 |
 |
|---|
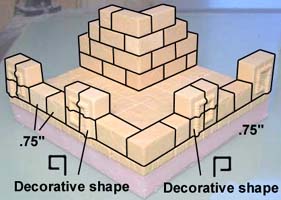
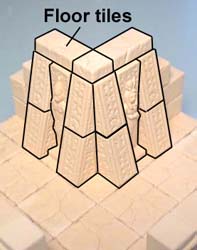
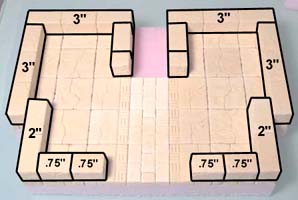
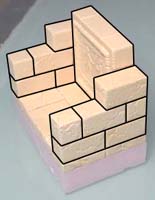
| 3. | Finish the inside of the corner by adding the sloped buttresses with statues in between them. Finally lay down 3 floor tiles to finish the top. |
 |
 |
|---|
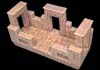
Three Doorways
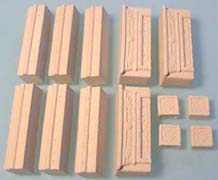
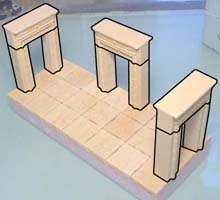
| 1. |
Collect the pieces shown here from mold #97. These pieces include 3 complete doorways and four small decorative blocks. |
 |
|---|
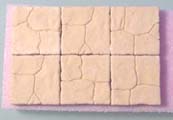
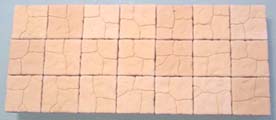 Glue a 3 x 7 grid of floor tiles down to a piece of foam board.
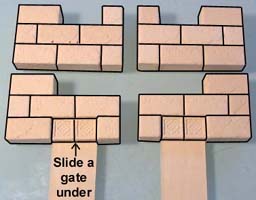
| 2. | Center the doorways onto three sides of the floor. Each doorway should center around a floor tile. Make the four wall sections shown here. Slide an upside down gate piece under the decorative blocks. This will help center them in the wall (so they don't recess too far back). |
 |
 |
|---|
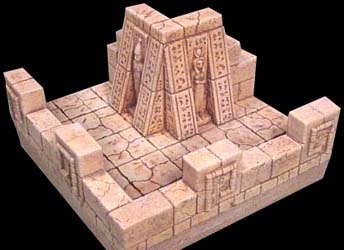
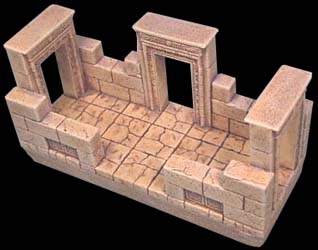
| 3. |
The wall sections with the decorative blocks go on the front. Here is the photo of the finished doorway section. |
 |
|---|
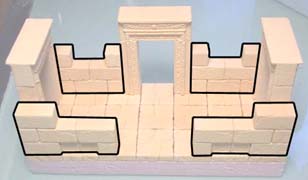 Glue these wall sections on each side of the doorways.
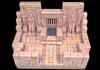
Statue Trap
| 1. |
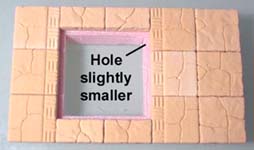
Glue the floor tiles shown here. When dry, cut a hole in the foam board a little smaller than 2" x 2". This will leave an edge that will hold up the gates. |
 |
|---|
 Collect the pieces shown here from mold
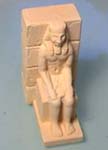
 | 2. | The floor section above uses decorative tiles from mold #292. If you do not have this mold, use regular floor tiles instead. Glue four wall blocks onto the back of the sitting statue. When it's dry, sand the bottom of this so it can move inside the doorway easily. Sand down the insides of the two doorway sides (the scraped side of the blocks). You want to do this so the statue will easily fit into the doorway. |
 |
 |
|---|
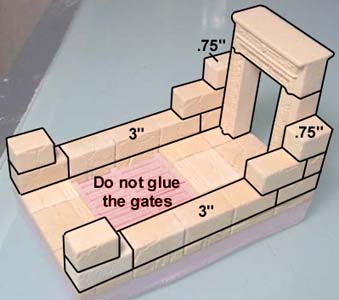
| 3. | Glue the doorway and wall blocks onto the floor. Do not glue the gates into the floor. These can be opened later to reveal the pit. The statue should slide easily inside the door frame. |
 |
 |
|---|
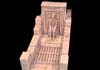
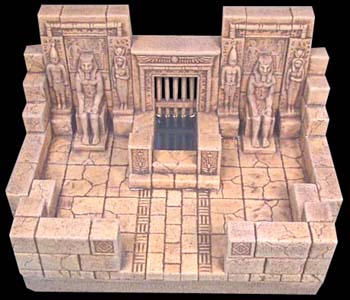
Forbidden Pool Entrance
| 1. | Gather these pieces from mold #97. Glue the floor tiles down onto a piece of foam board. The light tiles in the center are from mold #291. If you do not have this mold then use regular floor tiles instead. Do not glue the blue tiles down. This is where the water will go. | |
|---|---|---|
 |
 | |
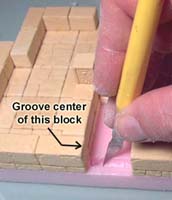
| 2. | Glue the wall blocks shown on the outside edge of the floor tiles. There will be a gate blocking entrance to the waterway. To give the appearance that the gate is submerged, you will need to cut a groove into the foam 1/4" deep. The gate will set into this groove. |
 |
 |
|---|
| 3. |
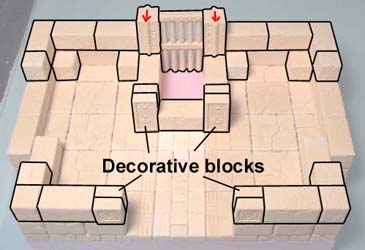
The decorative blocks are glued back to back. The top of the gate should be flush with the doorway blocks (where the red arrows are). The red arrows mean that you should slide the doorway sides forward a little. If the back side of this room is not flat, it will be difficult to put water in it. |
 |
|---|
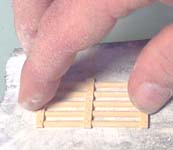 Sand down two gate sections until you can see through the bars. Glue the two gates back to back.
| 4. |
These are placed in the back wall. Notice that a couple of the 1" long blocks are turned on end on each side of them. The blocks labeled 1" reach behind a square block in front of them. Glue a row of small bricks (from the floor tile mold) on the front of the waterway entrance. |
 |
|---|
 Glue a floor tile to the back of the 1" square decorative blocks.
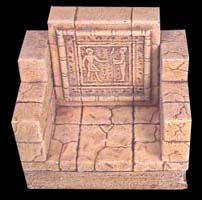
| 5. | 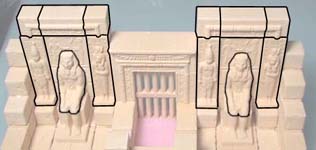 Finish the piece by adding the statue tops, small statues and decorative blocks on top of the walls. To make the water for the pool in the back, visit the Tips & Tricks 17 page. Step 9 on that page shows how to seal the back so the water won't run out. |
 |
|---|
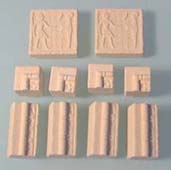
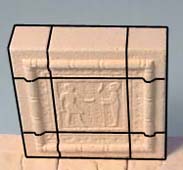
Panel End
| 1. |
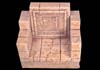
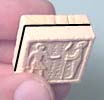
Gather these pieces from mold #97. Glue the 1" square decorative blocks back to back and glue the decorative edge blocks around it. |
 |
 |
|---|
 Glue a 2 x 3 grid of floor tiles onto foam board.
| 2. | Glue this large slab onto the long side of the floor tiles. Glue the remaining wall blocks on each side of the section. The two sides are mirror images of each other. |
 |
 |
|---|