Detailed Egyptian Tomb Pieces Page 5
These tomb pieces use a variety of molds. Click on the photo to see building instructions for each piece.
 |
 Water Gate |
 Water Corner |
 Water Crossing |
 Waterway Spring |
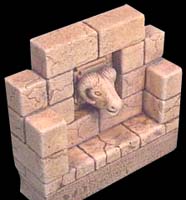
 Ram's Head End |
 |
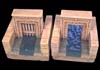
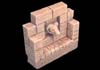
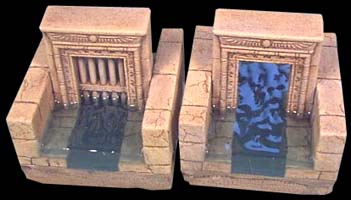
Water Gate
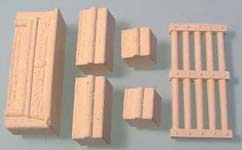
| 1. | Gather these step pieces from mold #97.Do not glue the tiles in blue. Sand the gates so the bars show through and glue them back to back. |
 |
 |
 |
|---|
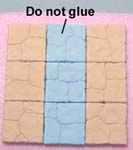
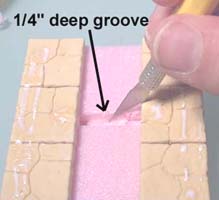
| 2. | Cut a 1/4" deep groove across the middle of the foam using a hobby knife. Press the gate down into it and make sure it sinks about 1/4". Ignore the glue shown on floor tiles. I had put glue on accidentally before taking these photos. |
 |
 |
|---|
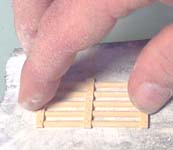
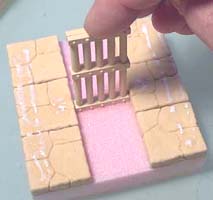
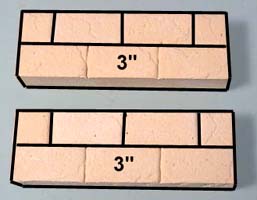
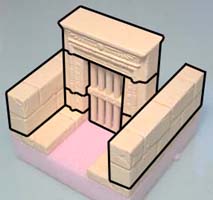
| 3. | Glue together 2 wall sections that will go on either side of the gate. Place them on each side of the canal and build the gate in the center as shown. |
 |
 |
|---|
| 4. | Build another section like this without the gate. Then you can swap the sections depending on whether the gate is open or closed. To make the water for this section and to plan new waterway sections, visit the Tips & Tricks 17 page. |
 |
|---|
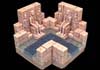
Water Corner
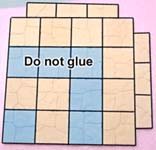
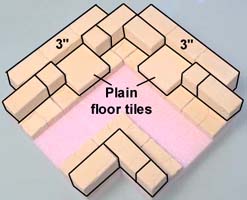
| 1. |
Glue these floor tiles down to a piece of foam board but do not glue the tiles shown in blue. There are a few 1/2" wide floor tiles on two sides. |
 |
|---|
 Gather the statues shown here from mold
 | 2. | Glue the wall blocks on the edges of the floor tiles. I'm using smooth tiles from mold #292 here, but you can just use regular floor tiles if you do not have this mold. |
 |
 |
|---|
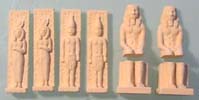
| 3. | Stack the rest of the walls. Add statues to both sides after the walls are finished. To make the water for this section, visit the Tips & Tricks 17 page. |
 |
 |
|---|
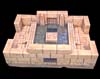
Water Crossing
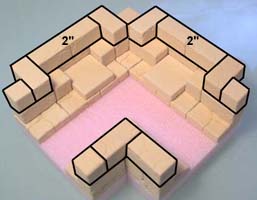
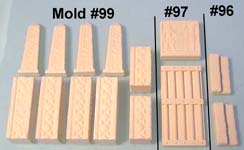
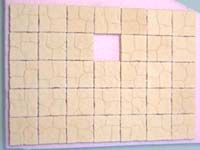
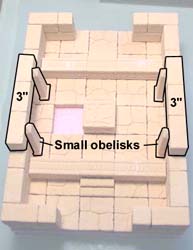
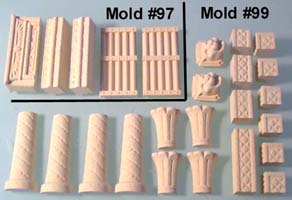
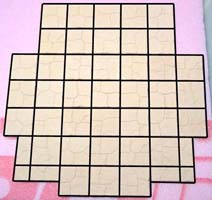
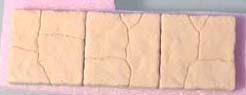
| 1. | Collect these various pieces from molds #99, #97 and #96. Glue a 5 x 7 grid of floor tiles down, except for the missing tile shown in the photo. |
 |
 |
|---|
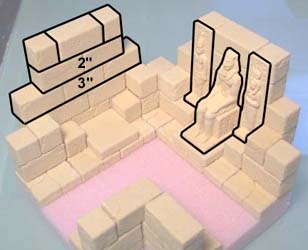
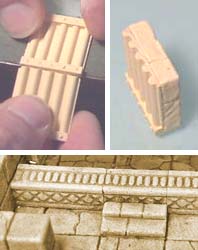
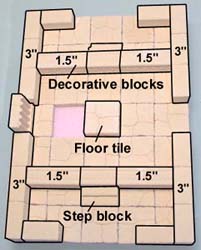
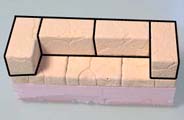
| 2. | Break one of the gates in half by placing it against a sharp edge. Glue the bottom half to the back of a floor tile (the upper half is used for another room later on). The next photo shows which way the decorative blocks are turned (so the scraped flat side is face down). It also shows how the step piece is positioned. There is a strip of decorative blocks across the top and bottom of the pool. |
 |
 |
|---|
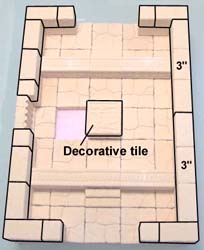
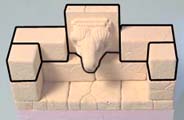
| 3. | Place the decorative square tile over the floor tile in the center of the pool. This can be used as a stepping stone to get people across. Glue the obelisks in place on each side of the pool. |
 |
 |
|---|
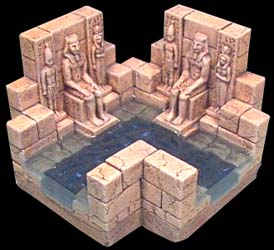
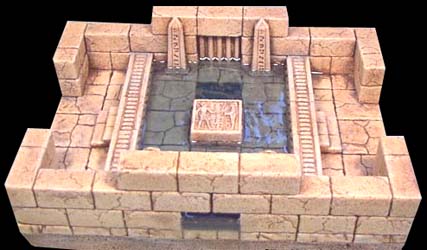
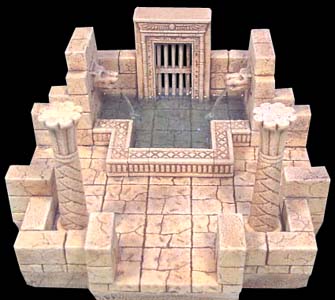
| 4. | Here's the finished photo. The missing tile under the pool gives the impression that there's an underwater passageway below. Regular hallway pieces can be joined to the left and right, and waterway pieces can be set against the top and bottom. To make the water for the pool in the back, visit the Tips & Tricks 17 page. Step 9 on that page shows how to seal the back so the water won't run out. |
 |
|---|
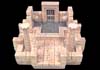
Waterway Spring
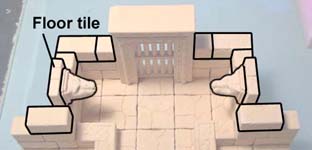
| 1. | Gather these pieces from molds #97 and #99. Glue the floor tiles down onto a piece of foam board. There are a few smaller floor tiles on the bottom of the photo. |
 |
 |
|---|
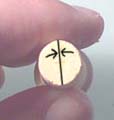
| 2. | When you glue the halves of the pillars together, take a close look at the top. You will see arrow markings on it. Make sure the arrows meet when you match the halves and the texture on the sides of the pillars will be correct. |
 |
 |
|---|
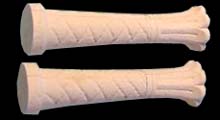
| 3. | Slide the door frame forward slightly so the back of the piece is flush. This will make it easier to seal off the back when you add water. Sand the gate sections until the bars show through, then glue them back to back. 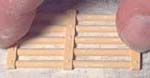 |
 |
 |
|---|
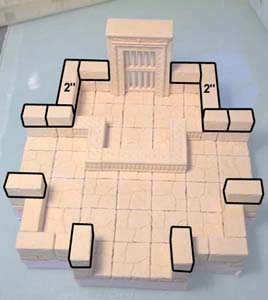
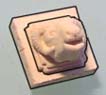
| 4. | Glue the lion's head statues to the back of a floor tile. Position these so that the floor tiles are centered within the walls you're putting them in to. |
 |
|---|
| 5. |
Wait until the piece is painted before you glue in the palm shaped pillars. To make the water for the pool, visit the Tips & Tricks 17 page. To see how to make water pouring from the fountains, take a look at this part of the Tips & Tricks 17 page. |
 |
|---|
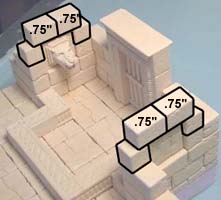 Finish the piece by gluing square blocks and .75" blocks on the top.
Ram's Head End
| 1. | You'll need the ram's head from mold #99 for this piece. Glue the ram's head onto the back of a floor tile. Glue a 1 x 3 grid of floor tiles onto foam board. |
 |
 |
|---|
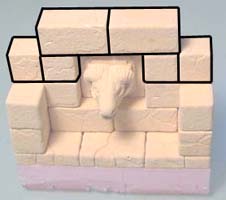
| 2. | Glue the wall blocks down onto the floor tiles. Glue the ram's head/floor tile into the wall so that the back of the floor tile is flush with the back of the piece. |
 |
 |
|---|
| 3. | Glue the remaining wall blocks to finish the end. You can also make an end using the lion's head instead. These statue head ends can be locations that characters need to search for in the tombs. By reaching into the statue's mouth, they can retrieve keys or clues to other areas. |
 |
 |
|---|