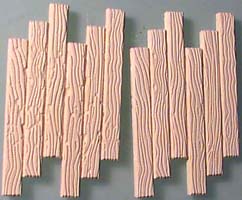
How to Use the Wooden Plank Mold |
|
Even though I'm giving instructions for only two projects, there are tons of uses for this mold. Some of these include:
|
|
|
|
Special Casting Instructions
I strongly suggest using harder material than regular plaster, such as hydrocal, hydrostone or dental plaster when casting blocks in this mold! For these examples, I'm using Die-Keen dental plaster (the ivory colored kind).
I've listed a place you can buy Die-Keen from, as well as complete casting instructions on the Casting Using Dental Plaster page. Regular plaster of Paris is too weak and your pieces will break when you try to remove them from the mold.
You will get the best results from using the wet water method found on the "Advanced Casting Instructions" page. For some reason, the texture of the wood planks just doesn't want to release the air bubbles on the surface otherwise.
| 1. | If you have any problems using the wet water method, you can also use the brushed method shown here.
Since this brush is too big, use a pair of scissors to trim it down a bunch. |
|---|
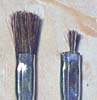 You will need a small, stiff-bristled brush to paint inside the mold. I suggest using an acid brush, you can find them at your local hardware store for 39 cents each. They're used to spread solder paste or flux onto solder joints.
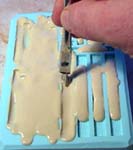
| 2. | Fill each pocket of the mold half way. Dip your brush into some water and then use it to paint around the inside of each piece. Paint in the direction that the planks are going, and go up and down each plank twice. Fill the mold the rest of the way with dental plaster. Be sure to wash out the brush immediately after you're finished. |
 |
 |
|---|
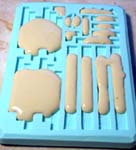
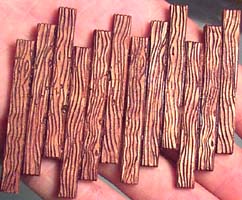
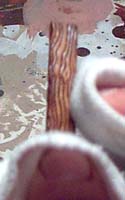
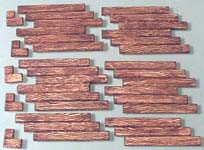
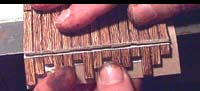
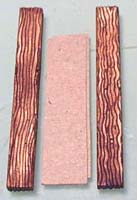
| 3. | Here's the difference between using a brush and not. Can you tell which one was cast without the brush? Surprisingly, once you paint the pieces the defects don't show up as much. If you do have pieces with defects, they work well for distressed or worm-eaten wood. |
 |
 |
|---|
Painting Instructions
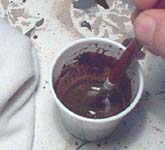
| 1. | I suggest that you paint the pieces before you assemble them into a project. Painting them after the fact is more difficult, because it's harder to use the paint as a stain and wipe away the excess. Mix up some brown paint with a touch of black in it (I use acrylic art paint from a tube). Add water to make it as thin as milk. Mix it up well! |
 |
|---|
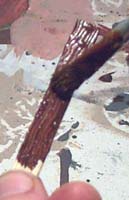
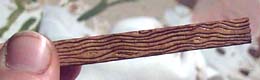
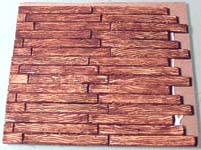
| 2. | Test out your paint on an extra plank first! Paint the plank using a soft bristled brush making sure you get in all the cracks. You'll need a soft cloth to wipe away the paint. I'm using a cotton rag from an old t-shirt I cut up. Gently wipe off the excess paint. The bottom photo shows the finished plank. Be sure to save the paint mixture for touch-up later on. If the plank is too dark, add more water to the paint. If the color is too light, add more paint. Building projects with pre-painted pieces is much easier. If you have to break or sand pieces, touch them up with the paint mixture afterwards. |
 |
 |
|---|---|---|---|
 | |||
Building a Milk Carton Cottage
You will need to cast the wooden plank mold 5 times to make this cottage.
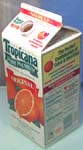
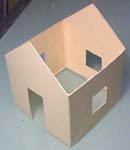
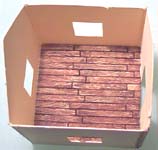
| 1. | Yeah, I know - it's not a milk carton, but you get the idea. They sell tons of products in these paper cartons. You can find them anywhere and they all measure the same size. That's why they're perfect for a project like this. First we need to remove the bottom of the carton. Hold the carton down with one hand, lay a pencil on the table and draw around the bottom. |
 |
 |
|---|
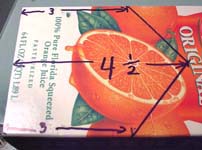
| 2. | Use a hobby knife and ruler to cut off the bottom of the carton. Now measure up from the bottom 3" on each side. Measure up in the middle 4 1/2" (be sure it's precisely the middle). Draw lines to form the roof peak. Draw a peak on the opposite side of the carton as well. |
 |
 |
|---|
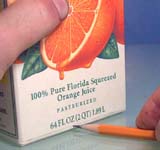
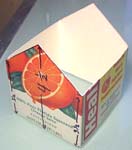
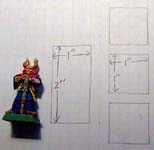
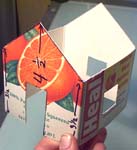
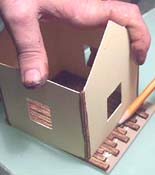
| 3. | Cut out the carton using a hobby knife and a ruler. For the doors and windows, get a piece of graph paper and draw a 1" wide x 2" tall rectangle for the door. Also draw a 1" x 1" square for a window. I've placed a Games Workshop miniature beside them so you can see the relative size of the door and window. |
 |
 |
|---|
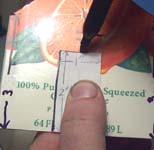
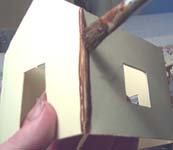
| 4. | Use a pair of scissors to cut out the rectangle and square. Place the door rectangle on the carton and draw around it. Do the same for the windows (one window on each side). Use a hobby knife to cut the openings on the carton. It helps if the openings are slightly larger, so don't worry about making them perfect. |
 |
 |
|---|
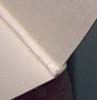
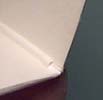
| 5. | If you look on the inside of the carton, you'll see a bump on the inside corners. This will get in the way of the floor that fits on the inside. Take a hobby knife and cut the bump away a little over 1/4" up from the bottom. |
 |
 |
|---|
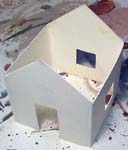
| 6. | Most cartons have a waxy coated outside. You can paint on it, but the paint will scrape off. I suggest you spray paint the outside white. Spray paint sticks much better. When dry, paint the whole thing a cream or almond color. If you intend to make a whole village, you might buy a can of almond colored spray paint. |
 |
 |
|---|
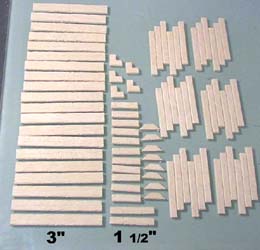
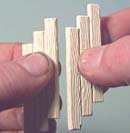
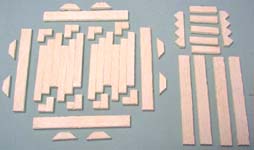
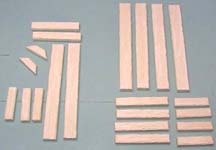
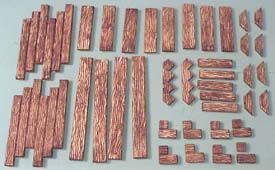
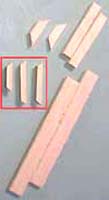
| 7. | This photo shows all of the pieces you will need to make the cottage. You will need to cast the plank mold 5 times. For the cottage floor, we'll need to snap a group of planks in half (first small photo). To make the door, take another group of planks and snap all of the boards apart. We'll only be using four of the six planks for the door. Paint all of the pieces at this point! Painting instructions are shown above this article. |
 |
|
|---|
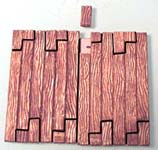
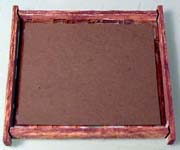
| 8. | Lay out these pieces for the floor. Cut a piece of cereal box to glue the floor planks down to. When the floor is dry, trim the excess cereal box away from the 3 flat sides. We'll take care of the overhanging boards next. |
 |
 |
|---|
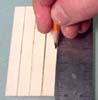
| 9. | Place the house down over the floor on 3 sides. To trim the last side, draw a pencil line across. Remove the house, place a ruler over the planks (slightly below the pencil line) and scratch a deep groove with a hobby knife. Go across at least 8 times to make the groove deep. I find it helps to use the back of the knife instead of the sharp edge. |
 |
|
|---|
| 10. | Lay the floor across a sharp table edge and break the excess off. Remove the broken planks and trim down the excess cereal box. Now glue the floor into the house. Let it dry completely before starting on the sides. Using brown paint, paint the corners of the house. This will help hide the gaps between the corner beams. |
 |
 |
|---|
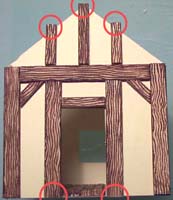
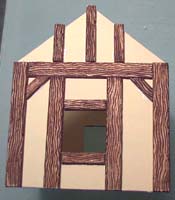
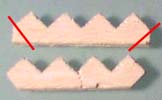
| 11. | Glue the planks shown onto the outside of the house. The ones circled in red at the bottom will need to be scored and broken to size. The ones circled at the top will need to be sanded at an angle so the roof will fit. The first photo shows the front with the doorway. The second photo is the back of the house with the window. |
 |
 |
|---|
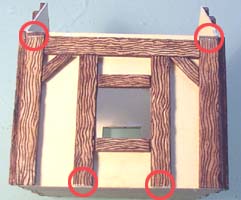
| 12. | Here's the side of the house. Notice that the top horizontal beam is placed slightly lower. This is so the angled roof won't hit it. The beams circled in red at the bottom need to be scored and broken. The beams circled at the top need to be sanded at an angle so the roof will fit correctly. |
 |
|---|
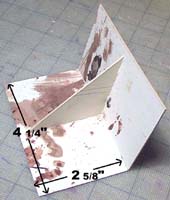
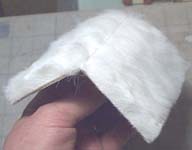
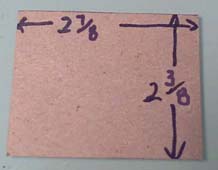
| 13. | I cut pieces of matt board to make the roof. The sizes are shown on the photo. I'm going to try something new to resemble a thatched roof. I found some fake fur in the craft department. I was hoping to find a gold color, but they only had white so I'll have to paint it. |
 |
 |
|---|
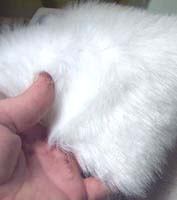
| 14. | Cut two squares of fur a little larger than each side and glue them on making sure the fur lays down the right way. Fur tends to lay down one direction so be sure it flows away from the roof peak. Use a pair of scissors to trim off the excess. |
 |
 |
|---|
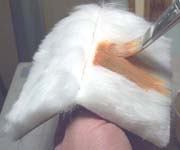
| 15. | To paint the roof, I mixed up some yellow paint very thin and added a touch of brown. Be sure to test your color on a scrap first. The paint has to be really thin and you have to drench it on - it's amazing how much paint the fur will soak up. Afterward, use a paper towel to soak up the excess. |
 |
 |
|---|
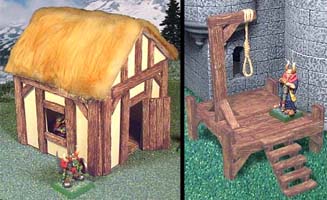
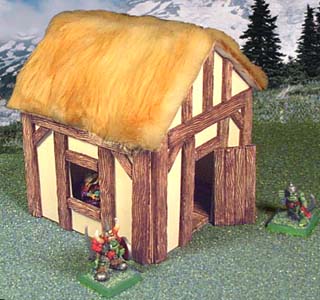
| 16. | Here's the finished cottage. The door is made out of the 4 broken strips from the floor glued together. The wood beams can also be used for joists to support an upper floor (or at least look like they're supporting it) for multi-level buildings. I also thought about doing one half of this building and placing it against a castle wall, or place half of this building up midway on a castle wall with wood bracing under it. You can make a simple building out of any small cardboard box and just glue the wood strips on the side. |
 |
|---|
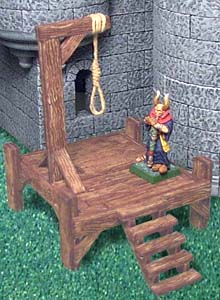
Building a Gallows / Guillotine
You will need to cast the wooden plank mold 5 times to make this model.
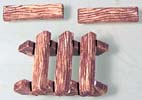
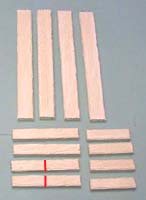
| 1. | The first photo shows the pieces needed to make the platform on which the gallows/guillotine will stand. The second photo shows the pieces for the hangman's arm and the guillotine. |
 |
 |
|---|
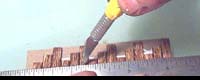
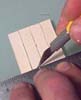
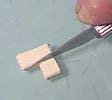
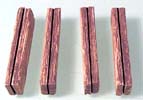
| 2. | We need to cut four of the 3" planks in half to form the legs for the gallows stand. Measure up 1 1/2" on each side. Lay a ruler over the planks and scrape across the backside with a hobby knife about 6 times. Then simply snap the planks in half. |
 |
 |
|---|
| 3. | You'll need to sand the corners of both stair stringers. I made them this way so you could glue them together end-to-end for longer stairways if needed. Also, take one of the small pieces and cut them apart. |
 |
 |
|---|
| 4. | Go ahead and paint the pieces (painting instructions at the top of this page). Cut a piece of cereal box to glue the floor onto. |
 |
 |
|---|
| 5. | Glue the sections down onto the cereal box as shown. I've enhanced the photo with black lines so you can see the divisions. Don't glue the small plank that I've set aside. Flip the piece upside down and glue 3" planks around the outside edges. These planks should touch the table surface. |
 |
 |
|---|
| 6. | Take the large plank pieces that you cut in half earlier and glue them back-to-back. These will form the legs of the stand. Place the two stair stringers on their back and glue three 1" planks on for steps. The other two planks will be glued on later. |
 |
 |
|---|
| 7. | To suspend the platform up in the air while you glue on the legs, place 2 building blocks under each end to raise the platform up 1" from the table surface. With the platform raised, glue on the legs and the stairs as shown. To finish the stand, add 2 angle braces on each side of the platform (shown in red). |
 |
|---|
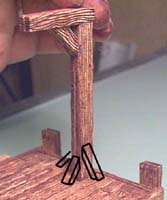
| 8. | Now for the hangman's arm. Glue all of the planks back-to-back except for the three 1" pieces. Sand the ends of these to make angle braces that support the arm (shown in the red box). These pieces are shown on their side. Place the arm in the slot on the stand, but don't glue it down. Also glue the support beams as shown outlined in black, but don't glue them to the stand either. This will let you remove the hangman's arm so you can place the guillotine on the platform instead. |
 |
 |
|---|
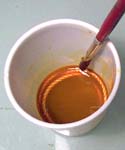
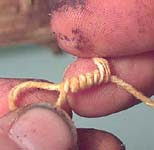
| 9. | For the rope, take a piece of string and dye it in a thin mixture of yellow paint (with a touch of brown). When dry, place the string next to a miniature so you can make the noose the right size. Glue and wrap the string as shown. I had to super glue the ends to hold them in place. |
 |
 |
 |
|---|
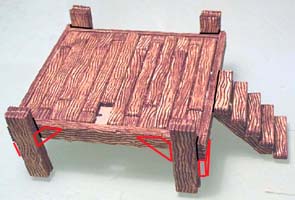
| 10. | Here's the finished gallows. The hangman's arm can be removed (and the hole filled with the spare plank) so you can set a guillotine in its place. Instructions for building the guillotine are shown below. It's really very easy to make. |
 |
 |
|---|
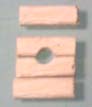
| 11. | Here are the pieces for the guillotine. The two pieces shown with the red line (1 1/2" long) need to be cut in half. Take two of these half pieces and carve a hole where the person's head goes through (upper right photo). Now sand the ends of the four 1" pieces to form angle braces to support the guillotine (these pieces are shown on their side). |
 |
|
|---|
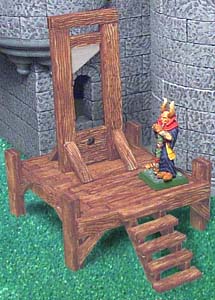
| 12. | Glue the long beams and the top beam back-to-back and lay them down. Since we want the blade and neck holder in the center, place a couple of strips of cereal box under them to raise them up slightly. The guillotine blade is made from a piece of cereal box painted silver. The last step is to glue the angle bracing at the bottom to help it stand up (see the finished photo a few frames up). The guillotine is finished! |
 |
 |
|---|