Star Fortress Building Instructions
 Block Scale and Uses |
 Basic Walls |
 Painting Instructions |
 Finished Photos |
 |
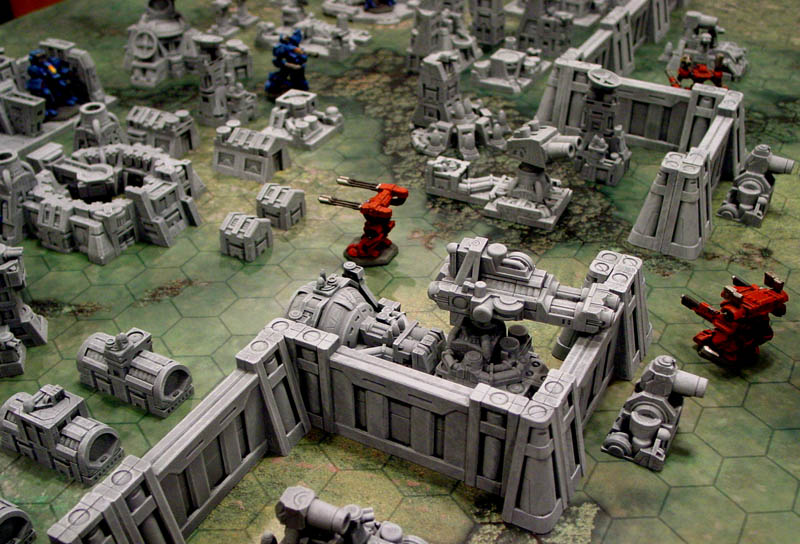
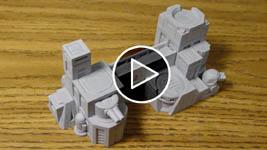
These instructions show how to use molds #275, #312, #313, #314, #315 and #415 to create fortresses and walls that can be used for 1:285 scale tabletop terrain, as well as terrain for 28mm figures.
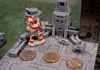
All of the complex buildings and equipment were made using molds #312, 313, 314 and 275. The large surrounding walls you see were made using molds #315 and 415. The mech miniatures you see here are from Reaper Miniatures from their CAV line. The mechs were painted by Matt Leahy. These blocks are originally intended for 1:285 scale or 6mm scale but can also be used for machinery for 28mm figures. Click on the photo for a larger view. |
 |
Block Scale and Uses
| 1. | Introduction Video This video shows how the molds are used to make the blocks for the fortress pieces. It also shows the size of the blocks and how they can be used for different scales of models. |
 |
|---|
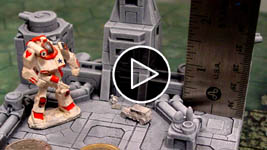
| 2. | This photo shows the scale of some of the blocks compared to a Battletech mech. The scale of the blocks was originally intended for 1:285 or 6mm scale. This scale is used for games such as Battletech, Epic 40K, CAV, Mechwarrior, Ogre and futuristic battle games of this size. The average block height is 3/4" tall (some blocks are 1/2" tall) so usually two blocks stacked up will block line of sight for most mechs. Click on the photo for a larger view. |
 |
|---|
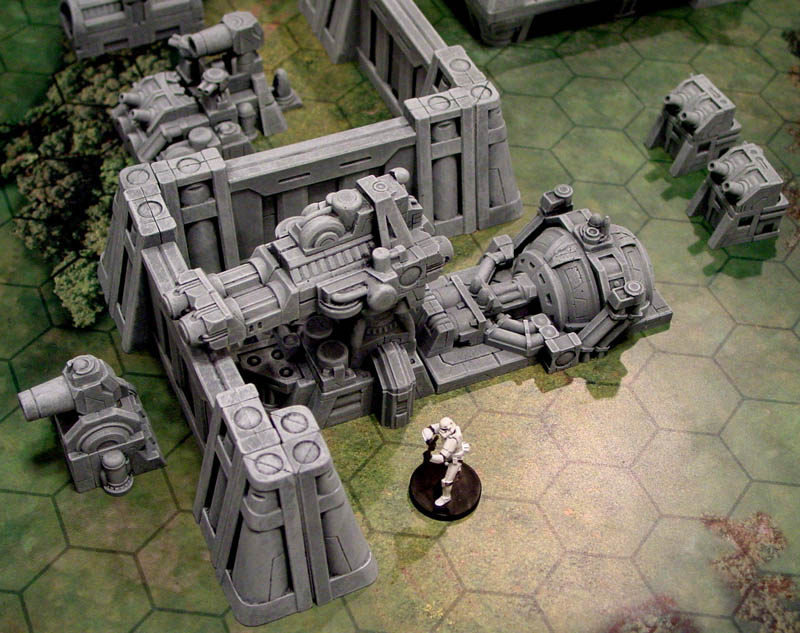
| 3. | However, these blocks can also be used for the more standard 28mm scale. Shown here is a Star Wars Storm Trooper. He measures around 1.5" tall, so two blocks stacked up can completely block line of sight. I've place the 28mm figure in the photo so you can see how the blocks could still work for other games. However, walls made from the blocks would end up looking very busy. I think the blocks work well for this scale if used for making guns and machinery. Click on the photo for a larger view. |
 |
|---|
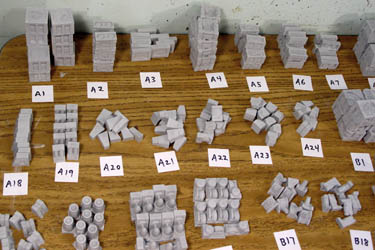
| 4. |
Click on the icon on the right to bring up a PDF file of the parts list. These are all of the parts from molds #312 (mold A), 313 (mold B) and 314 (mold C). The reference numbers of these parts are referred to in the instructions and also the videos. |
|---|

| 5. | How to Use the Star Fortress Blocks This video shows how to organize and use the pieces from molds #312, 313 and 314. You should print out the parts list in step 4 above to help you get familiar with the blocks and their uses. |
 |
|---|
| 6. | After you print out the parts list above, you will notice that there are 82 different blocks when you combine these three molds. If you want to follow the building instructions I have for these models, the best way to find the blocks that you need is to sort the blocks into small piles and arrange them by number. Here, I've written the number of each part on a scrap of paper to help me find the blocks I need quickly. This is time consuming at first but you will save more time in the long run if you do it this way. |
 |
|---|
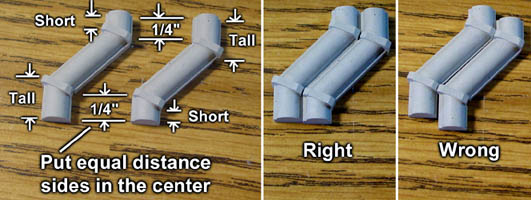
| 7. | The conduit blocks C22 and C24 have a trick to make them line up. Take two identical pieces and make sure the sides with 1/4" lengths are facing each other before setting them side by side. |
 |
|---|
Basic Walls
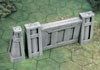
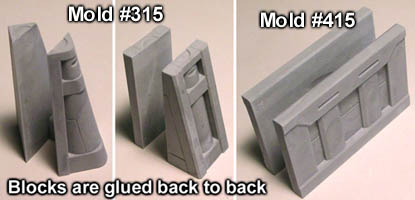
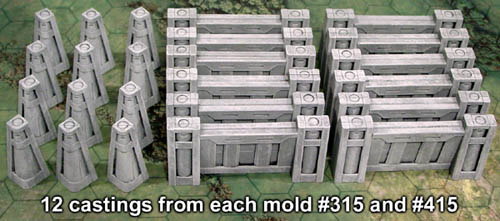
| 1. | These walls are made using molds #315 and #415. The corner posts, straight posts and wall slabs are all glued back to back. It might be a good idea to lightly sand the scraped sides of the blocks so they will glue together cleanly. |
 |
|---|
| 2. | The set shown here is made from 12 castings of each mold. I assembled the walls this way because it keeps the number of castings between both molds even. It also makes every wall section self-standing so they don't fall over but feel free to glue them together however you like. |
 |
|---|
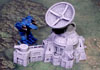
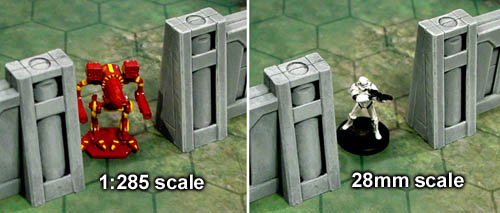
| 3. | This shows the comparison of scales. The left shows a model of a Battletech Mad Cat at a scale of 1:285. The right photo shows a Star Wars storm trooper in the 28mm scale. Both figures are about 1.5" tall and the wall completely blocks line of sight for either figure. |
 |
|---|
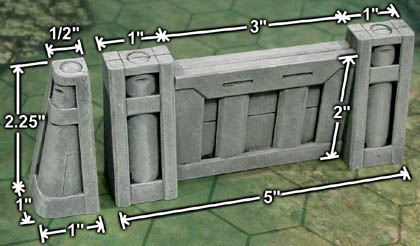
| 4. | Below, the exact dimensions of the wall section is shown. Click on the second photo for a larger view. This layout was made using 12 castings from molds #315 and #415. You will also notice that I had to spin the two opening walls around so that the corner posts would fit properly. | |
|---|---|---|
 |
 | |
Painting Instructions
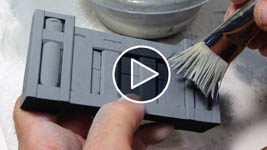
| 1. | Click on the video to watch it on YouTube. This video shows how the star fortress pieces and wall pieces were painted using the medium gray and light gray from the Castle Gray Painting Instructions page. The wall pieces are also painting using this method. |
 |
|---|
| 2. |
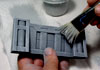
You can paint everything flat black using a brush and craft paint but I found that spray painting was faster and applied a smoother coating of paint to the surface. The tricky part is to get the spray paint down into all of the deep cracks. To do this, it will take a few tries at various angles. This is my method for spray painting all of the pieces:
|
|---|
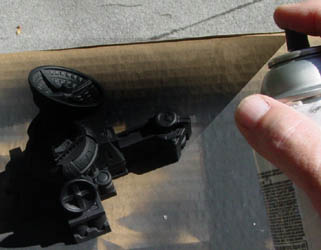 I've started by spray painting everything solid flat black. You will need about three cans of spray paint to do all of the pieces and wall sections.
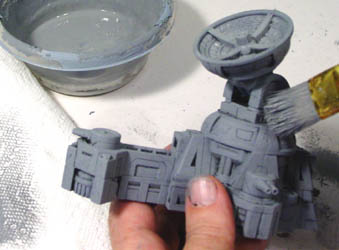
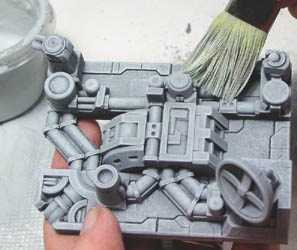
| 3. | The next step is to paint everything a medium gray. The color I'm using is from the Castle Gray Painting Instructions page. This step is not really dry brushing, but it's also not just slopping the paint on either. What I did is to paint the piece solid gray but wipe over half of the paint out of the brush and brush across the surface with a medium pressure. What you want is to paint the surface solid gray but to not fill in the deep black cracks or fine black lines on the piece. |
 |
|---|
| 4. | The last step is to lightly dry brush everything a light gray. The color I'm using is from the Castle Gray Painting Instructions page. This step is done very carefully by having very little paint on the brush and very gently brushing over the piece with several strokes to lightly bring out the details. Most likely you will have to wash your brush out and dry it completely after every two or three pieces you paint. Be sure to watch the video above for a better idea on how to do this. The wall pieces are also painted using this same method. |
 |
|---|
Finished Photos
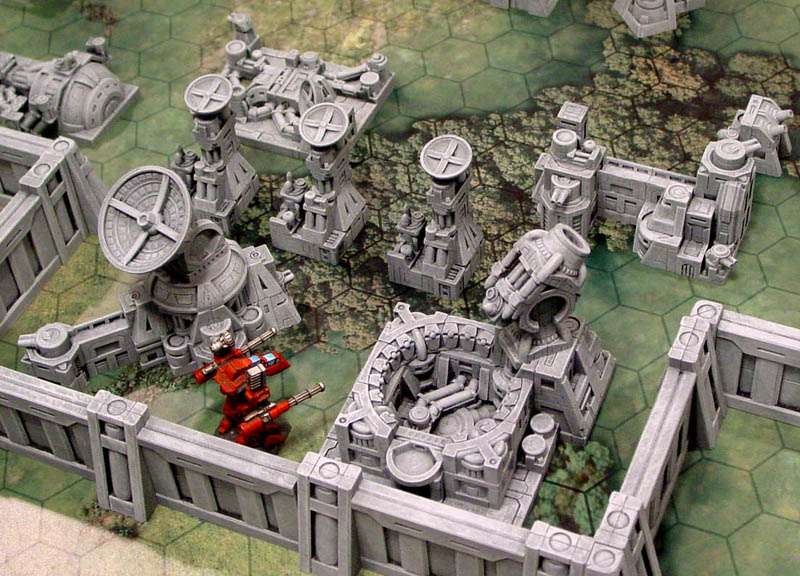
Click on the photos to see a larger view. The miniatures shown here are from the Reaper Miniatures CAV line. These were painted by Matt Leahy. The large rocks you see on the edges of some photo are from mold #180.


|

|