Ship Corridor Building Instructions
 |
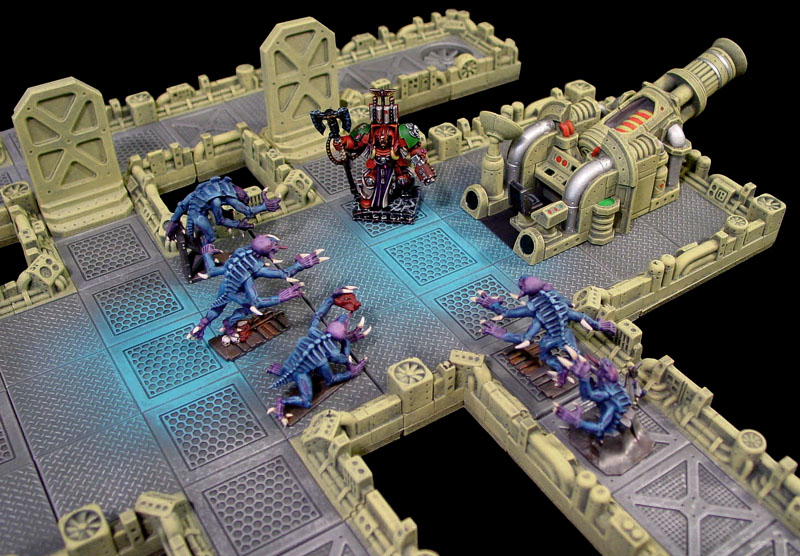 |
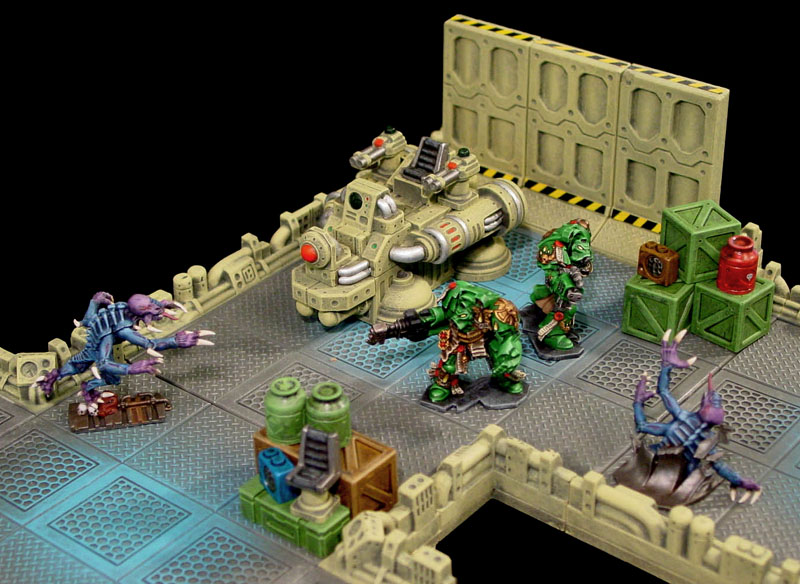
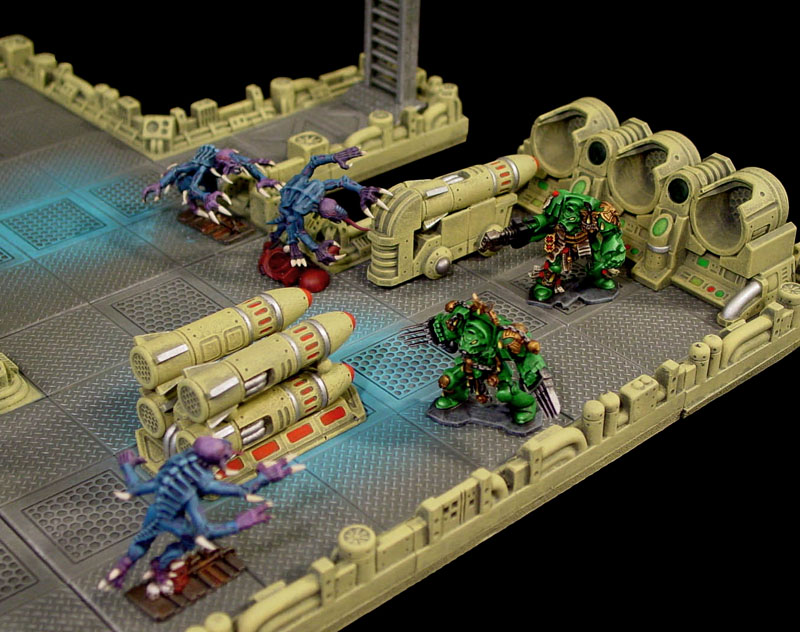
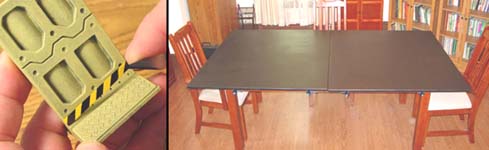
The photos you see here are the game board and accessories for my Space Hulk game by Games Workshop. I have used this set many times over the years and still enjoy playing it. Below you will find the instructions to build the sections for the game board only. You can find instructions for making the additional machinery on our machinery building instructions page. You can find painting instructions for these corridors on our painting instructions page. You can see additional tips on our tips & trick 28 page. |
|
Space Hulk Game Night This video shows how our gaming group uses this 3D game board for Space Hulk along with our house rules. Here you can see the full setup and get a good idea of just how large this can be when finished. |
 |
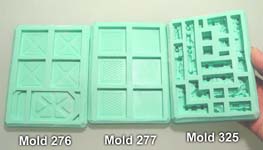
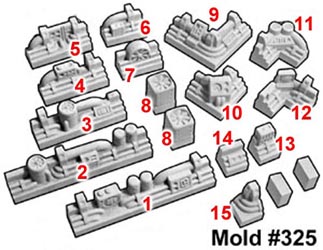
Making the Board SectionsThis page will show how to use Molds #276, #277, #279 and #325 to build space ship corridors. Keep in mind this is a very large project. This game board is not difficult to build but it is very time consuming because of the sheer size. Expect to devote about a month of your spare evening time to this project. | 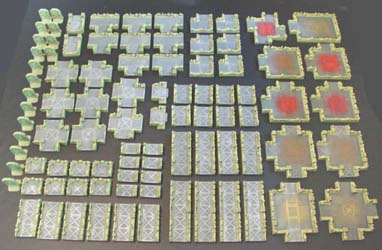
|
What You Will Need
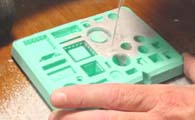
| 1. | Rubber MoldsIf you are new to Hirst Arts and have never cast pieces using our molds, then be sure you look at our Quick Guide for the Beginner page. This will give you an overview of what casting is all about. You will need molds #276, #277, 279 and #325. You can find these on our Molds Available page. |
 |
|---|
| 2. | Casting Material
I would not suggest using plaster of Paris because it's a softer material and the pieces would be difficult to get out of the mold without breaking. If you want to only build the basic set, then I would suggest buying a 25 pound box of dental stone. If you also wanted to make the advanced version (which would give you about double the amount of pieces), then I would suggest buying a 50 pound box instead. |
|---|
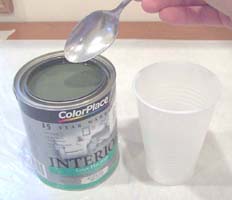
 For this project, I suggest using Gray Merlin's Magic dental plaster. You can find out more about this product and where to buy it on our
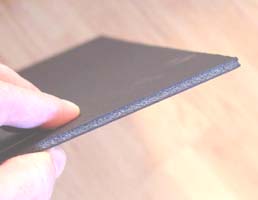
 | 3. | Basing MaterialI am going to base the game board pieces onto black foam core board. You can buy foam core board at most office supply stores for around $18.00 for a package of three 30" x 40" pieces. One package will be enough to base all of the pieces shown for both sets. To find foam core board near you, search the internet for "black foam boards" and you should find some. I found mine at Staples.com. These are slightly less than 1/4" thick. If you can't find black, white will do since you are going to paint it anyway. |
 |
|---|
| 4. | House PaintYou will find detailed instructions on how to apply the paint on our Painting Instructions page. I also have the formula for the exact colors I used on the Painting Instructions page, along with detailed instructions on how to brush the paint on the pieces. You may need different types of paint depending on the painting method you choose. This painting instructions page has 3 different types of painting methods you can try. |
 |
|---|
Number of Castings Needed
The Basic SetTo make the basic set, you will need to cast each mold the amount shown below: |
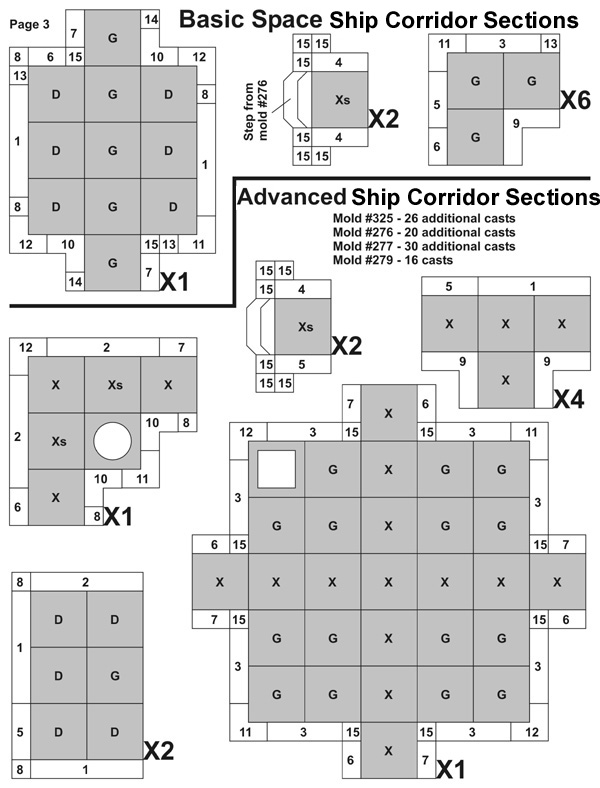
The Advanced SetTo make the advanced set you will need additional castings: |
|
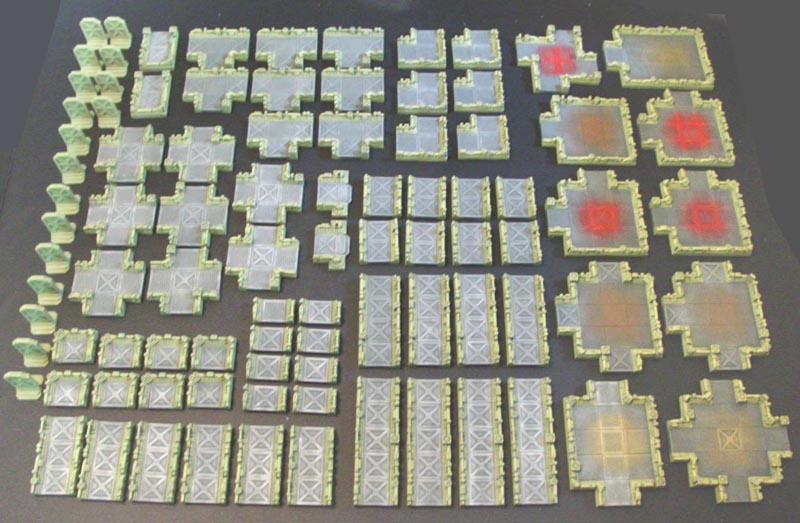
Basic set - click on the photo for a larger view. |
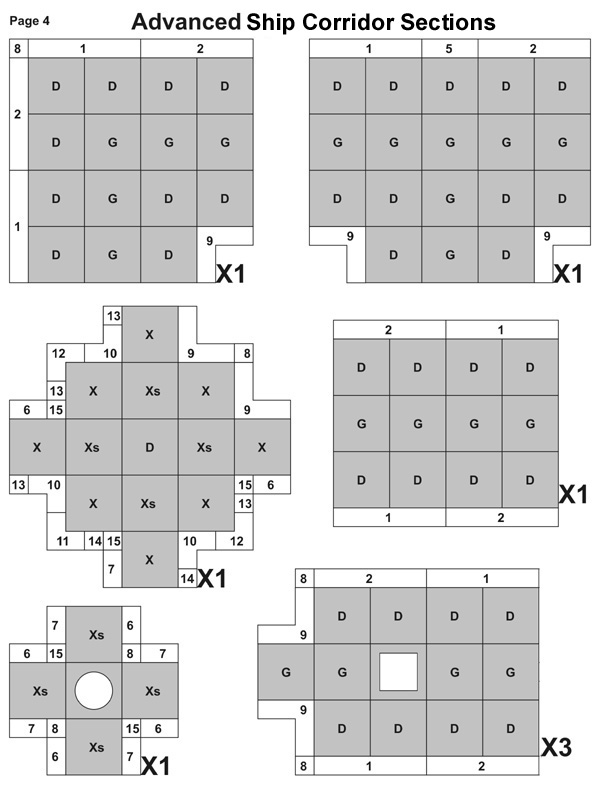
Advanced set - click on the photo. |

Plans for the Complete Set
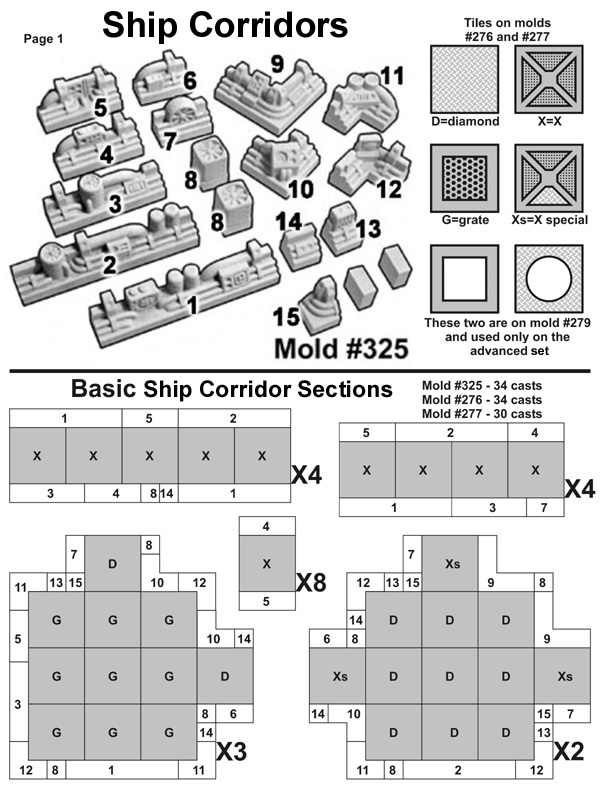
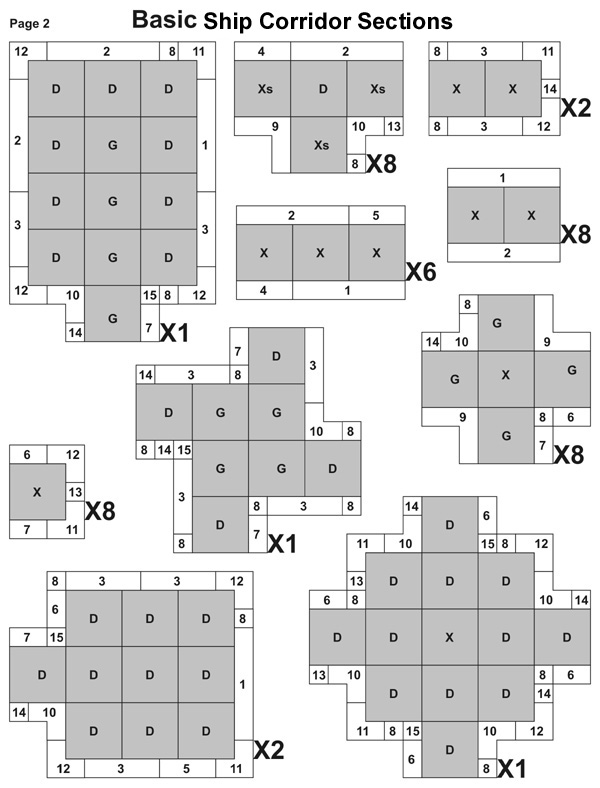
| 1. | You can find an easily printable version of these plans on the Building Plans Page. Look near the bottom for the plans labeled Ship Corridor Plans. I have also included some small photos of these plans below. If you click on the photo you will get a larger JPEG file of that particular plans page. Please note that both the basic and advanced plans are located here. | ||||
|---|---|---|---|---|---|
 |
 |
 |
 |
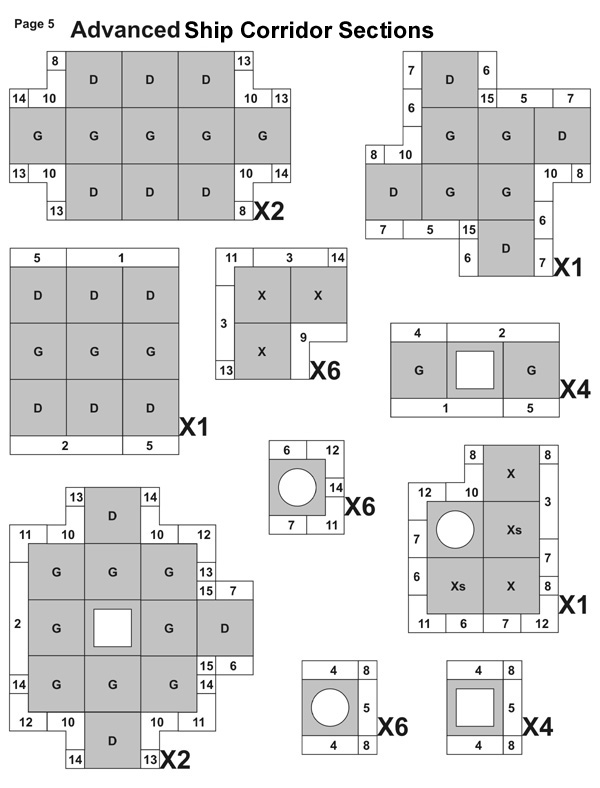 | |
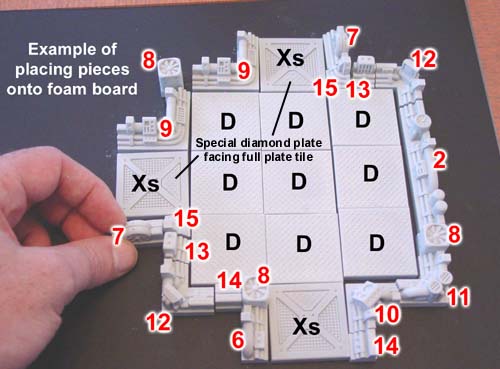
| 2. | In order to place the correct edge pieces around the outside of each game board section, I'm going to number the edge pieces. I have included this reference photo on the plans shown above. When you print out the plans you can refer to it to more easily assemble the board sections. The small square blocks in the bottom right will not be used. |
 |
|---|
| 3. |
"D" is for Diamond Plate, |
|---|
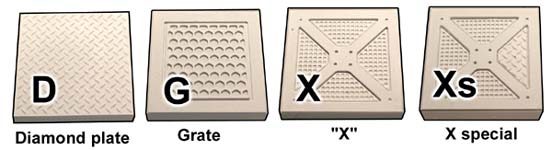 The floor tiles will be labeled this way:
| 4. | Here is an example of how the pieces will be laid out onto the foam board. I have placed numbers around the edges corresponding to the edge pieces. I have placed letters on the floor tiles corresponding to the type of floor tile used. Anytime you see an "Xs", the small section of diamond plate will be positioned towards a full diamond plate tile. |
 |
|---|
Gluing and Cutting the Sections
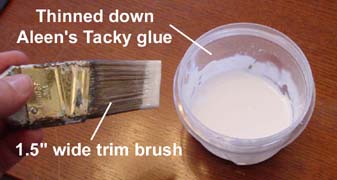
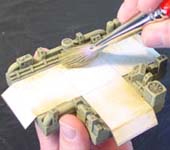
| 1. | I'm using Aleene's tacky glue to glue the pieces down to the foam board. You will need to thin the glue with water a little, about 3 parts glue to 1 part water because tacky glue is so thick. I thinned it to the consistency of regular Elmer's paper glue. You will also need a 1.5" trim brush. It works much faster than spreading the glue out with your finger. |
 |
|---|
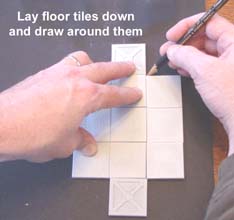
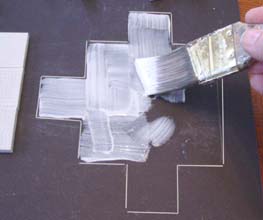
| 2. | Lay the floor tiles down onto the foam and draw around them using a pencil. Slide the tiles out of the way and paint down a layer of glue. |
 |
 |
|---|
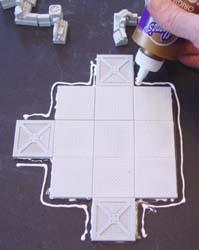
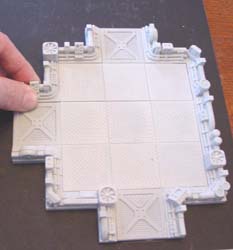
| 3. | Place the floor tiles into the glue and make sure they are straight. Find and place the edge pieces around the outside of the floor. Once they are in position, move them out of the way in large groups so you know exactly where they go back to. Place a bead of glue around the outside of the floor tiles. Move the edge pieces back around the outside of the floor tiles and make sure they are straight. |
 |
 |
|---|
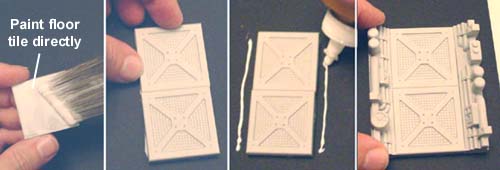
| 4. | For small pieces that only have 1 or 2 squares, it is faster to paint the bottom of the floor tiles directly and place them down. Then place a bead of glue around the outside and place the edge pieces around them. |
 |
|---|
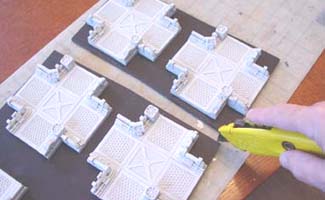
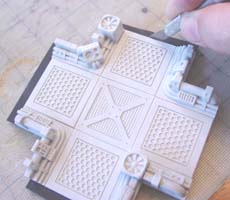
| 5. | Be sure to leave at least 1" of room between the board sections as you glue them down. This will allow you to cut them apart easier. I'm using a utility knife and a cutting board to cut the pieces apart. Be sure to lay something down to protect the table top if you do not have a cutting board. |
 |
|---|
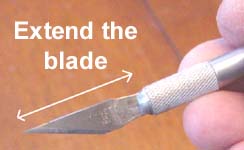
| 6. | To closely trim out the pieces, I'm using a hobby knife. Be sure to extend the blade out as far as it will go. This will allow the blade to reach all the way to the bottom of the foam when cutting. |
 |
|---|
| 7. | Place each piece on a cutting board and closely cut around the outside of each piece. It will take several passes with the knife to cut through each side. You will probably need about 5 new hobby blades for the whole set. Cutting paper dulls them pretty quickly. |
 |
|---|
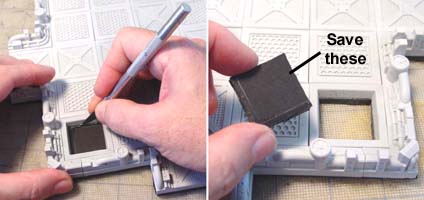
| 8. | When making the advanced corridors set, there will be square holes that need trimming out so you can put a ladder down them. In these cases, save the square pieces after you trim them out. You may want to glue broken grate pieces or hatches onto them so they can be placed back in the empty hole later on. Do not trim out the round holes. |
 |
|---|
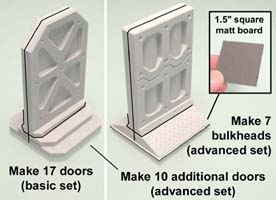
| 9. | You also want to assemble the doors and bulkheads. For the basic set, make 17 doors. For the advanced set, make 10 additional doors and 7 bulkheads. The ramp under the bulkhead doors can be pretty fragile and prone to chipping on the thin edge. To help with this, glue a piece of matt board or card stock under the bottom of the ramp to strengthen it. |
 |
|---|
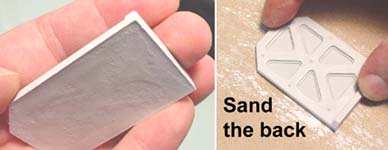
| 10. | If you look at the back of the door pieces you may notice a ridge around the outside edge from where the pieces were scraped on the back side. This ridge can make gluing the door halves difficult. To help with this, sand the back of the doors lightly to get rid of this ridge. Then the two halves will glue together much more neatly. |
 |
|---|
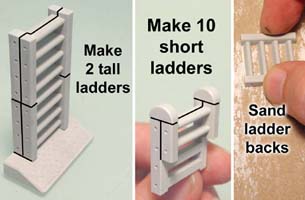
| 11. | For the advanced set you will also need 2 tall ladders and 10 short ladders. Your ladders will go together more easily if you sand the backs of the pieces. |
 |
|---|
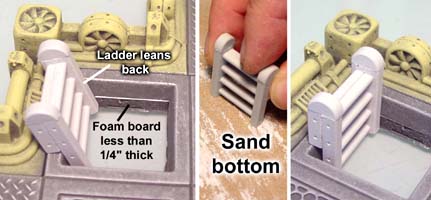
| 12. | Since the backing material we glued our pieces to is less than 1/4", the short ladders will be a little tall. This difference in height will mean that your short ladders will lean back slightly. If this doesn't bother you, then just leave the ladders as they are. If you want your ladders to stand up straight then you will need to sand the bottom of the ladders slightly to take off the difference. |
 |
|---|
| 13. | Once all of the pieces are glued and trimmed out, you will want to paint the pieces. For complete instructions on this, look at our Ship Corridor Painting Instructions Page. This page will give you several variations on how to paint the pieces depending on your skill level and how much work you want to put into the paint job. |
 |
|---|
| 14. | For instructions on making the hazard stripes and also for making a large game table surface visit our Tips & Tricks 28 page. |
 |
|---|