Detailed Egyptian Tomb Pieces Page 6
These tomb pieces use a variety of molds. Click on the photo to see building instructions for each piece.
 |
 Four Way |
 Small Fountain |
 Fountain Corner |
 Pillar Hall |
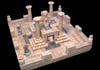 Large Fountain |
 |
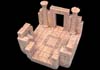
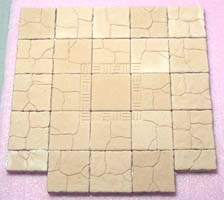
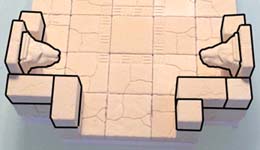
Four Way
| 1. |
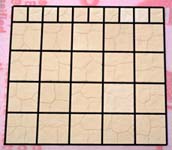
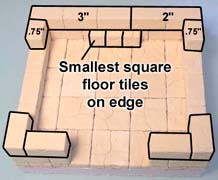
Glue the floor tiles shown on a piece of foam board. There are a few smaller tiles at the bottom of the photo. I have also used some decorative tiles from molds #291 and #292. If you do not have these molds, then just use plain floor tiles instead. |
 |
|---|
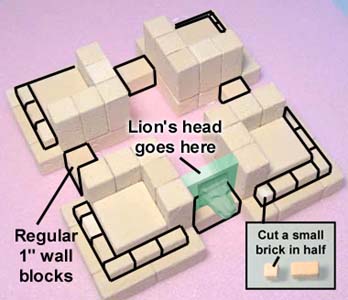
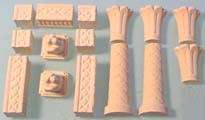 Gather these pieces from mold
 | 2. | Glue the wall blocks onto the floor tiles as shown. Glue the lion's heads on the back side of two floor tiles. Glue these into the wall so that the floor tile is flush with the outside. |
 |
 |
|---|
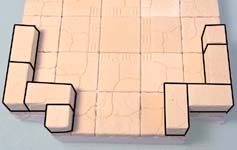
| 3. | Glue the blocks over the lion's heads to finish the front. Assemble the outlined wall section. Do not glue the blocks shown in blue. |
 |
 |
|---|
| 4. |
You can add a door by using the gate from mold #97. After you glue the two halves together, you'll need to sand down the edges so it will fit. If you don't sand them, you won't be able to get the gate in and out of the doorway easily. |
 |
|---|
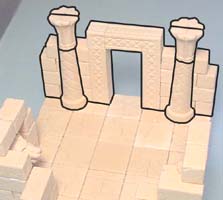 Add the wall section and glue the palm pillars onto the front of it. The palm tops and made by gluing two halves together.
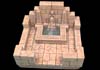
Small Fountain
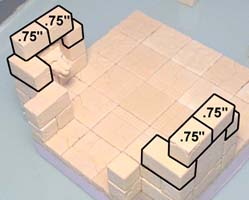
| 1. |
Glue these floor tiles down to a piece of foam board. I've made the top edge using small square floor tiles. You can use regular 1/2" floor tiles instead, but I had a lot of these small squares to use up. |
 |
|---|
 Gather the pieces shown here from mold
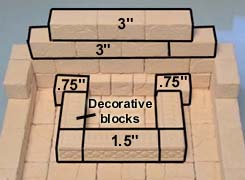
 | 2. | Glue the wall blocks on the edges of the floor tiles. In the center photo, I've used three small square floor tiles set on edge to put against the back wall. The decorative blocks are placed with the ridge lines facing up. | ||
|---|---|---|---|
 |
 |
 | |
| 3. |
To make the water for the pool, visit the Tips & Tricks 17 page. To see how to make water pouring from the fountain, take a look at this part of the Tips & Tricks 17 page. |
 |
|---|
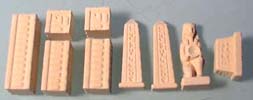
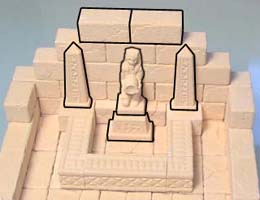 Finish the piece by gluing the pouring statue and obelisks onto the back wall. The statue is set on top of the decorative base.
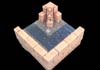
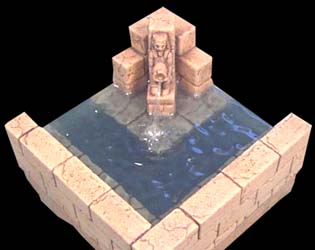
Fountain Corner
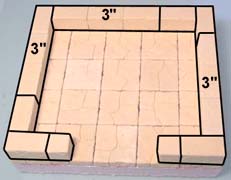
| 1. |
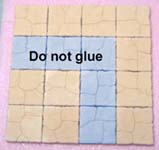
Glue it to three square and one regular wall blocks. Glue these floor tiles down to a piece of foam board but do not glue the tiles shown in blue. |
 |
|---|
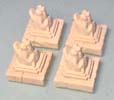
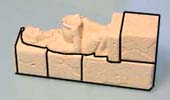 You'll need the pouring statue from mold
 | 2. |
To make the water for the pool, visit the Tips & Tricks 17 page. To see how to make water pouring from the fountain, take a look at this part of the Tips & Tricks 17 page. |
 |
|---|
 Glue the wall blocks on and add the pouring statue in the corner.
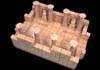
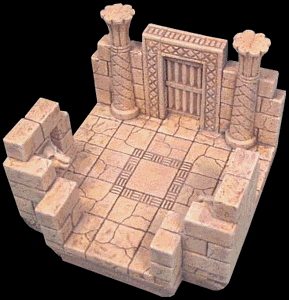
Pillar Hall
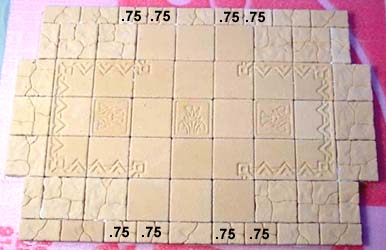
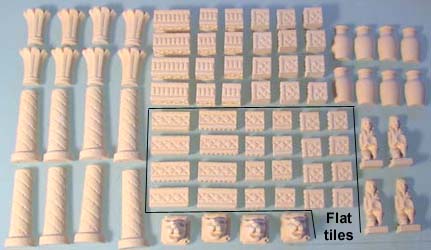
| 1. | 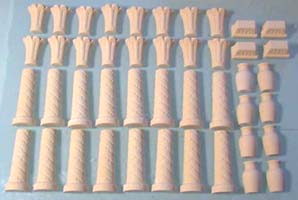 Gather these pieces from mold #99. The decorative tiles are from mold #292. I've used some of the .75" tiles around the outside just to use them up. |
 |
|---|
| 2. |
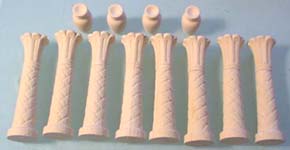
You will see arrow markings on it. Make sure the arrows meet when you match the halves and the texture on the sides of the pillars will be correct. Glue together 8 pillars and 4 vases. |
 |
|---|
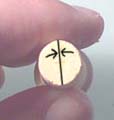 When you glue the halves of the pillars together, take a close look at the top.
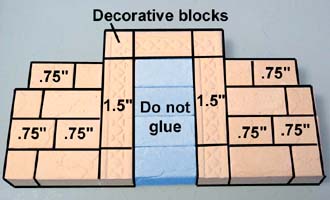
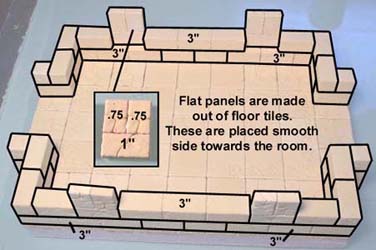
| 3. | Glue the wall blocks on top of the outside floor tiles. You will need four flat panels made out of floor tiles. Each of these are made by gluing together two .75" tiles and a 1" long tile. When these are dry, stand them on end and glue them into the wall so that the smooth side is facing into the room. The back side of these tiles should be flush with the outside of the room. |
 |
|---|
| 4. | 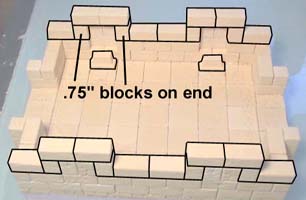 The last row shown here uses .75" wall blocks stood on end to help frame around the flat panels. Glue the pillars and vases in after the piece has been painted. |
 |
|---|
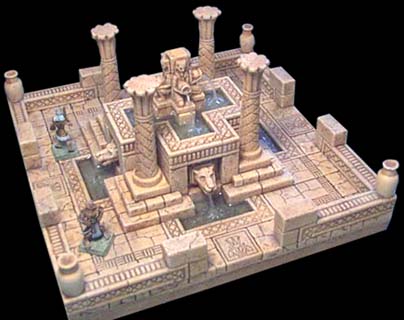
Large Fountain
| 1. | Collect these pieces from mold #99 for the fountain. When you glue the halves of the pillars together, take a close look at the top. You will see arrow markings on it. Make sure the arrows meet when you match the halves. 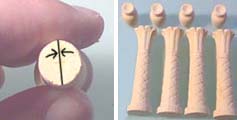 |
 |
|---|
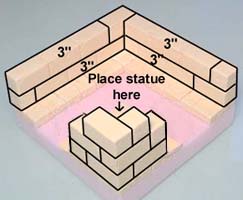
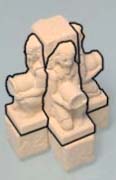
| 2. | Glue the wall blocks to form an "X". Add a regular block and square block to make the post. Add four statues around the sides of this post. The five smooth floor tiles (in the third photo) are from mold #292 (or use regular ones instead). Glue the decorative blocks to form the edges of the pool that will hold in the water. |
 |
 |
 |
|---|
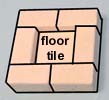
| 3. | Next we'll make the four corners of the fountain. Glue regular blocks around a floor tile. Add two regular blocks in the center. |
 |
 |
|---|
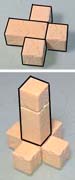
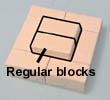
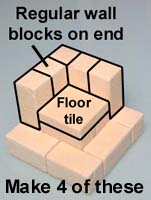
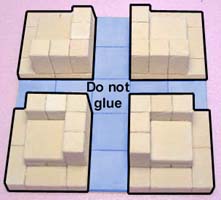
| 4. | Glue 5 regular wall blocks on end around two sides of this piece and add the floor tile in the center. Make 4 copies of this piece. On a piece of 10" x 10" foam board, lay down a cross pattern of 9 floor tiles (shown in blue). Do not glue these floor tiles down! Now glue the 4 sections you've made onto the foam board. Be sure that the tall backs are facing towards the center as shown in the photo. |
 |
 |
|---|
| 5. | Remove the floor tiles and glue down regular 1" wall blocks between the sections. Glue small bricks from the floor tile mold around the base of each section shown. You will need to cut one brick in half for the bricks to line up correctly on each base.
Glue these head tiles on top of the 1" blocks between the four bases. |
 |
|---|
 Glue four lion's heads onto the front of four floor tiles.
| 6. |
The next photo shows how the decorative floor tiles are glued around the base. The tiles outlined in black are flat tiles with the decorative hatch pattern on them. The remaining decorative floor tiles are from molds #291 and #292. If you do not have these molds, then use regular floor tiles instead. |
 |
|---|
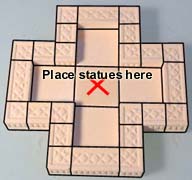
 Glue the top onto the four sections to complete the main center of the fountain.
| 7. | Finish the fountain by adding these walls on each corner. Glue the pillars on after the piece is painted. To see how to make water pouring from the fountain, take a look at this part of the Tips & Tricks 17 page. 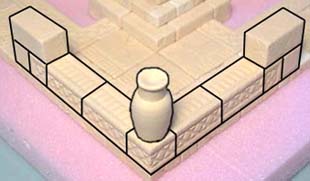 |
 |
|---|