Painting Outdoor Areas
|
Painting Dirt and Rock Tiles
Base Coat of Dirt ColorApplying a Dark Wash Final Dry Brush Painting Grass and Dirt
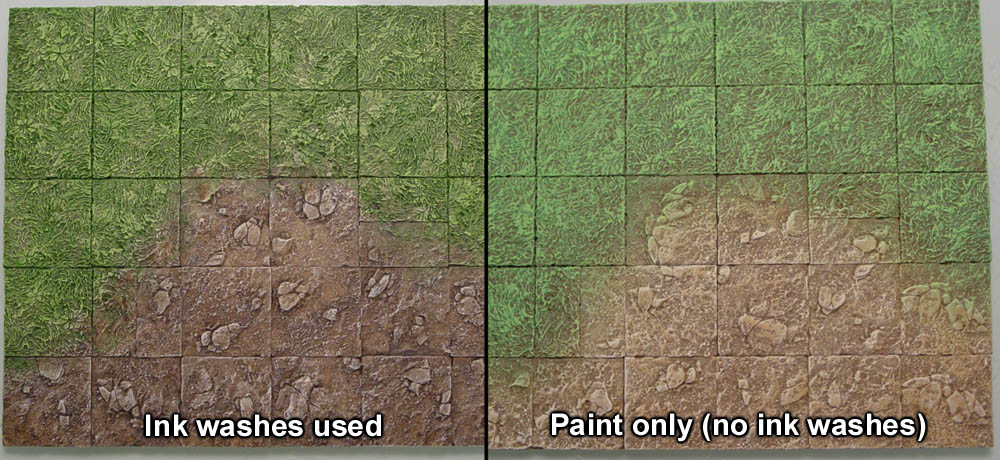
Painting Using Ink WashesPainting Using Paint Only |
 Castle Gray Colors |
 Earth Tone Colors |
 Antiquing Method |
 Spray Painting |
 RAL Color System |
 Cavern Floors |
 Aging Techniques |
 Ship Corridors |
 Wood & Brick |
 Outdoor Areas |
 Game Pawns |
Painting Dirt and Rock Tiles
| 1. | Click on the video to watch it on YouTube. This video shows how to mix up the basic dirt colored base coat used to paint rock tiles from Hirst Arts molds #283 and #286. |
 |
|---|
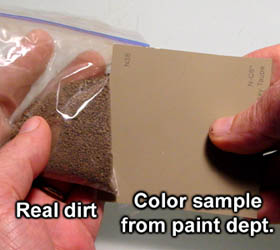
| 2. | Base Coat of Dirt ColorThis dirt color of paint is what we will use for the base color of the floor tiles. When you place an order for molds we can send you a color chip of this color that you can take to your local hardware store so they can mix you up a quart of this color in flat exterior latex house paint. Another way to find your color is to compare paint color samples to real dirt. However, you want the paint to be at least two shades lighter so it will simulate dirt with the sun shining on it. |
 |
|---|
| My color | RAL Classic | RAL Design System |
|---|---|---|
| Dirt |
RAL# 1019 Grey beige | RAL# 075 60 20 |
|
| 3. |
The dirt color recipe will vary depending on the kind of white paint you mix with the raw umber. If you use white acrylic craft paint, the recipe is:
| |
|---|---|---|
If you use flat white latex house paint, the recipe is:
| If you use white acrylic artists tube paint, the recipe is:
| |
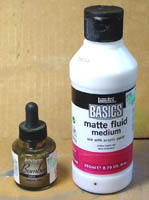
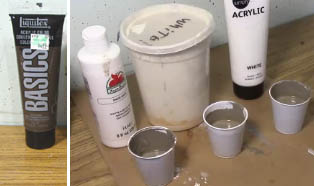 If you can't find this color, you can always mix up your own by using raw umber acrylic artists tube paint (shown on the left). This will be mixed with white paint to make the dirt color we need.
| 4. | Paint all of the floor sections completely with this dirt color. The dirt color of paint should be thick enough to cover in one coat but not have noticeable brush strokes in the paint after it dries. You may need to adjust the amount of water or paint to do this. If you have noticeable brush strokes after the paint dries, then you will see the brush strokes after you dry brush and ink wash the floor tiles. |
 |
|---|
Applying a Dark Wash
| 1. | Click on the video to watch it on YouTube. This video shows how to mix up a dark wash to be put on after the base coat. |
 |
|---|
| 2. | Here I will show two different recipes to make the dark wash that will be painted on next. Choose either one depending on which you can find the ingredients for easier. | |
|---|---|---|
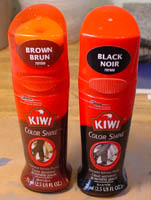
Liquid Shoe PolishThis recipe uses Kiwi liquid shoe polish you can find at your local Wal-Mart.
1 part: Kiwi liquid brown shoe polish. 1 part: Kiwi liquid black shoe polish. |
Art SuppliesThis recipe uses artist's paints and supplies you would find at your local art store.
1 part: Sepia India ink. 1 part: Matte fluid medium. | |
 The recipe is:
 The recipe is:
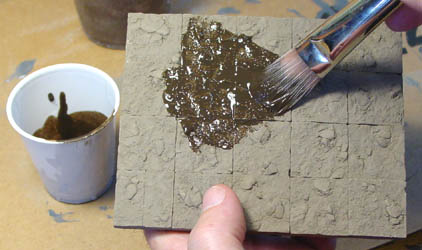
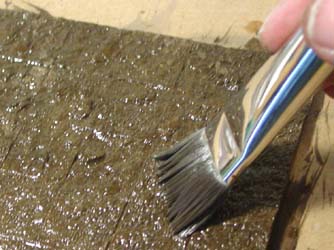
| 3. | Liberally apply one of these washes over the whole surface of the rock. If you use the shoe polish version, it will be slightly thinner than the ink version. Don't forget to also get the sides of the tiles. |
 |
|---|
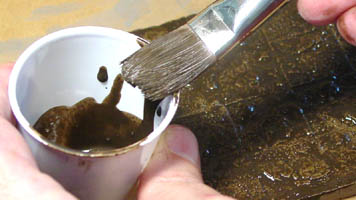
| 4. | Next you want to mop up the drips and pools that will collect on the low areas of the surface. You can do this by scraping your brush off on the side of the cup and then soaking some of the excess wash back into the brush. Repeat this process until all the excess puddles are removed. |
 |
|---|
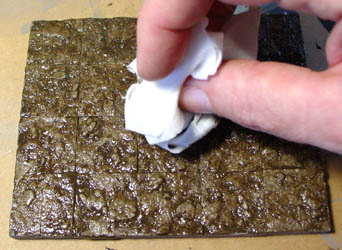
| 5. | Finally, use a moist baby wipe or lightly dampened paper towel to gently dab up the excess wash from the surface of the rock. This needs to be done more for the ink and matte mixture since it's thicker. The shoe polish mixture almost doesn't need to have the excess blotted off. Do this gently and don't wipe. If you take off too much, just paint more of the wash back on. |
 |
|---|
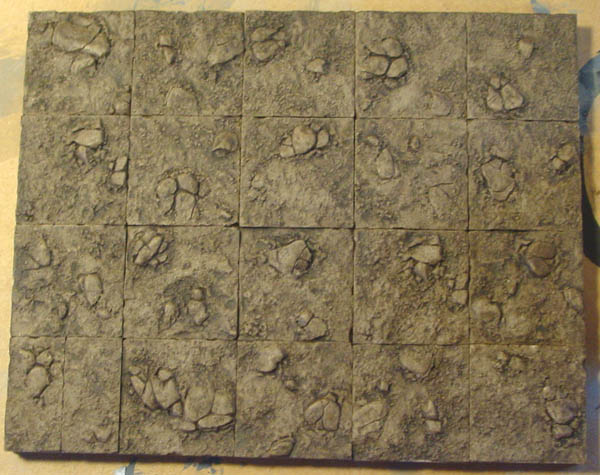
| 6. | Oddly enough, the ink wash will dry lighter than when you put it on. Here's a photo of the tiles after the ink wash has dried. Click on the photo for a larger view. If you like the look of the dirt and rock at this stage, you don't have to do the dry brushing if you don't want to. |
 |
|---|
Final Drybrush
| 1. | Click on the video to watch it on YouTube. This video shows how to mix up the light dirt color and how to dry brush it onto the surface of the dirt to finish the tiles. |
 |
|---|
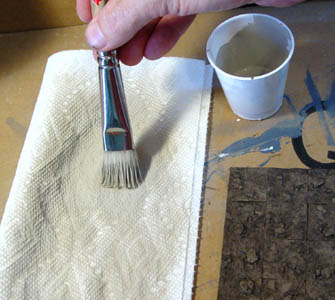
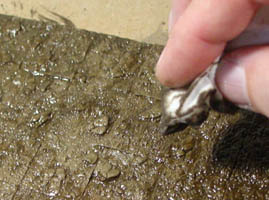
| 8. | To apply the final dry brush you will need a few materials.
Next, load up the brush with paint and brush it all off onto the paper towel. Try to remove all of the paint you can from the brush. |
 |
|---|
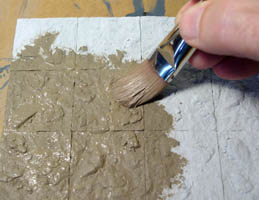
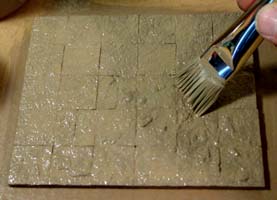
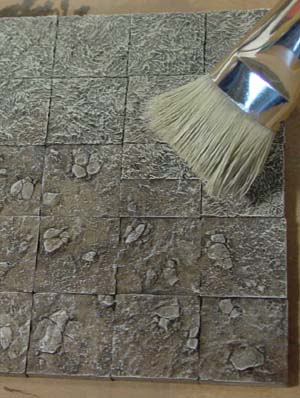
| 9. | 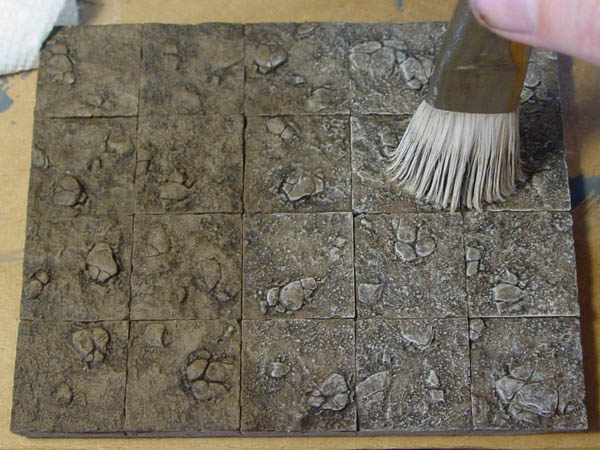 Gently brush over the surface. At first you should see no difference even after several strokes. If you see any white from these first few strokes then you have too much paint in your brush and you need to wipe it off more on the paper towel! Gently brush over the surface. At first you should see no difference even after several strokes. If you see any white from these first few strokes then you have too much paint in your brush and you need to wipe it off more on the paper towel!
Unlike the dry brushing of other models on this site, we are going to use short jabbing motions and very short strokes on the surface. If you use long strokes across the whole surface, you will only highlight the tops of the highest stone and will not reach the grains of dirt in the lower areas. Also, use a very light pressure on these small strokes to begin with. If after about 6 strokes you do not see any difference, then jam slightly harder with the brush. Eventually, you will see the texture come to life as it highlights the tops of the stones and dirt grains. You will run out of paint after about 12 square tiles. When your brush runs dry, pick up more paint from the paper towel and wipe off the brush again to continue. Click on the photo for a larger view. |
|---|
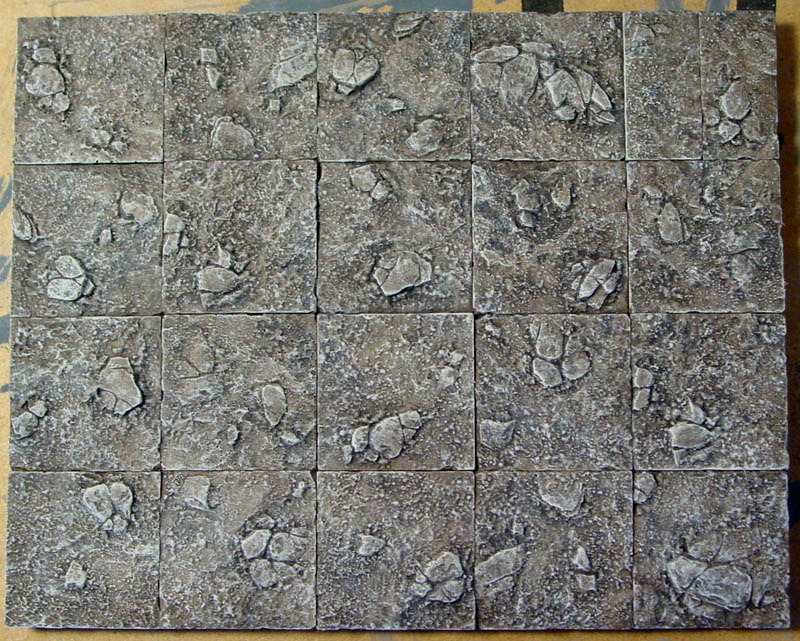
| 10. | Here is a sample of the finished painted floor. Click on the photo for a larger view. I think these rock and dirt tiles will be good for:
|
 |
|---|
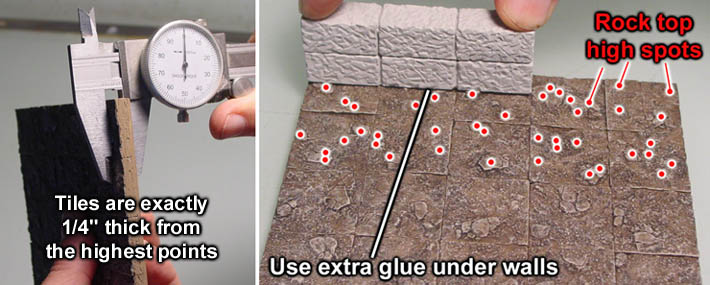
| 11. | On a final note, the tiles from molds #283 and #286 are 1/4" tall at their highest peaks. This means that all of the large and small rocks meet up at the top surface at the same level, so you can build walls on top of these tiles if you want. However, the dirt will dip down in several areas so the tiles will not match up in height in the lower areas. Because of this, you will need to use extra glue when gluing wall sections down onto the surface of the tiles because they will only be touching on the tops of the rocks. |
|---|---|
 |
Painting Grass and Dirt
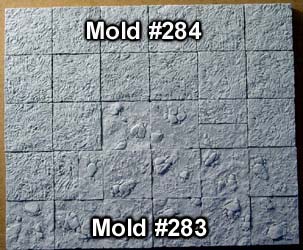
| 1. | The dirt and rock tiles are found on mold #283. The grass tiles are found on mold #284. The process of painting the tiles will blend the two textures together and hide the fact that they are simple squares. However, I have also included a couple of smaller tiles on both molds so that you can split a square into 1/2 rock and 1/2 grass. This also helps blend the two textures together. |
 |
|---|
Painting Using Ink Washes
| 2. | Click on the video to watch it on YouTube. This video shows how to paint the grass dirt and rock tiles from molds #283 and #284. This method uses ink washes along with paint. If you cannot find ink washes, then try the other method shown below these instructions. |
 |
|---|
| 3. |
A) Dirt colored paint. You can find the recipe further up on this page here. B) Light earth tone paint. You can mix this yourself using 1 part dirt colored paint to 3 parts white paint. C) Water. G) Matte fluid medium. You would need to get this at an art store and is usually found with the acrylic tube paints. H and i) Leaf green and Sepia India ink. These you will also find in an art supply store. J) Moist baby wipes. K) A 3/4" soft bristle paint brush. |
|---|
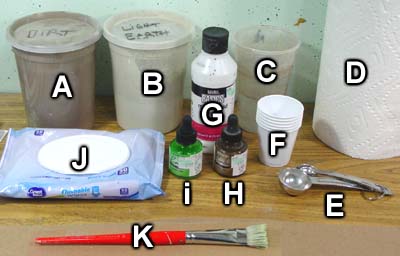 You will need the following supplies to paint using this method:
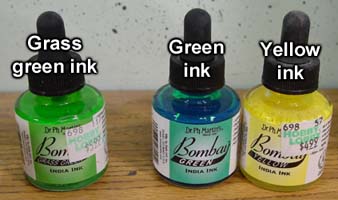
| 4. | The type of India ink I am using here is called "grass green". However, the art store you buy your ink from may not have this particular color. The common green color of ink (shown on the right) is actually called phthalo green and has a distinctive blue color to it. Since this color does not work well for grass, you may have to mix it with yellow ink to make the grass green color of ink. |
 |
|---|
|
| 5. | The first coat of paint will be the dirt color. You may need to thin the paint down if you are using straight house paint. If your paint is thick like heavy cream, I suggest thinning the paint about 2 parts paint to 1 part water. Coat the whole piece completely with this color, including the sides of the tiles. Paint the grass also. Let this dry completely. |
 |
|---|
| 6. | Liberally apply this wash over the face of the tiles. Be sure that it gets down into all of the cracks. You will notice that this ink wash is fairly thick, almost like brown paint. Even though it is thick, it will flow down into all the details. Don't worry if this all appears very dark. It's supposed to be dark because we will brush on lighter colors later. Don't forget the sides of the tiles. |
 |
|---|
| 7. | Next you want to mop up the drips and pools that will collect on the low areas of the surface. You can do this by scraping your brush off on the side of the cup and then soaking some of the excess wash back into the brush. Repeat this process until all the excess puddles are removed. |
|
|---|
| 8. | Finally, use a moist baby wipe or lightly dampened paper towel to gently dab up the excess wash from the surface. Do this gently and don't wipe. If you take off too much, just paint more of the wash back on. Let this wash dry completely before moving onto the next dry brushing step. |
 |
|---|
| 9. |
Gently brush over the surface. At first you should see no difference even after several strokes. If you see any white from these first few strokes then you have too much paint in your brush and you need to wipe it off more on the paper towel! Unlike the dry brushing of other models on this site, we are going to use short jabbing motions and very short strokes on the surface. Also, use a very light pressure on these small strokes to begin with. If after about 6 strokes you do not see any difference, jam slightly harder with the brush. Eventually, you will see the texture come to life as it highlights the tops of the stones and grass blades. Paint all of the grass as well as the rocks. When painting the grass, push harder on the brush to make the grass stand out much lighter than the color of the rocks. This is important because we will stain the grass next and the stain is very dark. If the grass is not light enough, the grass stain will not show up well. |
|---|
 Next we will apply the earth tone light colored paint. This paint is a light cream color. Load up the brush with paint and brush it all off onto the paper towel. Try to remove all of the paint you can from the brush.
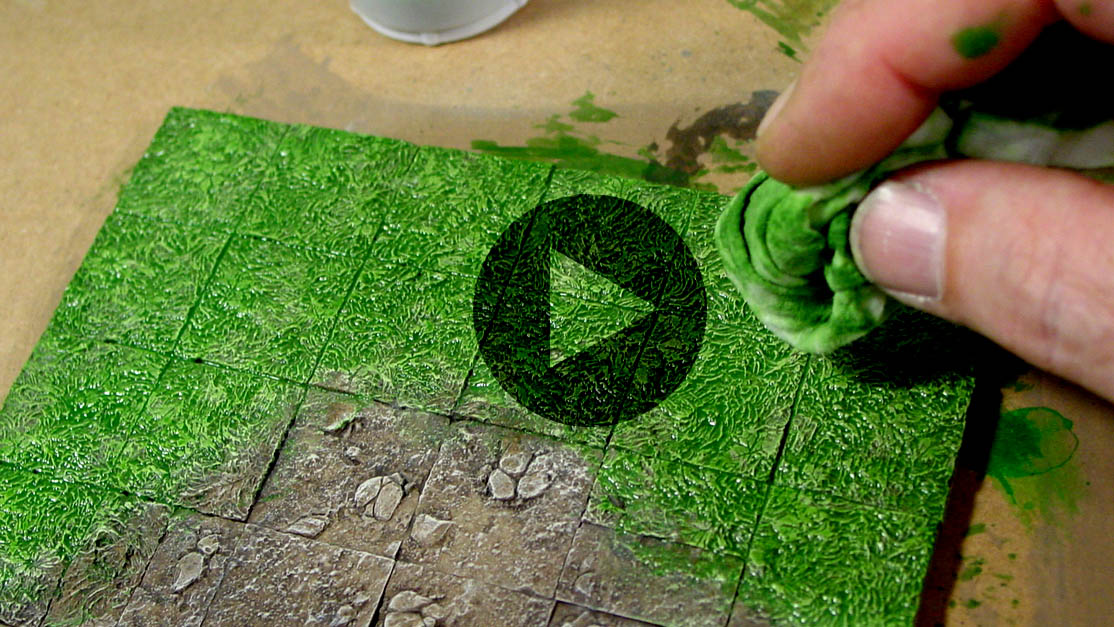
| 10. | Next you will need to mix up some grass wash. The recipe for this wash is 2 parts matte fluid medium, 2 parts grass green India ink and 1 part sepia India ink. Brush this wash liberally onto all of the grass sections. It's okay if you round the corners and paint a little of the rock tiles as well. Scrape the brush off onto the mixing cup and blot up any excess wash puddling on the surface of the grass. |
 |
|---|
| 11. | Finally, use a moist baby wipe and gently blot the surface of the grass. This will help give the surface a naturally irregular texture. It will also help some of the brown colors under the grass to come through. Where the grass meets the dirt, wipe along this line to blend the green into the brown so there is no noticeable line separating the two colors. Once this is dry, your floor will be completely finished. If you click here, you can see a comparison of the two painting methods; this method which uses ink washes and the instructions below which use paint only. |
 |
|---|
Painting Using Paint Only
| 1. | Click on the video to watch it on YouTube. This video shows how to paint the grass dirt and rock tiles from molds #283 and #284. This method uses paints only because sometimes inks and matte fluid medium may be hard to find. |
 |
|---|
| 2. | 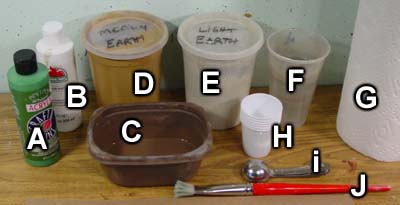 You will need the following supplies to paint using this method: You will need the following supplies to paint using this method:
A) Medium green acrylic craft paint. Try to find a color closest to a leaf color. Greens with a lot of blue in them will look strange. B) White acrylic craft paint. C, D and E) flat latex paint. The colors shown here are the dark, medium and light colors of the Earth tone colors. F) Water. |
|---|
|
| 3. | The first coat of paint will be the earth tone dark color. You may need to thin the paint down if you are using straight house paint. If your paint is thick like heavy cream, I suggest thinning the paint about 2 parts paint to 1 part water. Coat the whole piece completely with this color, including the sides of the tiles. Paint the grass also. |
 |
|---|
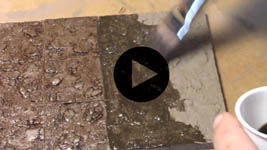
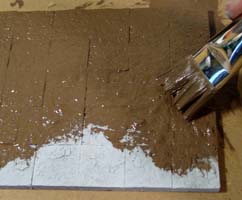
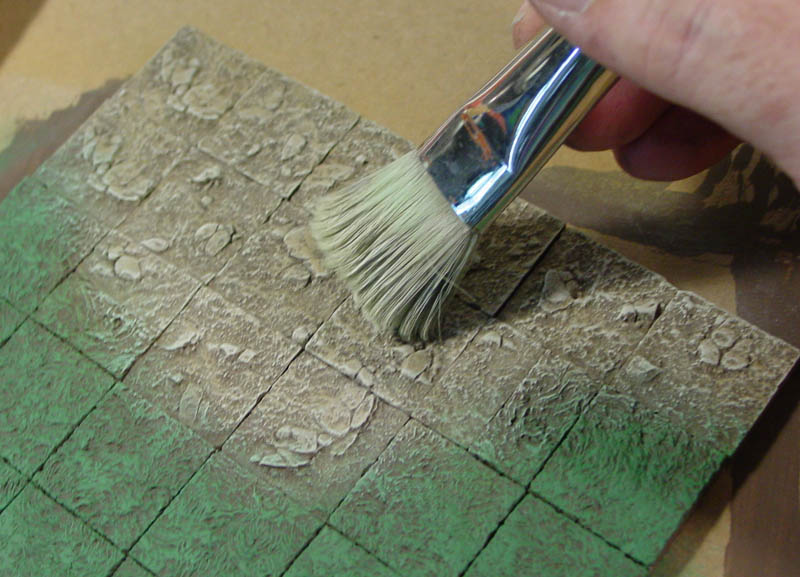
| 4. | Next we will dry brush the dirt and rocks only using the earth tone medium paint. You will want to dry brush this fairly heavily. Take your time and wipe most of the paint out of your brush but you don't have to be as careful as usual because we will be adding another lighter color on top of this. Eventually, you will not want much of the dark brown showing except around the edges of rocks and in the deepest areas. Click on the photo for a larger view. |
 |
|---|
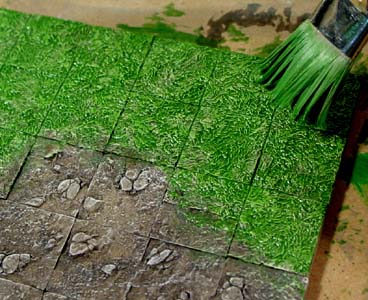
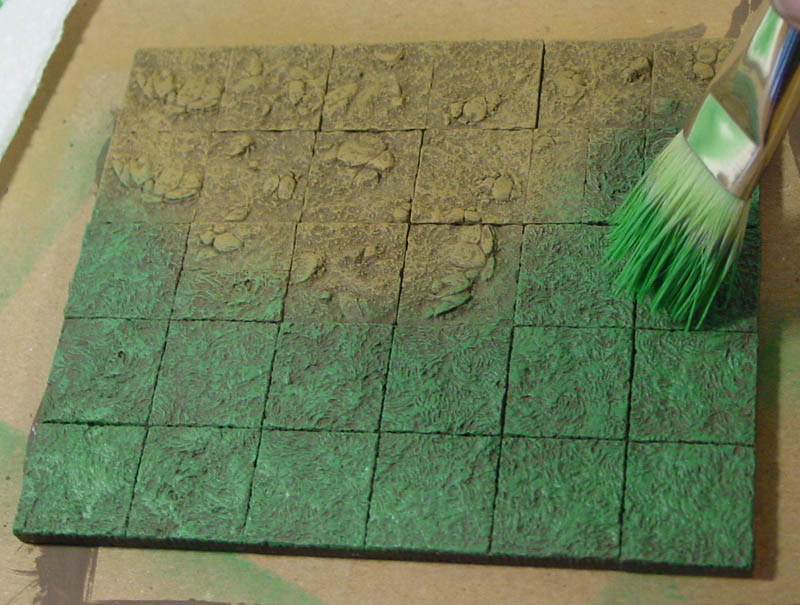
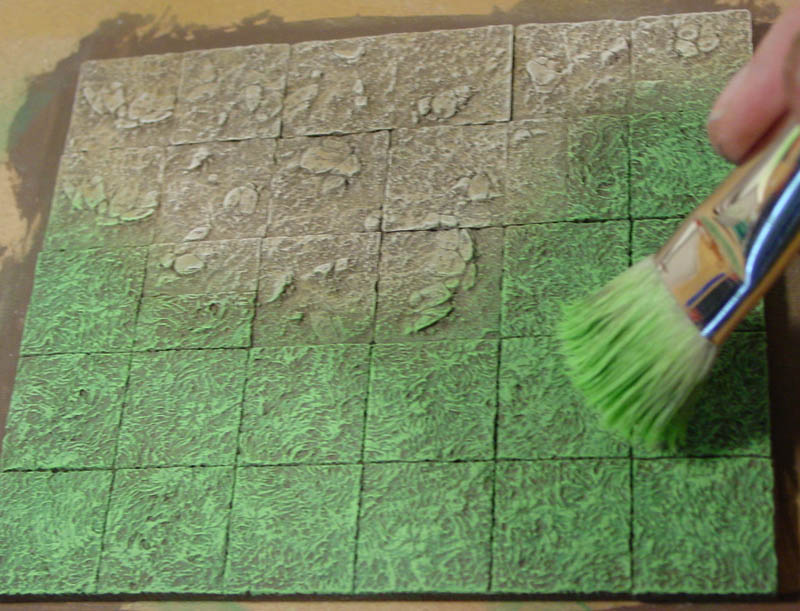
| 5. | Next we will dry brush the grass only using the medium green paint. You will also want to dry brush this fairly heavily. Start by wiping back and forth with the brush. You will need to do kind of a jabbing motion with the brush to get more paint into the deep grooves. Eventually, you will not end up with much of the dark brown showing except around the deep grooves but you should see a variety of greens from bright to muted dark. Click on the photo for a larger view. |
 |
|---|
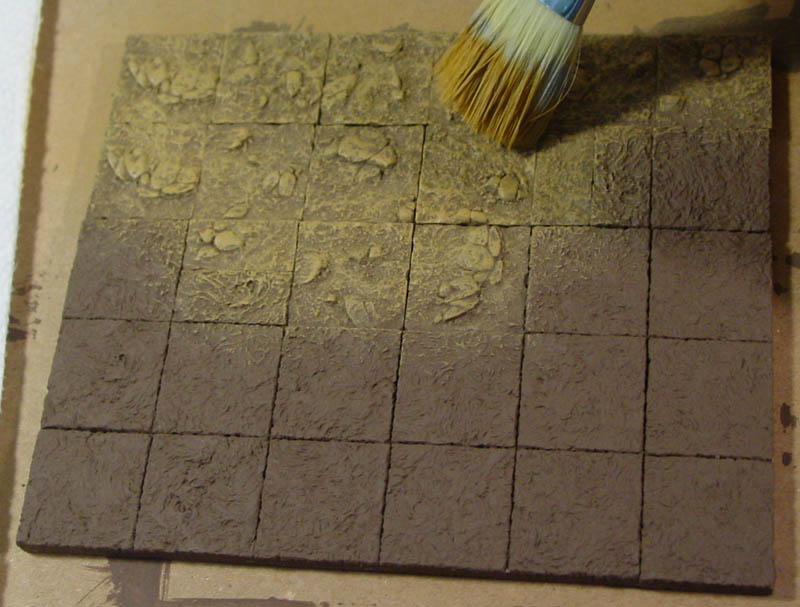
| 6. |
Gently brush over the surface. At first you should see no difference even after several strokes. If you see any white from these first few strokes then you have too much paint in your brush and you need to wipe it off more on the paper towel! Unlike the dry brushing of other models on this site, we are going to use short jabbing motions and very short strokes on the surface. Also, use a very light pressure on these small strokes to begin with. If after about 6 strokes you do not see any difference, jam slightly harder with the brush. Eventually, you will see the texture come to life as it highlights the tops of the stones and dirt grains. Do not paint the grass. However, you can overlap the edges somewhat when getting close to the borders of the grass tiles. This will help blend in the square shape of the tiles into a more natural curve. Click on the photo for a larger view. |
|---|
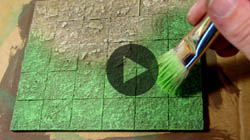
| 7. | Finally we will dry brush the light green onto the tops of the grass. The light green is a mixture of equal parts medium green, yellow and white. You won't need to mix up much of this color because the dry brushing will not use much paint. Apply the green onto the grass in the same method as you did for the final rock dry brushing. Go very lightly and slowly build up the colors onto the grass tiles. Click on the photo for a larger view. |
 |
|---|
| 8. |
The grass using the ink wash is shown on the left. The right photo is done using paint only. I've given instructions on painting the grass with and without ink washes because some people may not be able to find ink or matte fluid medium and only have paints available. Personally, I like the ink washes better. I feel that ink washes give more richness in color and have a more realistic look. The paint only method has a bit more of a pastel look to it because it's hard to get good deep rich colors when you mix white into your colored paint and dry brush it on top. |
|---|