Rubble Dice Tower Building Instructions
|
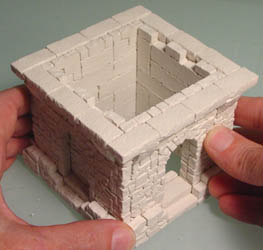
This page contains instructions on how to use mold #263 to build the Rubble Dice Tower. You will need 16 castings of mold #263 to build this tower. Click the photo for a larger view. Background photo by Steve Carter |

|
Building Instructions
You will need 16 castings of mold #263 to build this tower.
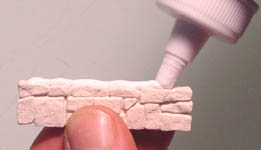
| 1. | First, I strongly suggest that you take a look at the Rubble Block Tips Page. This page describes mold #263 in detail and has a lot of good building tips on using the rubble block mold. Reading this page will definitely help you out when building this tower. |
 |
|---|
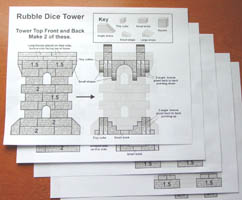
| 2. | Here are the Building Plans for the tower. After you print them out, you can lay the blocks directly on the plans. This will help you to select the correct blocks for each side of the tower. For these instructions, I will not be laying the blocks on the plans. This is because the white blocks will be easier to see in each photo against a darker background, rather than setting them on white paper sheets. |
 |
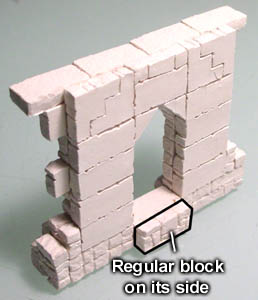
|---|
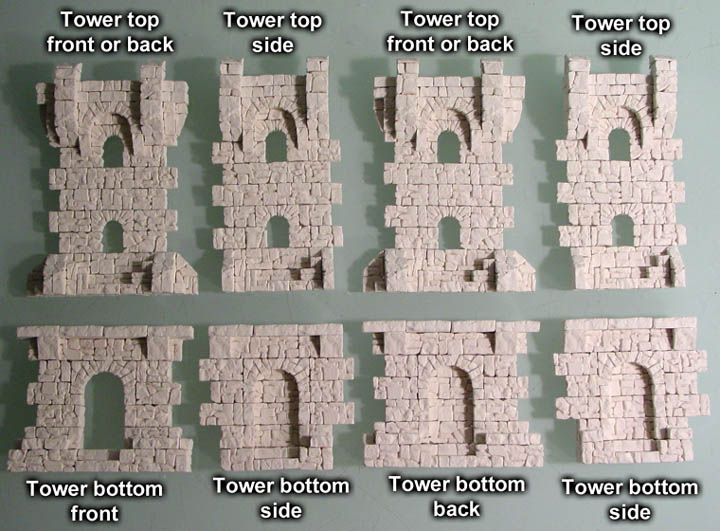
| 3. | The dice tower is made of eight separate pieces. The placement of blocks in each piece will be detailed below. |
|---|---|
 |
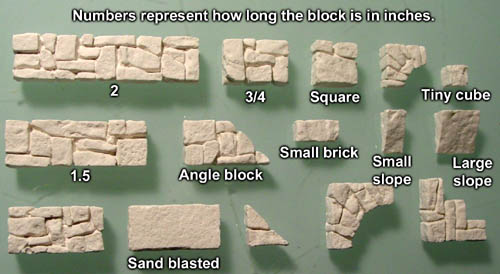
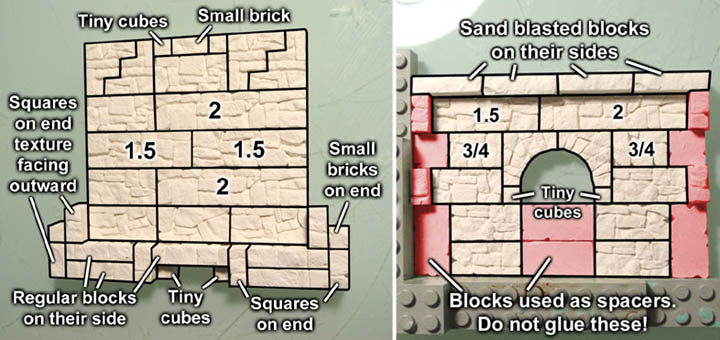
| 4. | Here is a key to how I have labeled the blocks. The number represents how long each block is in inches. I did not label blocks that are easy to identify such as the 1" long blocks or arches. |
 |
|---|
Tower Top Front and Back - Make 2 of these
| 5. | The red blocks on each side are used as temporary spacers so do not glue these blocks. Placing straight edges on both sides will help keep everything in line while the glue dries. I have used wooden strips but rulers will also work. The next step shows gluing long blocks set on their side to cap off the top. Be sure these have the rock texture facing up towards the top of the tower. |
|---|---|
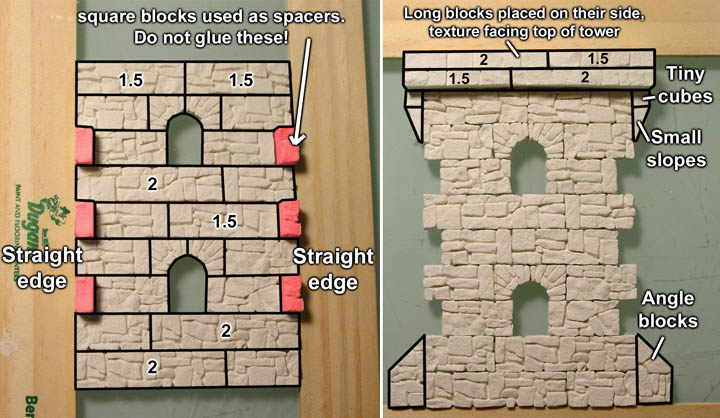 |
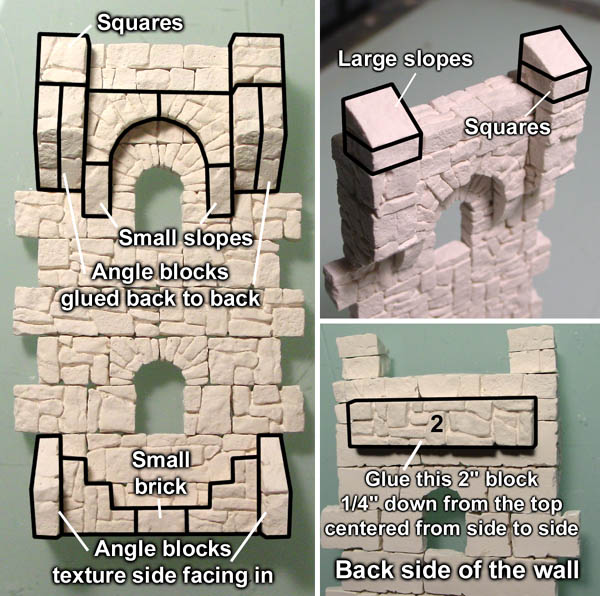
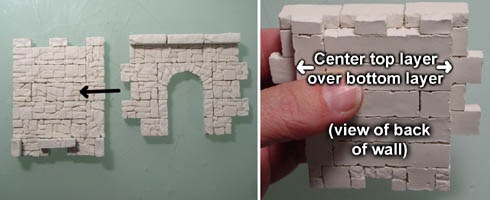
| 6. | Finish this piece by gluing the decorative elements onto the front. In the last photo, blocks are glued to the back side of the wall. These blocks are 1/4" down from the top and centered side to side. |
|---|---|
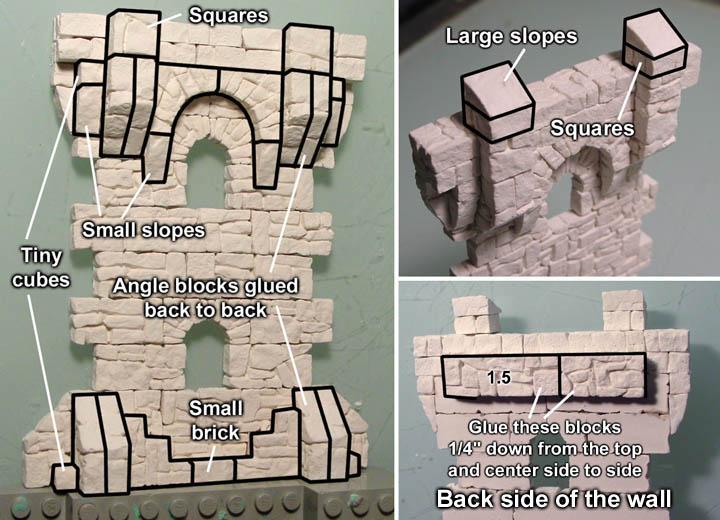 |
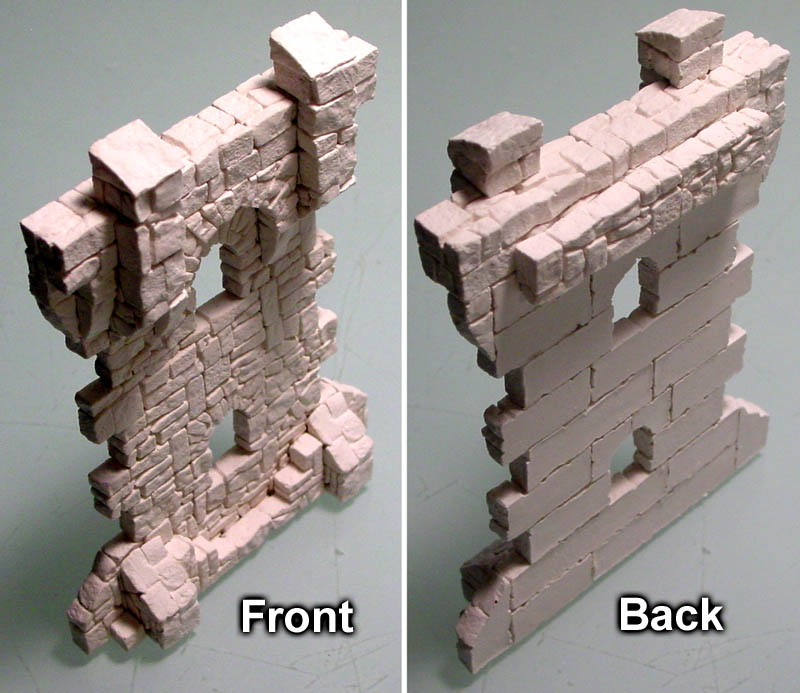
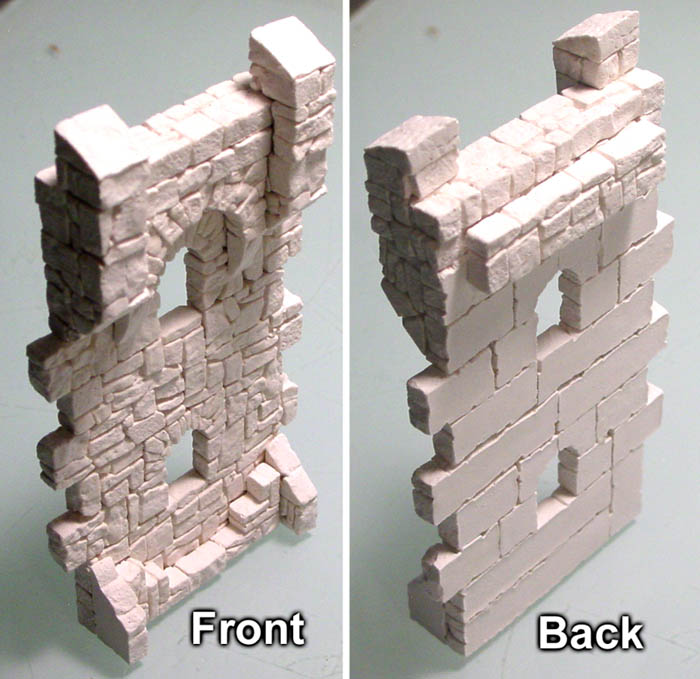
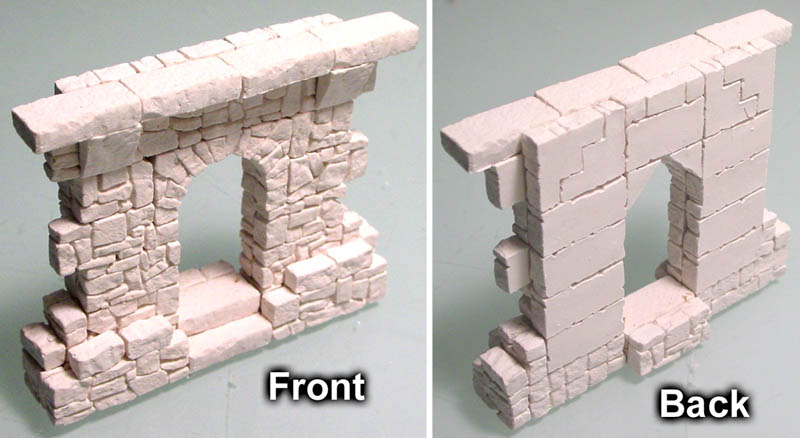
| 7. | This photo shows the front and back of the completed tower top section. Click the photo for a larger view. Make 2 of these. |
 |
|---|
Tower Top Sides - Make 2 of these
| 8. | The red blocks on each side are used as temporary spacers so do not glue these blocks. Placing straight edges on both sides will help keep everything in line while the glue dries. The next step shows gluing long blocks set on their side to cap off the top. Be sure these have the rock texture facing up towards the top of the tower. |
 |
|---|
| 9. | Finish this piece by gluing the decorative elements onto the front. Pay attention to the angle blocks at the bottom of the left photo. These need the texture side facing inward. Later on, the scraped side will be covered up by the front or back of the tower. In the last photo, a 2" long block is glued to the back side of the wall. This block is 1/4" down from the top and centered side to side. |
 |
|---|
| 10. | This photo shows the front and back of the completed tower top section. Click the photo for a larger view. Make 2 of these. |
 |
|---|
Tower Bottom Front - Make 1 of these
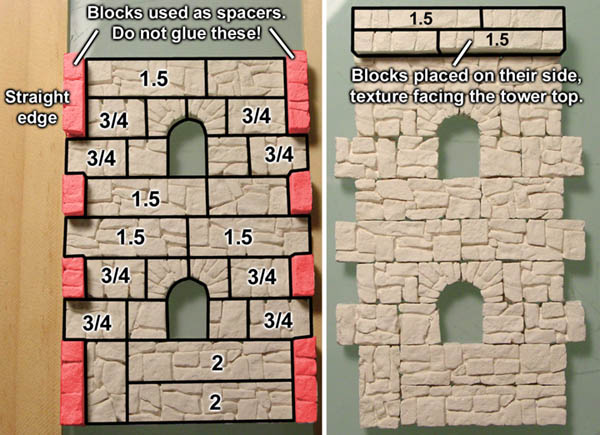
| 11. | Do not glue the blocks shown in red! These are spacers used to keep the doorway size correct. On the right photo, most of the blocks shown at the bottom are placed on their edge (except for the tiny cubes). This piece will be the bottom layer. |
|---|---|
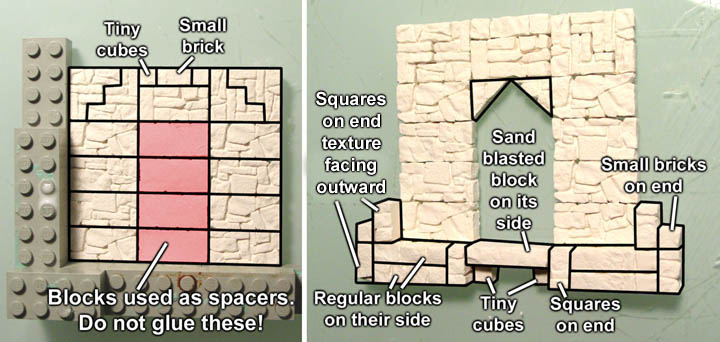 |
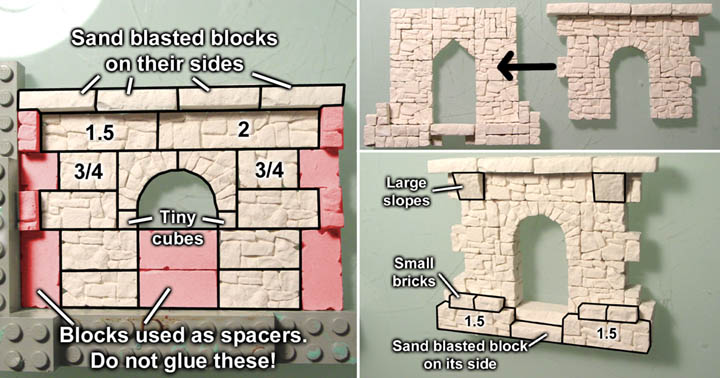
| 12. | Now for the top layer. The blocks across the top are the sand blasted blocks on their side, texture side facing up toward the top of the tower. Do not glue the blocks in red! These are spacers to help you line up the blocks. Once both pieces are completely dry, glue the top layer onto the bottom layer. Then add on the decorative pieces on the front. |
|---|---|
 |
| 13. |
This will act as a rest for the bottom of the dice chute. Click the photo for a larger view. Make 1 of these. |
 |
|---|
Tower Bottom Back - Make 1 of these
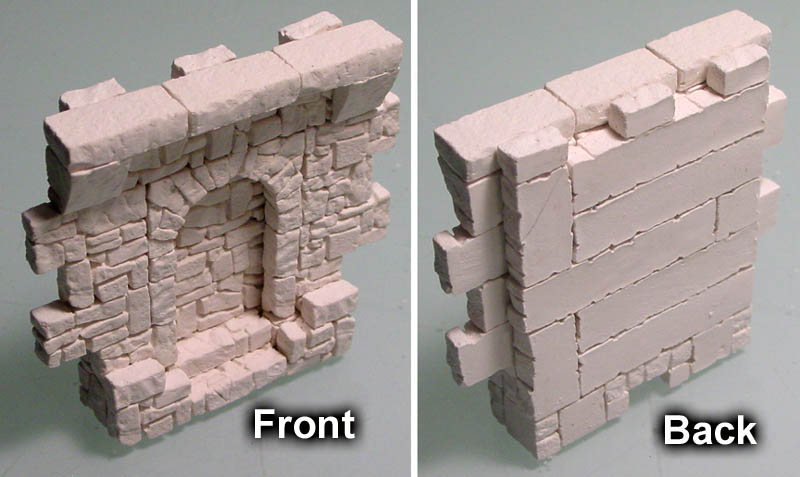
| 14. | The bottom layer is shown on the left. Most of the blocks shown at the bottom are placed on their edge (except for the tiny cubes). The top layer is shown on the right. Do not glue the blocks shown in red! These are spacers used to keep the doorway size correct. |
|---|---|
 |
| 15. | Once both pieces are completely dry, glue the top layer onto the bottom layer. Then add on the decorative pieces on the front. Click the photo for a larger view. Make 1 of these. |
|---|---|
 |
Tower Bottom Sides - Make 2 of these.
| 16. | The bottom layer is shown on the left. A few of the blocks shown at the bottom are placed on their edge. The top layer is shown on the right. Do not glue the blocks shown in red! These are spacers used to keep the doorway size correct. |
 |
|---|
| 17. | Once both pieces are completely dry, glue the top layer onto the bottom layer. Be sure that the top layer is centered over the bottom layer. It's hard to see because the top layer overlaps the bottom layer on both sides. |
 |
|---|
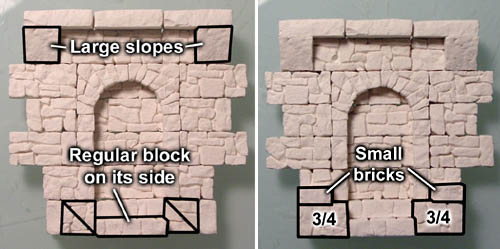
| 18. | Add the decorative pieces onto the front. The first photo shows filling the holes at the bottom with angle blocks. This is because I was running out of square blocks. Cap the bottom off using 3/4 blocks and add the small bricks. |
 |
|---|
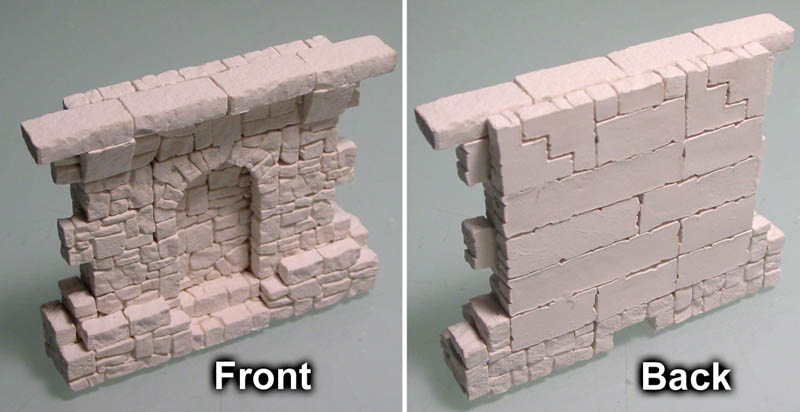
| 19. | This photo shows the front and back of the completed tower bottom side section. Click the photo for a larger view. Make 2 of these. |
 |
|---|
Assembling the Tower
Do not glue the sides together until after they are painted!
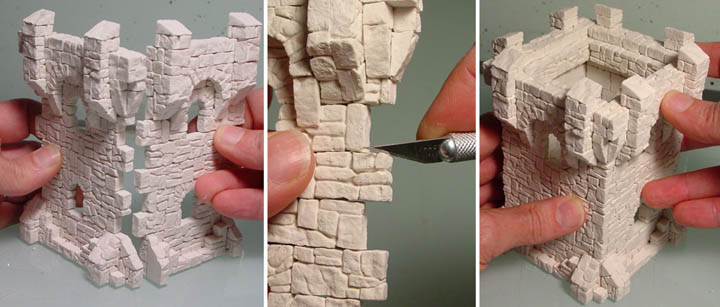
| 1. | When test fitting the sides together, be very careful! These blocks are very thin and the glue bind in the center can be very weak. Try to mesh the sides together and pay close attention as to which blocks are hitting each other. Use a hobby knife or file to trim down the blocks that get in the way of each other. I like using Aleene's tacky glue for this because it is flexible and will still hold the blocks together even if you push them a little. Brittle glue such as Elmer's wood glue will break instead of letting you push. Be sure that all the sides push together completely and continue to trim down if they do not. Do not glue it together yet! We need to paint each side separately or you will not be able to reach the inside of the tower. |
|---|---|
 |
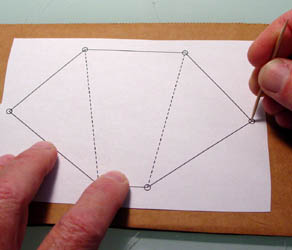
| 2. | Do the same process with the bottom of the tower but do not glue it yet. Cut out the dice chute template from the printed plans and lay it down over a piece of cardboard. Use a nail or ball point pen to punch a hole in each corner of the template. |
 |
 |
|---|
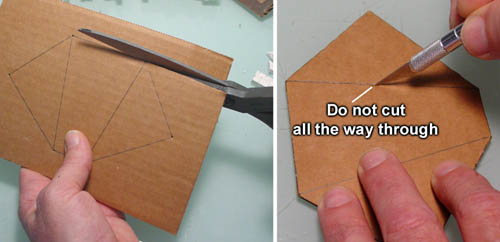
| 3. | Use a ruler and pencil to connect all the dots. Use a pair of scissors to cut around the outside shape. Next, use a hobby knife to cut the center fold lines but do not cut all the way through. Just cut through the top layer of paper. |
 |
|---|
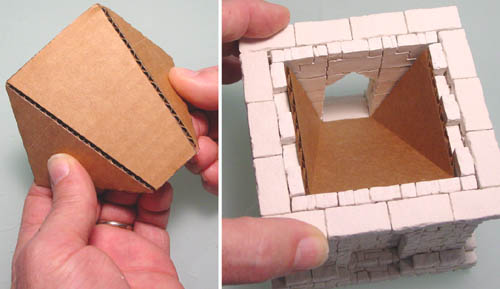
| 4. | Fold the sides down away from the cut lines and test fit the chute into the base. This may be a little tricky because the base is not glued together yet. The bottom small end of the chute will rest on the block under the doorway. Now we're ready to paint the separate sides of the tower. |
 |
|---|
Painting Instructions
The dice tower will use colors that I already have on the web site. The three colors used for this project are:
|
|
|


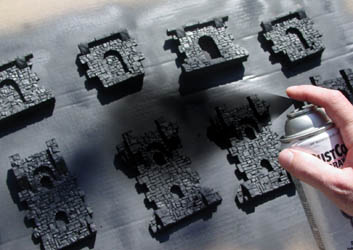
| 1. | The first coat I am spray painting it flat black. Be sure to do this outside or in a well ventilated area. Spray painting works much better because the pieces are thin and water based paint will soften the glue. The trick is to get the paint into all the cracks. To do this you will have to paint the walls straight-on, and also spray from all the angles you can think of. Paint the front and back of every piece. Also paint the dice chute. |
 |
|---|
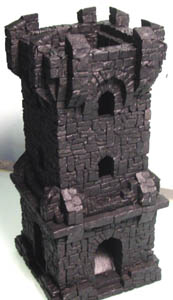
| 2. | Once dry, we will glue the tower together completely. Start by assembling and gluing the base and top separately. Once the base has dried completely, then glue in the dice chute. This is much easier to do if you have not glued the tower top on yet. Finally, glue the top of the tower onto the bottom of the tower and let it dry completely. This means that the inside of the tower will be completely black. The black will cover up the fact that the inside does not have a stone texture. After it is dry, look over the tower closely. If you find any white spots in the cracks, go ahead and paint them in by hand using thinned down black paint. It's much easier to spot these areas of you do not have a bright light directly shining on it while looking. |
 |
|---|
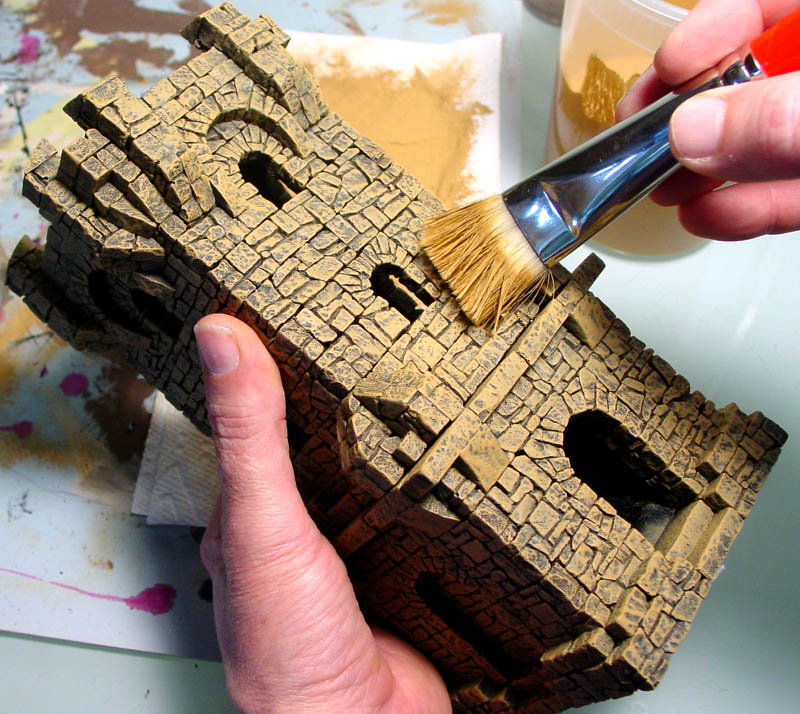
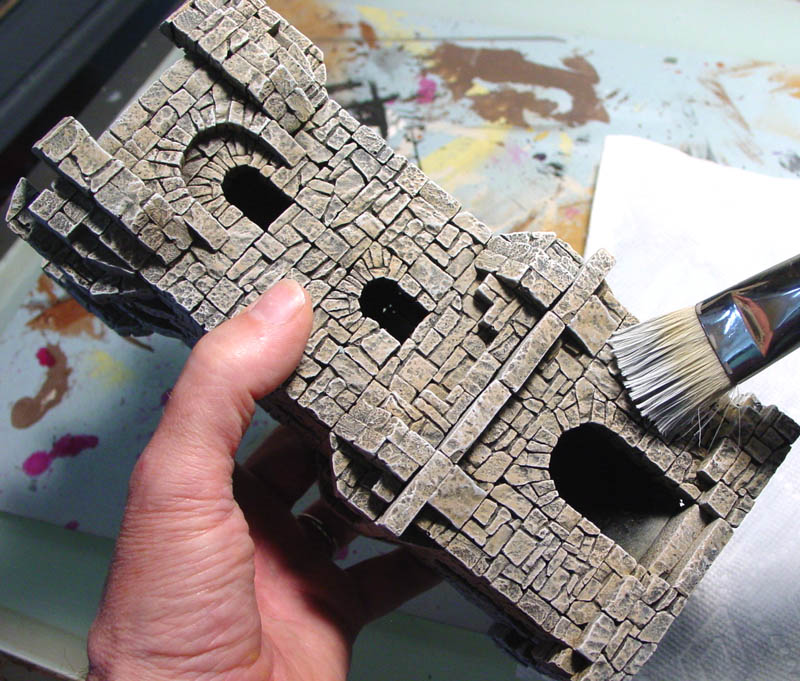
| 3. | The second coat of paint is earth tone medium color from the Earth Tone Painting Instructions page. This is sort of a "pumpkin pie" color. Dry brush this on lightly and when the brush starts to run out of paint, then dry brush heavily. If you do it right, each stone should have varying shades of brown on it with no black. If you do it badly you will have solid brown stones with no variety of shade on each stone. Click on the photo for a larger view. |
 |
|---|
| 4. | The last coat of paint is castle gray light color from the Castle Gray Painting Instructions page. Dry brush this on lightly. This color will highlight the edges of the stone in gray. It will also gray out the brown a bit. After the brush runs a bit dry, you can go a little more heavily but keep it lighter than when you were applying the brown. Click on the photo for a larger view. |
 |
|---|
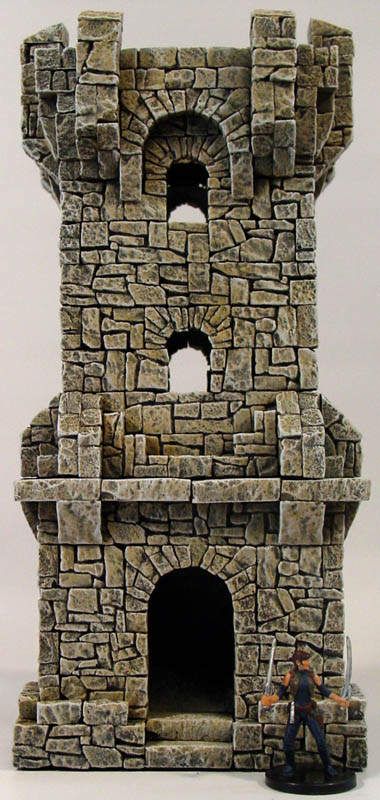
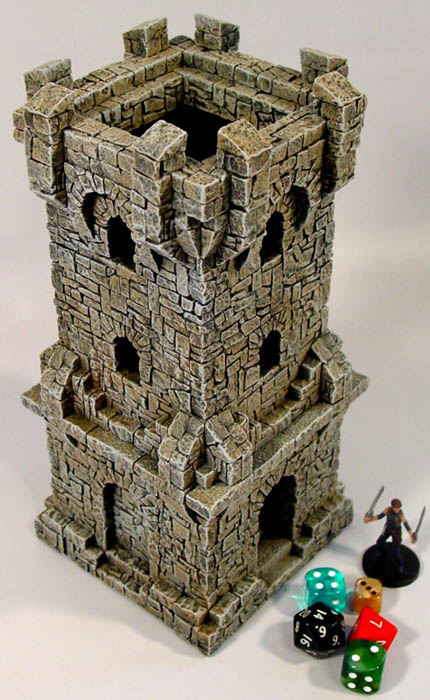
Finished Photos
I strongly suggest that you take a look at the Rubble Block Tips Page which describes mold #263 in detail and has a lot of good building tips on using the rubble block mold. You will notice that this dice tower has no tray on the bottom to catch the dice. I didn't add this so the tower could be used for terrain as well as rolling dice. Feel free to add a tray but you will have to make more castings of the mold because there will be very few blocks left from your 16 castings. You will not be able to fit any dice larger than 1" diameter through the door. Click on the photos to see a larger version of each. |
 |
 |