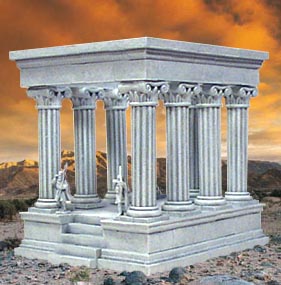
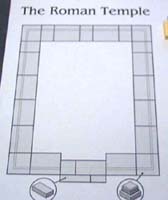
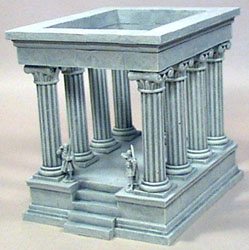
Building the Roman Temple |
|
This is one of the more difficult molds to use for 3 reasons:
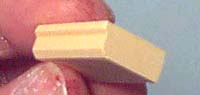
All of the blocks are smooth. This means that any difference in height (depending on how you scrape the mold) will be much more noticeable. With textured pieces, if the row of blocks waves a little, you really don't notice it. On super smooth pieces these waves are more obvious and a bit of sanding is required.
All of the blocks are smooth. This means that it's harder to find the side that you've scraped. Usually the blocks are slightly taller on the side you scrape them. You still need to stack the blocks with the side you scraped facing down.
All of the blocks are smooth. This means that any defects in the casting process are much more noticeable. If you have an air bubble or two in a textured piece, it just blends in with the texture. If you have air bubbles in a super smooth piece, it's more noticeable.
Special Casting Instructions
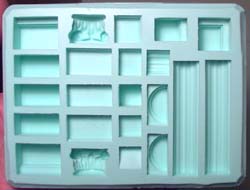 You'll notice that the pockets on this mold are much closer together. I squeezed as many blocks as possible on this mold. As it is, there are several blocks that wouldn't fit and had to be left out.
Because there are so many blocks, the walls between the pockets are very thin, even as thin as 1/8" in some places. This will make the mold a little more difficult to scrape.
I suggest you wait until the plaster is the consistency of toothpaste before scraping off the top. Also, be sure to scrape diagonally and from different directions. If you scrape straight across, the scraper will catch on those thin rubber walls and the bottom of the blocks won't be as smooth.
Special Building Instructions
If you want your model to look its best, you'll need to sand the blocks slightly. You can still build without sanding but it will be a little more noticeable when things are unlevel.
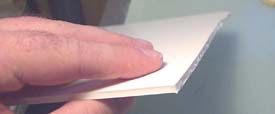
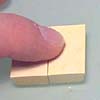
In this group of blocks, find the shortest one in the bunch. It's easiest to do by setting the blocks next to each other and feeling the tops with your finger. We will use this shortest block as a guide to compare all the other blocks to! |
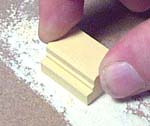
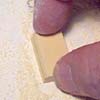
This really doesn't take as long as you think. I sanded all of the blocks for the temple in about 15 minutes using this method. |
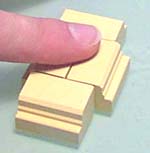 Start by laying out a group of blocks. Be sure the scraped side is down! The blocks are created exact size when I make the mold, but they always end up a little taller depending on how you scrape the mold.
 Next, take each block, set it next to the short one and feel the top. It should feel a little higher. Take the block to a piece of fine sandpaper and lightly sand the bottom. Now compare the height again. Continue doing this until the blocks feel the same height.
Building the Roman Temple
You will need to cast the temple mold 13 times to make this temple.
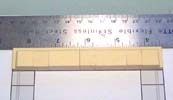
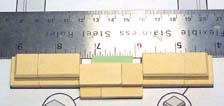
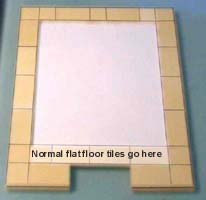
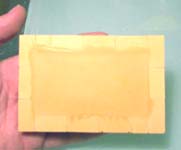
| 1. | You can download the plans shown here from the Building Plans page. We're going to start by laying down the base trim pieces. There's a close-up of what these look like in the photos. Be sure to sand as needed to make them level. Using a ruler will help you to line them up straight on the plan. |
 |
|
|---|
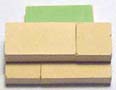
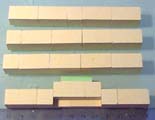
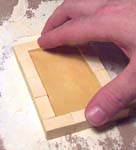
| 2. | You will also need some stairs. You can make these by gluing together the regular flat tiles shown here. Do not glue the piece shown in green. It's used to help hold up the stairs temporarily. Finish this first layer by placing down all of the blocks shown. |
|
 |
|---|
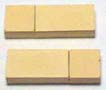
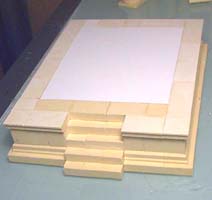
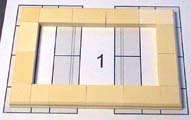
| 3. | The second row consists of regular smooth blocks (first photo). Be sure to stack and glue these with the scraped side down. Or if you want to, you can lay them all on their sides. Just be sure the blocks are the same height. This section also has steps made of the regular flat tiles. Again, do not glue the pieces shown in green. The next photo shows the separate sides glued together. The last photo shows the finished layer. |
|
 |
|---|
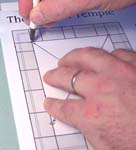
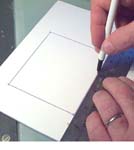
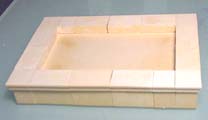
| 4. | To make the floor of the temple, we'll need some cardboard or foam core board. I'm using foam core board because it's really smooth and you won't get that corrugated pattern. If you use regular cardboard, you might glue a piece of cereal box on top of it to make it smooth. On the building plan I have a template for the floor. Simply lay the plan over the cardboard and poke the corners with a ball point pen. Remove the plan and connect the depressed dots. Finally, cut out the rectangle you've drawn. |
 | |
|---|---|---|---|
 |
 | ||
| 5. | The third layer (with the floor) will be made of top trim blocks. It's very important that these blocks are smooth on the scraped side. Place a group of blocks next to each other and find the shortest block. Lightly sand the bottom of the block until the scraped side is smooth. Next, take each block, set it next to the short one and feel the top. It should feel a little higher. Take the block to a piece of fine sandpaper and lightly sand the bottom. Now compare the height again. Continue doing this until the blocks feel the same height. |
 | |
|---|---|---|---|
 |
 | ||
| 6. | Now assemble the floor of the temple upside-down. In other words, lay the blocks down as you see them with the scraped side down, and lay the floor piece in the center. Glue everything together this way. Once the glue is dry, you can flip the piece over and have a flat smooth top for the floor of the temple. |
 |
 |
|---|
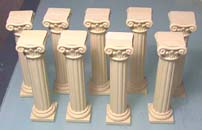
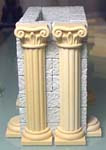
| 7. | Now to make the pillars. Start by gluing each half of the bases, pillars and capitals together. |
 |
 |
|---|
| 8. | When gluing these 3 pieces together, try to make the seams go at right angles to each other. In other words, line the pieces up with the seams going the same direction. Hold the top and bottom, and twist the center column 90 degrees. This will help the column stand up straight. |
 |
|---|
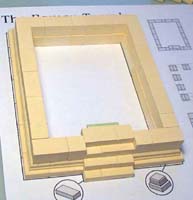
| 9. | Now for the final level of the temple. I'm going to make this final ring upside-down so it is easier to build. Start with the base trim pieces as shown on the plan. Be sure to sand them flat on the scraped side because once you flip it over that's the side that will show. Finally, add a ring of regular smooth blocks on top of it to finish the top. |
 |
 |
|---|
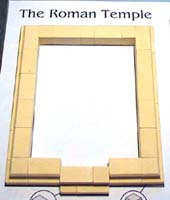
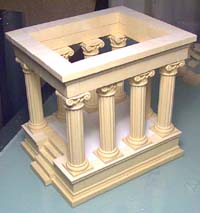
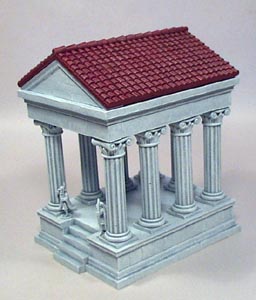
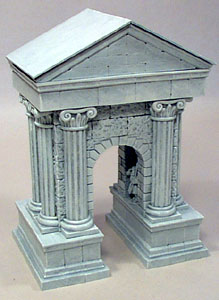
| 10. | The temple goes together something like this. Don't glue it together until you paint the pieces first. For instructions on painting the model, refer to the Painting Instructions page. I used shades of gray for this model, but made them much lighter than I did for the Wizard's tower. The lightest shade of paint (for the final dry-brushing) is straight white. |
 |
|---|
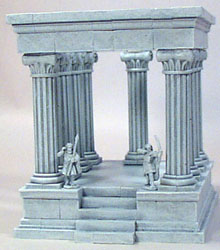
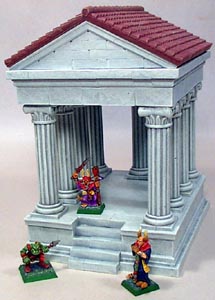
| 11. | Here are a few other shots of the temple. The miniatures that are used for statues are 25mm, slightly smaller than the Warhammer figures. This ends the instructions for the Temple. If you would like to add a tile roof to the temple, continue reading below. |
 |
 |
|---|
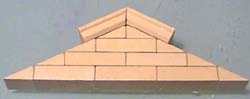
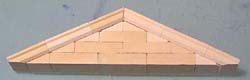
Adding a Clay Tile Roof
You will need to cast the clay tile roof mold 6 times to make this roof.
| 1. | Start by using the extra blocks from the Roman Temple mold (above). You may have to cast it a few more times to get enough sloped and flat blocks. You will have to sand pieces of the top decorative trim at an angle to meet at the peak. |
 |
|---|
| 2. | Glue on more pieces of the top trim mold so they extend well over both edges. When the piece is dry, sand the excess ends off so they're flush with the bottom. Be sure to make 2 copies of this peak. |
 |
|---|
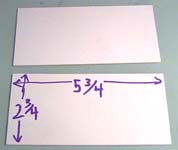
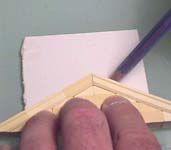
| 3. | Cut 2 pieces of heavy card stock for the roof. I'm using matt board which is about 1/6" thick. Both pieces are 2 3/4" x 5 3/4" each. Also cut a couple of peak braces from some excess card stock. Lay your roof peak down and draw around it to get the correct angle. |
 |
 |
|---|
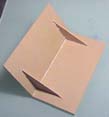
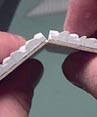
| 4. | Glue the card stock pieces together and add the braces. Don't glue on the roof tiles yet! Place 2 roof tiles meeting at the peak. You will notice the angle is too steep for the peak tile to fit in the middle. To fix this, sand down the edge so the peak tile will fit. |
 |
 |
 |
|---|
| 5. | Here's the finished roof. For tips on how to paint the roof, check out the Tips & Tricks 5 page. Here's a few photos with the roof added. The miniatures are Warhammer 30mm figures. 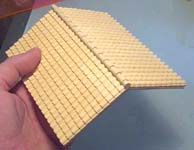 |
 |
 |
|---|
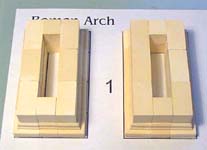
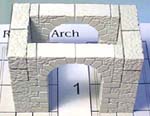
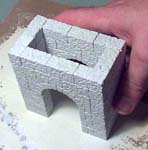
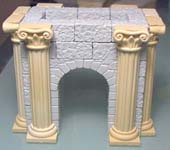
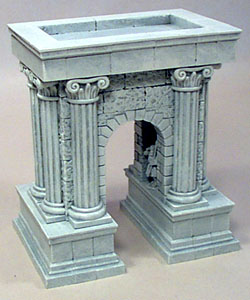
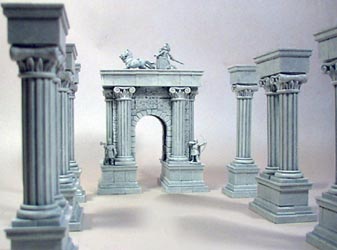
Building a Roman Arch
You will need to cast the Roman Temple mold 9 times and the Prison Tower mold 8 times to make this arch.
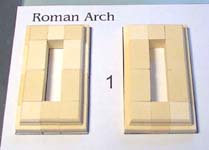
| 1. | The plans for this arch are on the Building Plans page for you to print out. I don't send copies of it with the molds. Please read the instructions above about sanding the blocks. This will be a quick version showing the arch construction. |
|---|
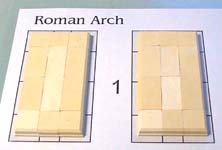
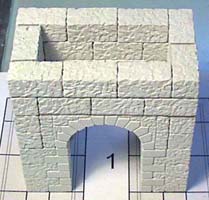
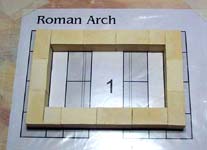
| 2. | The first three rows of blocks are made from the Roman Temple mold. The very first layer is made using the base trim pieces. The second row of blocks are the regular smooth blocks. |
 |
 |
|---|
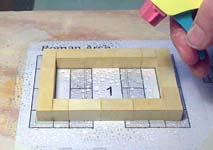
| 3. | The third layer is made upside-down out of top trim and flat tiles. It's sanded on the top. |
 |
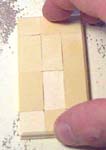 |
 |
|---|
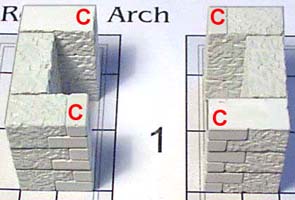
| 4. | Now it's time for the Prison Tower blocks. I cast these in a green material so you could tell the difference. The first 3 rows are exactly the same, stacked on top of each other. The corner blocks (marked with a "C") go on the inside of the archway only. The blocks in the lower right and upper left will need to be flipped upside-down so the brick pattern appears correctly. |
 |
|---|
| 5. | Glue 2 arches as shown. There is a flat block that glues on each side of them. Place the arches so they bridge the gap and fill in the outside ends with blocks. Lastly, add the remaining two rows of normal blocks. |
|
 |
|---|
| 6. | Depending on how you scraped your blocks in the mold, the height of the archway may differ slightly from the pillars. Most likely the arch will be a little tall. To check this, place a pillar (with the base and capital) next to the arch. If the arch is too tall, sand the bottom and top until it's the correct height. |
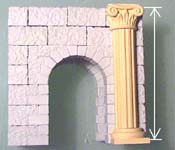 |
 |
|---|
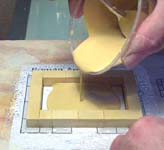
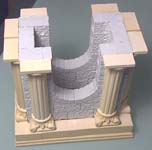
| 7. | On this layer, we're going to do something special. Instead of making a floor out of tiles or blocks, we're going to pour a floor (or ceiling) out of plaster. The first step is to tape a piece of plastic over the floorplan. It can be clear plastic wrap or part of a plastic baggie. Then glue together a ring of smooth regular blocks as shown. |
 |
|---|
| 8. | Spray the blocks with water. I mean soak it! Let the water bead up on the plastic at the bottom. Mix up some plaster and pour it in the ring of blocks. Pound on the table to level the plaster. If the plaster doesn't flow well, spray on more water. Allow this to set up completely. |
 |
 |
|---|
| 9. | When the plaster has set up, remove it from the plastic and let it dry. You will see that the plaster will creep under the blocks slightly. Once the piece is dry, sand the top (bottom?) completely flat. |
 |
 |
|---|
| 10. | The very last layer is made of top trim pieces. This ring is glued to the top of the flat roof you've just made. Now it's time to glue on the pillars. |
 |
 |
|---|
| 11. | Glue the pillars onto each side as shown. Flip the whole thing upside-down and glue the roof on. Do not glue the base pieces on! |
 |
 |
 |
 |
|---|
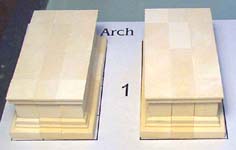
| 12. | After the sections are painted, then glue the base pieces onto the bottom. If you glue them on first, the inside of the arch is difficult to paint. Here are the finished pieces painted. I used the exact same roof peaks from the temple above for what you see here. The roof is made out of a piece of heavy card stock, folded in the middle and laid on top. |
 |
 |
|---|
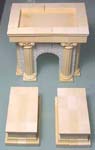
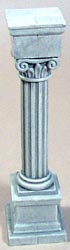
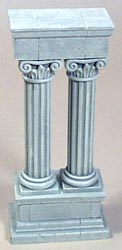
| 13. | Here's an example of a single pillar, a double pillar, and how they can be used with the arch. The figures on the arch are 25mm scale. |
 |
 |
 |
|---|
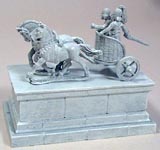
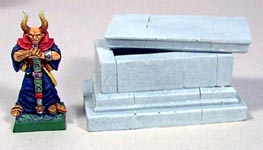
| 14. | The chariot base is one of the bases from the Roman Arch. The base used for the tomb is the same base used for the double pillars above. It has a 30mm figure next to it. |
 |
 |
|---|