Tips & Tricks 16
Making Antique Foil Doors
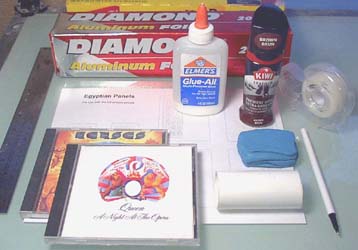
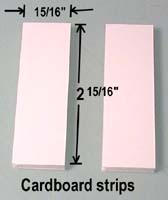
| 1. | This process can be used to make panels with any design you want. Here are the things you need:
|
 |
|---|
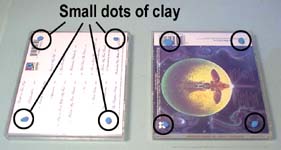
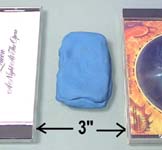
| 2. | Put 4 small dots of clay on the back of each CD to keep them from sliding around. Place the CD's about 3 inches apart and place a wad of modeling clay between them (the kind of clay that doesn't dry). |
 |
 |
|---|
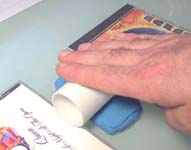
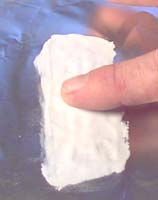
| 3. | Use the piece of pipe to roll out the modeling clay. The CD's are used as a guide to keep the top nice and even. You can also use a rolling pin for this, but wash it off good after you use it. The modeling clay has an oily residue that's kind of hard to get off. Polymer clay works just as good as modeling clay and it's a little cleaner. |
 |
|---|
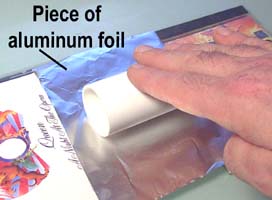
| 4. | Cut a piece of aluminum foil large enough to cover the clay with plenty of extra room around it. Try not to wrinkle it when you're cutting a square. Roll down a piece of aluminum foil on top of the clay. It doesn't matter if the shiny or the dull side is up when you lay it down. The shoe polish seems to stick pretty well to either side of the foil. |
 |
|---|
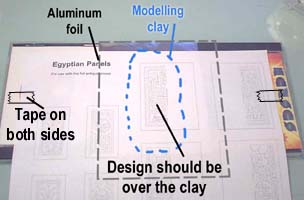
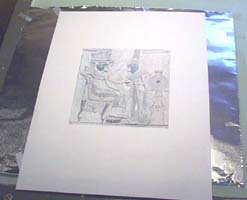
| 5. | I've included a few designs on the Building Plans Page. Look in the bottom left corner of the page labeled "Egyptian Panels" and print this page out on your printer. Place the design over the clay. You can kind of feel where the clay is underneath the paper. The clay acts as a support for the design. Tape the paper down on both sides to hold it in place. |
 |
|---|
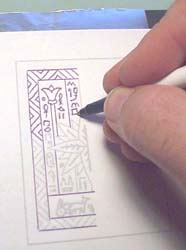
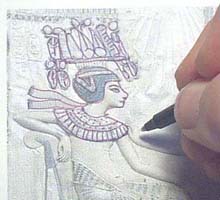
| 6. | Trace over the design using a cheap ballpoint pen. It's better if you have a pen with a fat round ball point. The fine ball point pens will tear through the paper. It's important that you press lightly, just enough to draw on the paper. If you press too hard you will tear through the foil! I used a ruler for the straight lines and did the other lines freehand. It doesn't matter if your tracing job is sloppy, the design will still look good when you are finished. |
 |
 |
|---|
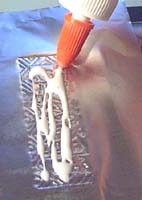
| 7. | Remove the paper design and pour some glue onto the foil. You don't need a lot of glue, just enough to give a thin coating over the design. The glue will settle down into the grooves and dry there, making the dents in the foil permanent. Leave this a couple of hours or until the glue dries completely. In the meantime, roll out another piece of clay and work on the next design on the sheet. |
 |
 |
|---|
| 8. |
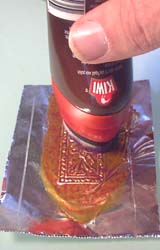
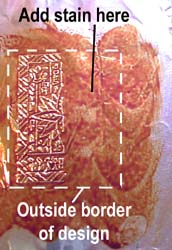
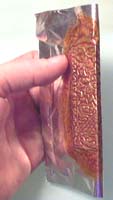
To stain the foil, I'm going to use "Kiwi" brand liquid brown shoe polish used for leather. It has a built in brush on the end, just push it down and rub the shoe polish all over the foil. Be sure to spread it all over the foil and cover all the area shown past the border of the design. The shoe polish will flow down to reveal the design. Let it dry completely! |
 |
 |
|---|
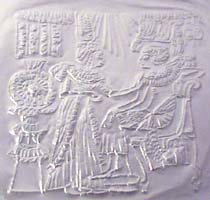
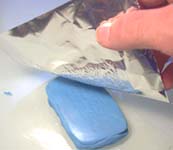 Once dry, remove the foil and flip it over so the glue is underneath.
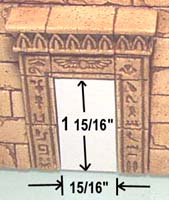
| 9. | The piece we have made is for one half of the large door. Since the doorway opening is 1" x 3", we need to make the door smaller so it will fit. I'm making these doors 1/6" short both ways so the doors will fit correctly. You can make the doors out of cardboard or foam core board. Put a thin layer of glue on the card board and wrap the foil around it. Trim up the edges, put glue on them and fold the foil over the edges. |
 |
 |
|---|
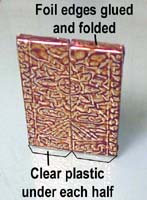
| 10. | Folding the edges over and gluing them is the hardest part of the whole process. The trick is to not get glue everywhere while you're doing it. If you do, you can always touch up the edges with more shoe polish. There are two separate door halves shown here. To get the doors to stand on their own, you can glue pieces of clear plastic onto the bottoms of the doors. This will allow them to be positioned or removed if you don't want them to show. |
 |
|---|
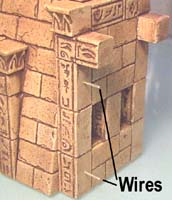
| 11. | However, I chose to pin the doors in place using pieces of wire. To do this, first you have to drill a couple of small holes in the side of the doorway. Then you glue a couple of wires into the holes using super glue. Use very thin wire. The wire looks thick here because I enhanced the photo to show the position. |
 |
 |
|---|
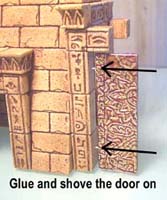
| 12. | Place glue on the wires and shove the door on. When the glue dries, the door will be able to hinge on the wire. For the smaller doors, use the smaller design on the sheet. The small doorway measures 1" wide by 2" tall, so you want to cut the door 1/16" smaller and it will fit properly. Apply the foil embossed designs to the smaller doors as well. |
 |
 |
|---|
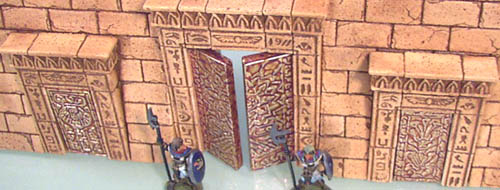
| 13. | When finished, you will have the doors on the Pylon temple. For building instructions and complete photos for this model, go to the Egyptian Pylon page. |
 |
|---|
Making Your Own Designs
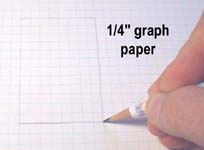
| 1. | Making your own designs is fairly easy. I suggest using 1/4" graph paper to draw it on, so it will be the right size to fit with the blocks. Draw your design in pencil. Pencil works the best because you can erase your mistakes, and you can see what you've already traced over in ink pen. |
 |
 |
|---|
| 2. |
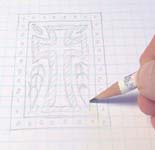
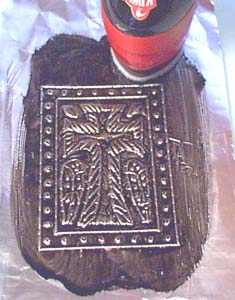
This time I'm using black shoe polish. Black shoe polish works great for making a steel door. I also found that simpler designs work better. The texture around the cross is almost too busy. A simple outline would have looked better. Also, small circles make great rivets for doors and steel plates. This technique would work nicely for sci-fi steep plates and hatches. Imagine making a large foil section with overlapping plates and rivets, then wrapping it around a cardboard tube for a rocket fuselage. |
 |
|---|
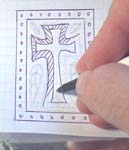 Trace over the design using a cheap ball point pen (follow the article above).
Copying Designs From Books
| 1. |
I'm using the second method here. I've scanned the image, and used my computer software to make it black-and-white and also to lighten the image up. Try to pick a design with not too much detail. The more detail you have, the busier the design will be. |
|---|
 Not very good at drawing? Then you can copy designs from books. The hardest part will be to get the design the right size for what you need. There are two ways to do this:
| 2. |
I've covered the clay with foil, and taped the paper design on top of it. The clay is thin enough that it's not a problem to tape the edges straight to the table. Be sure to put the foil dull side down or the India ink (shown below) won't stick to it. |
 |
|---|
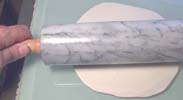 Since this item was much larger than the other things I had made, I'm using a rolling pin to roll out the clay. I'm using polymer clay which doesn't have an oily residue.
| 3. | The hardest part about using real photos is figuring out where to draw. Just do your best and try to keep the details down. Once you've drawn the image, remove the paper and spread a thin layer of glue onto the foil. Let it dry completely. Once dry, remove the foil and turn it over to reveal your raised image in the foil. |
 |
 |
|---|
| 4. |
Paint a layer of ink over the foil and let it dry overnight. When it's completely dry, use steel wool to scratch off the excess ink. It's up to you how much ink you want to take off. Don't push too hard or you'll tear through the foil. |
 |
|---|
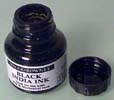 For this experiment, I'm going to try black India ink. This is the same type of ink artist use for fancy lettering with calligraphy pens. It should be easy to find at any art or craft store.
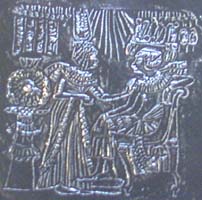
| 5. | The steel wool will take off ink from the whole picture. It will lighten up the outside and make the raised ridges shine. The piece of foil can then be wrapped around a piece of cardboard for a large panel door or wall section. Looking back, I should have picked a different photo for this example. The gray steel color just doesn't go with the Egyptian theme very well. Using India ink on foil is not my original idea. I believe it's from a school craft project that has been around for years. |
 |
|---|
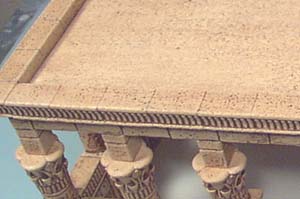
Making a Sand Textured Roof
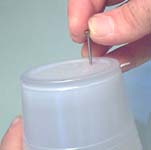
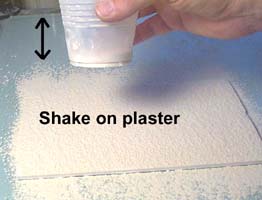
| 1. | To add sand texture to a slab roof, we're going to use the plaster itself as the sand. Real sand (to scale) would be very fine and powdery, just like plaster is. To sprinkle the plaster evenly, I'm going to poke holes in a plastic cup using a nail. This will make sort of a "salt shaker" that we can shake the plaster through. |
 |
 |
|---|
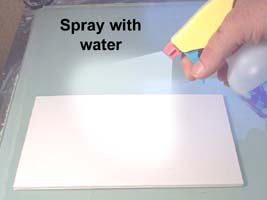
| 2. | Spray the surface of the roof with water. If your cardboard curls, then you may want to attach it to something stiffer like a piece of wood. Liberally shake on the plaster and cover the whole surface with it evenly. |
 |
 |
|---|
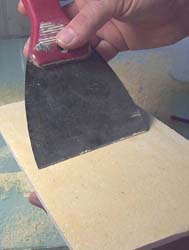
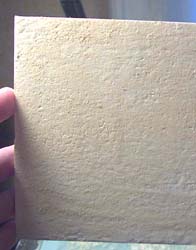
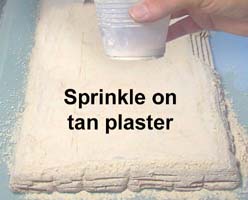
| 3. | Please note that I am using tan dental plaster to sprinkle on the roof. If you use white plaster, then you'll have to paint it before using a staining method. Wait 5 minutes before you scrape the roof. Using a wide putty knife, gently scrape off the dry plaster on top. Stop when you get down to damp plaster, the scraping will sort of compact it down onto the roof. Let it dry completely. Once dry, use a stiff brush to gently remove the remaining dry plaster on the surface. It will leave the texture you see here. |
 |
 |
|---|
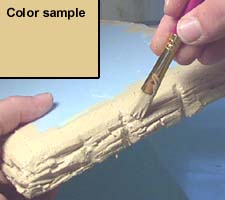
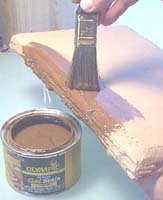
| 4. | You can paint the roof the same way you paint the rest of the temple. Refer to the Antiquing Method shown on the painting instructions page. It consists of sealing the roof with varnish, then using shoe polish or gel stain to finish the model. For instructions on building the temple, see the Egyptian Temple Building Instructions page. |
 |
|---|
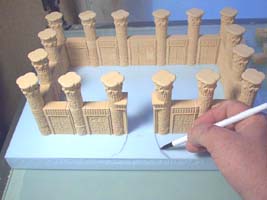
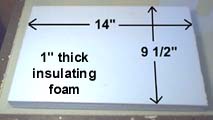
Carving a Sand Textured Base
| 1. |
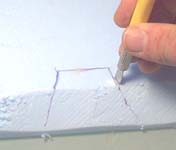
This is the stuff they use for sheeting on houses before they put siding on. Center the temple on the board and use a pen to outline where the stairs will go. |
 |
|---|
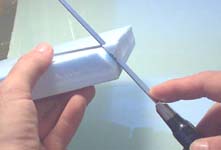
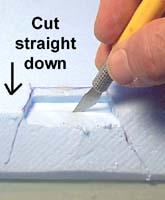
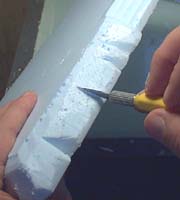
 For this section, I'm going to carve a stone base for the
 | 2. | Use a sharp knife to bevel the edge all the way around the foam. The first photo shows me using a bread knife, but I would have done just as well with a sharp hobby knife. Next, use a sharp hobby knife to cut straight down on each side of the stairs. |
 |
 |
|---|
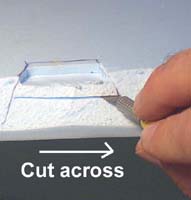
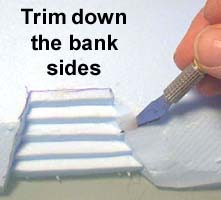
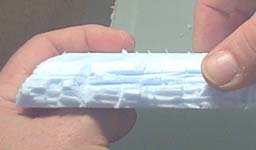
| 3. | Cut the steps as shown. It's OK if they're uneven. Trim down the sides of the bank next to the steps. |
 |
 |
 |
|---|
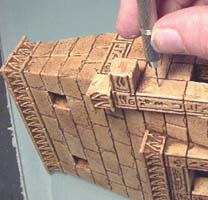
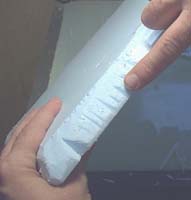
| 4. | Make a few vertical cuts in the foam. Use your finger to knock the cut pieces of foam out. You don't want many vertical cuts. Be sure to spread them out and make them different sizes and depths. |
 |
 |
|---|
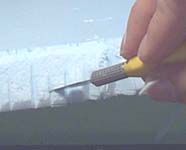
| 5. | Make several horizontal cuts in the foam. These should be more shallow than the others and more frequent. Angle the knife as you cut to help remove pieces. Use your finger to knock the cut pieces of foam out. |
 |
 |
|---|
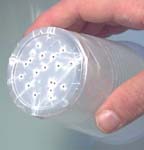
| 6. | Paint the foam with a sand colored latex paint. This will cover the blue color and give something for the plaster to stick to. Next, sprinkle tan plaster over all the surfaces and let it dry completely. This plastic cup has holes in the bottom to sift the plaster through evenly. |
 |
 |
|---|
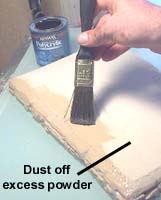
| 7. | When it's completely dry, use a stiff wide brush to dust off the excess powder! Now that the blue foam has a base color and texture, I'm going to follow the Antiquing Method used to paint the rest of the Egyptian pieces. This consists of sealing the piece and staining it with gel stain or shoe polish. |
 |
 |
 |
|---|
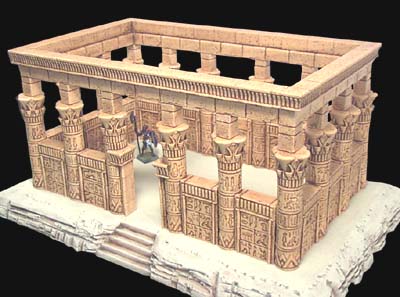
| 8. | To finish the rock base, dry-brush the rocks on the side with a sand colored latex paint. Then paint the top surface solid with the same color. 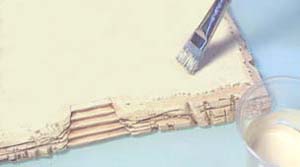 The completed Egyptian Temple is shown on the rock base. For instructions on building the temple, see the Egyptian Temple Building Instructions page. |
 |
|---|