Tips & Tricks 31
Carving Rock Faces
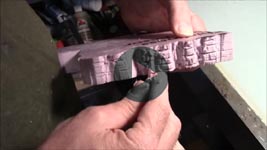
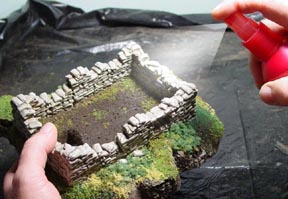
Click on the video to watch it on YouTube. This video shows the process of cutting a rock face texture into insulating foam. It is recommended that you practice a bit using scraps of foam. Once you get the hang of it, go ahead and carve the texture into your real project. These foam rocks are used for the Sandbag Fortification project. |
 |
| 1. | This rock face will be carved out of 1" thick insulating foam. It comes in pink or blue and you can usually find it at most lumberyards. This is the stuff they use on the side of houses before they put siding on. If you live where the weather is nice all the time, then it may not be available in your area. |
 |
|---|
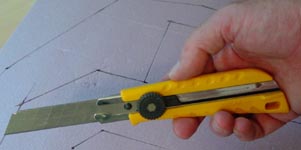
| 2. | For making large cuts into the 1" thick foam, I'm using an 18mm snap off utility knife. It's the kind of knife where you can snap the ends off when the blade gets dull. This 18mm knife has a thicker longer blade than most simple snap off knives. I believe the common sized knives (like you find at Wal-Mart) would not be sturdy enough for the job. You'll need to go to a larger hardware store for one of these. |
 |
|---|
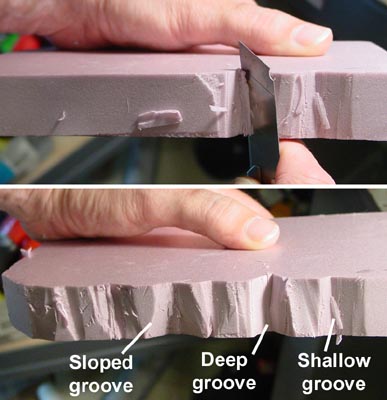
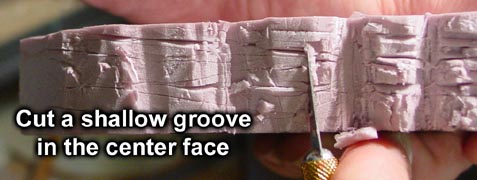
| 3. | Rock faces usually have two kinds of crevices, wide shallow vertical crevices and deep thin horizontal cracks. First we'll work on the shallow vertical crevices. Using the knife, cut some shallow grooves into the foam. These range from 1/4" wide to 1" wide. The depth can also be from 1/4" to 1" deep. The real trick to making it look natural is to have a variety of cuts. Make one vertical groove that is shallow and the next one fairly deep. Make one groove fairly thin and the next groove wide. Make one groove straight up and down and the next groove angle to the left. Make one groove choppy and the next one smoother. The variety of size, depth, angle and texture will give your rock face a more natural look. |
 |
|---|
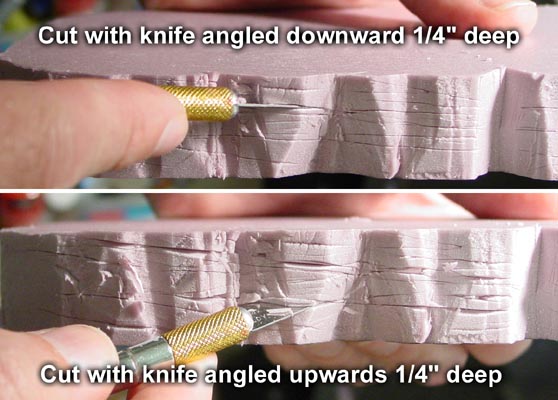
| 4. | Using a regular hobby knife, make horizontal cuts in the foam. Start by angling the knife downward and make several cuts about 1/4" deep. Then angle the knife upwards and make several more cuts about 1/4" deep. You would think that a lot of foam would come out of the grooves but most loose pieces seem to want to hang on. |
 |
|---|
| 5. | On the front face of the rock, try to add smaller vertical grooves by cutting the foam. This will pull out many of the foam slivers that are stuck. |
 |
|---|
| 6. | While cutting these grooves, drag the knife across the surface of the foam. This will texture the front surface and pull out more bits. |
 |
|---|
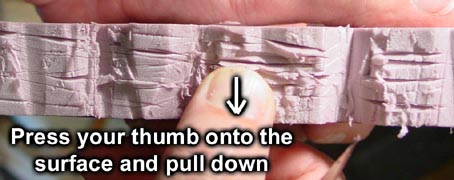
| 7. | Finally, press your thumb onto the surface and pull down. This will remove many more slivers and get rid of any loose hanging stuff. |
 |
|---|
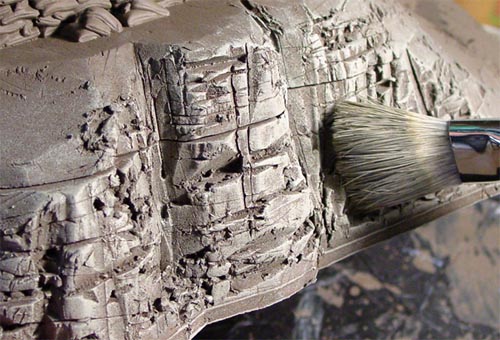
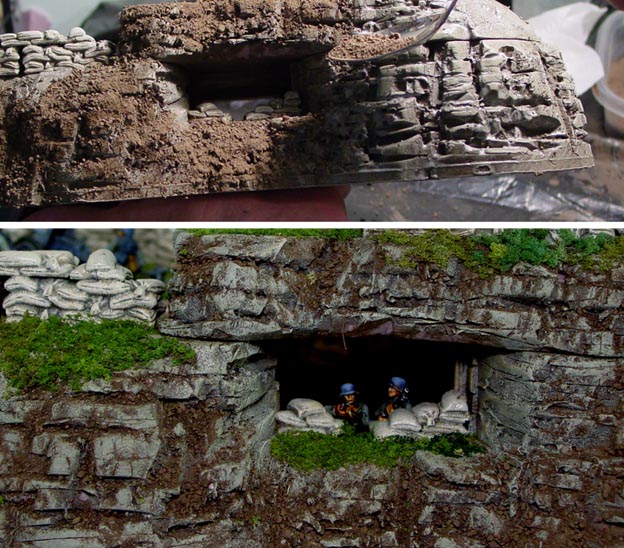
| 8. | You can then paint the rock face in shades of gray-brown. Here I started with the brown colors from the Earth Tone Painting page. I thought the colors were a little too brown, so I added half gray to them - dark gray to the dark brown, medium gray to the medium brown, etc. After the foam is dry brushed the rock texture comes out pretty good. |
 |
|---|
Preparing the Dirt
Click on the video to watch it on YouTube. This video describes the steps in preparing real dirt from your yard to use on your displays. This dirt will be sealed later on using hairspray and will set up to be very durable once it's finished. |
 |
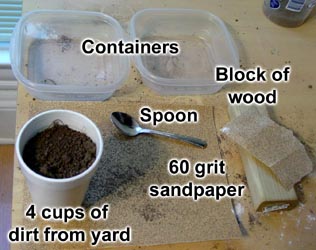
| 1. | I started by collecting dirt from the yard. It's better if you can get the dirt from a bank or washed out area where no grass is growing. That way you don't have to deal with a lot of grass roots. You'll need about 4 cups of dirt. Be sure that the dirt is completely dry. Otherwise the dirt will not grid down but instead just clog your sandpaper. You can spread it out on several sheets of newspaper overnight to dry it out. You will also need some containers, a spoon, some 60 grit sandpaper and a block of wood. |
 |
|---|
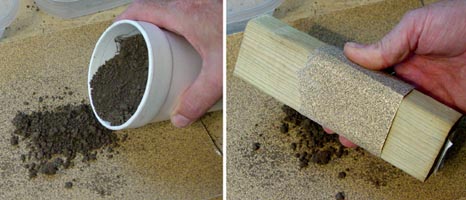
| 2. | Sprinkle about a 1/4 cup of dirt onto a sheet of sandpaper. Then take a strip from a separate sheet of sandpaper and wrap it around the block of wood. If you don't have a block of wood, anything hard and flat will work. |
 |
|---|
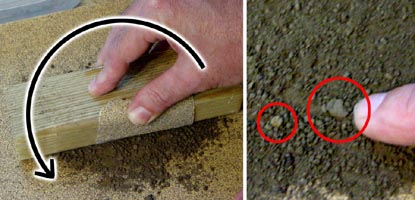
| 3. | Using a circular motion, grind the dirt until it's about the texture of ground coffee. While you're doing this, remove any rocks or roots that you may run into. Either throw them away or save them for where you need larger ground cover for your model. |
 |
|---|
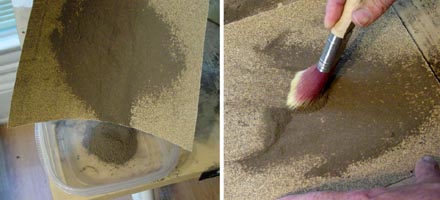
| 4. | Pour the ground dirt into a container. It will be sifted later. When your sandpaper clogs up, use a stiff bristled brush to clean it off. Then pour this fine dirt into your "fine dirt" container. If the sandpaper does not want to clean this way, then your dirt is still too wet. |
 |
|---|
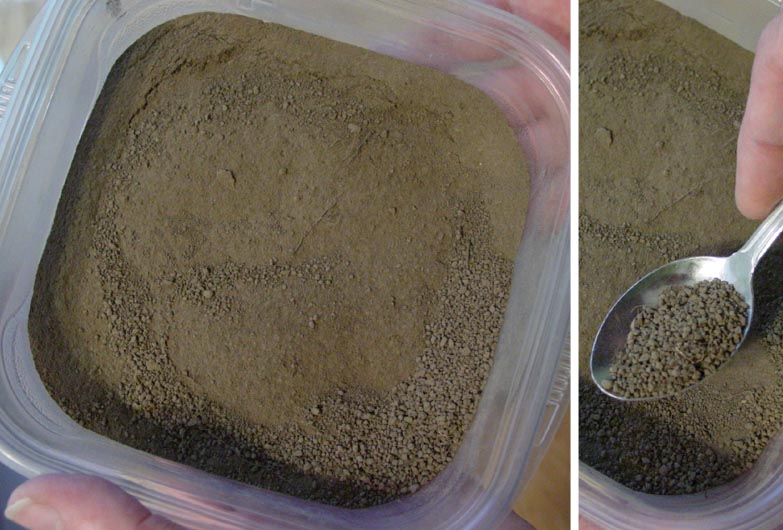
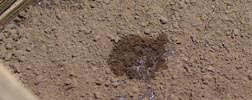
| 5. | To sift the dirt, tilt the container and lightly tap the bottom. The fine dirt will settle to the bottom and the coarse dirt will come to the top. Scoop this coarse dirt out using a spoon. Now stir the dirt around with a spoon. Tilt the container and lightly tap it. Scoop out the coarse dirt and place it in the "coarse dirt" container. After you have repeated this process about six times the dirt will be sifted pretty well and you will have a container of "fine dirt" and a container of "coarse dirt". Click on the photo for a larger view. |
 |
|---|
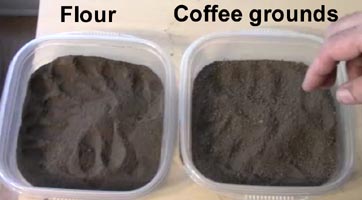
| 6. | When you're finally finished, you'll have two containers of dirt. One will contain fine dirt the consistency of flour. The other will contain coarse dirt the consistency of coffee grounds. For the project I'm doing, I'll need about a full cup of each. |
 |
|---|
Gluing on Ground Cover
Click on the video to watch it on YouTube. This video describes how to apply glue and ground cover to your model. We will use the prepared dirt along with ground foam scenic materials from Woodland Scenics. This ground cover is being used on the Sandbag Fortification project. |
 |
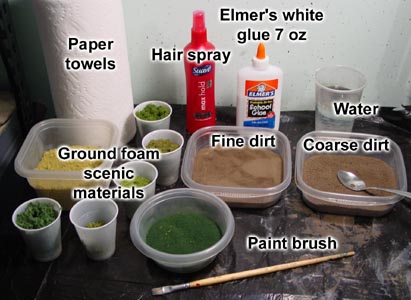
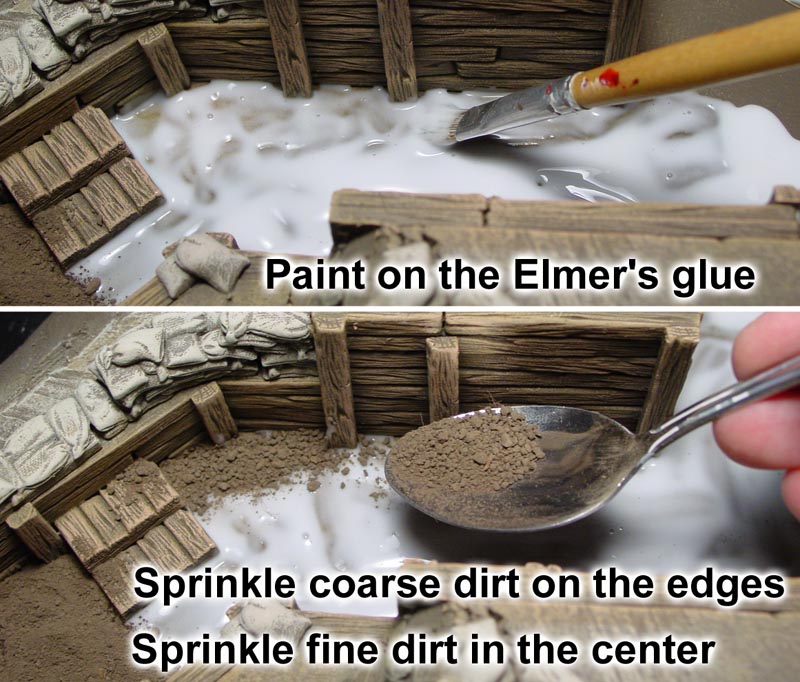
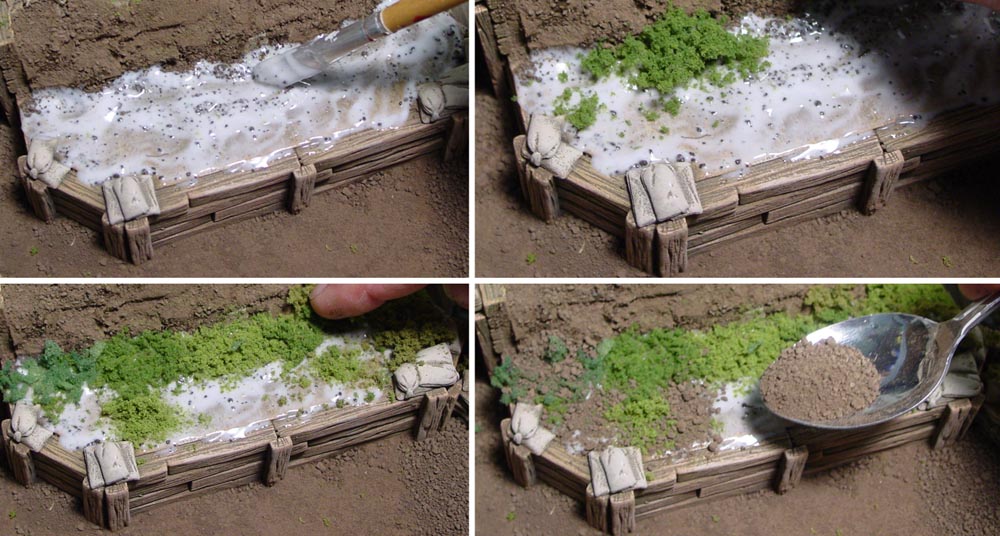
| 1. | When gluing on ground cover to your model, there are several things you will need. Paper towels, hair spray (pump bottle), Elmer's white glue (7oz bottle), water, fine and coarse dirt and a paint brush. For the grass and foliage, I am using Woodland Scenics ground cover. This is ground up colored foam in different colors and textures. A larger variety of color and texture will give you a more realistic looking layout. Cover your table with a trash bag. You are going to be sprinkling dirt and ground foam everywhere which will make a huge mess otherwise. |
 |
|---|
| 2. | Start by pouring the Elmer's glue into a small cup. It's much easier to just pour the glue on from the cup than to squeeze it out of the bottle. You'll want about a 1/16" of glue on the floor of the trench. Once the glue is on, sprinkle the coarse dirt around the edges of the trench. Afterwards, sprinkle the fine dirt in the center of the trench. The fine dirt represents the areas that are packed down from people walking over it a lot. Don't worry about getting too much glue. If the glue is thick, it will take longer to dry. But even a thick layer of glue will still end up being pretty thin after it dries. Click on the photo for a larger view. |
 |
|---|
| 3. | If you see glossy wet spots appearing through the dirt, then you will need to apply more dirt. |
 |
|---|
| 4. | There are places where I want the wooden planks to show through the dirt. To get this effect, I'm wetting down a paper towel and wiping off the glue from the surface of the planks. |
 |
|---|
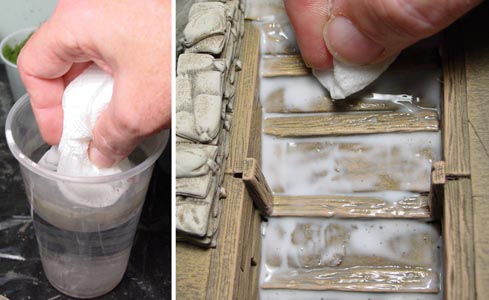
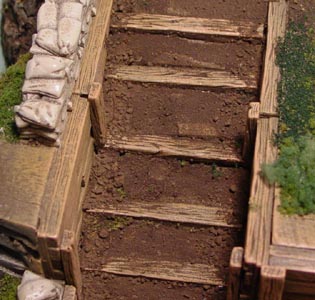
| 5. | This sounds pretty straight forward but it's not as easy as it looks. You have to wipe off the glue, find a clean spot on the towel and wipe it again. Do this several times until most of the plank is completely free of glue. Then coarse dirt is sprinkled on the outside edges and fine dirt is sprinkled on the center where people walk. After it is completely dry and the excess dirt removed with a paint brush, you can see that dirt did not stick to the center of the plank. This photo shows the end result after the excess dirt is removed, hair spray is applied and the model has dried. |
 |
|---|
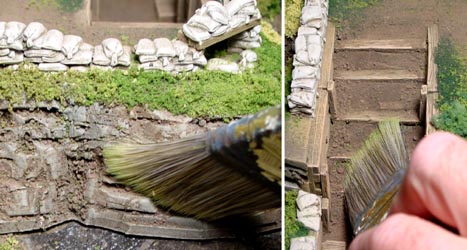
| 6. | If you want the rock face to look a bit more like fresh loose rock, you can glue dirt into the cracks. To do this, you paint glue directly onto the rock face. Then you use a very wet paper towel and wipe all the glue off from the face of the rock. To do this well, you really need to press the wet towel down into the cracks. Then wipe off the surface. Get a new wet towel and wipe off the surface again. You don't want any glue on the surface of the rock. Click on the photo for a larger view. |
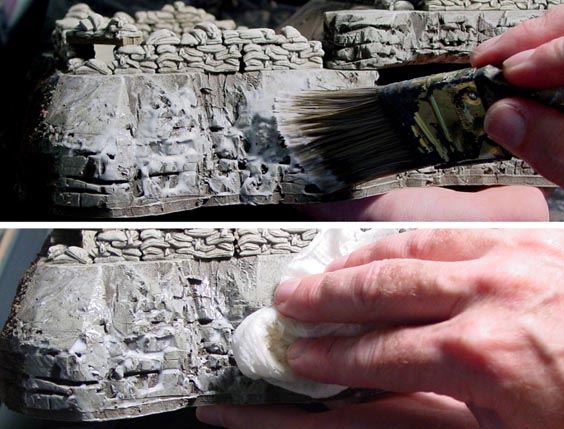 |
|---|
| 7. | Then sprinkle coarse dirt onto the rock face. This looks like it sticks everywhere simply because the face of the rock is wet. Once dry, brush the excess dirt off and seal it with hair spray. Looking back on the project, there were a couple of things that bothered me about this. I like the natural look but I should have wiped off more glue. Also, the dirt seemed a little too red in color compared to the rock face. If I had not mixed gray into the rock color, the dirt color would have matched better. This part is completely optional so you don't have to add it if you don't want to. Click on the photo for a larger view. |
 |
|---|
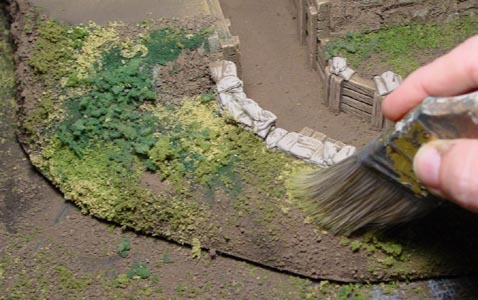
| 8. | To put on the ground cover, paint on the glue and sprinkle on the ground foam. Be sure to vary the color and texture and apply each kind of color in small patches of varying shape and size. Occasionally add patches of dirt. Press the grass down with your fingers to embed it into the glue well. Click on the photo for a larger view. |
 |
|---|
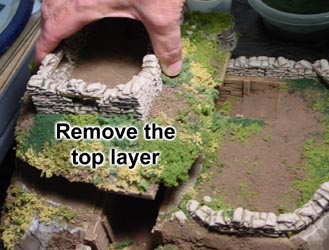
| 9. | When you start to apply the ground cover, be sure the top layer is set on and apply the glue and ground cover as if it's all one solid hill. After you have glued down all of the ground cover and dirt, remove the top layer and set it aside to dry. If you don't take the top layer off, it will permanently glue into place. Allow this to dry completely (overnight) before moving onto the next step. |
 |
|---|
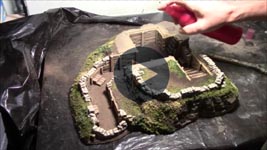
Applying Hair Spray
Click on the video to watch it on YouTube. This video describes how to use cheap hairspray to seal the dirt and grass onto your model. The hair spray is being used to seal the Sandbag Fortification project. |
 |
| 1. | Use a wide soft brush to loosen the excess dirt that you do not want. This will mostly be on the well traveled areas such as down in the trench. Also brush over the grass lightly to remove any excess just resting on the surface. Don't take off too much, just the loose stuff. The hair spray will glue down the rest. Turn the whole thing upside down and let the excess fall onto the trash bag covering the table. |
 |
|---|
| 2. | If you chose of add dirt to the rock face, brush over the surface well to remove all of the dirt from the face. Wiping with a lightly damp towel is also helpful. Be sure to remove excess dirt from the plank steps and from the planks on the sandbag roof enclosure. |
 |
|---|
| 3. | Saturate the whole layout with hair spray. You might want to do this in a well ventilated area. You will notice that they dirt will turn very dark (into mud). Don't worry because it will dry a lighter color. If you don't want your sandbags to have a slight sheen to them, immediately dab the hairspray off with paper towel. Don't wipe it off or the hairspray will wipe off your paint. |
 |
|---|
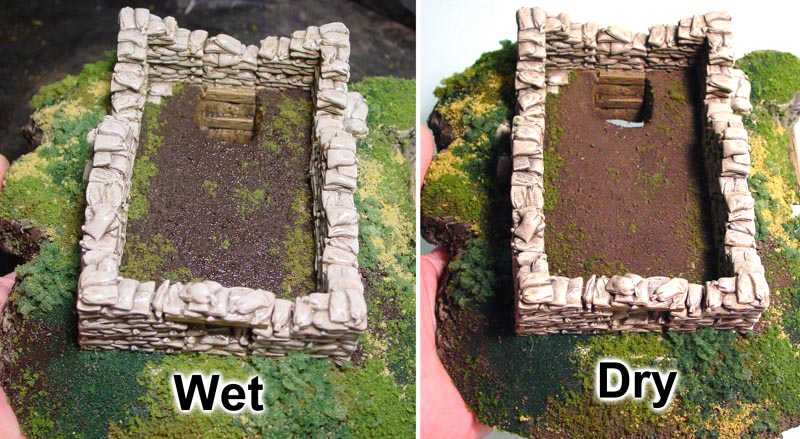
| 4. | These photos compare the wet dirt (just sprayed with hairspray) to what it looks like after it is dry. Click on the photo for a larger view. The finished dirt is halfway between the light dirt that you just sprinkle on and the dark mud from when it's wet. |
 |
|---|
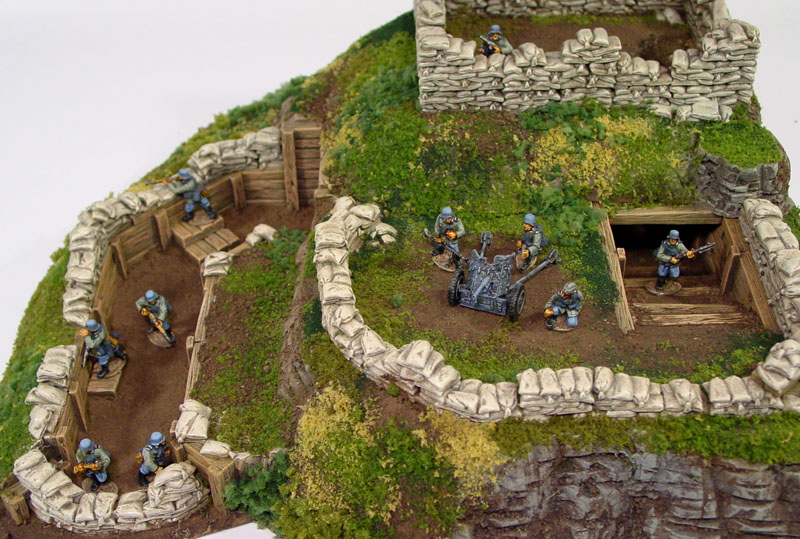
You can find complete information on how to build this model on the Sandbag Fortification Building Instructions page. Information about the sandbag mold and the trench plank molds can be found on our Tips & Tricks 32 page. The German soldiers you see here are Bolt Action figures from Warlord Games. These soldiers are 28mm in scale and measure about 1 1/4" tall. These soldiers were painted by GRG3D. |
 |