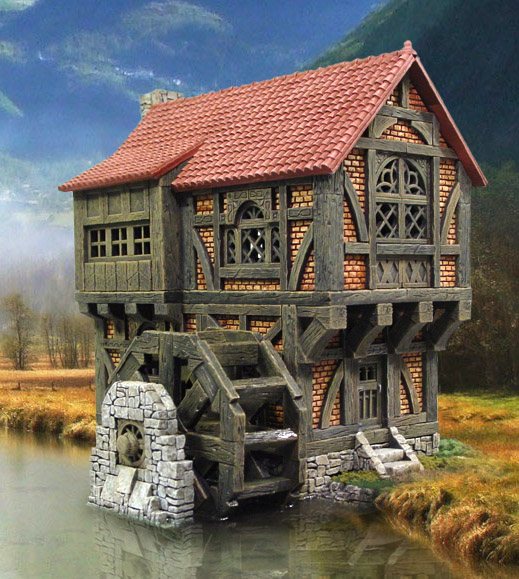
Watermill Building Instructions
|
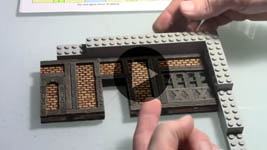
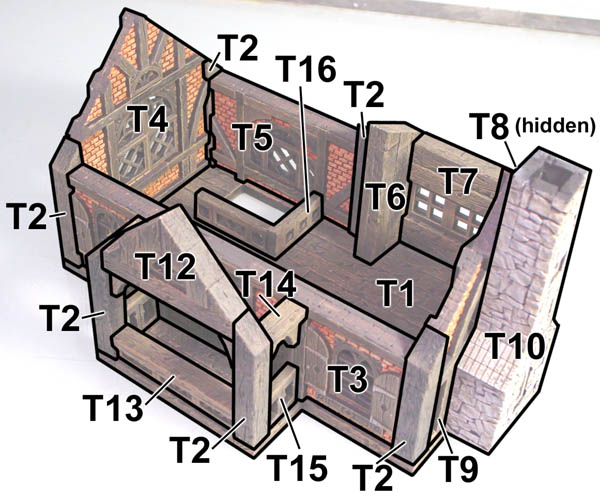
To build the watermill shown here, you will need: 20 castings of mold #226 wooden beam mold. You will also need to print out the watermill building plans. The printed plans show where every block goes. The instructions below only tell you what problems to look out for when assembling the mill. This is a fairly complex project. If this is your first building project using Hirst Arts molds, I strongly suggest you choose a more simple project instead. Please follow these instructions in order. For example, glue together all of the wooden and stone sections in Step 1 before moving on to Step 2. However, you may glue together the sections within a certain step in any order you like. For example, you may glue together the wooden and stone sections in step 2 in any order. But all sections in step 2 should be completed before moving onto step 3. |
|
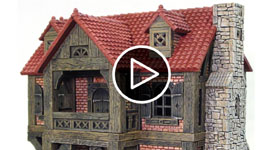
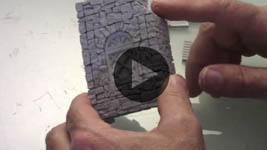
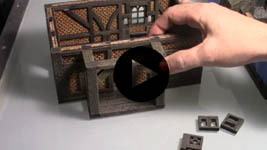
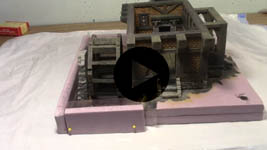
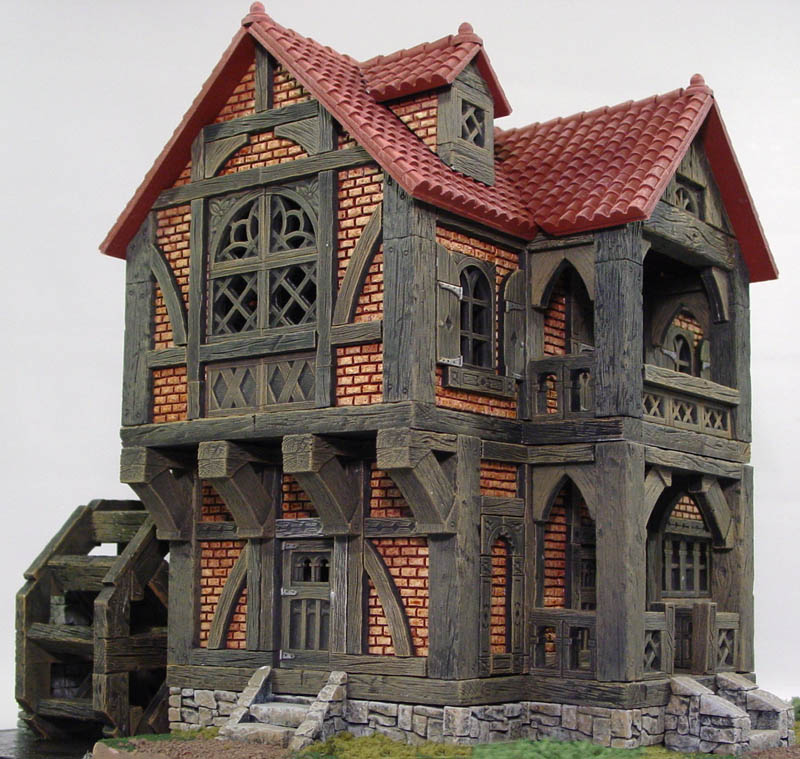
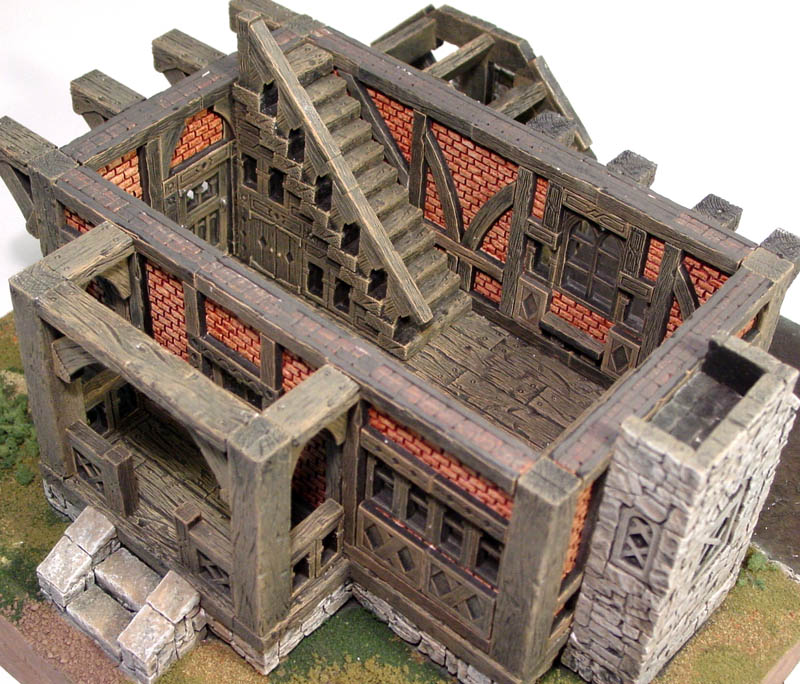
The Finished Watermill This video shows what the watermill will look like which may help you to decide if you want to attempt this project. |
 |
Step 1: Castings and Printed Plans
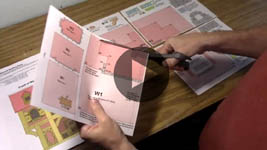
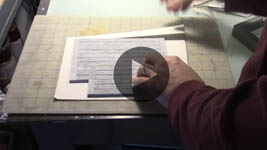
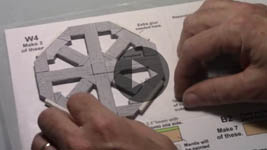
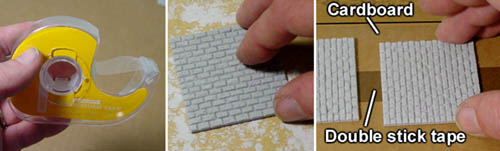
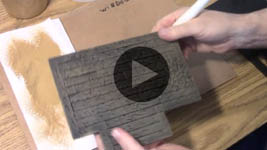
| 1. | Castings and Printed Plans This video shows how to sort the blocks onto cardboard and also how to assemble the printed plans. |
 |
|---|
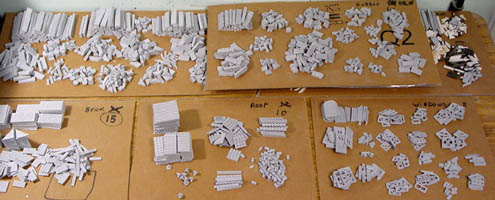
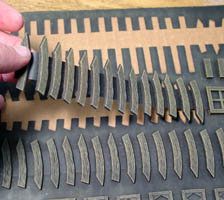
| 2. | The number of castings are listed at the top of this page and also on page 1 of the printed plans. It's probably a good idea to make a few extra castings just in case you break a few pieces. Sort these castings onto large pieces of cardboard so you can move them when not in use. |
 |
|---|
| 3. | Print out the watermill building plans. Tape pages 4, 5, 6 and 7 of the plan together to make a complete large plan. Trim the white edge off and cut the corners off so you can line the plans together along the dotted lines. |
 |
|---|
| 4. | When printing the plans, be sure to set your printer to print "actual size". Place a ruler on the plans to make sure they measure accurately. The large W1 box should measure 12" long. |
 |
|---|
Step 2: Gluing Wood and Stone Sections
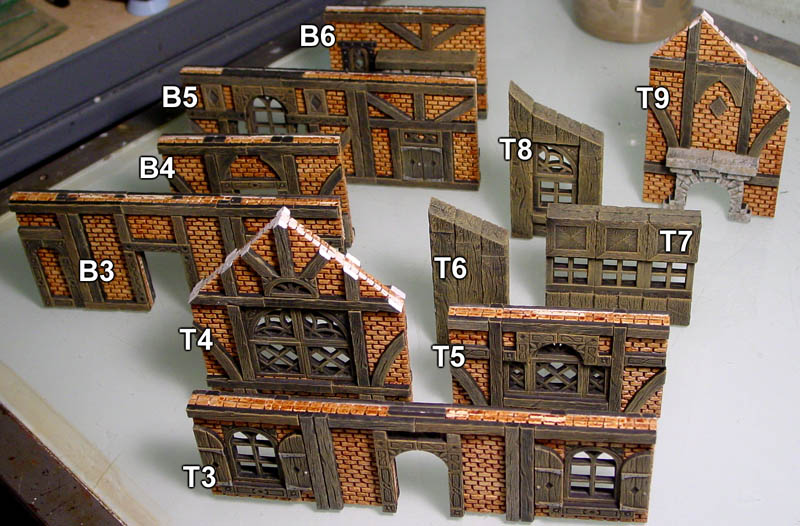
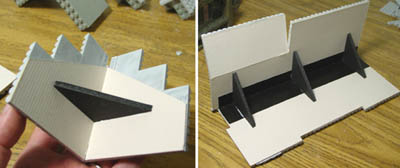
Glue together the following wood and stone sections: | ||
B1 bottom floor |
T1 top floor |
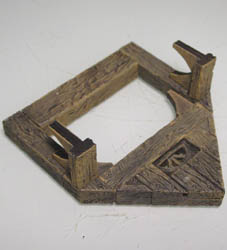
R4 roof dormer peaks W4 wooden wheel |
| 1. | Preassembled Piece Checklist This video shows each piece that will be preassembled. This is a long and boring video, so feel free to skip it unless you need to see what a particular preassembled piece looks like. |
 |
|---|
| 2. | Here is a quick view of what all of the preassembled pieces will look like. Click on the photo for a larger view. The instructions and videos below will help you through some of the more difficult assembly problems. There is no need to watch the video above unless you have questions on what a particular preassembled piece will look like when finished. |
 |
|---|
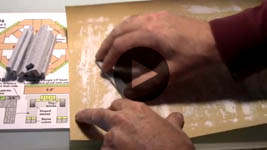
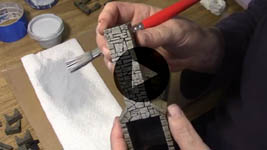
| 3. | Wood and Stone Section W5 This video shows my method of gluing blocks and also details on piece W5. |
 |
|---|
| 4. | When assembling the wood and stone sections, I lay the blocks directly on the plan. Then I slide them off the plan and glue the edges together. An "L" shape of Legos will help keep the corners square. The insert in W5 is glued onto thick card stock separately. |
|---|---|
 |
| 5. | Wood Floors B1 and T1 This video shows my method of gluing the floors B1 and T1 together. |
 |
|---|
| 6. |
When I glued my wooden beams onto the floor, it tended to warp when it dried, even after letting it dry with heavy books set on it. I was eventually able to straighten it out (as shown in the video) but even after that it would still want to revert back to warping slightly over time. I believe the best solution to prevent warping was to not glue it down to anything. The beam planks are 1/4" thick with a lot of good flat area so that the glue will bind the sides of the beams together well. Once the walls are glued on top, it should be plenty strong without gluing the floor down to anything. |
|---|
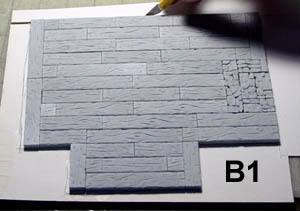 The two floor sections B1 and T1 caused me some unique problems. In the video, I glued the floor sections down onto matt board. This is heavy board used to add a colored border around pictures when you have them framed and measures a little less than 1/16" thick.
| 7. | Wood Beams B2 and T2 This video shows my method of gluing the beams B2 and T2 together. |
 |
|---|
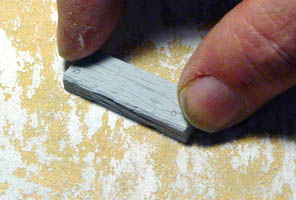
| 8. | From here on out, whenever you glue any of the large beams together, give the back a quick sanding to remove any high edge off of the back. This will give you a much better glue joint when gluing the beams back to back. Also use the "L" shape of Legos to keep the edges of your beams square after gluing them together. |
 |
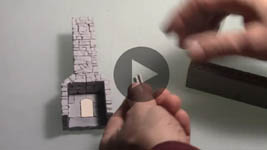
|---|
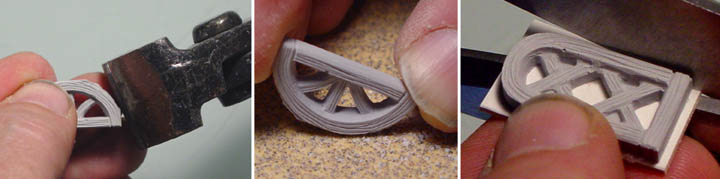
| 9. | Chimney Bottom B7 This video shows my method of gluing the rubble stone chimney and sanding the corners of the window inserts. |
 |
|---|
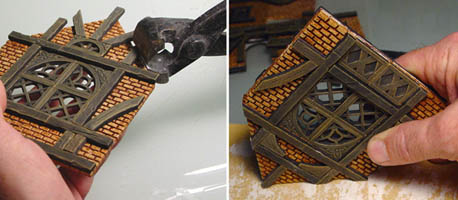
| 10. | On the face and sides of the chimney, there are several windows that we are going to round the top of so they will fit into a round stone arch. Start by using tile nippers to take off the main square edge of the top. Then use sandpaper to sand the corners off completely until they fit inside the rounded arches. Once rounded, glue these windows onto card stock, and then cut then out using scissors when dry. |
|---|---|
 |
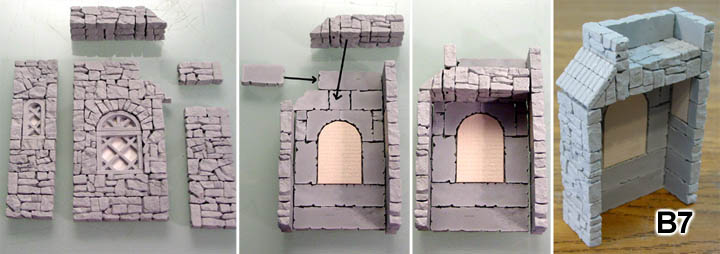
| 11. | This photo shows how the chimney bottom B7 is assembled. Don't forget to add the three strips of brick to the shoulder of the chimney. The top row of brick is sanded at an angle to fit up against the side of the main chimney. |
|---|---|
 |
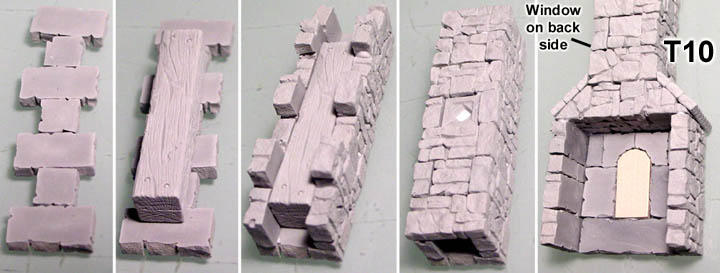
| 12. | Chimney Top T10 This video shows my method of gluing the rubble stone chimney top. |
 |
|---|
| 13. | This photo shows how the chimney top T10 is assembled. Don't forget to add the three strips of brick to the shoulders on each side of the chimney. The top row of brick is sanded at an angle to fit up against the side of the main chimney. Be sure that the small diamond window is on the same side of the chimney as the other window. Both windows are glued onto card stock. |
|---|---|
 |
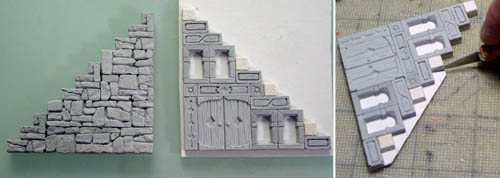
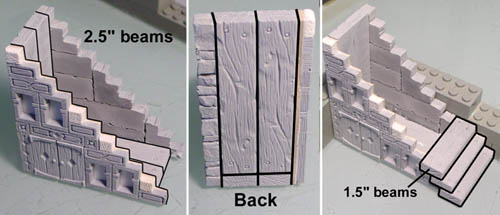
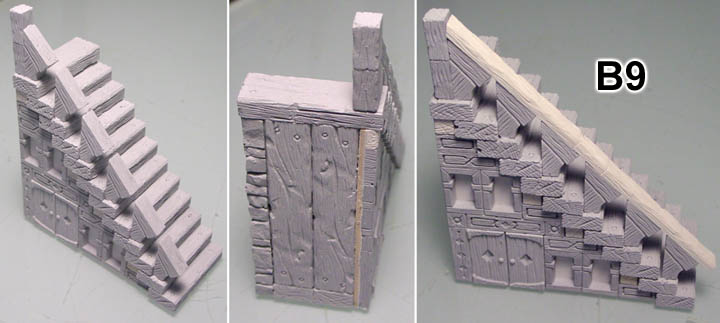
| 14. | Stairway B9 This video shows how to make the stairway and railing leading up to the second floor. |
 |
|---|
| 15. | Glue the stone side of the steps together. Glue the decorative side onto thick card stock, then trim off the excess card stock. |
 |
|---|
| 16. | Once dry, glue them on either side of two 2.5" beams. The beams form the bottom and the back of the stairway. When dry, glue 1.5" beams on for the steps. These steps will overhang the decorative side slightly. |
 |
|---|
| 17. | Finish the stairway by gluing on the angle braces, making sure the texture is facing outward. These angles will be recessed slightly to match the depth of the decorative side of the stairway. Once glued in place, glue the top two planks on to finish the railing. |
|---|---|
 |
| 18. | Upper Fireplace T11 This video shows how to make the upper fireplace T11. This requires use of the tiny bricks and a pair of tweezers. |
 |
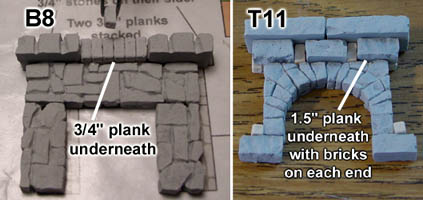
|---|
| 19. | The fireplaces B8 and T11 are fairly easy. The difficult part is to get the tiny bricks where you want them. On the B8 fireplace, the mantle is not glued on but painted separately in a wood color. |
 |
|---|
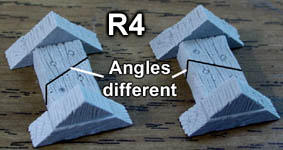
| 20. | Be careful when gluing the R4 pieces. Be sure to alternate the angles shown here. Otherwise you will run out of angle pieces of one type. |
 |
|---|
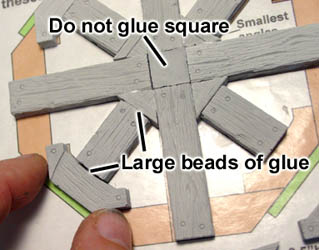
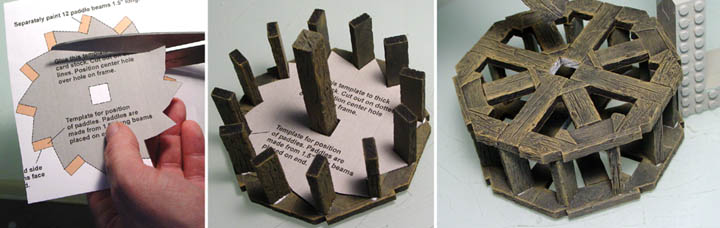
| 21. | Water wheel W4. This video shows the challenging part of getting all the pieces to line up. |
 |
|---|
| 22. | On the water wheel, do not glue the small square in the center. That just holds the correct size for a beam to stick through later on. You will need large beads of glue on the angled spokes. This is because the fit is not exactly correct but close enough to work if you use enough glue. The 1.5" beams used to form the paddles around the outside of the wheel will be panted individually and be glued into place after everything is painted. |
 |
|---|
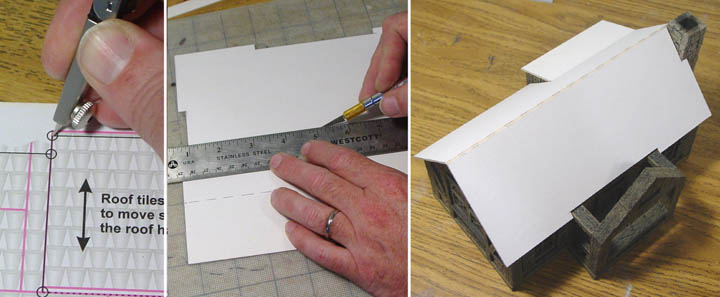
Step 3: Cutting the Water Base
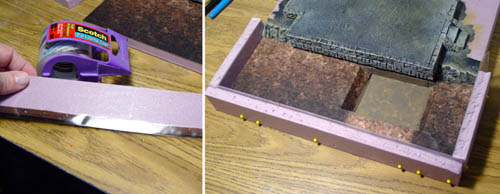
| 1. | Cutting the Base W1 This video shows how to cut 1/2" thick foam to create the base for the watermill and how to glue on the printed river bottom. |
 |
|---|
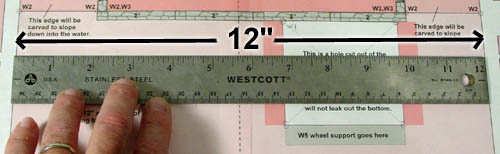
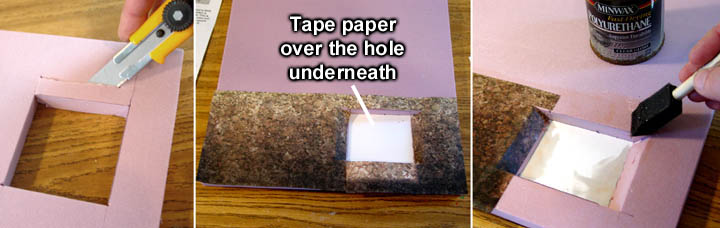
| 2. | For the base of this project, I'm using 1/2" thick insulating foam. When plotting and cutting the foam, be sure you place the foam printed side down because that printing will show through the river bottom. Lay the plan over the foam and poke holes in all the circles with a W1 next to them. Then connect the dots with a ruler and trim out the foam. Try to be sure your sides are cut vertically straight. |
|---|---|
 |
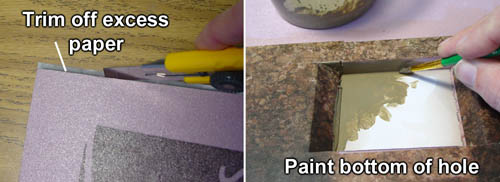
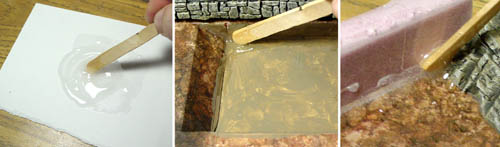
| 3. | Trim the sides of the hole at a 45 degree angle. Flip the foam over and tape a piece of thick paper over the hole from the underside. Cut out the printed riverbed (from the printed plans) and varnish it down into place. The printing is 1/4" oversized to hang over the outside edges. If you crease the paper at the edges of the hole, it will lay down better. |
|---|---|
 |
| 4. | When the varnish is dry, trim off the excess paper with a hobby knife. Then paint the bottom of the hole dirt brown and also paint the pink foam around the hole. |
 |
|---|
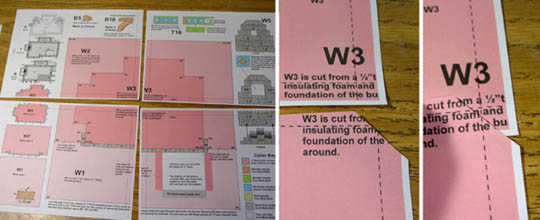
| 5. | Cutting the Foundation W2 & W3 This video shows how to cut 1/2" thick foam to create the foundation for the watermill and how to glue on the rubble stone. |
 |
|---|
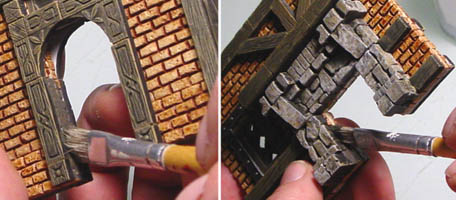
| 6. | Cut piece W2 out of 1/2" foam. Bevel each of the ends to form the banks of the river. Carve a rock texture into both banks by using a knife to make vertical grooves, finer horizontal grooves and then scraping out some of the cut layers. |
|---|---|
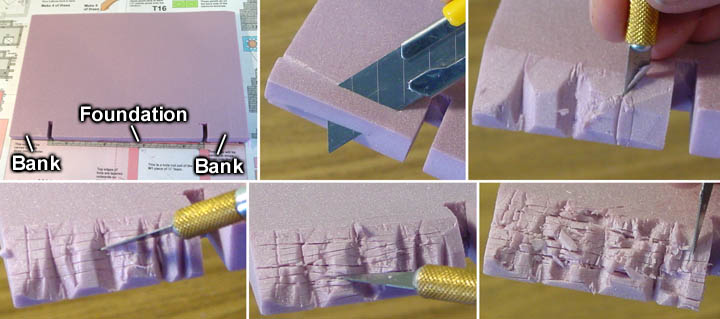 |
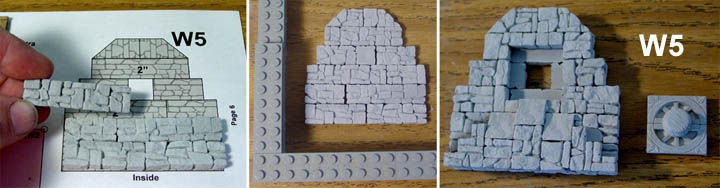
| 7. | Cut piece W3 out of 1/2" foam and glue it on top of W2. I've pinned it in place while the glue dries. Glue on the rubble blocks around the outside of W3, making sure the block tops are flush with the top of the foam. Then glue the rubble blocks onto W2 (the row under what you've just glued). |
|---|---|
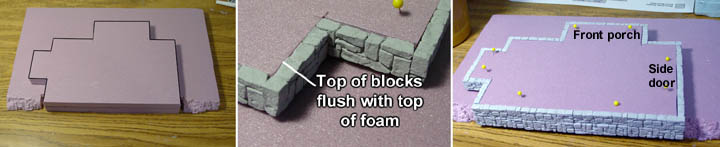 |
| 8. | Glue the steps and stone railings onto the sides of W3. Be sure that each set of steps is centered onto each wall. |
 |
|---|
Step 4: Painting the Pieces and Base
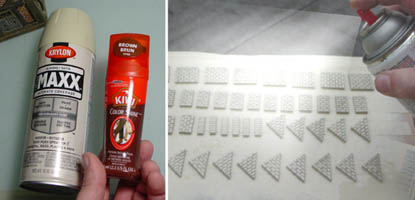
| 1. | Painting the Brick Panels This video describes the parts list and shows how to paint the brick panel pieces. |
 |
|---|
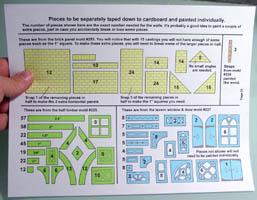
| 2. | On page 23 of the printed plans is the parts list. This describes the exact number of pieces that you need to tape down and paint individually. Since this is an exact number of the pieces you need, it will be a good idea to paint an extra piece or two just in case you break or lose a piece here and there. |
 |
|---|
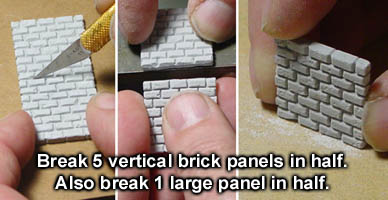
| 3. | As for painting the brick panels, you will need to start by breaking 5 vertical panels in half. You can do this by scoring it with a hobby knife and then snapping it across a sharp edge. You will also need to break one large 2" x 2" panel in half horizontally. If the broken edge is rough, sand the edge with fine sand paper. |
 |
|---|
| 4. | I'm going to use permanent double stick tape to tape the pieces down onto cardboard. Lightly sand the back first to remove any sharp edge or the pieces will not stick to the tape. |
 |
|---|
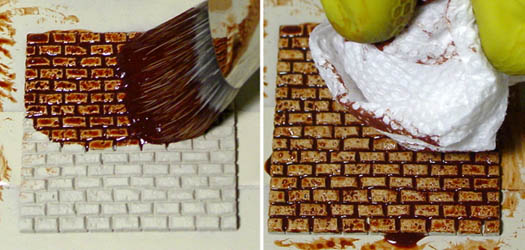
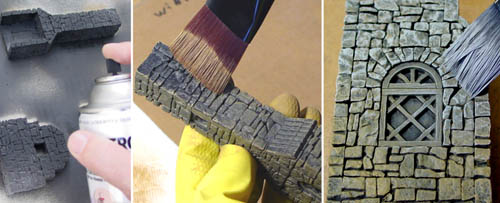
| 5. | I'm going to use almond spray paint and Kiwi liquid brown shoe polish to color the brick pieces. Start by spray painting all of the pieces almond color. I could not find a flat color but satin seemed to work fine. Don't worry about getting the edges or the cracks between the bricks. Just make sure to color over the face of the brick with a nice solid coat. |
 |
|---|
| 6. | When dry, paint on the brown shoe polish and then dab it off using a dry paper towel. It's best to wear a rubber glove when doing this. Dab off the excess in an irregular pattern for a more natural look. |
 |
|---|
| 7. | Painting Planks and Windows This video describes how to paint the individual wooden planks and windows. |
 |
|---|
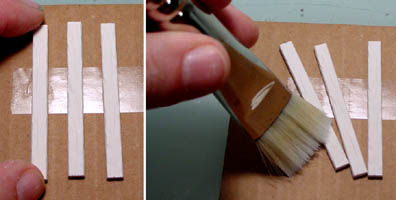
| 8. | Before we can spray paint these black, we need to stick these down to a piece of cardboard. I'm going to use cheap permanent double stick tape. You need the permanent kind or the pieces will not hold down. |
 |
|---|
| 9. | Before sticking them down, check the back of your planks. If the backs are concave, then you will need to sand the back slightly with fine sandpaper so they will stick to the tape properly. Simply lay a piece of fine sandpaper on a flat surface, place a plank on the sandpaper and give it a few quick swipes. This is much quicker and easier to do than you may think. |
 |
|---|
| 10. | Check to see if your pieces are stuck down properly by taking a wide brush and brush across them with medium pressure on the cardboard. Just pretend you are dry brushing your planks with paint. If they do not come loose from the cardboard then you know they will stay in place when you go to paint them. |
 |
|---|
| 11. | The first coat I am spray painting is flat black. Be sure to do this outside or in a well-ventilated area. Be sure to spray from all angles so that you get the sides and ends of each plank as well. |
 |
|---|
| 12. |
Click on the photo for a larger version of it. If you are using house paint, thin the paint slightly and make the brush as dry as possible. If you are using acrylic craft paint then you may not have to thin it. If the paint is too thick, you will get solid brown on the top of your planks. If you thin the paint but put too much on, the paint will run into the cracks. The trick here is to thin the paint slightly, dip your brush in and brush almost all of it off on a paper towel (even more than usual for dry brushing). What you want are lots of thin coats of paint. When first brushing over the planks, it will not look like anything is happening. This is exactly what you want. Don't go back for more paint but instead keep brushing over the planks. If the coat of pumpkin pie color is thin enough, the black transmutes through the brown and changes the color completely. Pumpkin pie turns into a dark oak. Remember to brush lightly, keep the paint thin and keep the brush really dry. |
|---|
| 13. | When finished, pull up the tape and the planks should come up with it. Your wooden planks are now completely painted and ready to glue on. The most time consuming part of the whole process is sticking them down onto the cardboard at first. When pulling them off of the tape, it's best to sort them into piles so you can find the right length of plank you need easily. |
 |
|---|
| 14. | Painting Preassembled Wood Pieces This video describes how to paint all of the wooden sections that you glued together in Step 2. |
 |
|---|
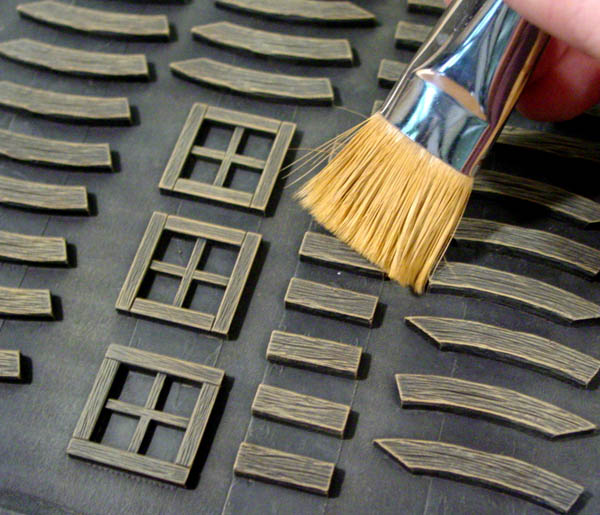
| 15. | Painting the preassembled wood pieces is very much the same as painting the planks. All pieces are spray painted flat black. Be sure that you completely spray all sides and angles on each piece. Afterwards, you will dry brush medium brown from the Earth Tone Painting Instructions page. |
 |
|---|
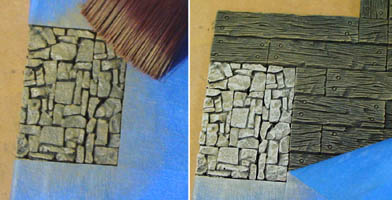
| 16. | Painting the Stone Pieces This video describes how to paint all of the stone sections that you glued together in Step 2. |
 |
|---|
| 17. |
Afterwards, you will dry brush medium brown from the Earth Tone Painting Instructions page. This will be a little heavier dry brushing than with the wooden planks The last coat of paint is castle gray light color from the Castle Gray Painting Instructions page. Dry brush this on lightly. This color will highlight the edges of the stone in gray. It will also gray out the brown a bit. After the brush runs a bit dry, you can go a little more heavily but keep it lighter than when you were applying the brown. |
|---|
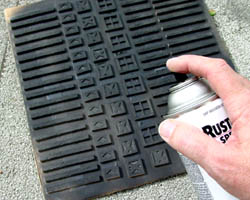
 All stone pieces are spray painted flat black. Be sure that you completely spray all sides and angles on each piece.
| 18. | Since the wooden floors have a section of stone on them, I'm going to mask off these sections using a good blue painters masking tape. Dry brush the stone heavily with the medium brown and then lightly dry brush with the light gray. Afterwards, peel the tape off and compare the stone floor to the wood floor all around it. |
 |
|---|
| 19. | Painting the Stone Foundation This video describes how to paint the stone foundation that is part of the water base. |
 |
|---|
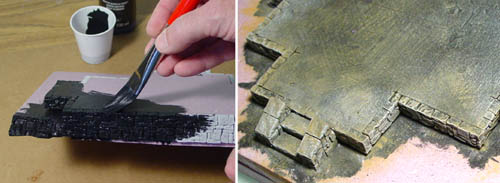
| 20. | The stone foundation W2 and W3 are painted the same way as all the other stone. We have to brush on black acrylic paint because spray paint will dissolve the foam. |
 |
|---|
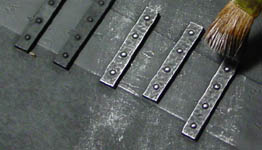
| 21. | Don't forget to dry brush silver paint on any of the metal items such as the straps and hinges on the doors and shutters. I made a couple extra straps just in case I broke one of them accidentally. |
 |
|---|
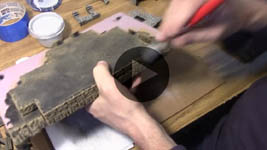
Step 5: Building the Remaining Walls
Glue together the following walls using the painted brick and timber pieces:
B3, B4, B5, B6, T3, T4, T5 and T9.
| 1. | Building the Remaining Walls This video shows how to build the remaining walls using the fully painted pieces. |
 |
|---|
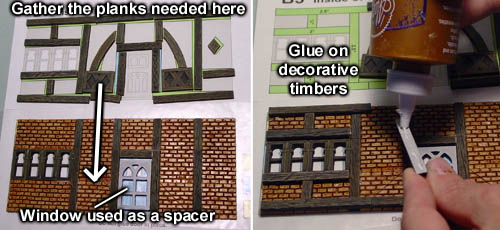
| 2. | Lay a piece of wax paper over the wall plan. Brick sections should be positioned with the full bricks on the bottom row. Glue the edges together as you place the pieces against each other on the plan. |
 |
|---|
| 3. | Gather the decorative timbers needed for the second layer. Placing them on the plan above is a good way to collect the pieces and keep track of where you will be gluing them. Glue these onto the wall. |
 |
|---|
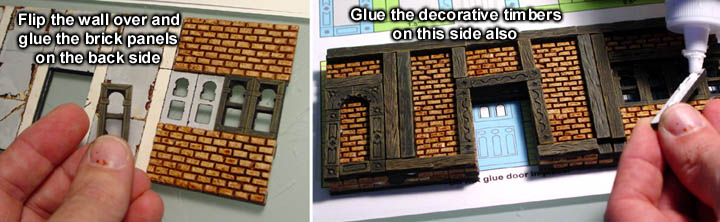
| 4. | When dry, flip the wall section over and glue the brick panels and windows on the back side. When gluing brick panels on the back side, glue the edges of the brick panels together also. This will give you a stronger wall. Finish the wall by gluing the decorative planks onto this side of the wall. |
|---|---|
 |
| 5. | Remaining Wall Building Suggestions This video shows things to look out for when assembling these walls from pre painted pieces. |
 |
|---|
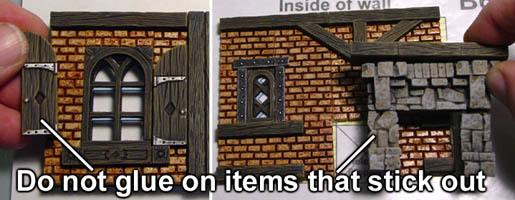
| 6. | When gluing the walls, do not glue things that stick out. This includes items with hinges and fireplaces. Just leave a spot for them to be glued on after the wall is completed. If you glue them on now, you will not be able to flip the wall over flat to glue the back side of the wall. |
 |
|---|
| 7. | On the roof peak sections, some beams will stick out beyond the edge of the roof line. Use a pair of tile nippers to trim these off. Then flip the piece over and glue the back side on. Then trim the other side's beams off as well. Afterwards, sand the roof edges to make them flat. |
 |
|---|
| 8. | Painting the Doorways This video shows what color to use when painting the doorway and fireplace openings. |
 |
|---|
| 9. | Before we glue the walls onto the floors, we need to paint the insides of the doorways and fireplaces. Otherwise these places will be difficult to reach with a brush. Mix up some dirt brown with a little black added to it. The color should match close to the color of the beams. |
 |
|---|
Step 6: Gluing Walls Onto the Floors
| 1. | Gluing Bottom Floor Walls This video shows what to look out for when gluing the walls around your bottom floor. |
 |
|---|
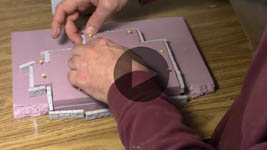
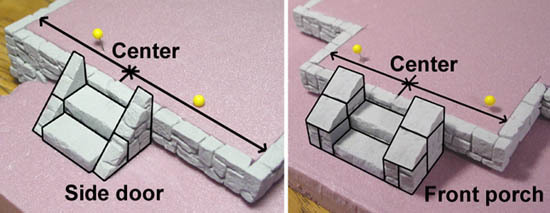
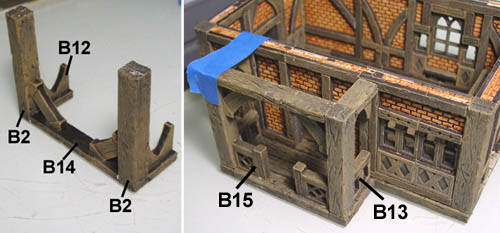
| 2. | Here are photos of wall sections and where they are positioned on the bottom floor. Click on the photos for a larger view. The stairway does not need to be glued in place. |
 |
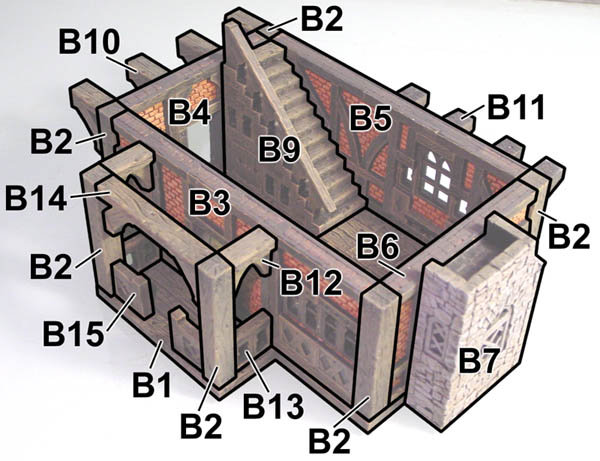 |
|---|
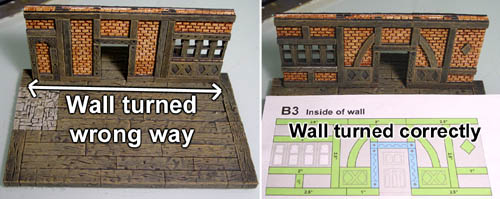
| 3. | When positioning the walls onto the floor, be sure the wall is facing the correct way. In the first photo, the outside of the wall is facing in, which puts the doorway in the wrong place. Compare the wall to the building plans to see which side of the wall is the inside and the outside. |
 |
|---|
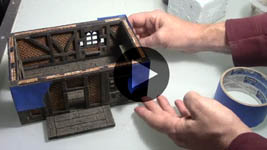
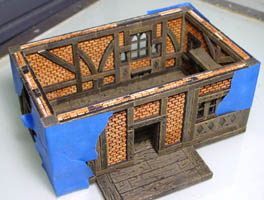
| 4. | Test fit the walls before gluing anything in place. Seldom will a wall fit correctly without any sanding. If the bottom center of the wall is high and the wall rocks back and forth, sand or carve the middle bottom until it sets properly on the base. Once all four walls and beams fit fairly well, glue the walls and beams down to the floor. To hold the walls in place while the glue dries, use blue painter's masking tape to hold the corners of the walls in position. Always check the walls every few minutes to be sure nothing has moved until the glue dries. |
 |
|---|
| 5. | Gluing Bottom Floor (continued) This video shows attaching the front porch and upper braces onto the bottom floor. |
 |
|---|
| 6. | To finish the lower front porch, glue the top and side braces onto the beams upside down. Once this is dry, flip it over and glue it onto the house, while gluing the lower railings on at the same time. |
 |
|---|
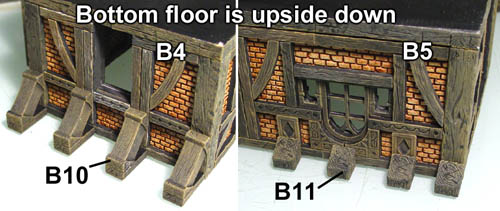
| 7. | Now, flip the house upside down to glue on the outer braces. Position the braces as you see shown in the photo. The B11 braces will not be evenly spaced apart because of the decorations on the B5 wall. |
 |
|---|
| 8. | Gluing the Top Floor This video shows how to assemble the top floor and how to position the chimney. |
 |
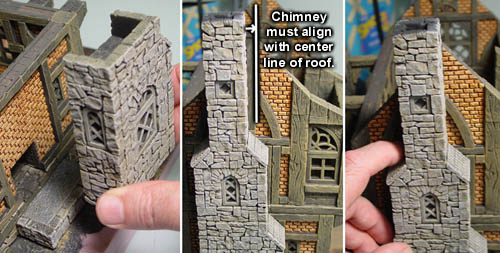
|---|
| 9. | This photo shows where all the pieces go on the top floor. Click on the photo for a larger view. The front porch top will be easier if you assemble the front as shown, then glue it on after it has dried. |
 |
 |
|---|
| 10. | Test fit the chimney before you glue it on. The right side of the chimney must align with the center peak of the roof. You may have to sand the bottom at an angle to get it to fit. Glue each chimney separately onto its level, so that each level can be lifted off. |
 |
|---|
Step 7: Finishing the Water Base
| 1. | Gluing the Water Wheel W4 This video shows how to assemble the wooden water wheel W4 using the template to help align the paddles. |
 |
|---|
| 2. | We'll start by assembling the water wheel. Tape the template down to card stock with double stick tape and cut it out on the dotted line with a pair of scissors. Also cut the square hole out of the center. Lay half of the water wheel down smooth side up and glue the 1.5" long painted beams around the outside using the template as a guide. Be sure that the smooth side of the beams is touching the edges of the template. Once dry, remove the template. Glue the other half of the water wheel onto the paddles but be sure to leave the center beam in as a guide. The center beam will be removed later, so don't glue it in place. |
|---|---|
 |
| 3. | Positioning the Water Wheel and Pouring the Water This video shows how to correctly position the water wheel and pour in the water effects. |
 |
|---|
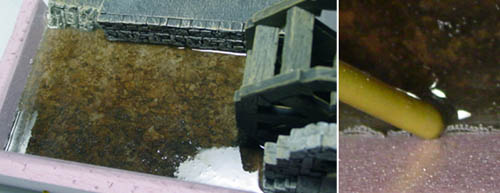
| 4. | Stick some packaging tape onto strips of 1/2" foam. Pin these around the outside of your river to form a dam. Be sure that there are no wide gaps between strips of foam and that they are standing up at a 90 degree angle. |
 |
|---|
| 5. | Use 5 minute epoxy to seal around all edges. Seal around the hole in the bottom, around the rock bottom edge, around all sides and also up all corners. |
 |
|---|
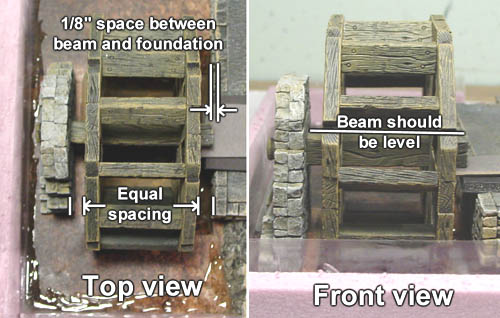
| 6. | It's important to position the water wheel correctly before pouring the water. Make sure you have at least 1/8" of space between the center wooden beam and the stone foundation. Equally space the wooden wheel between the stone support and the stone foundation. Prop up the beam on one end to make the beam level. |
 |
|---|
| 7. | Place a trash bag or plastic under your base in case the water leaks out. Mix up 12 ounces of Envirotex Lite, (6 ounces of A and 6 ounces of B). Add 5 drops of blue, 5 drops of green and 2 drops of red food coloring. Mix slowly for about 5 minutes and make sure colorant is completely mixed. |
 |
|---|
| 8. | Pour the Envirotex into the river. Give it about 30 minutes for bubbles to come to the surface. Take a paintbrush handle and run it around the edges of items to break small bubbles the come to the surface. Let it harden overnight. |
 |
|---|
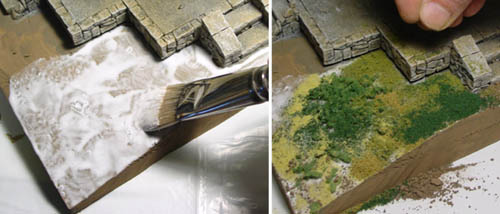
| 9. | Finishing the Water Effects This video shows how to add ground cover and add texture to the water surface. |
 |
|---|
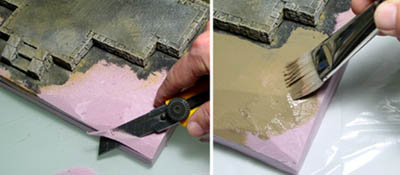
| 10. | I'm going to finish the ground cover before texturing the water. Use a knife to round off the edges of the hill a bit. Then paint the surface of the foam a dirt color. Don't forget to paint the edges all around dirt color also. The pink edge under the water I have painted black. |
 |
|---|
| 11. | After the paint is dry, brush on white glue (thinned down Tacky glue) and then sprinkle on the ground cover. I'm using Woodland Scenics ground foam of different colors and textures. |
 |
|---|
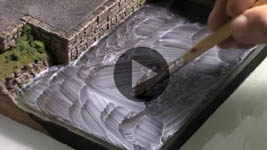
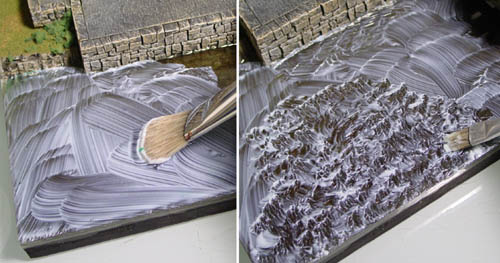
| 12. | To texture the water, I'm using Liquitex Medium Gloss Gel. Put on a thin coat. If you put it on thickly, it will not dry completely clear and there will be a few white spots. Use a smaller stiff bristled brush to texture the surface. |
 |
|---|
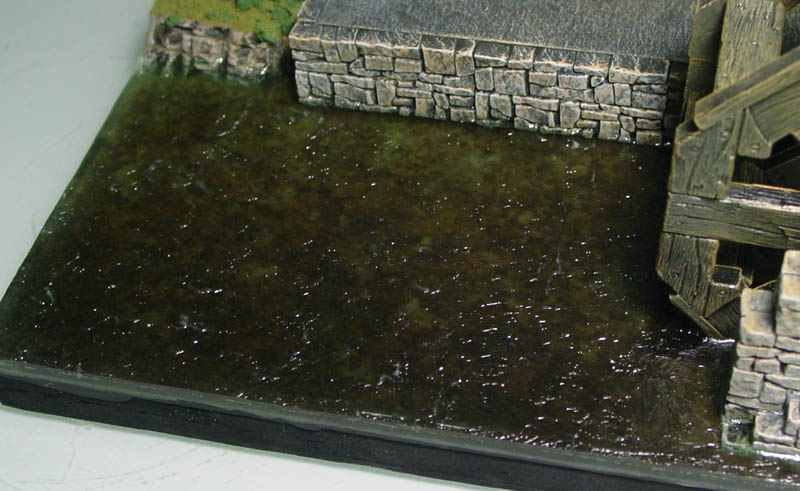
| 13. | This photo shows the finished textured water Click on the photo for a larger view. You can still see the river texture underneath the Envirotex and the texture helps distort the printing a little. I think the effect worked out very nice. |
 |
|---|
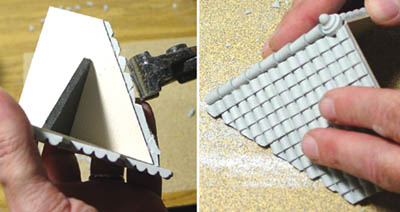
Step 8: Making the Roof
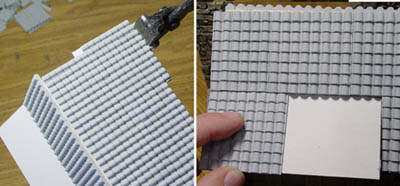
| 1. | Making the Roof (Part 1) This video shows how to cut the roof template and glue the clay tiles on. |
 |
|---|
| 2. | Place the roof template onto mat board and poke holes in each of the corners. Connect the dots and trim out the roof shape using a hobby knife. Cut halfway through the mat board at the center fold line of the roof so it will fold in half. The other dotted line for the smaller roof needs to be cut on the back side of the mat board so it will fold upwards. Test fit this piece of mat board onto the roof and trim up edges so that it will set correctly. |
|---|---|
 |
| 3. | Glue the tiles onto the roof and then trim them with tile nippers where needed. Wait to glue tile onto the smaller lifted roof section until after all the other tiles are in place, otherwise you won't know how far down to slide these tiles. |
 |
|---|
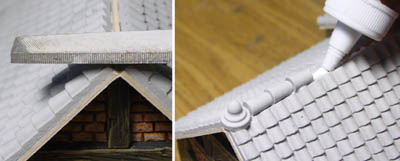
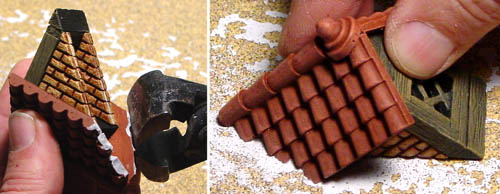
| 4. | File down the peak end of the roof (opposite of the chimney end) and glue on the decorative cap. Then run a bead of glue down the peak groove and glue in the small peak tiles. |
 |
|---|
| 5. | Making the Roof (Part 2) This video shows how complete the smaller roof sections and paint them. |
 |
|---|
| 6. | Cut the roof templates out of card stock for R2 and R3 and glue the tiles on them. Then place them on a 90 degree angle of some kind and glue the top peak tiles on them. I've used Legos for the 90 degree form. |
|---|---|
 |
| 7. | Cut the small angles from page 36 of the plan out of cardboard or foam core board. Glue these onto the underside of R1 and R2. Be sure that you move them in from the ends at least an inch so they do not get in the way of the wall peaks. I placed a piece of black duct tape on the underside of R1 to strengthen it. |
 |
|---|
| 8. | Use tile nippers to trim off the excess tiles on R2. Leave about 1/8" beyond the mat board. If you break off something you shouldn't have, save the piece and glue it back on later. Afterwards, sand the edge down fairly close to the mat board. |
 |
|---|
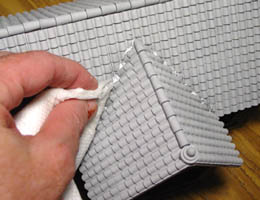
| 9. | Position the main roof on the building. Then position the R2 roof in place against the main roof. Use a pencil to draw a line on the roof as to where it sets. Put a bead of paintable caulking along the underside of the pencil line, making sure to put more caulking in the valleys between tiles. Place the R2 roof against the main roof and use a wet paper towel to wipe up any excess caulking. |
 |
|---|
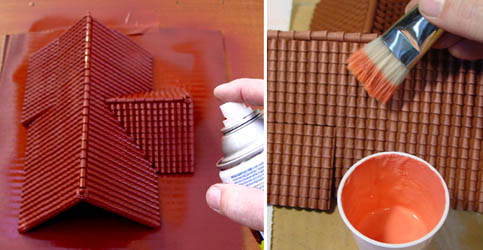
| 10. | Spray paint all 4 roof sections with rust colored primer. Afterwards, dry brush all of the roof sections with medium pink. My pink color is half white, half red plus a little bit of yellow. |
 |
|---|
| 11. | Assemble the dormers as shown from the painted pieces. Glue the roof on so that the dormer does not go past the card stock edge. Make 2 of these. |
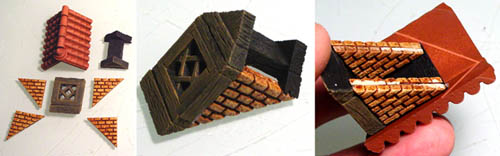 |
|---|
| 12. | Use tile nippers to trim off the excess back corners. This is difficult to do without excessively breaking the tiles. Afterwards, sand the back edge until the whole bottom of the dormer is flat. |
 |
|---|
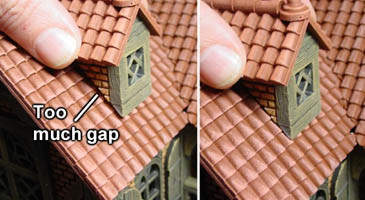
| 13. | The dormers will simply glue onto the face of the roof. Be sure to place the edges of the dormers so they center on the highest point of the tiles underneath. Otherwise you will see an obvious gap under the edges of your dormers. The bottom edge of the dormer should be 2-3 tiles up from the bottom edge of the roof. |
 |
|---|
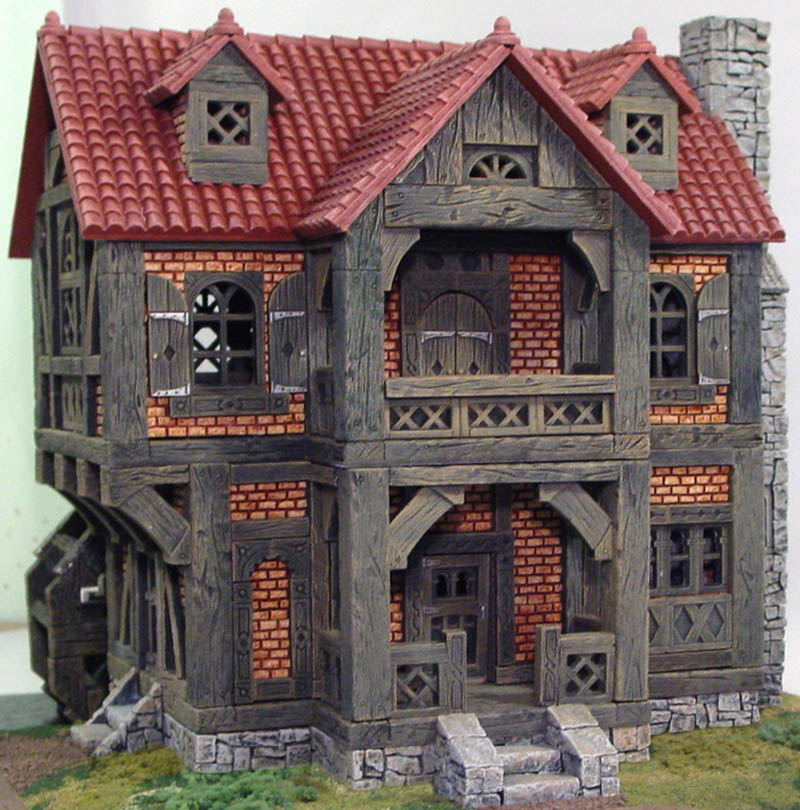
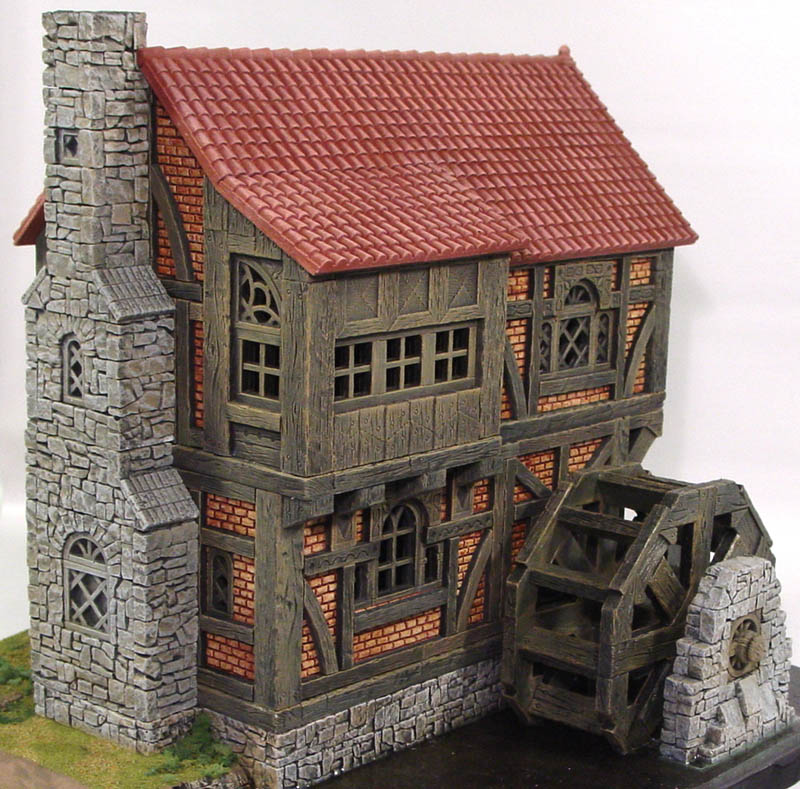
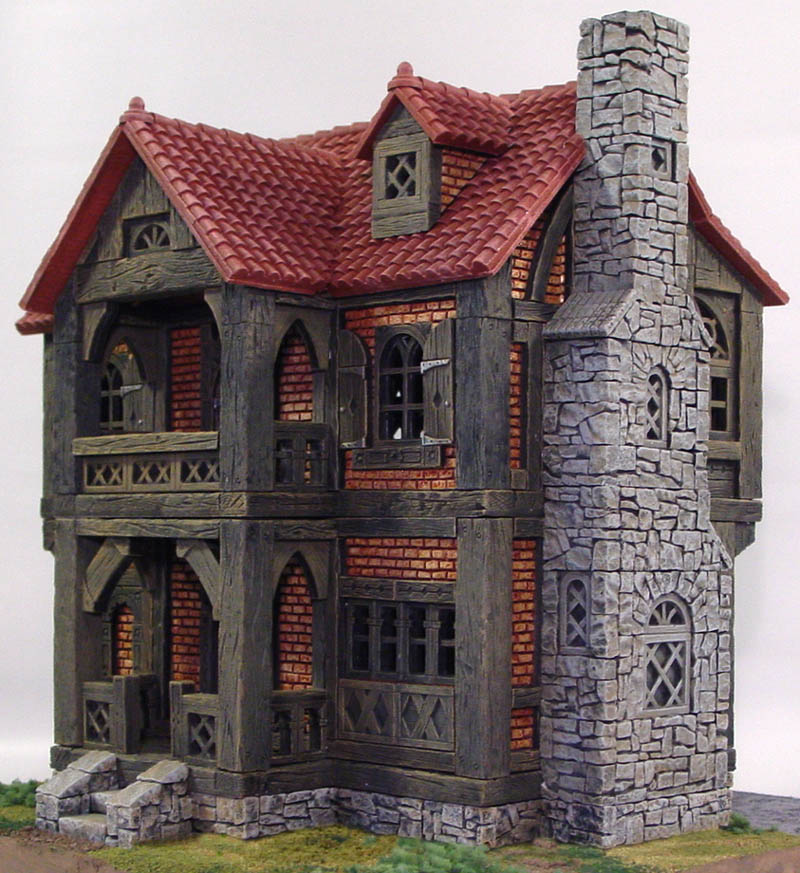
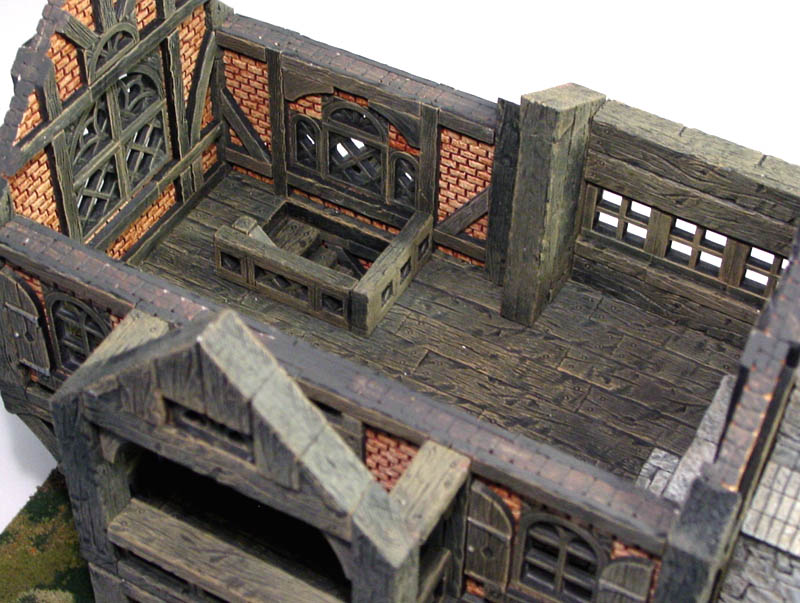
Finished Photos
Click on the photos to see a larger view.
 |
 |
 |
 |
 |
 |