How to Use the Small Block Mold |
|
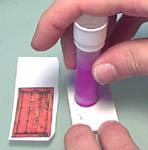
I strongly suggest using harder material than regular plaster, such as hydrocal, hydrostone or dental plaster when casting blocks in this mold! For these examples, I've used Excalibur dental plaster.
I've listed a place you can buy Excalibur from, as well as complete casting instructions on the Casting Using Dental Plaster page. Regular plaster of Paris is too weak and your pieces might break when you try to remove them from the mold.
You will get the best results from using the wet water method found on the "Advanced Casting Instructions" page. For some reason, the small brick texture doesn't want to release the air bubbles on the surface otherwise.
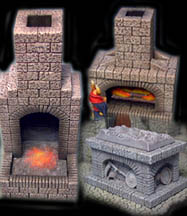
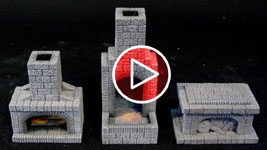
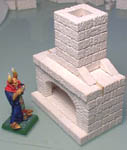
The Finished Fireplace Forge and Tomb This video shows what these items will look like which may help you to decide if you want to attempt this project. |
 |
Building The Forge
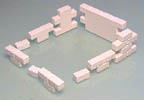
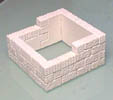
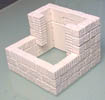
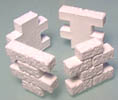
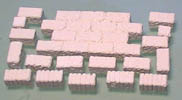
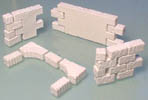
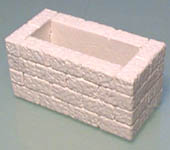
| 1. | Glue the following bricks together. Place the decorative trim bricks around the top edge as shown. The last photo shows decorative blocks on the inside. Do not glue the blocks shown in green - they're placed there to hold up the other blocks until they dry. | |||
|---|---|---|---|---|
 |
 |
 |
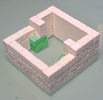 | |
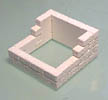
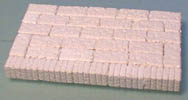
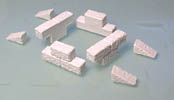
| 2. | Here's the second row of the forge. Notice the green support blocks are removed. |
 |
 |
 |
|---|
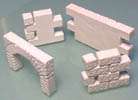
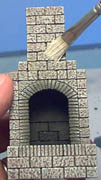
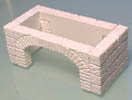
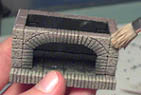
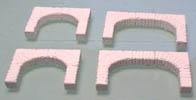
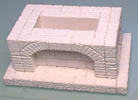
| 3. | The third piece of the forge contains the arch. The main arch front is made of four pieces, two arch pieces and two decorative blocks. |
 |
 |
 |
|---|
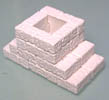
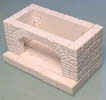
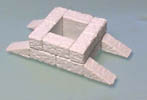
| 4. | The top of the forge is shown here. There are six small bricks on each side forming the steps up to the small chimney. |
 |
 |
 |
|---|
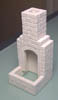
| 5. | The final chimney pieces are placed on top. Feel free to extend the chimney as tall as you need. Now it's time to paint. |
 |
 |
 |
|---|
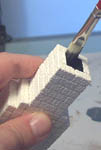
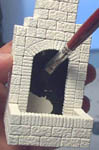
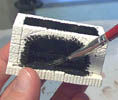
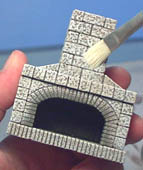
| 6. | I'm going to paint the inside of the forge black. Thin down the black paint to the consistency of milk. Also paint bricks around the edge (that would get charred by the fire). |
 |
 |
 |
|---|
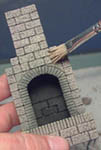
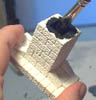
| 7. | Now apply a thin coat of dark brown-gray. I'm using the same colors that were used on the Earth Tone Painting Instructions. Feel free to paint over the black on the decorative trim bricks. The black will still darken those bricks slightly. Let it dry completely Now we'll add a medium brown-gray dry-brushed on top of it. |
 |
 |
|---|
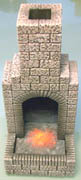
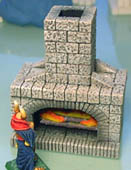
| 8. | We'll finish the forge by lightly dry-brushing the lightest shade of brown-gray. Try to avoid the edges of the bricks that are charred, which should appear darker in color. To the right you see the finished forge. To find out how to add the fire inside, check out the Tips & Tricks 4 page. |
 |
 |
|---|
Building a Fireplace
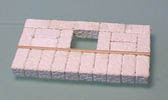
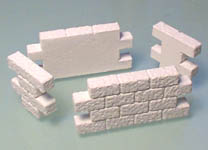
| 1. | Glue the following bricks together to form the floor of the fireplace. The decorative pieces go along the front. |
 |
 | |||
|---|---|---|---|---|---|---|
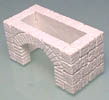
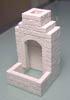
| 2. | Here's the main arch of the fireplace. Glue the arch together before gluing the whole thing. |
 |
 |
 |
|---|
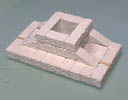
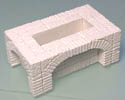
| 3. | The top of the fireplace is shown here. The space left between the sloped blocks will make it easier to fit the fireplace into a wall section. |
 |
 |
|---|
| 4. | The fireplace mantle has a thick strip of matt board in the middle. This pushes the mantle bricks out slightly (this step is optional) |
 |
 |
|---|
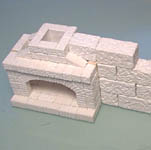
| 5. | You can see by the photo that wall blocks can easily fit in the space between the sloped blocks (if you want the fireplace in the center of a wall). The right photo shows you the scale compared to a 25mm figure. |
 |
 |
|---|
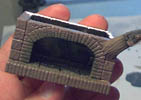
| 6. | I'm going to paint the inside of the fireplace black. Also paint bricks around the edge (that would get charred by the fire). I left the fireplace in two pieces so I could paint the inside and add the fire easily later on. |
 |
 |
|---|
| 7. | Now apply a thin coat of dark brown-gray. I'm using the same colors that were used on the Earth Tone Painting Instructions. Feel free to paint over the black on the decorative trim bricks. The black will still darken those bricks slightly. Let it dry completely Now we'll add a medium brown-gray dry-brushed on top of it. Be sure to paint the top of the fireplace as well. |
 |
|---|---|---|
 |
| 8. | We'll finish the forge by lightly dry-brushing the lightest shade of brown-gray. Try to avoid the edges of the bricks that are charred, which should appear darker in color. To the right you see the finished fireplace. To find out how to add the fire inside, check out the Tips & Tricks 4 page. |
 |
 |
|---|
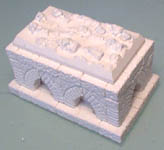
Building a Tomb
I'll show you two different versions of the tomb. Many of the techniques shown here are continued on the Tips & Tricks 4 page.
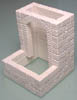
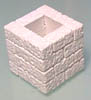
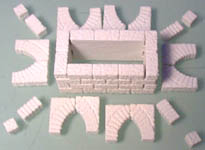
| 1. | Glue the following pieces together to form the inside of the tomb. |
 |
 | |||
|---|---|---|---|---|---|---|
| 2. | Glue the arches as shown. Then glue them against the inside of the tomb. |
 |
 | |||
|---|---|---|---|---|---|---|
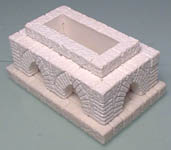
| 3. | Glue the pieces shown to make the base of the tomb. |
 |
 | |||
|---|---|---|---|---|---|---|
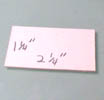
| 4. | Glue the body of the tomb down to the base. For the lid, I'm cutting two pieces of matt board 1 1/4" x 2 1/4". This will raise the center of the lid up slightly. |
 |
 | |||
|---|---|---|---|---|---|---|
| 5. | Place and glue the decorative blocks on the matt board as shown and fill the ring with plain bricks. Finish the lid by placing a ring of plain bricks around the outside edge. |
 | |||
|---|---|---|---|---|---|
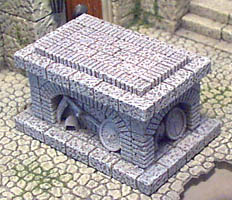
| 6. | I've painted the tomb using the same colors as the Earth Tone Painting Instructions. To add a little extra decoration, I used some model bits from Games Workshop miniatures. I painted them the same color as the stone and glued them into place. The tomb is finished! |
 | |||
|---|---|---|---|---|---|
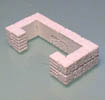
Another Tomb Design
| 1. | Glue the following pieces together to form the inside of the tomb. The decorative arches and pieces are laid out next. |
|
 | |||
|---|---|---|---|---|---|---|
| 2. | The floor of the tomb is shown here. I've placed black lines between the pieces so you can see how it's made. Glue the inside down to the base, then glue the arches around the outside. |
 |
 |
|---|
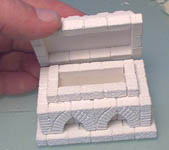
| 3. | We're going to make a lid that fits over the tomb. Glue the bricks shown in green to each other but not to the rest of the tomb! We want to remove this ring of blocks later. |
 |
|---|
| 4. | Glue the top slab of the tomb down to the ring of blocks only! This will allow you to remove the lid later. To see how to make the top slab, check out the Tips & Tricks 4 page. |
 |
 |
|---|
| 5. | Here's the finished tomb. It was painted using the same colors as the other items above. Once again, you can see how to make the top slab on the Tips & Tricks 4 page. |
 |
|---|
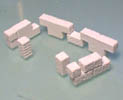
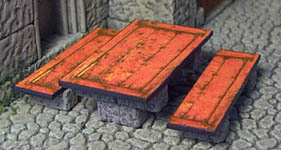
Simple Table and Benches
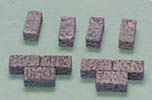
| 1. | Paint the bricks shown here. For the wooden part of the table, you can print out the doors on the building plans page, or you can cut them out of matt board and paint them. |
 |
 | |||
|---|---|---|---|---|---|---|
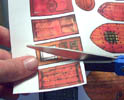
| 2. | Glue the color print down to the matt board with a glue stick. Trim the pieces out with a hobby knife. Use a marker to color the edges of the matt board. |
 |
 | |||
|---|---|---|---|---|---|---|
| 3. | Here is the finished table and benches. You might also use stained wood for the surface of the table. Use your imagination to build other small brick items such as a well, fountain, stone chairs, etc. |
 | |||
|---|---|---|---|---|---|
Making Floor Tile Molds
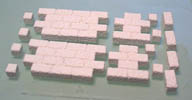
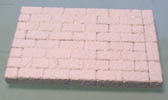
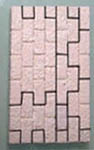
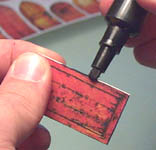
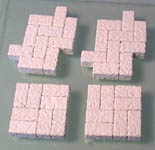
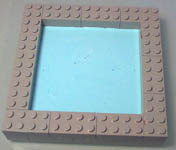
| 1. | Please note that making molds are for individual use only. Selling or trading molds made from my blocks is strictly prohibited. For more information, please check our Legal Statement. The small brick mold is excellent for making custom floor tiles. Glue some bricks down to a piece of plexiglass with superglue. For this example, I'm making two different kinds of tiles. The ones on the top will form a continuous pattern when put together. The bottom ones will form an alternating pattern. |
 |
|---|
| 2. | Mix up a small batch of silicone RTV moldmaking rubber. Paint the rubber into the cracks using a stiff bristled brush. Build a short wall around the tiles using Legos (shown below). This will contain the rubber while it cures. Pour the remaining rubber over the top and let it cure overnight. For more information on mold making, check out the mold making page. |
 |
|---|
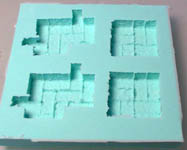
| 3. | When cured completely, remove the Legos to reveal the finished mold. I'm going to pour plaster into the molds to make the tiles. |
 |
 |
|---|
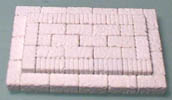
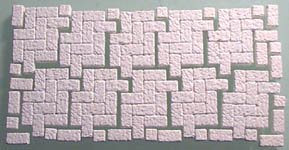
| 4. | I'm assembling two small floor sections using the tiles. The first one will need some extra bricks to fill in the edges to make a complete brick street section. |
 |
 |
|---|
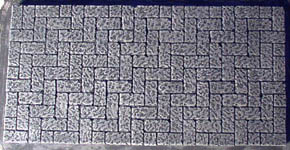
| 5. | The finished painted sections are shown here. You can make a mold of larger sections for the floors of dungeons or cobblestone streets. Make complete floor sections and cast tons of them for a game board layout. |
 |
 |
|---|