Basic Casting Instructions
 Casting Instructions |
 Advanced Casting Instructions |
 Casting Using Dental Stone |
 Casting Using Plastic & Resin |
 Customer Reviews of US Products |
 Customer Reviews of Overseas Products |
Before your Very First Cast
Washing the Mold This video shows how to wash out the mold before your first casting. |
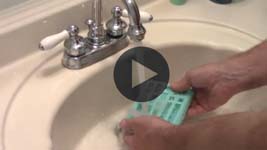 |
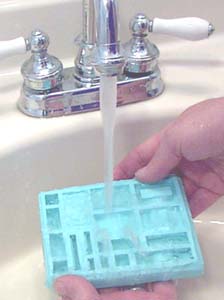
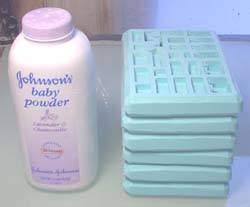
When you first receive your molds in the mail, you will notice they have a fine white powder on them. This is simply baby powder (corn starch). This keeps the molds from sticking together when they are shipped. This coating of powder will make your very first cast come out badly because it keeps the plaster from flowing into the small details. To remedy this, take the molds and wash them off completely in the sink. A forceful jet of running water aimed at the pockets in the mold will help wash the powder out of the details. I have noticed the quality of your castings will become better and better the more you use the mold. |
 |
Making a Reusable Measuring Cup
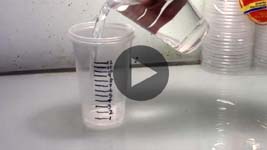
| 1. | Click on the video to watch it on YouTube. This video shows how to make a measuring cup that you never have to wash out. |
 |
|---|
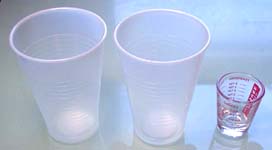
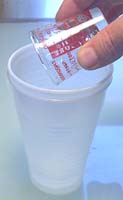
| 2. | When measuring water, paint or resin, the problem with standard measuring cups is that they are difficult to clean. Here's a way to make a measuring cup that never gets dirty. Get 2 clear 16 ounce plastic cups and a liquid measuring cup. The measuring cup shown here is a 1 ounce cup. |
 |
|---|
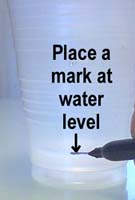
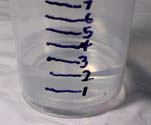
| 3. | Nest the 2 plastic cups (set one inside the other).
Pour it into the large plastic cups. Place a mark at the waterline with a fine tipped permanent marker. |
 |
 |
|---|
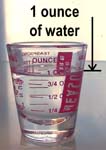 Measure 1 ounce of water in the measuring cup.
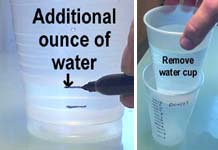
| 4. | Place 1 additional ounce of water into the cup. Place another mark at the new waterline. Continue adding 1 ounce of water and making a new mark each time. Once you have about 12 ounces, you'll probably have enough marks on the cup. Remove the inner cup and your reusable measuring cup will be ready to use! |
 |
|---|
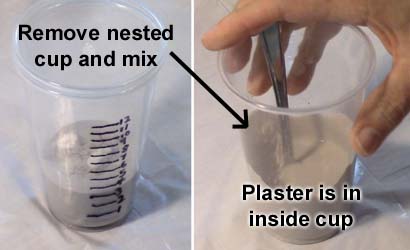
| 5. | To use this cup, place a clean cup inside your measuring cup and pour in the stuff you want to measure. In this case I've poured in water and dry plaster. Afterwards, remove the inner cup and mix up your plaster. When finished you'll still have a clean measuring cup to use again. |
 |
|---|
About Casting Material
About Casting Material (the stuff you pour into the mold). This video explains the difference between plaster of Paris and dental stone. For the demonstration below we will be using plaster of Paris. |
 |
|
There are several casting materials that you can pour into the mold to make blocks. | ||
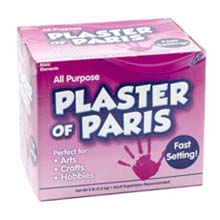
Plaster of ParisIt's the material that most people know about. It's the weakest of the casting materials, will chip easily and is more difficult to pour into a mold with very small pieces. However, this material is the easiest to find, you can buy it in small quantities and works just fine for school projects such as pyramids, castles and temples which have large solid blocks. |
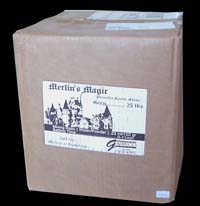
Dental StoneDental stone is the best material available. I have a review of it on the Dental Stone page which shows how to mix it and where to buy it. Dental stone is the hardest material, flows the best into the mold, takes paint better and can be used to cast small delicate pieces. However, it's usually only sold in large boxes, has to be mail ordered and shipping can be expensive unless you live in a big city with a dental supply place nearby. |
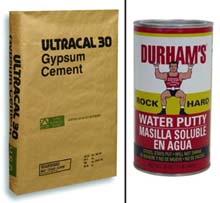
OthersThese include Hydrocal, Ultracal, Durham's water putty, Rockite, and many other types of patching plasters and cements. For a list of these products, check out the Customer Reviews page. If you live outside of the US, then check out the Overseas Reviews page. Most of these can be found locally at your hardware store or lumberyard. However, be sure to get a product that sets up in 25 minutes after mixing with water. Some products such as joint compound or spackling compound have to air dry instead and will not work in the molds. |
Setting Up a Work Area
Click on the video to watch it on YouTube. This video shows what a normal casting area looks like and what kinds of tools you will need for casting. |
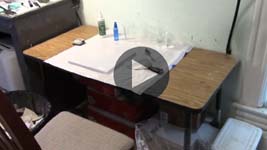 |
This is the way that I have arranged my work area. It doesn't take a large space but it's handy to have all the items you need close by. I sit in the center with my casting material on the right and a low trash can on the left. Here's a list of the items I have on hand: 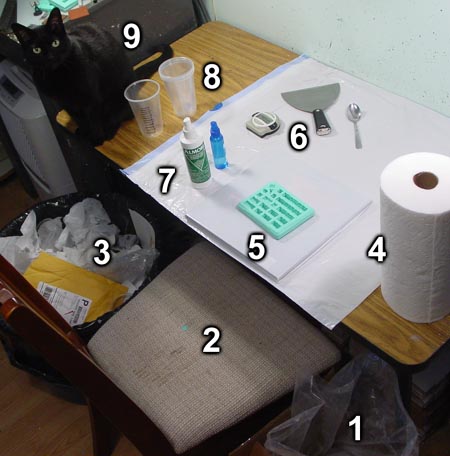
|
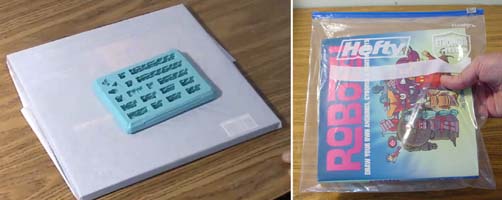
The pound board (#5 above) can be made from wrapping a thin hard back book in a trash bag. You can also take a smaller hard back book and put it into a gallon sized zip-lock freezer bag instead. Just make sure the book is large enough to hold a mold with a little extra room around the outside. |
 |
Mixing Plaster of Paris
| 1. | Click on the video to watch it on YouTube. This video shows how much water and powder to use when mixing up plaster of Paris. Please remember that plaster of Paris is the least expensive but also the weakest material to use. |
 |
|---|
| 2. | For the average size mold, I'm going to start with 2 ounces of water. If after mixing you find that you have too much left over, then start with a lesser amount next time. Here I'm nesting an empty cup inside my reusable measuring cup then filling water up to the 2 ounce mark. |
 |
|---|
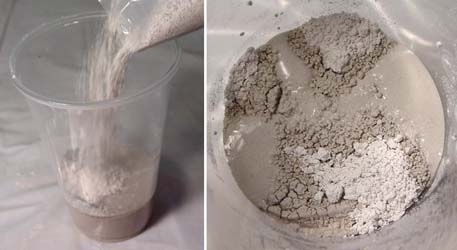
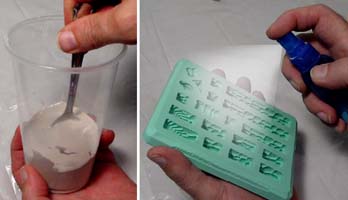
| 3. | Sprinkle the plaster powder into the water, let it soak in, then sprinkle more in. As more plaster sinks to the bottom, it will start to pile up. Keep adding until you see a lumpy texture form on the surface. On the close-up photo you'll notice that the plaster no longer sinks into the water but that the water is soaking up into the dry lumps above the water line. What you see here is just about right. |
 |
|---|
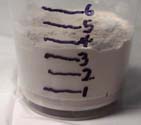
| 4. | By nesting this cup back into our measuring cup, you will notice that the plaster is now sitting at the 3.5 ounce mark. So if you have trouble adding powder by eye, simply add powder until you get to the 3.5 ounce mark and your mixture will be about right. Mix this well using a spoon. |
 |
|---|
Pouring the Plaster
| 1. | Click on the video to watch it on YouTube. This video demonstrates how to pour the plaster into the mold, remove air bubbles and scrape the mold flat. |
 |
|---|
| 2. | Mix this plaster up well using a spoon. Spray the face of the mold using the surfactant you have mixed up. The surfactant will help the plaster slide into all of the details of the mold and also help bring air bubbles to the surface. |
 |
|---|
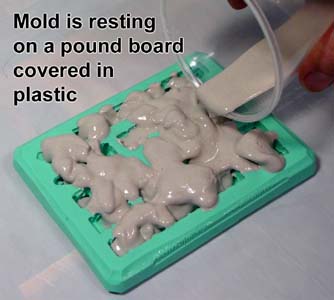
| 3. | Set the mold on the pound board. This is the hardback book you have wrapped in a trash bag. The pound board is item #5 from setting up a work area shown in the information two sections above this one. As you pour the plaster into the mold, you will notice that it will be fairly thick and not want to flow into the mold very well. Don't worry about this just yet. If the plaster were any thinner, you would have very weak blocks that would crumble when trying to remove them from the mold. |
 |
|---|
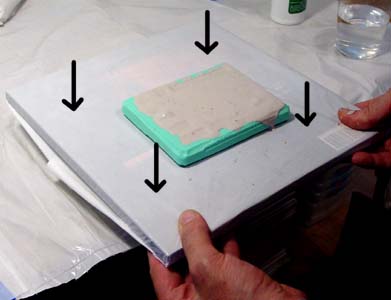
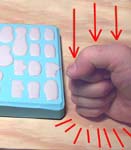
| 4. | Smack the pound board sharply down onto the table top. It works best if you can get a nice flat contact between the board and the table top. Also try to keep the mold level while you are doing this. With just one tap you will see the plaster flow down into the mold and bubbles will come to the surface. Continue to tap the covered book onto the table top to release more air bubbles, maybe 15-20 more times. Don't do this so hard that plaster flies out of the mold. You will continue to see more bubbles come to the surface. |
 |
|---|
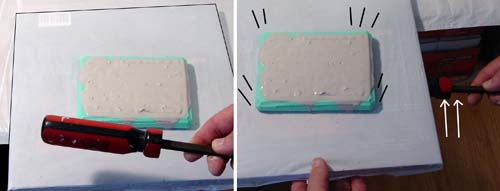
| 5. | Another method is to extend the bottom half of the book off of the table top. Then tap underneath the book using the handle of a large screwdriver or something that won't damage the book. |
 |
|---|
| 6. | You can scrape the mold immediately if you like. However, If you let the plaster set in the mold for 3 minutes, it will thicken up a little and scrape more level. Plasters may vary, so occasionally poke the corner of the plaster with the putty knife to see how thick it is. If it's the consistency of soft serve ice cream, then you will be able to get the tops of the mold more level and flat. |
 |
|---|
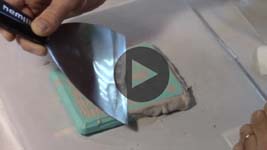
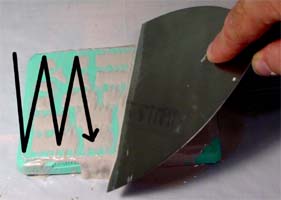
| 7. | I'm using a 6" wide putty knife to scrape the top of the mold. I like metal ones the best. You can find these in the paint department of most hardware stores. Start by holding the knife at a 45 degree angle to the mold and work across with a zigzag motion across the top of the mold. This will loosen up any thick plaster that may be stuck onto the surface of the mold. |
 |
|---|
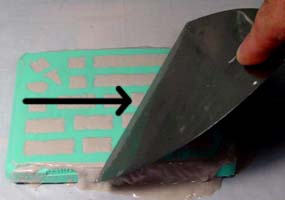
| 8. | Next, hold the knife at a 45 degree angle to the surface of the mold. While scraping, twist the blade so that it does not scrape straight across the surface of the mold but instead scrapes across it at an angle. This is kind of hard to describe. The edge of the blade still contacts the surface of the mold all the way across. This will keep the blade of the knife from catching on the straight edged pockets of the mold. I think the video explains it better. |
 |
|---|
Demolding the Blocks
| 1. | Click on the video to watch it on YouTube. This video shows removing the blocks from the mold as well as cleaning the mold and work surfaces. |
 |
|---|
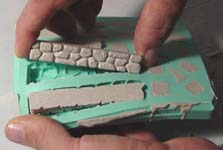
| 2. | Let the mold set for at least 20-25 minutes. Afterward, simply flex the mold and pop the bricks out. Each brick is perfectly detailed and should be extremely accurate in size. |
 |
 |
|---|
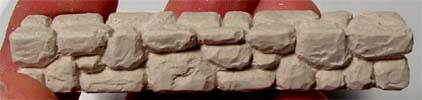
| 3. | Here is a close-up of a block cast in plaster of Paris. Even though the plaster did not flow into the mold well, using the pound board and surfactant still gave good results. |
 |
|---|
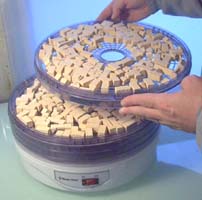
| 4. | Let the blocks dry thoroughly before gluing and painting. I got a food dehydrator one Christmas and I wondered "What the heck am I ever going to use this for?" Now it makes a wonderful block dryer which dries them in about 3 hours. Another way to speed up the drying process is to put them in the oven and bake them at a low temperature for a few hours, or place them in front of a fan overnight. Most any glue can be used to assemble the bricks with. Anything that can glue porous material will work. My favorite is Aleene's Tacky glue that you can get at Wal-Mart or any craft shop. |
 |
|---|
Storing the Molds
You can store the molds for up to 2 weeks without any special care. Just stack them flat on top of each other. If you need to store them for longer than 2 weeks, give them a coat of baby powder (either corn starch or talc) and store them flat in a stack no more than 6 molds high. The baby powder will keep the molds from sticking together. Keep them out of direct sunlight and away from extreme temperatures. When you use them again, be sure to wash the powder off and your first cast will come out better. |
 |
Original Pound Board
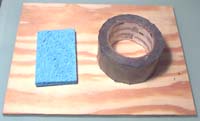
| 1. | This is the first pound board I had made long ago. You may prefer to use this instead of covering a book with plastic. To make this, you'll need a small piece of plywood, a kitchen sponge and some duct tape. Usually a 1 foot square piece will do. You can also use a thick piece of Plexiglas or acrylic sheeting instead of plywood which cleans up easier. |
|
|---|
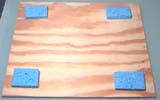
| 2. | Cut the sponge into 4 squares and place one on each corner. Use the duct tape to hold the sponges in place. |
 |
 |
|---|
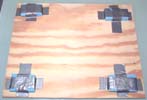
| 3. | Flip the board over. Now when your pour plaster into the mold, you can pound your fist on the board and it won't shake the whole table. The work surface puts a lot more force into jarring the mold and releasing air bubbles. If you get plaster on the work surface (and you will), simply scrape it off with the putty knife when it dries. |
 |
|---|
| 4. | However, if you really want to do the thing right, you can make a $40 vibrating table to do the pounding for you. Instructions for how to build it are on our Advanced Casting Instructions page. |
 |
|---|
If you're using only one small mold, making a lot of blocks can take a while. It's best to do this while working on other projects. For example:
- I'll pour one mold and set a timer for 3 minutes.
- While I'm waiting, I'll paint a base coat on a miniature I'm working on.
- When the timer goes off, I scrape the mold and reset the timer for 25 minutes.
- While the blocks are setting up, I'll paint base colors on the miniature until the timer goes off.
- I remove the blocks, pour a new batch and continue the process all over again.
- At the end of the day, I have enough for a building while getting other projects done.
Another way to increase the amount of blocks you can make is to simply buy more molds. Many times I have up to 9 different molds going at once. While three molds are setting up, I'm pouring the next three. In a couple of hours, I have enough to build a mansion.