Casting in Plastic
Casting Instructions |
Advanced Casting Instructions |
Casting Using Dental Stone |
Casting Using Plastic & Resin |
Customer Reviews of US Products |
Customer Reviews of Overseas Products |
Casting using plastic or resin will reduce the life of the mold!
If you cast using plastic or resin, this will greatly shorten the life of the mold. However, there are many items that simply must be cast in resin or you will not be able to remove them from the mold such as a graveyard fence.
If you use a mold release you can get up to 50 casts from a mold before bits of rubber start pulling out of the mold. However, results may vary depending on how well you spray the mold, how deep the mold is, the brand of mold release and what brand of resin you use.
|
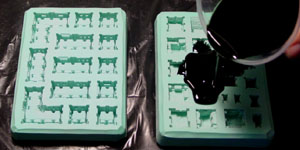
The instructions and videos shown on this page focus on the Hirstopolis game project. You can find more information about this project on the Hirstopolis Main Page. However, the instructions below can apply to any project that you want to cast in resin. If you are here specifically for the Hirstopolis instructions, to make a 3 player game you will need 72 ounces of liquid resin and one bottle of black colorant. If you are making a 6 player game you will need 144 ounces of casting plastic and two bottles of black colorant. |
The Pros and Cons of Spray Mold Release
Spray mold release will extend the life of the mold greatly. I have been able to get 50 casts from a mold before bits of rubber start pulling out of the mold. However, results may vary depending on how well you spray the mold, how deep the mold is, the brand of mold release and what type of resin you use.
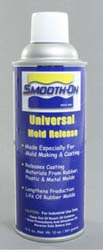 The mold release you see here is Smooth-On Universal Mold Release.
You can find it at www.smooth-on.com.
This product does an excellent job protecting the mold when you are casting in plastic. The problem is that the castings are extremely difficult to paint because this release puts such a greasy coating on the blocks.
In order to paint the pieces you must clean them first which is difficult and time consuming. Soap and water and a toothbrush will work but soaking them in trisodium phosphate (TSP) will probably do a better job. After that you can use regular spray paint to base coat your model then dry brush the highlights using latex paint as shown on my painting pages.
If you must paint the pieces then I suggest you use the other mold release shown below. If you don't need to paint the pieces then this mold release does a great job preserving the mold.
Even though you can't paint the casting easily, this mold release does have some good properties to it. It works great to break bubbles on the plastic surface just after you pour the liquid plastic into the mold. It also does an incredible job of keeping the liquid plastic from sticking to the plexiglass when you lay it over top of the mold.
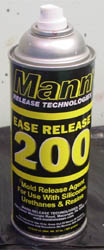 The mold release you see here is Mann Ease Release 200.
You can also find it at www.smooth-on.com.
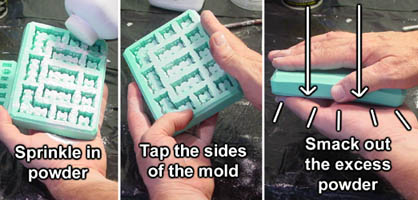
This mold release is sprayed into the mold to protect it when casting in plastic. It also allows you to paint the pieces without having the clean them first. The process is to spray the inside of the mold, baby powder the mold and then knock out the excess baby powder.
This mold release is also an excellent rubber to rubber mold release. This means that you can spray it on an original sculpture and pour liquid silicone mold making rubber over the sculpture to make your own mold. You can't do that with the other mold release above.
You might wonder why I would need the universal mold release shown above. The reason is that Mann Ease Release 200 does not do as good of a job releasing plastic from the hard plastic or plexiglass you lay over the mold. It also does not break the air bubbles that come to the surface after you pour plastic into the mold.
For these reasons I end up using both of these mold releases when casting in plastic. I use the Mann Ease Release 200 on the mold before I baby powder it and I use Universal Mold Release to spray on the liquid plastic to pop the bubbles and to spray on the plexiglass to keep liquid plastic from sticking to it.
Setting Up Your Work Area
This is the way that I have arranged my work area. I use a large trash bag to cover the table surface (K). Many of these items are optional depending on the mold you are casting and how you intend to paint the pieces afterwards. 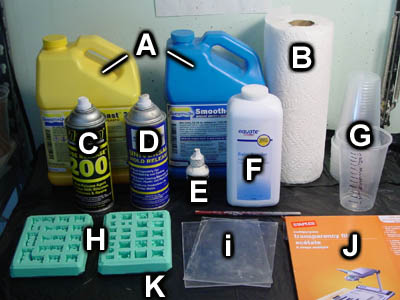
|
Preparing a Mold for Resin
| 1. | Casting in Plastic This covers the basic steps in casting plastic resin in the molds using the products shown in the instructions below. |
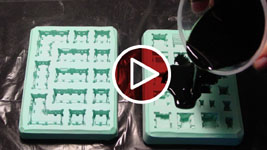 |
|---|
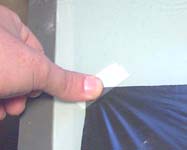
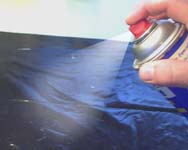
| 2. | Tape a piece of plastic or trash bag down onto your work surface. The liquid plastic will spill over, and it's much easier to get it off of a trash bag than to scrape it off of your table. Be sure your work surface is level! Spray the trash bag with mold release. The kind of mold release I'm using is Smooth-On's Universal Mold Release. |
 |
 |
|---|
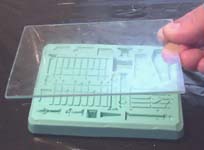
| 3. | You'll need a piece of hard plastic large enough to cover the face of the mold. A CD cover may work for this if you cannot find plexiglass. If a hardware store sells plexiglass for windows, they probably have scraps they have cut off from larger pieces they will end up throwing away. Many times they will just give these to you if you ask. |
 |
 |
|---|
| 4. |
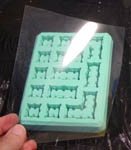
I'm using a piece of flexible plastic large enough to cover the mold with about 1" of excess all the way around. For most molds you do not need to use flexible plastic. For most molds, you can simply spray the hard plastic with mold release, lay it over the mold after you pour the liquid in and place a weight on it while the liquid is curing. A two pound weight is usually about right. However, there are a few molds such as #370 that have thin side walls and the sides will bow outward if you place weight on it while the plastic is curing. This thin plastic under the hard plastic will allow you to press down on top of the mold and release the pressure while the plastic cures. Be sure you get transparency film that can be used in a laser printer and photocopiers! Any other kind of plastic will not work. Liquid plastic heats up when it cures. If you use any other kind of plastic, the heat of the liquid plastic will warp the film. Laser printers and copiers fuse the toner to the plastic with heat, so plastic used in laser printers and copiers is resistant to the heat. If you are only using the hard plastic, spray the hard plastic with mold release. If you are using the flexible plastic, spray the flexible plastic with mold release. I suggest you spray both sides of the plastic in either case. |
|---|
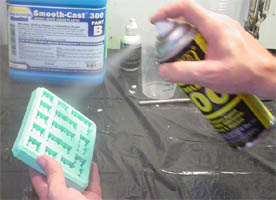
| 5. | Spray the face of the mold with mold release. If you intend to paint the pieces later on, then I suggest you use the Ease release 200 for this. It will protect the mold but also allow you to spray paint the pieces afterwards.
If you spray the face of the mold with universal mold release, then you will have to scrub the pieces with soap and water before you can get paint to stick to them. If you do not intend to paint the pieces then you can use the universal mold release for all of these steps. |
 |
|---|
| 6. | Dust the surface of the mold with talcum powder. Hold the mold over a trash can. Tilt the mold and tap the sides to spread the talc around. Turn the mold 1/4 turn and tap the next side. Continue all the way around until the talc covers all of the pieces in the mold. Turn the mold upside-down and smack it face down onto your hand (over a trash can). This will knock the excess powder out of the mold. |
 |
|---|
Coloring the Plastic
| 7. |  |
|---|---|
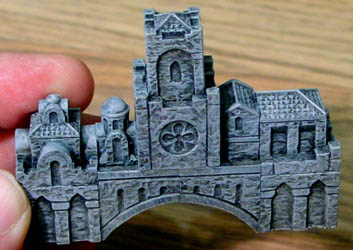
For these instructions, I'm going to be adding colorant to the plastic while casting the blocks. The colorant you see here is called So-Strong and it's from www.smooth-on.com. These bottles have a nice dropper tip so you can easily measure drops of colorant that you add to your casting resin. I have found that the darker you want your color to be, the amount of colorant goes up exponentially. The plastic castles you see here show the difference in the amount of black colorant needed. |
Mixing and Pouring Resin
| 9. | For this demonstration, I will be using a product called Smooth-Cast 300 from www.smooth-on.com. This casting plastic gives you about a 3 minute working time which means you have to work fast! But it also means you can remove the castings from the mold in about 10 minutes. There are hundreds of different brands and types of liquid plastic. At the end of this article I will review a few types of resin I have used. |
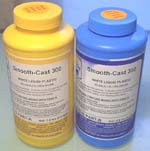 |
|---|
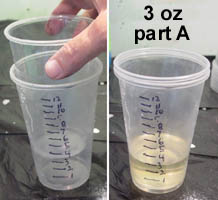
| 10. | Be sure to shake the resin container to mix it up before pouring out what you need. Many types of resin will separate in the jug and need shaking. We are going to use a reusable measuring cup to measure the parts of resin. Start by nesting a clean cup into your reusable measuring cup. Pour 3 ounces of part A into the cup. The amount of resin shown here is just the right amount to fill mold #370 and #371 for the Hirstopolis project. |
 |
|---|
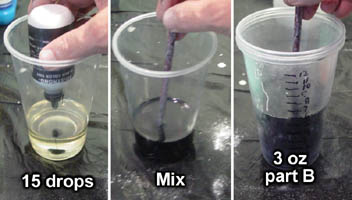
| 11. | Next, add 15 drops of black colorant to this and mix it up with a stirring stick until the black is completely dissolved into the Part A. Adding colorant may not be necessary depending on how you intend to paint your project. For this project, I intend to start with dark plastic so I do not have to under coat the model with dark paint. Finally, add 3 ounces of part B and mix for about 15-20 seconds. |
 |
|---|
At this point the clock is ticking and you only have about 2 minutes to pour the plastic in and cover the top of the mold with the hard plastic. |
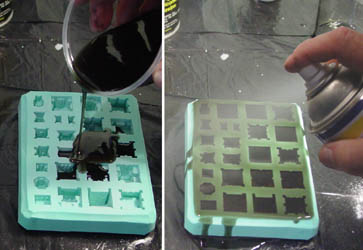
| 12. | Pour the plastic into the molds as quickly as you can without making a mess. You want to overfill the molds so that there is a thin solid layer of liquid completely covering the face of both molds. You will be filling two molds, mold #370 and mold #371 even though I only show one mold in the photo. Spray the top of the mold with the universal mold release. This will pop the tiny bubbles that rise to the top of the liquid plastic. |
 |
|---|
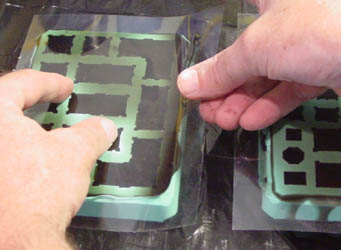
| 13. | Immediately cover the face of each mold with a thin flexible plastic sheet. To do this, lay down one edge of the plastic first and then roll the thin plastic across the top of the mold. You may want to run your other hand across the top of the plastic to push out the excess liquid while you are laying the thin plastic down. Do your best to try and keep air bubbles from forming under the plastic. |
 |
|---|
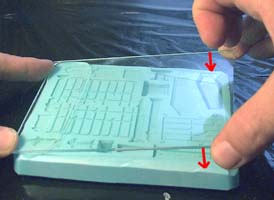
If you are casting most other molds, you can simply place a piece of hard plastic over the mold, setting down one end first. As you hinge the other side down, the excess resin will squeeze out from under the plexiglass, pouring onto your work surface. Afterwards you can set a 2 pound weight on top of the hard plastic until the resin cures. However, for mold #370, doing this would spread the edges of the mold out causing the blocks to distort and flare out on the sides. For this reason I have used the thin plastic on the step above. |
 |
| 14. |
This will squeeze the excess liquid from off the top of the mold. Continue to put pressure various places across the top of the mold until all the excess is squeezed out. Do not leave a weight on top of the mold while the plastic cures! If you keep pressure on the hard plastic and hold it there while the plastic cures, it will distort the edges of the mold and the blocks around the outside will flare out at the base. By pressing down and releasing, the thin plastic will stick down to the top of the mold, even when you take pressure off of the top. This way you do not need to place a weight on top of the mold to keep the top flat. |
|---|
Removing and Cleaning the Pieces
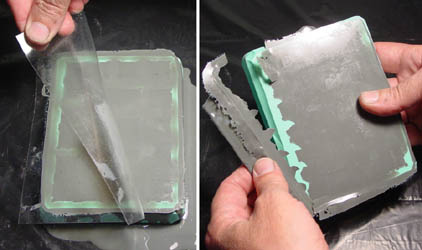
| 15. | Let the mold set for about 15 minutes or until the top surface of the mold no longer feels warm to the touch. Then peel off the thin plastic. It should come off easily because it was sprayed with the mold release. Next, flex the plastic that spilled over the edge of the mold and break it off. I like Smoothcast 300 because it's brittle in thin sections, which makes it easy to break off the excess. |
 |
|---|
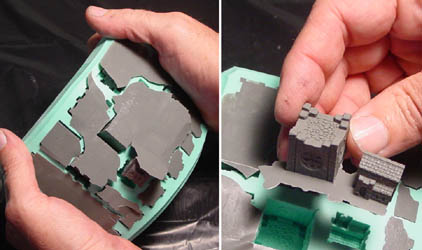
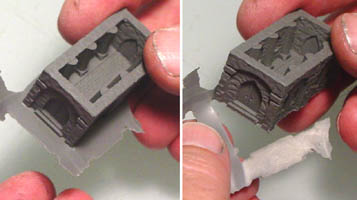
| 16. | Flex the mold to break up the thin layer of hardened plastic and separate the blocks. This will make the blocks easier to pop out of the mold. If you find this is difficult to do, it may mean that you did not press hard enough on top of the mold when squeezing out the uncured liquid and the layer of cured plastic is thicker than you would like. The blocks will end up having some flash (excess cured plastic) around the bottom. |
 |
|---|
| 17. | Since we used smooth-cast 300, the flash will be easy to break off. Simply apply some pressure around the edges of the blocks and it will break off. There may be occasional pieces that you have to trim up using a hobby knife but most solid square blocks will be easy. |
 |
|---|
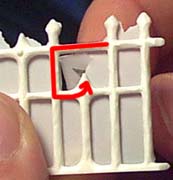
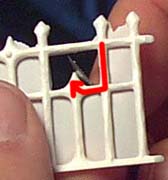
| 18. | To remove the excess flash from the inside of the tracery details, use an x-acto or hobby knife. Poke the knife up through the thin plastic and trace around the inside of the fence with the knife. The flash should be so thin that the knife will easily trim off the excess with little or no pressure. |
 |
 |
|---|
Gluing Resin Cast Pieces
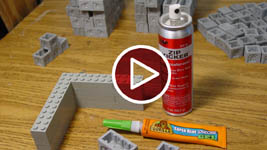
| 19. | Gluing Plastic Cast Pieces This covers the type of glue I like to use along with other tips on gluing plastic. |
 |
|---|
| 21. |  |
|---|---|
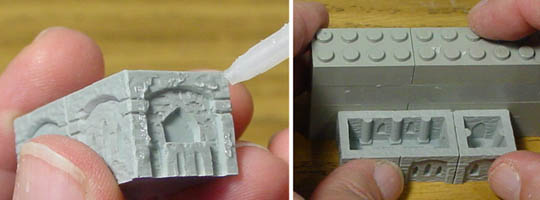
Before gluing, you want to check to see if the blocks are square. This is especially important for blocks found around the outside of the mold. If you use the thin transparency plastic shown in the instructions above, this shouldn't be much of a problem. A good way to check this is to place a block against a wall of some kind. If you see a gap between the top of your block and the wall, then you will need to trim down the bottom center of the block. Sandpaper also works well for this. If you do not see a gap between the top of the block and the wall, then it means the side of the block is perfectly square and will not give you any problems when assembling the pieces. |
| 22. | Place a thick bead of glue on the surfaces that will touch. Line the blocks up and hold them in place for a few seconds. |
 |
|---|
| 23. |
I have found that if you continue to hold the blocks in place, this will give the glue time to set and it will eventually stick. . One of the good things about the gel version of this glue is that it will usually not set up instantly, which gives you time to adjust and move the blocks when needed. If the glue continually gives you problems with not sticking, spray it with the accelerator (zip kicker) and it will harden instantly. However, you need to be careful when using it. I suggest you move the blocks to a different location before spraying them with the zip kicker. Once sprayed, this accelerator hangs in the air and will instantly harden any glue it comes in contact with. This can pose a problem when your glue hardens before you want it to. |
|---|
| 24. |
The example here shows two block sets which are meant to fit together to make a cube. Test fit these pieces after you glue them together to make sure they will form a cube easily. In this example, I needed to trim down some plastic on the inside in order to get them to fit properly. You want to do this before you paint the pieces. |
|---|
Painting Resin Cast Pieces
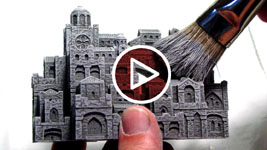
| 25. | Click on the video to watch it on YouTube. This covers types of paint and materials used in order to get the paint to stick to your plastic models. |
 |
|---|
| 26. |
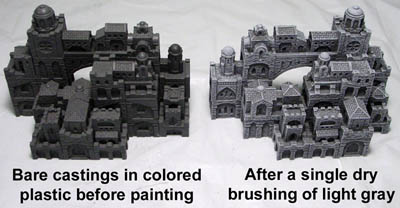
However, since I used Mann Ease Release 200, I am able to get paint to stick to the pieces in limited ways without cleaning them. This means that there are some painting techniques that work and others that do not. I have found that dry brushing acrylic paint onto the blocks works well without having to clean the blocks. However, I would not be able to slop on a base coat of thinned acrylic paint and have it stick. Thick dry paint seems to stick well while thinned watery paint does not. This is the main reason I colored the plastic dark when casting is so I did not need to apply a dark base coat to the pieces. The dark plastic already counts as the base coat. It also saves me a lot of painting time. |
|---|
| 27. | For the Hirstopolis set, I only applied the final dry brushing to the pieces with no other painting involved. I used the Castle Gray Light color for this. You can see the exact color and the dry brushing process on the Painting Instructions Page. This photo shows the difference before and after this single dry brushing. Click on the photo for a larger view. |
 |
|---|
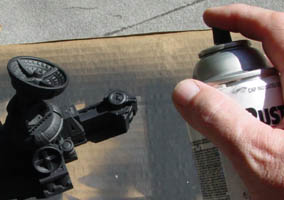
| 28. | If you do not want to color the plastic, you can always spray paint the pieces and then dry brush them normally. I am using regular cheap spray paint here and it works well. The reason I did not do this for the Hirstopolis project is because I could not get spray paint down into the windows and the deep cracks between buildings. However, the star fortress pieces shown here are shaped in such a way that spray paint can get down into all of the cracks. Most items and stone textures can be spray painted. |
 |
|---|
The instructions below are an alternate painting method. This was an experiment that I tried. It worked well (the paint adhered nicely to the blocks) but was much more work than I originally anticipated when using it for the Hirstopolis project. I have included this in the instructions section because this method can be used successfully on many types of castings depending on their texture. However, if you are making the Hirstopolis project, I strongly suggest you color the plastic and follow the dry brushing instructions above instead of the method shown below. |
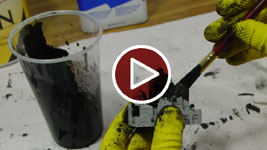
| 29. | Using Gel Stain on Plastic Click on the video to watch it on YouTube. This experiment shows how gel stain works on plastic cast pieces. |
 |
|---|
| 30. |
You may also need some plastic cups for mixing the gel stain since we need to thin it down. |
|---|
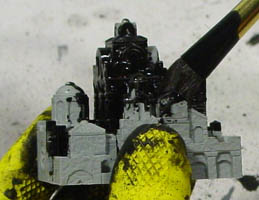
| 31. | I found that black gel stain straight out of the can was too dark. To fix this I mixed 1 part gel stain with 1 part paint thinner. This allowed the gel stain to flow into the details easily and it would leave more gray showing once wiped off. When painting it on, you really need to jam it down into all of the details. I used a 1/2" wide brush with long bristles. It will pretty much destroy the brush by the time the project is painted. Gel stain is oil based so you might want to have some ventilation in the room while working. |
 |
|---|
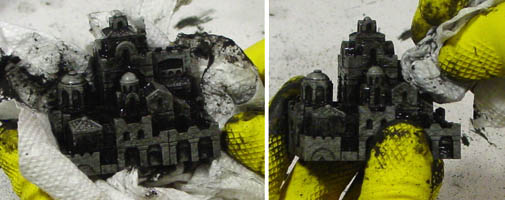
| 32. | After painting, nest the piece in a paper towel and start wiping the excess stain off. This is going to take a lot of paper towels. Try to get down into the details as best you can. |
 |
|---|
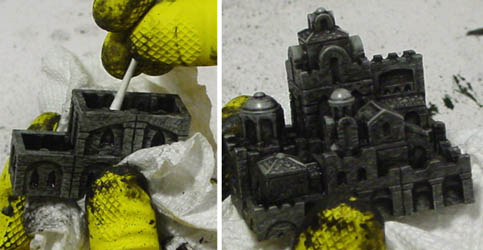
| 33. | Since paper towels will not get down into all of the details you will have to use cotton swabs to pull out the excess gel stain from between buildings and around windows. For the Hirstopolis project, I used about 500 swabs so be sure to get a big box of them if you try this method. |
 |
|---|
| 34. | After the stain is dry, you can dry brush it with light gray paint to finish it up. After trying this method, I realized it was much easier to add colorant to the plastic while casting the pieces, then dry brush with light gray afterwards. This process was way too time consuming for the Hirstopolis project but I think there are many other projects where this method would work well. |
 |
|---|
Types of Resin I've Used
These are a few types that I have tried out. It doesn't mean that they're the best, it just means that I haven't had time to try out any others. There are hundreds of other products available.
Smooth-cast 300 from Smooth-On - My favorite casting resin so far.
 Mix Ratio 1:1
Pot Life 3 minutes
Demold Time 10 minutes
Viscosity 80 cps (almost water thin)
Tensile Strength 3000 psi
Cost 2 pint kit is $21.00, 2 gallon kit is $62.60
Smooth-On's web site is at www.smooth-on.com or you can call them at 1 (800) 762-0744. You can order a trial sample directly from them, but you'll have to find one of their distributors to order anything else (which is easy to locate on their web site).
Advantages: It's water thin, which helps the plastic flow into all the details. Bubbles also pop easily because the mixture is so thin (especially with a quick spray of mold release).
It sets up quickly. The pot life says 3 minutes, but don't believe it. If you don't get it poured in 1 minute then you might as well forget it. Once you pour it in the mold, it sets up and can be removed from the mold in about 15 minutes. If you wait longer than that, the pieces slowly turn more brittle and are harder to remove from the mold without breaking.
Disadvantages: It's a little more brittle than other plastics I've used when fully cured. It's also fairly expensive.
Hardcast 300 from Silpak - My second favorite casting resin.
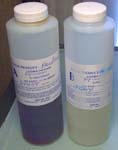 Mix Ratio 1:1
Pot Life 3 minutes
Demold Time 30 minutes
Viscosity 150 cps (consistency of milk)
Tensile Strength 2389 psi
Cost 2 pound kit is $5.78, 2 gallon kit is $63.04
Silpak's web site is at www.silpak.com or you can call them at 1 (909) 625-0056. You can order the product directly from them, but they prefer to sell to distributors.
Advantages: It's not quite as thin as the smooth-cast, but pretty good. The bubbles don't pop quite as easily, but spraying mold release will get rid of most of them.
This product is very durable (pieces will flex instead of breaking) so they hold up a little better than the smoothcast. The price for the 2 pound kit is the cheapest I've seen for casting resin.
Disadvantages: The company will fill the order for you directly, but prefers you go through a distributor. But since they don't have an organized distributor list, that makes things a bit awkward.
Alumilite Super Light Liquid Casting Plastic
 Mix Ratio 1:1
Pot Life 90 seconds
Demold Time 5 minutes
Viscosity 190 cps (consistency of thin honey)
Tensile Strength 6000 psi
Cost 28oz kit is $30.25, 2 gallon kit is $94.00
To order, call the Alumilite company at (800) 447-9344 and order it directly from them. They have a web site at www.alumilite.com, but you can't order online.
Advantages: It sets up quickly. Once you pour it in the mold, it sets up and can be removed from the mold in about 5 minutes so you can make lots of copies quickly. Thin areas and small sharp edges take longer to cure. It's also the strongest material I've used so far.
Disadvantages: It's thicker than the other casting plastics I've used, so you might have a problem casting fine details or undercuts. Bubbles are also difficult to get rid of, because they don't pop easily. Combine that with a very short cure time and you don't have much time to get the material into where you need it. It's also one of the more expensive plastics I've used.
However, they do have a slower setting white version that is very close to the Smooth-cast 300 listed above. It does not set up as hard as their tan product shown here but it also has the advantage of not being as sensitive to moisture as the smooth-cast products.
Resin Casting Terms
Here are a few terms you might want to know. They will help you decide on what type of plastic to use. I've only listed four that are the most important to me. If you go digging for information you'll find a bunch of other factors that I haven't listed here but for what we do they really aren't as important.
- Mix Ratio - Most are equal part of A and B (mix ratio of 1:1).
- Pot Life - The amount of time you have to pour it into the mold after you mix it up.
- Demold Time - How long you have to wait before you can remove the piece from the mold. The thinner the piece is, the longer you have to wait.
- Viscosity - How thin the mixture is when you pour it. Viscosity is measured in Centipoise (cps). The higher the number, the thicker the mixture is. Water is from 1-50cps. Corn oil is from 50-100cps and honey is from 2000-3000cps. The thinner the casting resin, the more easily it will pour into the details.
- Tensile Strength - How much you can bend a piece before it breaks. The higher the number, the more force it can resist before breaking.

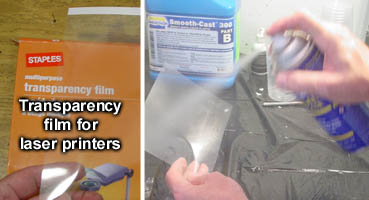 About the Flexible Plastic
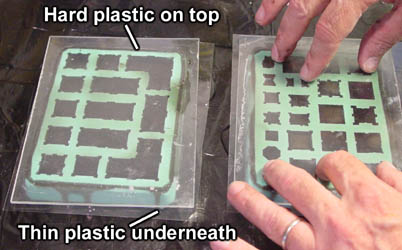 After the thin plastic is down, immediately place the hard plastic down over the top of each mold and press down on the top.
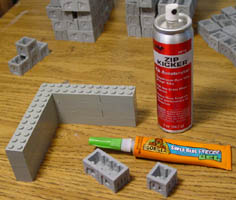
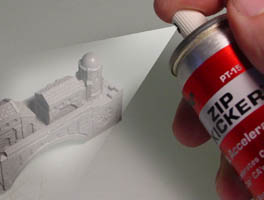 I have found using this glue to be a bit tricky. Sometimes you press two blocks together and they bond instantly. Sometimes they won't stick at all. Many times it seems like the glue will stick the blocks to my fingers but not make the blocks bond to each other
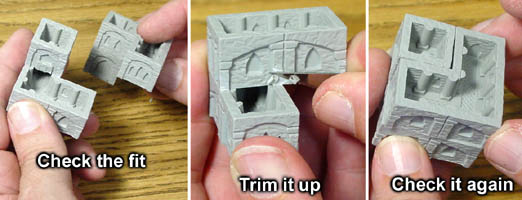 If you are making the Hirstopolis set, you will find that many of the block arrangements are meant to fit into themselves.
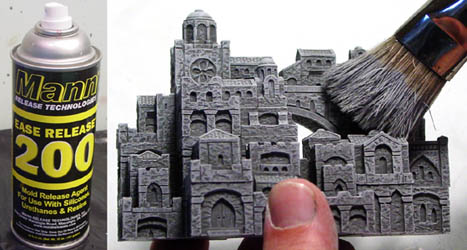 With most mold release, you would need to clean the pieces before paint will stick to them.
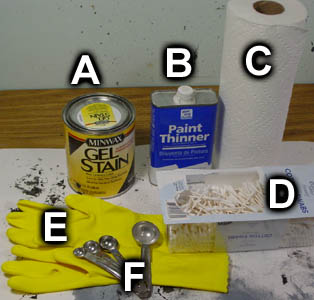 For this section I decided to try using gel stain on resin cast pieces to see what would happen. Gel stain is an oil based stain which is very thick like jelly. It will not run and also has a long drying time so you can take your time when wiping off the excess. I found that it sticks to plastic very well.