How to Use the Small Turret Mold |
|
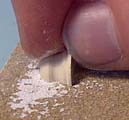
For complete instructions on pouring the blocks, see the Casting Instructions Page. Below are a few suggestions on how to use the turret mold.
Making Turrets
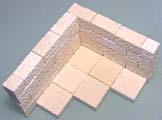
| 1. | I'll show how to create corner turrets for your castle by doing one corner. Start by making the bottom of the keep with square corners. We're going to add the turret to the second floor. |
 |
|---|
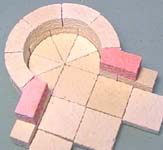
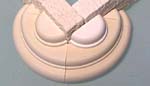
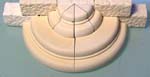
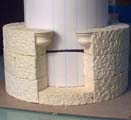
| 2. | Create the second floor separately. When dry, it will lay on top of the first floor. The photo shows the circular pieces added onto the square corner. The blocks shown in red are special pieces included on the turret mold. They help splice the turret seamlessly into the flat wall. |
 |
|---|
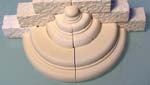
| 3. | The second row of blocks is placed on top staggered. The blocks shown in red are special blocks on the turret mold used to splice the turret into the flat walls. |
 |
|---|
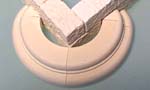
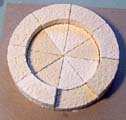
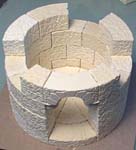
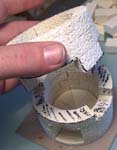
| 4. | Once the second floor is placed on top of the first, you need a way to support the turret. The photos on the right show what pieces are used to support the turret. These pieces are shown upside-down. The final decoration is the knob sanded in half. |
 |
|
|---|
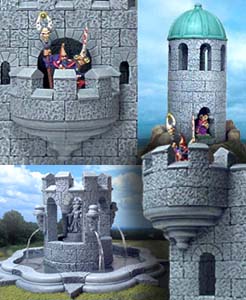
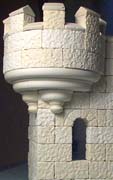
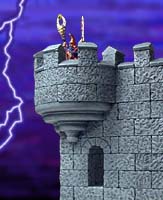
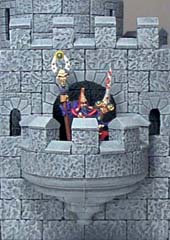
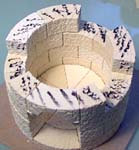
| 5. | Here's a photo of the finished turret. The miniature was made by Games Workshop. There are lots of possibilities for this thing. The turret could have extended further down into the first floor and included a window, we could have added the dome to the top, or the turret could reach all the way down to the base. Also, these turrets could attach to a flat wall (half circle), or they could be on an inside corner (quarter circle). They also make great circular staircases using the flat tiles as steps. |
 |
|---|
Making a Balcony
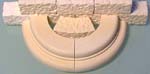
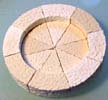
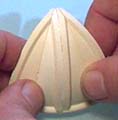
Making a balcony is very similar to making a corner turret. The only thing different is how to brace the underside. The pieces shown here are upside-down so you can see how the underside of the balcony is built. Start with 2 of the large smooth curved sections. Place a regular curved piece inside to act as a brace. Next you'll need 4 of the smaller smooth slices put together to form a half circle. Place these on top and glue them to the brace block and against the wall. Finish the decoration by sanding a knob piece in half and gluing it against the wall. |
|
 |
Building a Tower
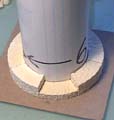
| 1. | To build the tower, you'll have to cast the turret mold 9 times. We'll start with the base of the tower. Glue the first layer of blocks down to a piece of cereal box. Be sure that one of the outside blocks is a flat one (for the threshold of the doorway). |
 | |||
|---|---|---|---|---|---|
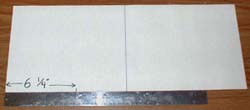
| 2. | Lay down 2 pieces of notebook paper end-to-end and tape them together. Place a ruler on the left side and measure in 6 1/4" and place a mark. Draw an arrow to the line as I have done. |
 |
|---|
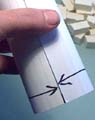
| 3. | Roll the paper, line up the arrows and tape the roll together. Place the paper in the center of the tower. This will be a circular guide we will build around. |
 |
 |
|---|
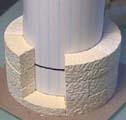
| 4. | Add 2 more rows of blocks leaving the doorway open.
Sand 2 of the decorative caps halfway. Glue these to the inside top of the doorway as shown. |
 |
 |
 |
|---|
| 5. | Place the curved arch over the doorway and add the other blocks shown. Since we want this tower to come apart later on, we need to mark where the tower will separate. Use a marker and draw lines on the tops of all these blocks. The marks will remind you where not to glue later on. |
 |
 |
|---|
| 6. | Continue to add 2 more rows to the tower, but be sure not to glue where the marks are. When the glue is dry, you should be able to remove the top section to make painting easier. |
 |
 |
|---|
| 7. | For the second floor, glue the pieces together as shown and let them dry completely. Glue this on top of the tower. |
 |
 |
|---|
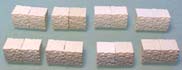
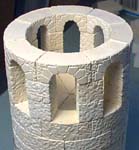
| 8. | For the window pillars, stack 2 half-circular blocks together. You will need to make 8 of these pillars. |
 |
 |
|---|
| 9. | Glue the pillars to the tower and add the circular window sections on top. After the glue is dry you can trim the extra cereal box from around the base of the tower. |
 |
 |
|---|
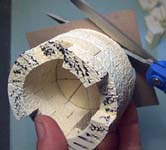
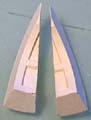
| 10. | Now for the dome roof. Take two sections of the dome and glue them together. You will notice that there is a right and left half to each section.
Each completed section will form 1/8th of the dome. You will need to make 8 of these sections for a complete dome. Let these sections dry before continuing. |
 |
 |
|---|
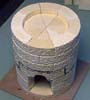
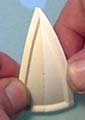
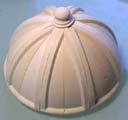
| 11. | Glue the 1/8th sections together to make four quarters of the dome. When dry, glue together the complete dome. Sand the top flat and glue the knob decoration on the top. Here's what the complete tower looks like. |
 |
 |
 |
|---|
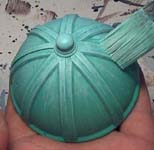
| 12. | To paint the model, follow the instructions on the Painting Instructions page. For the dome, I'm going to use green paint, mixed with a little white for the first coat, then a lighter green dry brushed afterwards. This will simulate the patina of a copper dome (copper turns green when it oxidizes). |
 |
 |
|---|
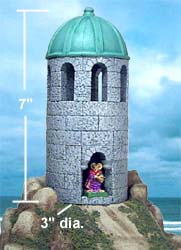
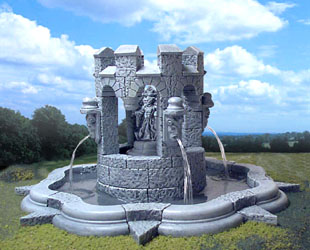
| 13. | Here's a photo of the finished tower on a rock hill. To see how I built the hill, go to the Tips & Tricks 6 page. The turret mold was also used to create this fountain. To see how I built the fountain, visit the Tips & Tricks 6 page. |
 |
 |
|---|
Tower with a Conical Roof
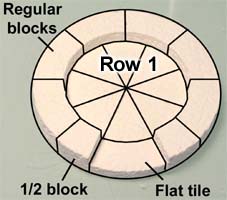
| 1. | To build the tower, you will need 12 castings of the turret mold #61. You will also need 4 castings of the slate conical roof mold #87. We'll start with the base of the tower. Glue the first layer of blocks down to a piece of cereal box. Be sure that one of the outside blocks is a flat one (for the threshold of the doorway). |
 | |||
|---|---|---|---|---|---|
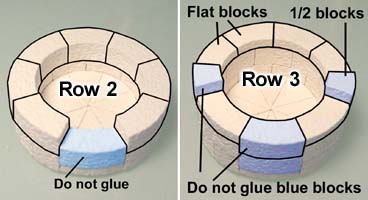
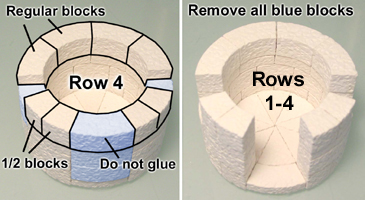
| 2. | For row 2, glue regular blocks all the way around. Do not glue the block shown in blue. This blue block will set lower than the others because of the front step in the doorway. For row 3, glue flat blocks around. Once again do not glue the blocks in blue. On each side there's a 1/2 block which will stick up a little. These blocks will hold the place for windows that will go on the sides of the tower. |
 |
|---|
| 3. | For row 4, glue regular blocks around the back side and 1/2 blocks on the front side. Do not glue the blocks in blue. After the glue is dry, remove the blue blocks and you will have the base of the tower as shown on the right. |
 |
|---|
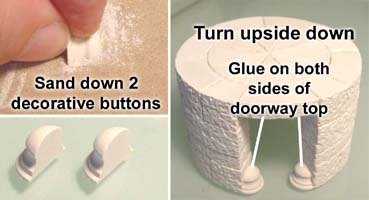
| 4. | Sand 2 of the decorative caps halfway. Glue these to the inside top of the doorway as shown.
I've turned the tower upside down to make sure these pieces glue flush with the top of the doorway. This will complete rows 1-4. |
 |
|---|
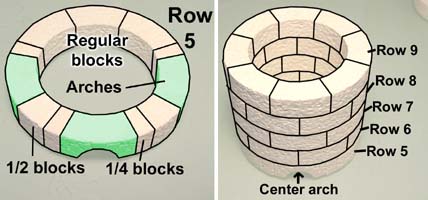
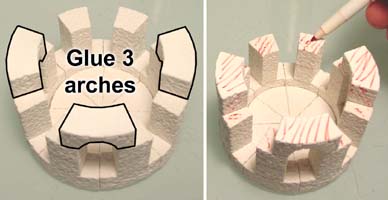
| 5. | Row 5 contains a mixture of blocks. The arches are shown in green. Glue all of these blocks together.
The following rows 6, 7, 8 and 9 are made using regular blocks. Be sure to stagger the blocks so the seams alternate going up the tower. The center top row block should be positioned directly above the bottom middle arch. |
 |
|---|
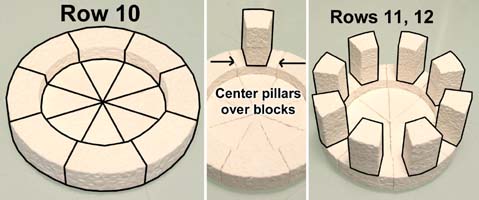
| 6. | Set the top half onto the bottom half to see how it fits. Do not glue them because you will not be able to paint the inside of the tower if you do. Next, glue 8 pillars. You make these by stacking and gluing two 1/2 blocks per pillar. |
 |
|---|
| 7. | Glue a ring of regular blocks around floor tiles for row 10. Next, glue the pillars on and be sure they are centered over the blocks below. |
 |
|---|
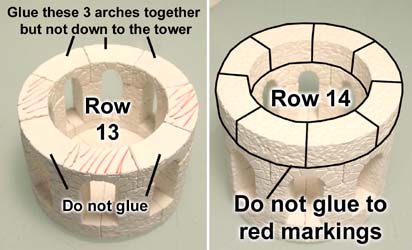
| 8. | Next glue the 3 arch blocks as shown. Be sure to only put a small amount of glue on the bottom of the arches so it doesn't squeeze out everywhere. The arch ends will only cover half of the column they are sitting on. Take a marker and mark the tops as shown here. These marks will let you know where not to glue when putting on the next layer. We want to be able to lift off the top later on. |
 |
|---|
| 9. | While the glue is still wet, place the remaining arch pieces around the tower. Glue the back 3 arches together, but do not glue them down to the red marked area. Do not glue the other two arches at all. Now glue a ring of blocks on top, but do not glue to the red marked area. Not gluing the red marked area will allow you to remove the top later on. |
 |
|---|
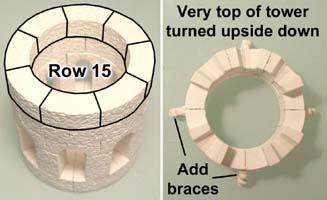
| 10. | Finish the tower by adding row 15. Let this top dry completely. Once dry, flip the top over and add decorative braces around the outside. I'm going to add 12 braces eventually but start by placing 4 braces at even intervals around the tower. These should line up to the center of arch blocks (or seams if there is no arch block). |
 |
|---|
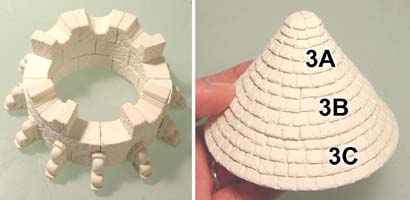
| 11. | Glue 2 braces between each existing brace to make 12 braces total around the tower top. Assemble a 3" slate roof using mold #87. You will need to cast the mold 4 times to make this roof. For information about the conical slate roof, visit the Conical Roof Building Instructions page. |
 |
|---|
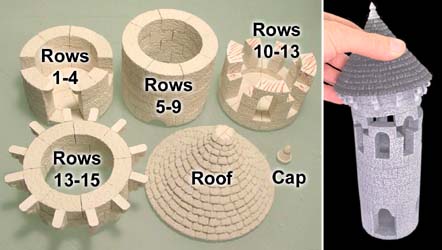
| 12. | Here are all the pieces before painting. To paint the tower, follow the instructions on the Painting Instructions page. For instructions on painting the slate roof, visit our Conical Roof Painting Instructions page. All of the pieces are glued together after painting except for where the arches come apart. |
 |
|---|
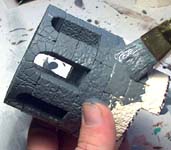
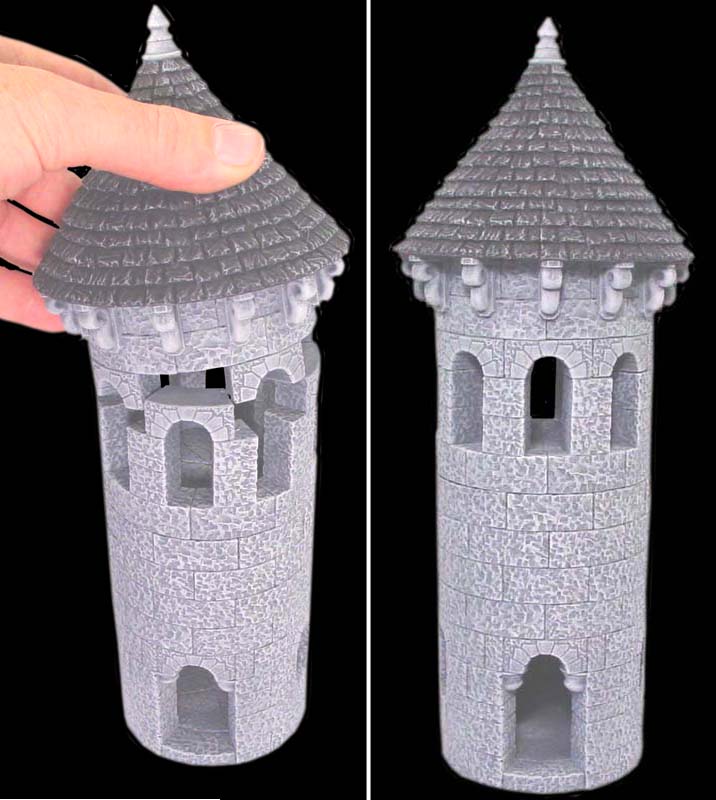
| 13. | The roof shingles are painted solid black and then dry-brushed with a medium gray. You want this dry brushing to be fairly light but stark so the shingle shape stands out. For information about the conical slate roof, visit the Conical Roof Building Instructions page. Click on the photo for a larger view of the tower. You can also make a rock hill for the finished tower. To see how to build a hill, go to the Tips & Tricks 6 page. |
 |
|---|