Detailed Dungeon Pieces Page 5
 |
 Bridge Pillar Hall |
 Burial Chamber |
 Tall Stair Room |
 The Fallen Bridge |
 The Circular Staircase |
 |
Bridge Pillar Hall
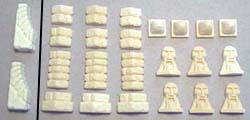
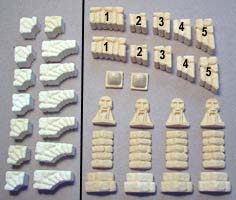
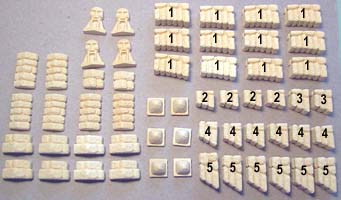
| 1. | You will need these decorative pieces: |
 |
|---|
| 2. |
Glue the long blocks and arches as shown on the second photo. I made these walls out of extra blocks. If you run out of long blocks, feel free to substitute shorter blocks instead. |
 |
|---|
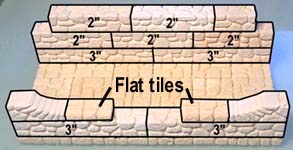
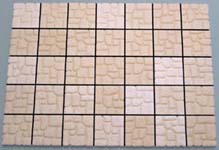
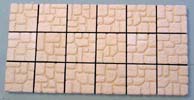 Glue the tiles shown to make the floor.
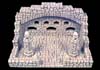
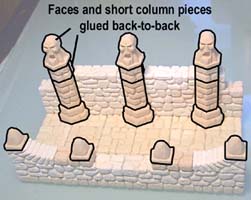
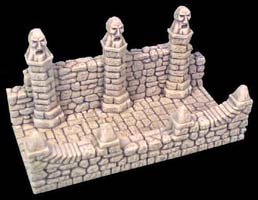
| 3. | Glue the column pieces, faces and decorative spikes to finish the piece. The faces and short column pieces are glued back-to-back. Here's a photo of the finished hall. |
 |
 |
|---|
Burial Chamber
| 1. |
Glue a 5 x 7 grid of floor tiles to form the base. |
 |
|---|
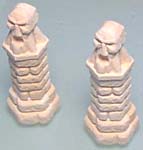
 You will need the following decorative pieces. From mold
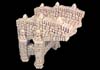
 | 2. | Assemble and glue the back wall as shown. There are only two 3/4" flat blocks on this wall (on opposite sides). The other flat blocks are 1/2" and 1" flat blocks placed on their side. Also glue together two full pillars. |
 |
 |
|---|
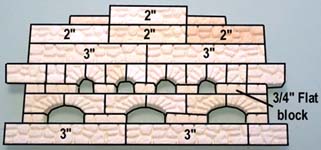
| 3. | Glue the large arches and additional blocks onto the top of the back wall as shown. If you run out of 2" pieces, just use more shorter blocks instead. |
 |
|---|
| 4. | Glue the back wall to the base and add the blocks onto the side and front. Mirror these blocks on the other side as well. Don't glue the columns down until after you paint the model. |
 |
 |
|---|
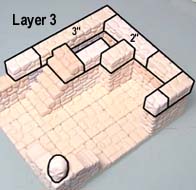
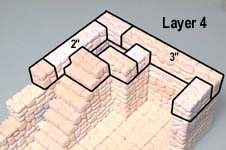
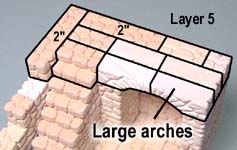
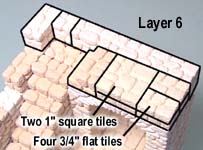
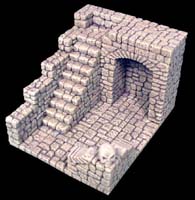
Tall Stair Room
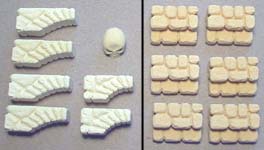
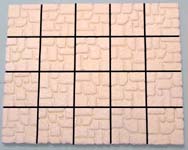
| 1. | For the room you will need these pieces. From mold #70, 4 large arches, 2 medium arches and 1 skull. From mold #74 you will need 6 step blocks. Make a 4 x 5 grid of floor tiles as the base. |
 |
 |
|---|
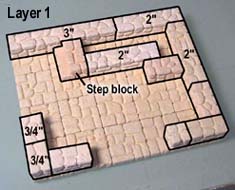
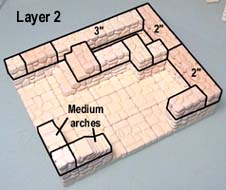
| 2. | Assemble and glue the blocks on for each layer shown. |
|---|---|
| |
|
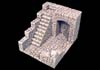
| 3. | Here's a photo of the finished stair room. The large arch serves as a support for the walkway above and as a nice alcove for a statue. You could also gate off the area as a holding cell. |
 |
|---|
The Fallen Bridge
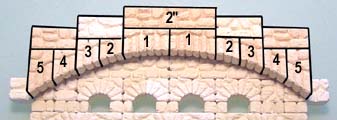
| 1. | This model needs a lot of special blocks. All of these blocks are from mold #74. You will need: 6 full column pieces, 8 column bases, 2 short column pieces, 4 faces, 6 decorative spikes and all of the arch pieces shown. For specific information on the arch pieces, refer to the Fieldstone Bridge Building Instructions. |
 |
|---|
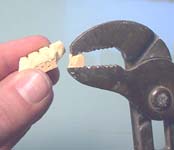
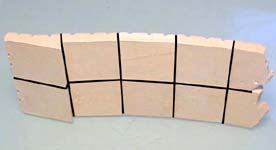
| 2. | Using a pair of pliers, break the ends off 2 walkway tiles from the bridge. Make sure the "side" is facing you just as it is in the photo. Glue together the walkway as shown, using the broken tiles on the end. |
 |
 |
|---|
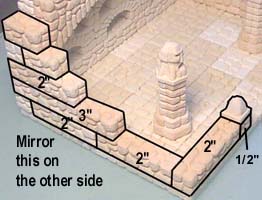
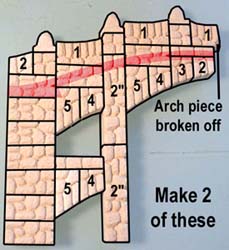
| 3. | Make 2 of these bridge side pieces. The arch piece on the top right is broken off on the end. The red area shows where the walkway will be glued into place. Glue the walkway in and add the blocks for supports. After building other models, I always had extra #1 arch pieces left. If you run out of #1 arch pieces, use some of the other arch pieces instead. |
 |
 |
|---|
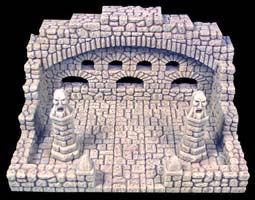
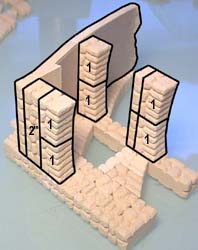
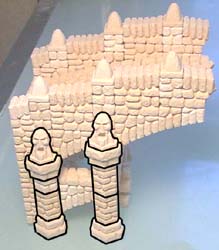
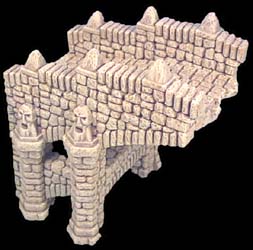
| 4. | Glue the other side of the bridge on and add the column pieces onto the sides. Here's a photo of the finished bridge section. If you like, mirror the other half to make a complete bridge instead of a fallen one. |
 |
 |
|---|
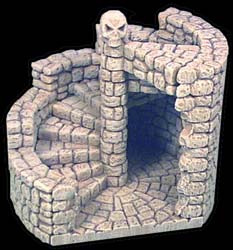
The Circular Staircase
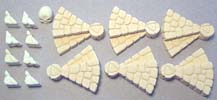
| 1. | For the staircase you will need these pieces. From mold #70, 8 angle blocks and 1 skull. From mold #72 you will need 6 circular step blocks. For specific information on the circular pieces, refer to the 4" Fieldstone Tower instructions. |
 |
|---|
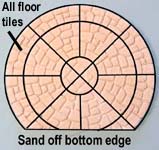
| 2. | Start by gluing together the floor tiles to form the base. Do not glue the first row down! Just glue them to each other. You will need to paint under the stairs later on. |
 |
 |
 |
|---|
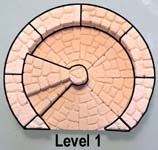
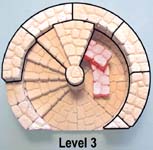
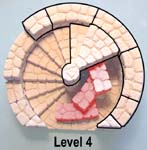
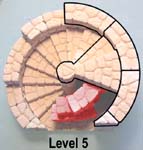
| 3. | Do not glue the blocks shown in red! They're used to hold up the stairs and will be removed later. |
 |
 |
 |
|---|
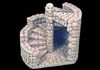
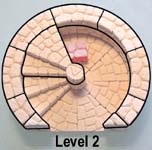
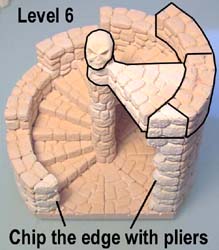
| 4. | After you glue the last level on, you may also want to chip the edge of the angle blocks with pliers. If you don't, the blocks will make the opening a little smaller than a hallway section and might look odd. Here's a photo of the finished staircase. It can be used as an entrance into your dungeon, or as a way up to the next level. |
 |
 |
|---|