Detailed Dungeon Pieces Page 6
 |
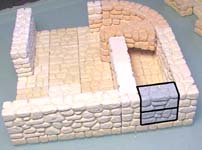
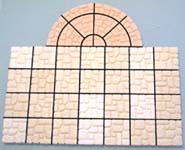
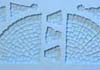 Making a Floor Tile Mold |
 Simple Round Corner Section |
 Short Stair Room |
 Altar of Sacrifice |
 The Observatory |
 |
Making A Floor Tile Mold
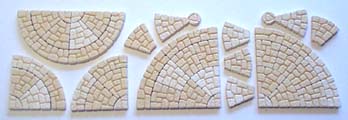
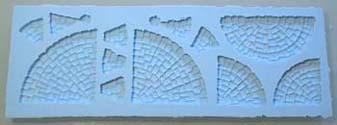
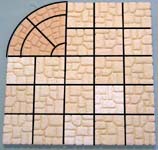
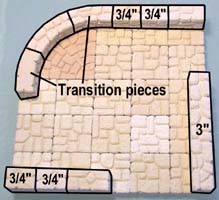
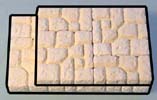
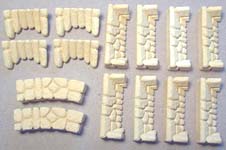
| 1. | If you try to use the circular molds for dungeon pieces, you'll discover one very big problem. You never have enough floor tiles! The circular molds are meant for towers mostly, which need a lot of wall blocks and very few floor tiles. That's the reason there aren't very many on a mold. My suggestion is to make a mold of complete floor tile sections. Not only will it be much quicker to cast and assemble, but since the sections will be cast in one large piece, the floors will be much stronger as well. |
|---|
| 2. | The first step is to glue the floor tile pieces down to something sturdy. I'm gluing them down to a piece of heavy paper board. I've also sanded down a couple of the spiral staircase blocks to just one step. That way I can make a spiral staircase go up in either direction. |
 |
|---|
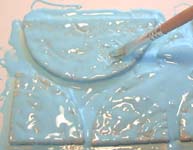
| 3. | Use a stiff bristled paint brush to paint a thin layer of silicone rubber mold making material over the blocks. Make sure it goes into all of the cracks and holes. Rinse the brush out with paint thinner. For information on mold making silicones and where to find them, check out the mold making page on this web site. |
 |
|---|
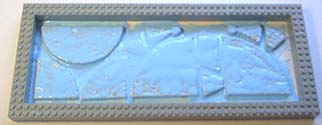
| 4. | I used Legos to form an outside box around the pieces. This will keep the silicone rubber from leaking out. Pour enough silicone over the blocks to cover them completely. When the rubber is cured you'll have a large floor tile mold. | |
|---|---|---|
 |
 | |
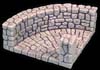
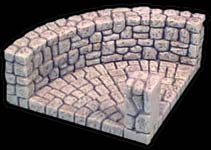
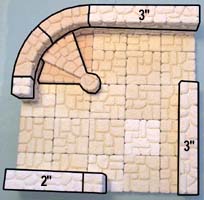
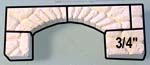
Simple Round Corner Section
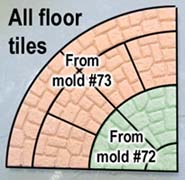
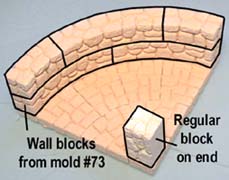
| 1. | You will need molds #72 and #73 to make this corner section. It will save you a lot of time if you make a mold of the floor section as stated in the article above. Place a regular block on end to fill up the corner spot. |
 |
 |
|---|
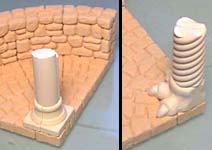
| 2. | Feel free to add different types of posts onto the corner of the piece. The first photo is a broken column piece from mold #71 and the second is a claw foot and spiral column from mold #80. The final photo is the finished painted piece. |
 |
 |
|---|
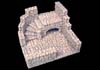
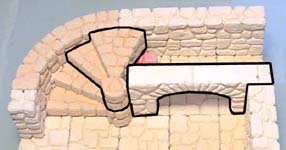
Short Stair Room
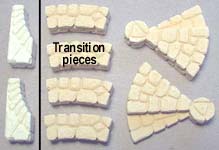
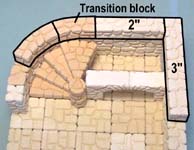
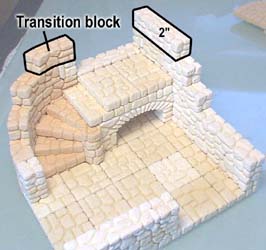
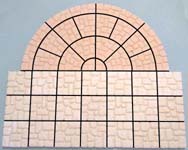
| 1. | For the room you will need these special pieces. From mold #70, 2 medium arches. From mold #72, 4 transition pieces and 2 circular stair pieces. For information on the transition pieces, see the page about mold #72. Glue together the floor tiles as shown to form the base. |
 |
 |
|---|
| 2. | Glue down a first layer of blocks. The transition pieces are used to connect a curved wall into a straight wall. When you put down the second row of blocks, add the spiral stair block as well. |
 |
 |
|---|
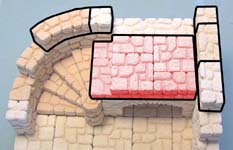
| 3. |
Add another circular step block and glue the archway into the room as shown. Do not glue the block in red. This block is used to hold up the stair until the glue dries. |
 |
|---|
 Glue together the archway and let it dry.
| 4. | Glue 2 regular blocks together and set them in the opening. Do not glue them into the wall! You want it to fit loosely, so you can remove the blocks for a secret passage later. Sand them down a little if needed. Add the next row of blocks shown. |
 |
 |
|---|
| 5. | Glue together the floor tiles shown. When dry, stack these 2 slabs together to form the top walkway of the stairs. |
 |
 |
 |
|---|
| 6. | Place this slab over the arch but do not glue it into place. You will need to remove it so you can paint under the arch easily. Also, you will want to access this place later on to show the secret passage from the inside. Also add the other blocks around the outside wall as shown. |
 |
|---|
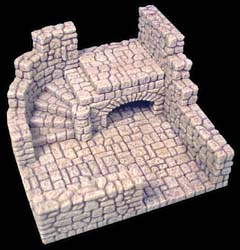
| 7. | Add the last 2 blocks to finish the piece. Here's what the finished room looks like. |
 |
 |
|---|
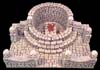
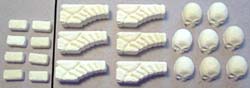
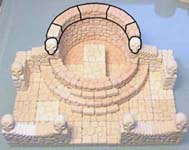
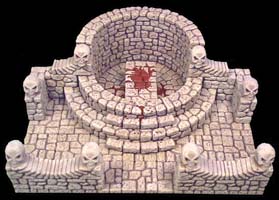
Altar of Sacrifice
| 1. |
From mold #260 you will need 8 of the smallest bricks. From mold #70, 6 large arches and 8 skulls. Glue together the floor tiles as shown for the base. |
 |
|---|
 This room uses circular pieces from mold
 | 2. | Glue down the pieces as shown. Don't glue down the blocks in red if you want to remove the altar slab later. |
 |
 |
|---|
| 3. | Continue adding the pieces shown to finish the model. |
 |
 |
|---|
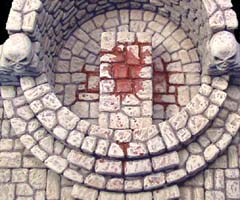
| 4. | I've added dark brown and red to the slab for blood stains. You can also remove the slab and put a pool or fountain in the bottom instead. |
 |
 |
|---|
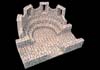
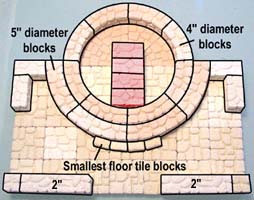
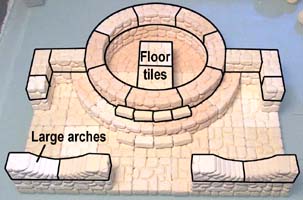
The Observatory
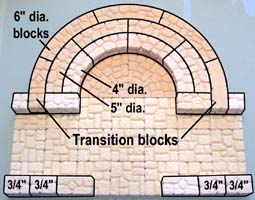
| 1. | For the room you will need molds #72 and #73. The special pieces shown are from mold #73 which are 4 braces, 2 transition pieces and 8 arrow slits. For information on the transition pieces, see the page about mold #73. Glue together the floor tiles as shown to form the base. |
 |
 |
|---|
| 2. | Glue the blocks down for the 1st and 2nd levels. The 4" and 5" diameter blocks are on mold #72. The 6" diameter blocks and transition blocks are on mold #73. Notice the transition block on the right is placed upside down. |
 |
 |
|---|
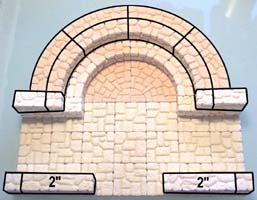
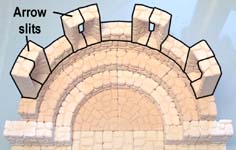
| 3. | The back side is the only part that continues up further. Place the arrow slit blocks and shorter 6" blocks in between them. |
 |
 |
|---|
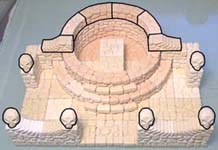
| 4. |
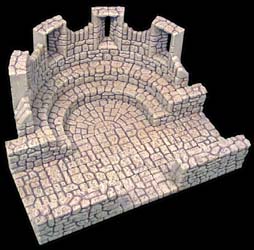
Here's a photo of the finished observatory. |
 |
|---|
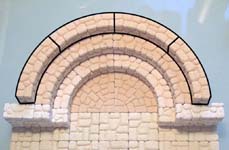
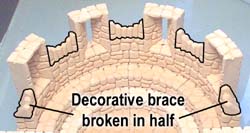 The last pieces are the decorative teeth. Take one of the teeth blocks and break it in half. Place the broken pieces on each end. Place the remaining teeth blocks in between the arrow slits.