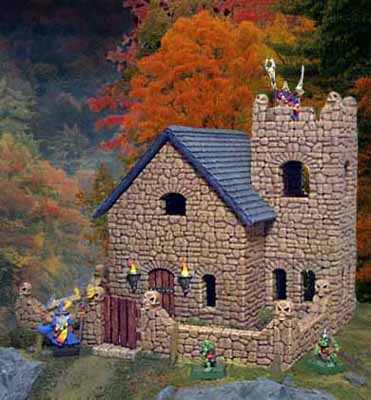
Warlock House Building Instructions |
|
About the Fieldstone Mold
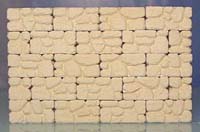
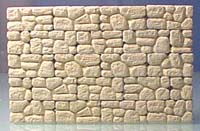
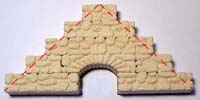
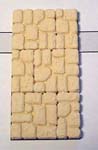
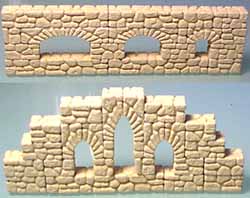 The fieldstone mold was designed to build walls that look like random stone, even though you're building with square blocks. On the mold, I've also included 3 sizes of windows. These window pieces can also be turned on their side to form gothic arched windows.
Also on the mold is a skull. It measures exactly 1/2" high so you can stack blocks on top of it and everything will still line up correctly. Not only can they be used to decorate your dungeon, but they can also be used as game pieces or tokens (your team has to collect 4 skulls and get out of the dungeon before the other guy).
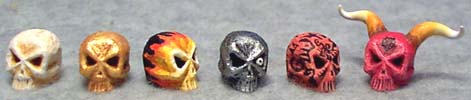 Not only can the skulls be painted, but you can also use some epoxy putty to add details such as eyeballs and horns. Overall, I think this is one of the most useful molds I've created.
 Getting these pieces to look right took a lot of work. At first, I didn't see a way to make fairly seamless random stone walls without making "keyways" in the blocks so they would overlap into each other (similar to the cobblestone mold #210).
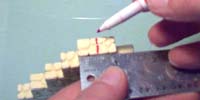
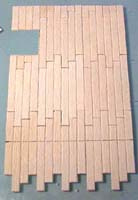
I started by carving several test pieces to see how they would look, and get an idea for what size to make the stones. I stacked up the test blocks to see how they looked. The left photo shows that gaps between blocks are easy to see.
While stacking up blocks, I moved my desk lamp to the side and found that the gaps almost disappeared (lower right photo). I discovered that when I made the stones larger, the gaps between the blocks became less noticeable. This was because larger stones needed deeper grooves, and the deeper grooves disguised the gaps better.
 I also wondered how bad the horizontal rows would show up, but after stacking blocks the horizontal seams didn't bother me. I guess it's because most random stone walls are built in rows.
Lastly, (I could have kicked myself for not noticing it earlier) I asked myself "Why do all of the blocks have to be the same length?". When I varied the length of the blocks from 3" down to 1/2", I didn't have near as many seams between the blocks.
Overall, I'm very pleased with how the blocks came out. I'm even more pleased that they can be stacked just like normal blocks, which makes building very easy.
Special Casting Instructions
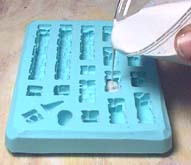 Casting this mold is pretty easy. The only thing you have to watch is that you pour the plaster in slowly. This mold has several steep undercuts, but nothing that will trap air unless you pour too fast.
I suggest that you make a work surface out of a small board with pieces of kitchen sponge attached to the back (refer to the Casting Instructions Page on how to make this). Pour plaster in the mold slowly, while using your other hand to lightly pound on the board. This will give the plaster time to creep into all of the details of the stone.
You can also mix your plaster a little thinner than normal. These pieces are thick enough that they won't break easily when you try to remove them from the mold.
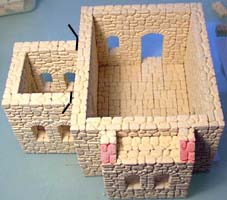
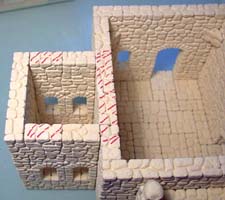
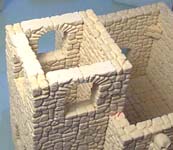
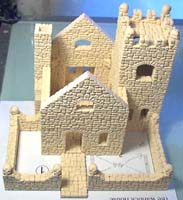
Building the Warlock House
You will need to cast the #70 fieldstone mold 22 times to make this house. I know it sounds like a lot of casting, but this is a fairly large house compared to the other projects. Directions for making the base for the house is on the Tips & Tricks 7 page.
Also, if you don't have any other molds, you can make the house using only the fieldstone mold (#70). However, you'll have to make the floors and roof out of cardboard instead. The Tips & Tricks page gives instructions on how to make these without using other molds.
If you do intend to use the other molds I show here, you'll want molds #260 (Flagstone Floor Tile Mold), #220 (Wooden Plank Mold) and #240 (Wood Shingle Mold).
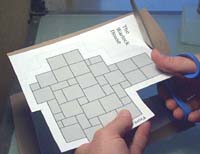
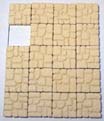
| 1. | You can find the Warlock House plans to this house on the Building Plans page. Glue the floorplan down to a piece of cereal box. You'll notice a light line around the outside of the floorplan. Cut out the floorplan on this line and trim the line off completely. That way you won't have any extra cereal box sticking out from under your house. You'll need to cast the #260 flagstone floor tile mold 4 times to make the floor. Glue the blocks directly down to the floorplan. If you don't have mold #260, you can glue wood strips down to make the floor, or you can paint the floor as shown on the Tips & Tricks page. If you're not making a floor at all, the step below will be a little different. The red block shown would be a full block instead of a half block. |
 |
|---|---|---|
 |
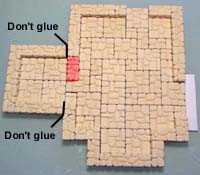
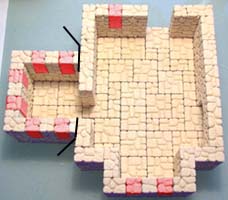
| 2. | The first row of blocks is laid around the outside of the floor. Do not glue them to the floorplan! Only glue them to each other. You must be able to remove the building from the floor so you can paint it later on. The block shown in red is a flat block (1/4"tall). Don't glue it down to the floor! Only glue the edge to the wall. Don't glue the blocks on the black line! You will have to remove the side tower later on for painting the inside. |
 |
|---|
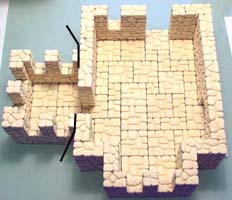
| 3. | This is layer #2. Once again, don't glue on the black line. As you build on the model, you should be able to remove the tower at any time. For the remainder of the building, don't glue where you see the black line! |
 |
 |
|---|
| 4. | As you start building up the rows, cross off the levels that you've completed on the plan. It's pretty easy to lose your place otherwise and put the wrong blocks down. |
 |
|---|
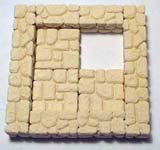
| 5. | This is layer #3. The blocks shown in blue are flat blocks (1/4" thick). For the center posts on the windows, glue the 2 blocks back-to-back. The others shown in blue are just standing on end with the flat back against the wall. Also note the pieces shown in red are the widest arches. These are used to make the top of the fireplace. |
 |
|---|
| 6. | This is layer #4. To help get the windows the right width, place blocks shown in red there temporarily to hold the place. Do not glue these blocks. Remember not to glue where the black lines are shown. We want to remove the side tower later on. |
 |
 |
|---|
| 7. | This is layer #5 On this row you place the window and doorway arches. You should still be able to remove the side tower. |
 |
 |
|---|
| 8. | This is layer #6 and #7 Here are the next two layers. You notice that we've covered the smaller windows at the bottom with the 3" long blocks. The blocks shown in red are the angle blocks. |
 |
 |
|---|
| 9. | If you would like to add a second floor to your house, you'll need to add some angle blocks in the corners to support the floor. If you don't want an upper floor, don't add the blocks. I wanted the angle blocks a little lower, so I used a flat tile as a spacer. By placing the tile flush with the top, the angle piece ends up a little lower. |
 |
 |
|---|
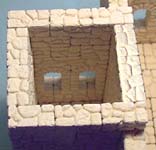
| 10. | This is layer #8 Glue a full layer of blocks in a ring around the building, but only 2 blocks are glued on the tower. Afterward, mark the top of the tower section (and part of the wall) with a marker. As we continue the tower on up, do not glue to this marked section. We want to lift off the top of the tower later on so we can paint the inside. |
 |
|---|
| 11. | To finish this layer, place the remaining blocks on the tower as shown, but don't glue them down! As you continue to stack and glue the remainder of the tower, don't glue to the marked area. |
 |
|---|
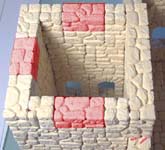
| 12. | This is layer #9 and #10. As you glue layer 9, don't glue onto the marked area. On layer 10, do not glue the blocks shown in red. These blocks are holding the place for the windows and will be removed later on. |
 |
 |
|---|
| 13. | This is layer #11 and #12. Layer 11 also has spacer blocks. Do not glue the blocks shown in red. Afterward, remove the spacer blocks to reveal your window openings. Layer 12 uses the medium window arches. |
 |
 |
|---|
| 14. | For layer 13, glue 3 floor tiles down a piece of cereal box. When dry, cut away the excess cereal box around the edge. If you don't have a floor tile mold, you can put together 6 regular blocks to make the same shape (and you don't have to glue it down to anything). |
 |
|---|
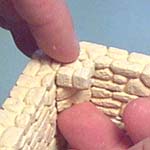
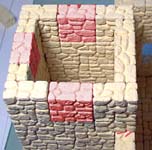
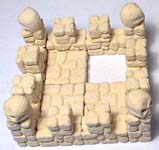
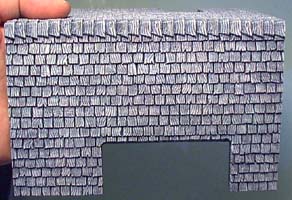
| 15. | To finish layer #13, glue the blocks around the outside. Add the square blocks on top to form the crenellations. The skulls are optional. Do not glue this onto the top of the tower! If you glue it on, it will be difficult to paint the inside of the tower. |
 |
 |
|---|
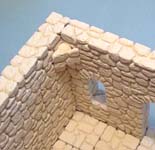
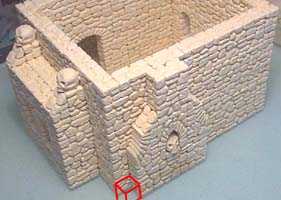
| 16. | Now for the chimney. Lay the blocks down directly on the plan and glue them together (but don't glue them to the paper). Glue the chimney onto the side of the house. Be sure that it centers over the fireplace on the other side of the wall. You'll know it lines up correctly if you can place a square block on the corner (shown in red). |
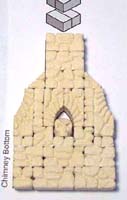 |
 |
|---|
| 17. | The first photo shows the different layers you stack together to form the top of the chimney. The very top is made of two rows of flat blocks laid on their side. It helps if you temporarily put a regular block in the center and build around it. Then remove the center block later. Do not glue this chimney top to the rest of the building yet. If you glue it on, it gets in the way of painting. |
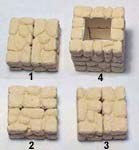 |
 |
|---|
| 18. | For the roof peak, lay the blocks directly on the plan and glue them together. You will need 2 roof peaks. Be sure they're completely dry, then mark a line across the center of the top block. Lay a piece of coarse sand paper on the table and sand off the jagged edges. You could use angled blocks on the ends instead, but you would have to cast the mold several more times to have enough. |
|
 |
|---|
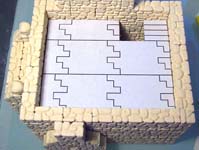
| 19. | The second floor is optional. If you want to add it, glue the floorplan down to a piece of cereal box. When dry, cut it out (including the hole) and be sure it fits in the building. Additional trimming may be needed. |
 |
 |
|---|
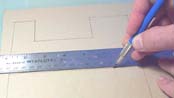
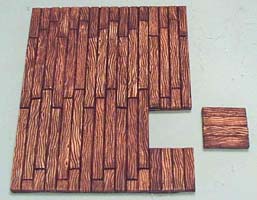
| 20. | Using pieces from the wooden plank mold, glue the wood planks onto the floorplan. You'll notice that the planks overhang at the bottom. Use a ruler and hobby knife to score a line across the bottom, then snap the pieces off clean. Look at How to Use the Plank Mold for more information. If you want to use the flagstone tile mold instead, glue them down as shown in the last photo. You can also use wood strips, or paint the floor to look like wood if you don't have the other molds. |
 |
|
|---|
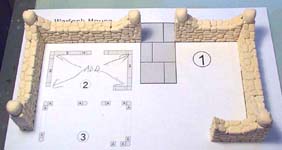
| 21. | Glue the garden wall together, but don't glue it to the plan! You don't have to put the skulls on if you don't want them. Also, glue the walkway together, but not to the plan. |
 |
 |
|---|
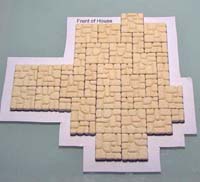
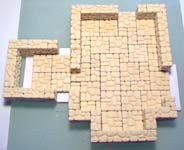
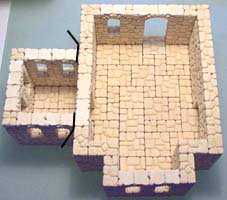
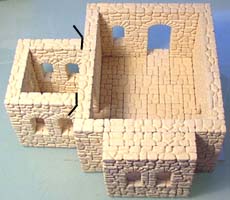
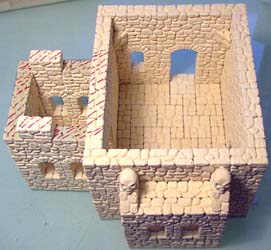
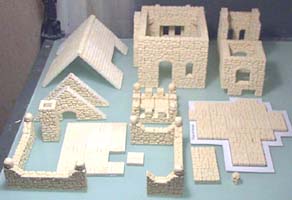
| 22. | Place all of the pieces of the house together to see how it looks. Don't glue it together yet! The second photo shows all of the pieces ready to be painted. The roof is the last item to be made. The building plans include a roof template. |
 |
 |
|---|
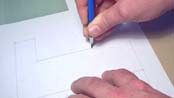
| 23. | Lay the roof template over a piece of cardboard and push on each of the corners with a pencil. When you remove the template, you will see the little depressions in the cardboard. Connect the dots to draw the roof on the cardboard. Cut out the roof with a hobby knife and score the center crease so it will fold easily. Test fit the roof on the building and trim as needed. |
|
 |
|---|
| 24. | I used the wood shingle roof mold #240 to add the texture to the roof. For instructions on using the roof mold, look at Tips & Tricks 5 page for more information. If you don't have the wood shingle roof mold, you can make shingles out of cereal box. Go to the Gothic Church Building page or the Tips & Tricks page for instructions on doing this. |
 |
|---|
Painting Instructions
| 1. |
I started with a mixture of paint 2 parts black, 1 part blue and mixed it thin (to the consistency of milk). Using a large soft brush, paint a small area of the roof (about 2" square) and immediately wiped the paint off with a soft rag. You have to work in small sections, otherwise the paint will dry and you won't be able to wipe the excess off. Move onto the next section until the whole roof is stained. You'll notice that the color won't be even, making it look more real. Finally, dry-brush some white paint onto the shingles to bring out the highlights. This will make the individual shingles stand out and look good. |
|---|
 I wanted the color of the roof to look like old wood shingles. Try your paint colors on an extra section of roof before you do it for real! I'm going to apply the paint and wipe it off like a stain. If the test piece ends up too dark, add water to the paint. If it's too light, then add more paint.
| 2. | I used the same method to paint the wood floor. I also made a trap door out of planks to fit the hole in the tower top. Once again, test your colors out on a spare plank. Mix some brown paint thin and paint it on. Immediately wipe off the paint with a soft rag. Go ahead and paint the whole thing at once. It's small enough that you have time to wipe off the excess paint before it dries. |
 |
|---|
| 3. |
The first color is a dark brown. Mix it as thin as milk and slop it on with a 1" wide brush. Be sure it runs into all the cracks (and there's a lot of them with these blocks). The second color is about the color of pumpkin pie. It gives a good red undertone (similar to Arkansas river rock). Don't thin the paint. Dip the brush in the paint, wipe a good amount off on a rag and brush over the surface using a medium heavy pressure. The brush won't reach into the deep crack which will remain dark brown. The last color is a cream color, lightly dry-brushed on top. Keep the paint colors fairly bright. Once you start brushing them on, they will become muted from the colors underneath showing through. If you're going to paint a lot of these structures, here's a really good suggestion:
|
|---|
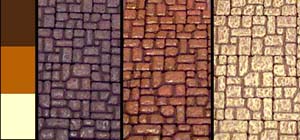 I painted the stone walls in 3 steps. The strip of colors on the left is what I used. For complete painting instructions and to see the exact colors used, visit the
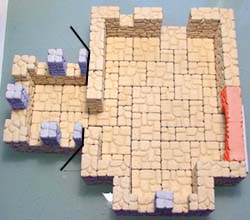
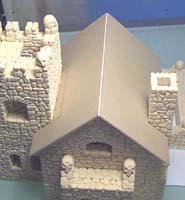
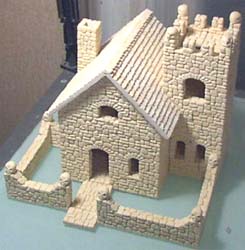
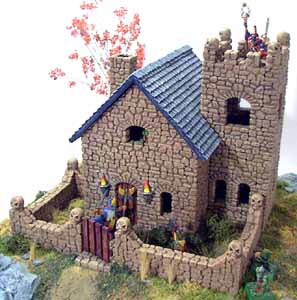
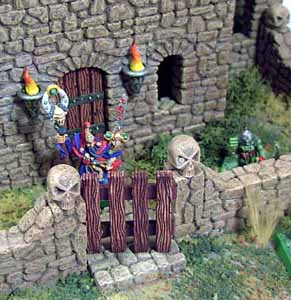
 Here are a few photos of the finished Warlock House. For instructions on building the base it sets on, look at the Tips & Tricks 7 page. |
 |
 |
 |
 |
 |
The miniatures shown are from Warhammer(TM). Warhammer(TM) is a trademark of Games Workshop. This site and its contents are not affiliated or endorsed by Games Workshop.