The Wizard's Tower
|
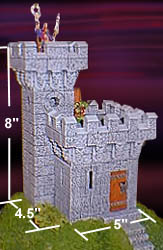
The Wizard's Tower model is one of the easiest to build. If you are a beginner, I would suggest starting with this model before moving onto some of the more difficult buildings on this web site. The Wizard's Tower mold (#50) has a lot of basic building blocks, which you will need on most any project you want to make. Once you complete this project, you may notice that you had not used any of the 3/4" long blocks to build this tower. The 3/4" block is a later addition to this mold, and it is very useful if you want a round topped window that is square on the bottom. |
|
Building Instructions
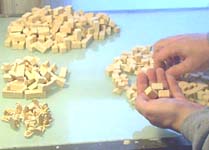
You will need to cast mold #50 (the Wizard's Tower mold) 18 times to have enough blocks to build the tower. For complete instructions on pouring the blocks, see the Casting Instructions page.
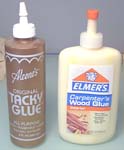
| 1. | The blocks should be completely dry before gluing them together. If they feel cool or look darker than the other blocks, they're still wet. I'll be using Aleene's Tacky Glue, but you can also use Elmer's Wood Glue. For complete instructions on drying blocks and types of glue, check out the Building Instructions Page. |
 |
 |
|---|
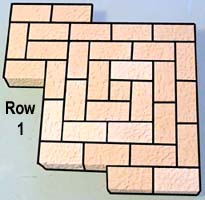
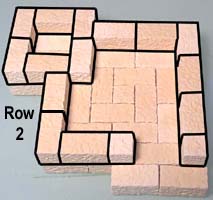
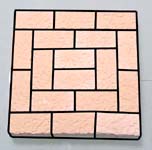
| 2. | You can print out the floor plan for this tower from the Building Plans Page, or you can simply follow the instructions shown here. Glue together the blocks shown to make the floor. Be sure that they're all smooth side down when you glue them. The second row of blocks is shown in the next photo. |
 |
 |
|---|
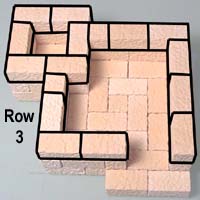
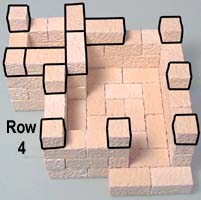
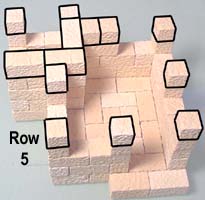
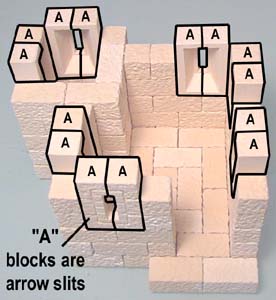
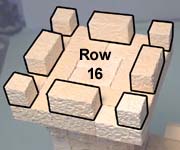
| 3. | Rows 3, 4 and 5 are pretty simple. The last two rows use a lot of square blocks. The empty spots are for arrow slits. |
 |
 |
 |
|---|
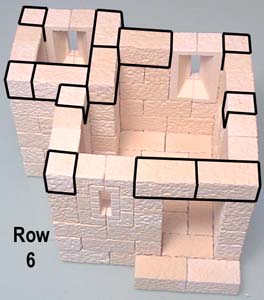
| 4. | Glue the arrow slit blocks into the gaps that we left in the previous rows. Be sure the bevel side is facing inside the building. It's easier to add these while the glue from rows 4 and 5 is still wet. Finish row 6 by adding the blocks shown. The top of the tower should be flat again. |
 |
 |
|---|
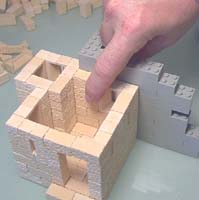
| 5. | Occasionally, push something flat up against the sides of the tower to keep it straight and square. Here I'm using Legos formed in a right angle wall to push against the tower. If you do this for each row as you glue it down, your tower will stay straight all the way up. If you don't have Legos, you can make other kinds of forms on the Tips & Tricks 6 page. |
 |
 |
|---|
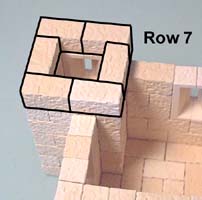
| 6. |
You want to make them ahead of time so they will be dry when you're ready to use them. Row 7 continues the small tower. |
 |
 |
|---|
 Next we'll make the roof pieces.
| 7. |
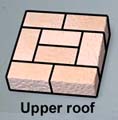
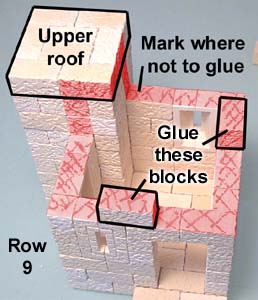
Next, glue on the upper roof and the two blocks shown in the large photo. Now for the tricky part. We need the tower to open up so we can paint the inside and place figures in the tower later on. To get the tower to come apart in sections, we need to mark in red where not to glue. Take a marker and draw lines on the area shown in the large photo. These marks will be a reminder to you where not to glue when putting on the next few rows of blocks. |
 |
|---|
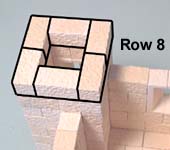 Glue on row 8 as shown in the small photo.
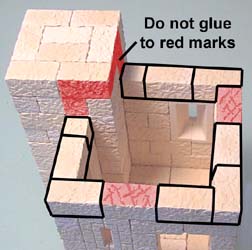
| 8. | For the next 2 rows, glue the blocks together but do not glue them to the red marks. The red line in the photo shows where the tower should come apart if you glue it correctly. |
 |
 |
|---|
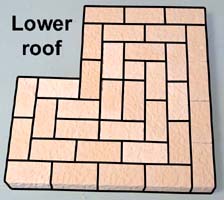
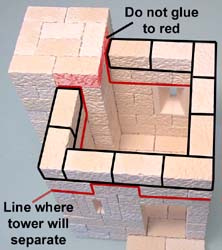
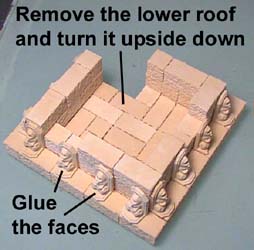
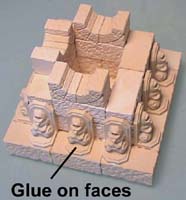
| 9. | Glue the lower roof onto the blocks below, but don't glue it onto the side of the tower. Let it dry completely before you move on. Once dry, remove the lower roof and turn it upside down. The 2 rows of blocks below should stick to it. Now add the decorative faces around the outside as shown. |
 |
 |
|---|
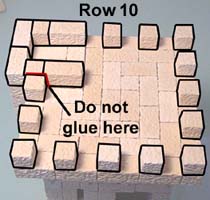
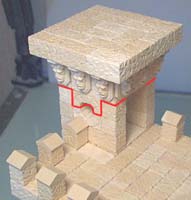
| 10. | Allow the faces to dry completely, then place the lower roof back onto the model. Add row 10 and row 11 on next. Look at the photos carefully and do not glue in that little spot shown. Otherwise the lower roof will not come off. |
 |
 |
|---|
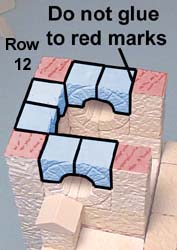
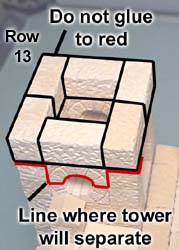
| 11. | Take a marker and draw lines on the area shown. These marks will be a reminder to you where not to glue. For the next 2 rows, glue the blocks together but do not glue them to the red marks. |
 |
 |
 |
|---|
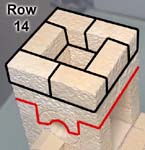
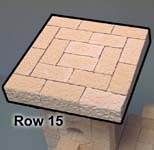
| 12. | Glue on row 14. Next, glue together the blocks in the second photo for the tower top. Let it dry completely before you glue it to the top of the tower (row 15). |
 |
 |
 |
|---|
| 13. | Once the top of the tower is completely dry, remove it and turn it upside down. Next, glue the decorative faces onto the underside. Place the top of the tower back on and continue to add the remaining two rows of blocks. |
 |
 |
|---|
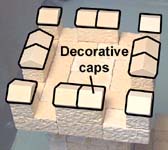
| 14. | Finish the tower by gluing on the last two rows. The final row is made of the decorative top caps. |
 |
 |
|---|
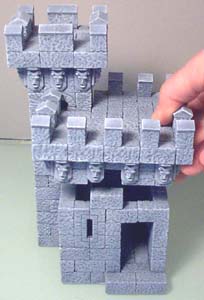
| 15. |
If you're going to use the model for wargames and other heavy use, you'll want to protect it with a coat of flat varnish or lacquer. The completed model is shown here with a few finishing touches such as doors, grass, bushes and terrain. The base for this model was carved from a block of blue foam. Ground cover was added using railroad scenic materials. The doors were made from mattboard. Keep in mind that you can build any design you want! Make it twice as large, or with additional towers. The possibilities are endless! |
 |
|---|